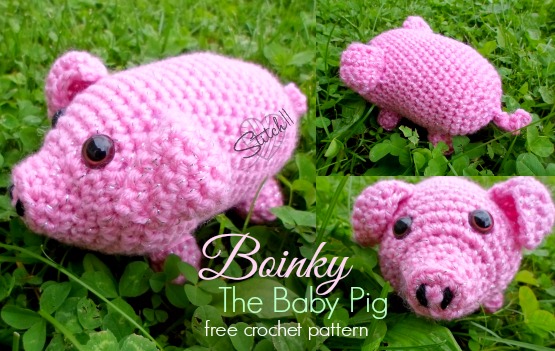
The idea of Boinky the Baby Pig came from my daughter- like most of my designs. We like to browse images of adorable animals. When we came across some baby pigs, she was taken over by their major cuteness. After looking at about 3,476 baby pigs, she asked me to make her one. She told me it's name would be Boinky. So there ya have it, a free crochet pattern for this adorable and simple baby piglet.
Supplies
F/5-3.75 mm crochet hook
Medium/Worsted weight yarn (I used a pink sparkly I Love This Yarn)
2 12mm Safety Eyes ( I bought mine at Hobby Lobby. You can also fine them at JoAnns and online)
Small amount of black yarn for the nose holes
Yarn Needle
Fiberfill-batting
Stitches
CH- Chain
SC- Single Crochet
HDC- Half Double Crochet
SC DEC- Single Crochet Decrease
Magic Circle
Round 1: Magic Circle. 6 SC into magic circle. Pull ring tight. Join to first SC. (6)
Round 2: CH 1, 2 SC into each of the next 6 stitches. Join to first SC. (12)
Round 3: CH 1, (working this round in back loops only) 1 SC into next 12 SC. Join to first SC. (12)
You will now start working in continuous rounds. Use a stitch marker here.
Round 4: 1 SC into next 12 SC. (12)
Round 5: 1 SC into next 2 stitches. **2 SC into next stitch. 1 SC into next 2 stitches. Repeat from ** 2 more times. 2 SC into the last stitch. (16 SC)
Round 6: 1 SC into next 16 stitches. (16)
Round 7: 1 SC into the next 3 stitches. 2 SC into next 11 stitches. 1 SC into next 2 stitches. (27)
I moved my stitch marker here.
Round 8: 1 SC into next 5 SC. 2 HDC into next 2 stitches. 1 SC into next 14 stitches. 2 HDC into next 2 stitches. 1 SC into next 4 stitches. (31)
Round 9: 1 SC into next 6 stitches. 1 HDC in next next 5 stitches. 1 SC into next 10 stitches. 1 HDC into next 5 stitches. 1 SC into next 5 stitches. (31)
Round 10: 1 SC into next 6 stitches. 1 HDC into next 2 stitches. 2 HDC into next stitch. 1 HDC into next 2 stitches. 1 SC into next 10 stitches. 1 HDC into next 2 stitches. 2 HDC into next stitch. 1 HDC into next 2 stitches. 1 SC into next 5 stitches. (33)
I moved my stitch marker here.
Round 11-13: 1 SC into next 33 stitches.(33)
Round 14: 1 SC into next 8 stitches. SC DEC. 1 SC in next 17 stitches. SC DEC. 1 SC into next 4 stitches. (31)
Round 15-17: 1 SC into next 31 stitches. (31)
Attach your safety eyes. (I attached my eyes between rows 8 and 9)
Stitch on the nose holes with yarn needle and black yarn.
I moved my stitch marker to where I left off from round 17.
Round 18-25: 1 SC into next 31 stitches. (31)
Stuff the front of the piglet.
I moved my stitch marker here.
Round 26: 1 SC into the next stitch. **SC DEC. SC into the next stitch. Repeat from ** 9 more times. (21)
Round 27: 1 SC into next 21 stitches. (21)
Round 28: 1 SC into the next stitch. SC DEC 10 times. (11)
Stuff the rest of the pig well.
Round 29: SC DEC 5 times. slip stitch into the next stitch. (6)
Finish off leaving long tail.
Close your hole using a yarn needle and the tail you just left.
Pig Tail
CH 5, skip one CH, 3 SC into each of the remaining 4 CH. Finish off and attach to the butt of the pig.
Pig Ears (make two)
Row 1: Magic Circle. 6 SC into magic circle. Pull ring tight. Join to first SC (6)
Row 2: CH 1. 2 SC into first stitch. 1 SC into next 2 stitches. 2 SC into next stitch. 1 SC into next 2 stitches. Join to first SC. (8)
Row 3: CH 1. 2 SC into first stitch. 1 SC into next 2 stitches. 2 SC into next stitch. 1 SC into next 2 stitches. CH 1, turn. (8)
Row 4: 2 SC into first stitch. 1 SC into next 6 stitches. 2 SC into next stitch. CH 1, turn. (10)
Row 5: 1 SC into each of the next 10 SC. CH 1, turn. (10)
Row 6: SC DEC 2 times, SC into next 6 stitches. CH 1, turn. (8)
Row 7: SC into next 4 stitches. SC DEC 2 times. (6)
Finish off. Attach ears to the pig. The top of the ears are row 7. This is the part of the ears that will fold down near the eyes after they are attached
Pig Feet (make four)
Round 1: Magic circle. 8 HDC into magic circle. Pull ring right. Join to first HDC. (8)
Round 2: CH 1 (working in back loops only) 1 HDC into each stitch around. Join to first HDC. (8)
Round 3: CH 1. 1 HDC into each stitch around. Join to first HDC. (8)
Finish off, stuff the feet and attach feet to the piglet.

they such a cutie pigs …sweet… 🙂
sooo cute!
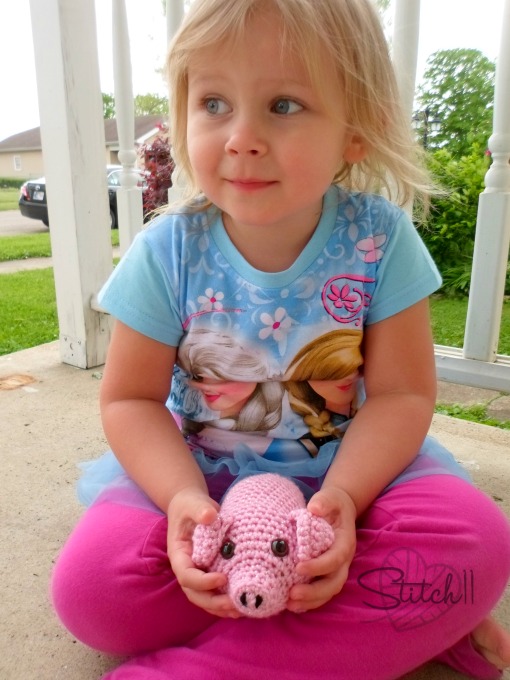
The picture of your daughter cuddling her piggy is the cutest! My youngest daughter was a pig lover when she was little too. Thanks for sharing your pattern.
Thank you for the free pattern of the adorable, little piglet! Boinky will be my 1st animal that I will crochet. Love that little fella and your sweet daughter is as cute as a little bug’s ear!
totally adorable 🙂
Adorable!
Hi, I wanted to say a huge thanks for the free pattern. I have a friend who runs a wildlife rescue here in the UK and recently they had a baby wild boar piglet come into care. I saw your pattern and thought I could do a few little tweaks and make it look like a wild piglet. And so I made one up and asked my friend if she would like to sell it to help raise funds for looking after the little piglet. She fell in love with it. So I have made her up 10 so far to sell to help with the costs of looking after such a cutie piglet. I wanted to thank you and your daughter for helping too because if it weren’t for your pattern I wouldn’t have thought of the idea. 🙂 https://www.facebook.com/mintythewildboar?fref=ts this is little Minty’s facebook page if you or others would like to see her progress. And this is the link to a photo of my Minty. 🙂 https://scontent-lhr.xx.fbcdn.net/hphotos-xtp1/v/t1.0-9/s600x600/11083927_10152768870337960_7812310438007040257_n.jpg?oh=dec7d24aacf30b375048fdac0c9a2706&oe=55AC6CE4 I hope you like it. 🙂
Oh wow! You did amazing with your changes! I love that my pattern inspired you in a way to help an animal <3 <3 Thank you so much for sharing!!
Thank you so much for this cute pattern!