Introduction to Crocheting Animals
Crochet animals are a cute and fun project to make, even for beginner crocheters. They make a great gift for anyone, kids and adults alike, especially since you can easily personalize and customize them for your recipient.
Crochet stuffed toys are truly adorable. You can make small crochet toys as keychains or desk buddies. Or make a giant cuddle buddy that will help you relieve stress as you fall asleep.
Crochet animals may look complicated at first, but once you learn the basics of amigurumi, you will have so much fun making these crochet animal patterns!
Is it Hard to Crochet Animals?
Crocheting stuffed animals is not that hard. Once you are familiar with the basic stitches and techniques that are used in amigurumi, you will be able to create all sorts of crocheted creatures.
What is Amigurumi?
Amigurumi is the Japanese art of crocheting (or knitting) creatures. The word amigurumi (Ah-mee-guh-roo-mee) comes from the Japanese words “ami” meaning knitted or crocheted, and “nuigurumi,” meaning stuffed doll.
Amigurumi refers to any crocheted stuffed toy. It can be small projects like keychains, crocheted dolls, stuffed animals, and even giant crochet plushies.
Is Amigurumi Easy for Beginners?
Yes! A crocheter of any skill level can definitely try making amigurumi projects. There are free crochet patterns that are great for beginner crocheters, using only the very basic stitches and techniques. Make sure to consult your pattern for the recommended skill level, and browse through the techniques used to see if you know how to do everything you need to do to complete the project.
Stitches and Techniques Used in Amigurumi
If you want to start making amigurumi crochet animals, you will need to know some basic skills and techniques. If any of these are unfamiliar to you, check out our Crochet Fundamentals course, which covers all this and more to get you started making amigurumi or any other projects you’d like to make!
Magic Circle or Magic Ring
Most amigurumi patterns begin with a magic circle or magic ring. This allows you to close the hole at the beginning of the project tightly so that stuffing will not peek through.
If you are having trouble making a magic ring, you try one of the following techniques to start:
- Ch 2 and make your stitches in the first chain.
- Ch 4, slip stitch to the first stitch to close and make your stitches in the center ring.
Do note that while these two techniques are easier, the center might not close as tight and may leave a small hole.
Single Crochet
Single crochet is the main crochet stitch used in making amigurumi. It produces a dense fabric with tight stitches that do not have holes.
You’ll also need to know how to work increases and decreases in single crochet. This will allow you to create seamless transitions, curves, and shaping to your amigurumi project.
Crocheting in a Continuous (Spiral) Round
Most amigurumi crochet patterns are made in continuous rounds. This means you will be crocheting around in a circle without joining with a slip stitch at the end of each round.
This gives you a project without a clear seam where the end of the round is. It also makes it harder for you to see where the end of the round is as you stitch, so having a stitch marker will be very helpful to help you keep track of your stitches.
Changing Colors
Amigurumi crochet patterns can be colorful so you will need to know the different ways to change colors in amigurumi and find one that you are comfortable with. Check out Little Farm Crafts for four color-changing techniques you can try out.
Supplies Needed for Making Crochet Animals
To be able to make crochet amigurumi animals, you will need to have your basic crochet supplies such as yarn and a crochet hook. You will also need a stitch marker, a tapestry needle, some polyester fiberfill stuffing, and safety eyes (optional, see below).
What is the Best Yarn to Use for Making Amigurumi Crochet Patterns?
You will find that most amigurumi patterns recommend using cotton or acrylic yarn in weight of (3) DK or (4) worsted. Acrylic and cotton yarns are both inexpensive, easy to work with and come in a wide range of colors.
Mercerized cotton is tightly spun and has a bit of a shine, which can add a different look to your amigurumi projects. Any kind of cotton is strong, durable, and easy to care for, which makes it a good choice for crochet animal projects that will be played with.
Here are a few cotton yarns we like:
- Lion Brand 24/7 Cotton
- Patons Grace
- Lily Sugar’n Cream
- Lion Brand Oh Baby
- Knit Picks Dishie
- YarnArt Begonia
Acrylic yarn is generally softer than cotton and is a little easier to work with than cotton for beginning crocheters. Choosing an anti-pilling or more premium acrylic yarn will ensure your projects wear a little better.
Check out these acrylic yarns for your next amigurumi project:
- Premier Yarns Premier Anti-Pilling Everyday Worsted
- Lion Brand Basic Stitch
- Scheepjes Chunky Monkey
- Knit Picks Brava Worsted
- Red Heart Super Saver
- Caron Simply Soft
Cotton and acrylic blends are another great choice that is lightweight, soft, and durable. These yarns are machine washable, which makes your crocheted toys easy to care for.
These are some of our favorite cotton-blend yarns that you can try out for your next project:
Polyester yarns like velvet and chenille are also great to use for making large-scale toys and amigurumi. These yarns make soft, plush crocheted toys that have great texture and are great for cuddling and hugging.
Here are some of our favorite yarns for making giant plushies:
- Bernat Velvet
- Loops & Threads Sweet Snuggles
- Premier Yarns Parfait Chunky
- Bernat Baby Blanket
- Lion Brand Go For Faux
- Bernat Blanket
Tips for Making Amigurumi Projects
Here are some quick tips that are good to know before you begin crocheting your first amigurumi project.
When making amigurumi projects, you will want to make sure to create tight stitches so that there are very few holes for your stuffing to peek through. One way to do this is by using a crochet hook that is at least one size smaller than what is recommended for the yarn you are using. Amigurumi patterns will tell you the size crochet hook the designer used.
Safety eyes are a potential choking hazard for children under the age of 3. If you are making your crochet toy for small children, you may want to embroider the eyes instead of using safety eyes.
Always use a stitch marker when working in the round. Since most crochet amigurumi patterns are worked in continuous spiral rounds, you will want to use a stitch marker to help you see where the end of the round is.
Before you sew your crochet animal’s parts together, use pins to mark where you will be attaching them. This will ensure that you are sewing your pieces in the right spot.
Always read through your pattern before you get started. Go through your pattern to check for the materials you will need, as well as the stitches and techniques that will be used. Some patterns may be marked as “intermediate” but doable for advanced beginners who are up for a challenge.
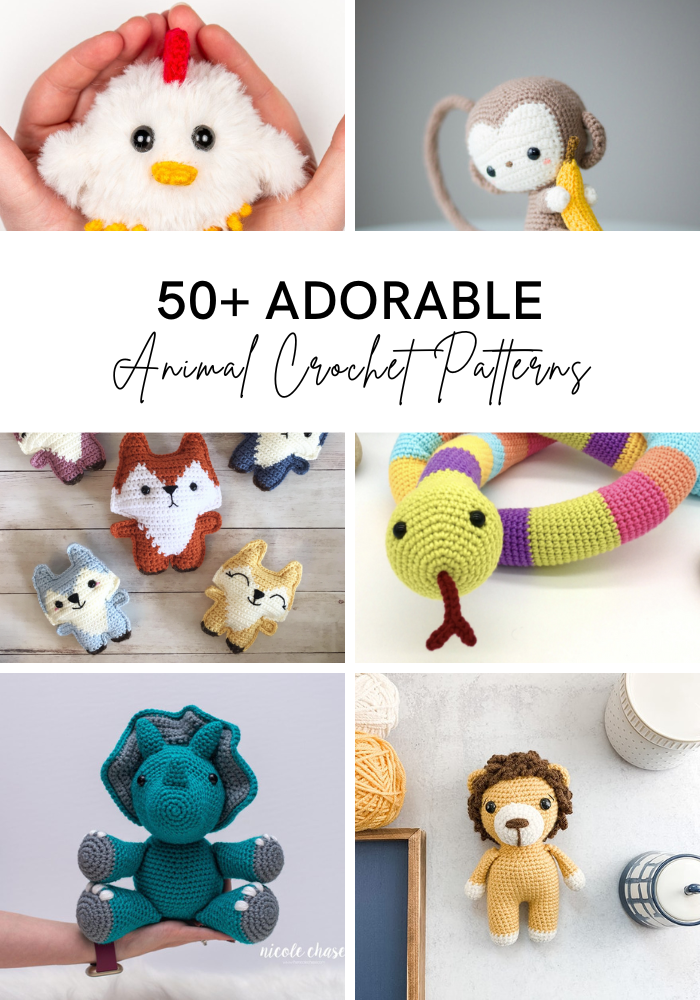
Check out the list below for some adorable animal crochet patterns. You will find different patterns ranging in skill level from super beginner to intermediate crocheter, arranged by the type of animal.
Marine Animal Crochet Patterns
Take a dip into the world of amigurumi animals with these adorable sea creatures. They are great accessories for a nursery or playmates for your small children.
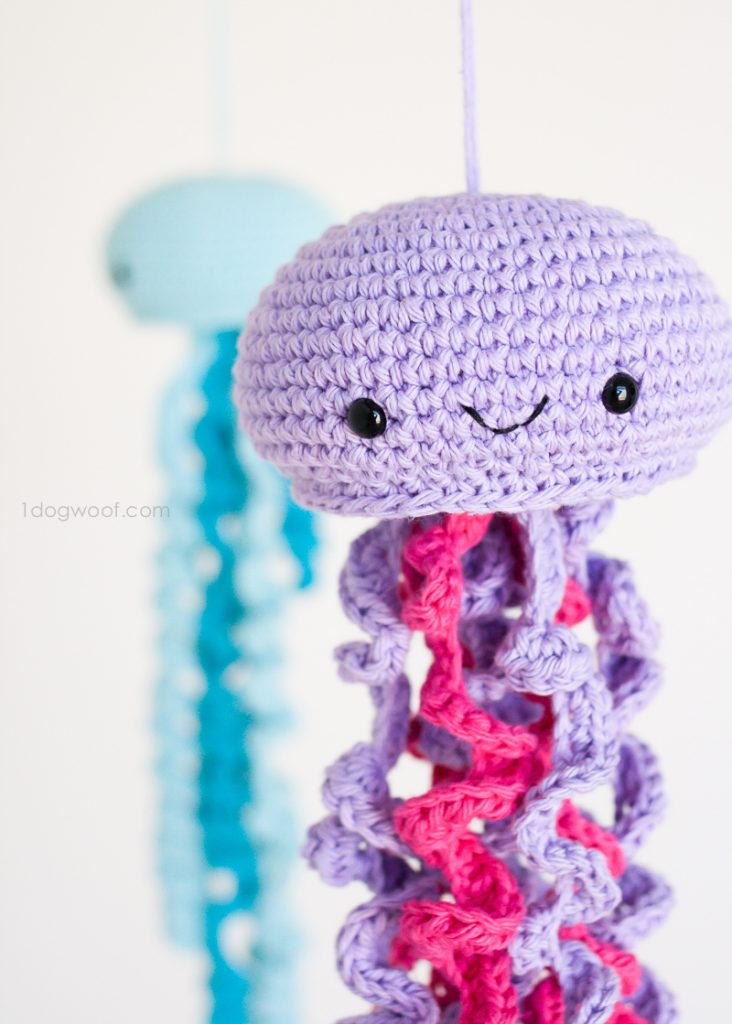
Crochet Jellyfish
Designer: One Dog Woof
Yarn weight: (4) Worsted
Yarn suggestion: Bernat Handicrafter Cotton
These cute crochet jellyfish were designed to be hung in the bathroom to help dry little hands. It is an easy pattern that will not take a long time to make even for beginner crocheters. If making these for small kids, make sure to supervise them as they play as the long tentacles may pose a hazard.
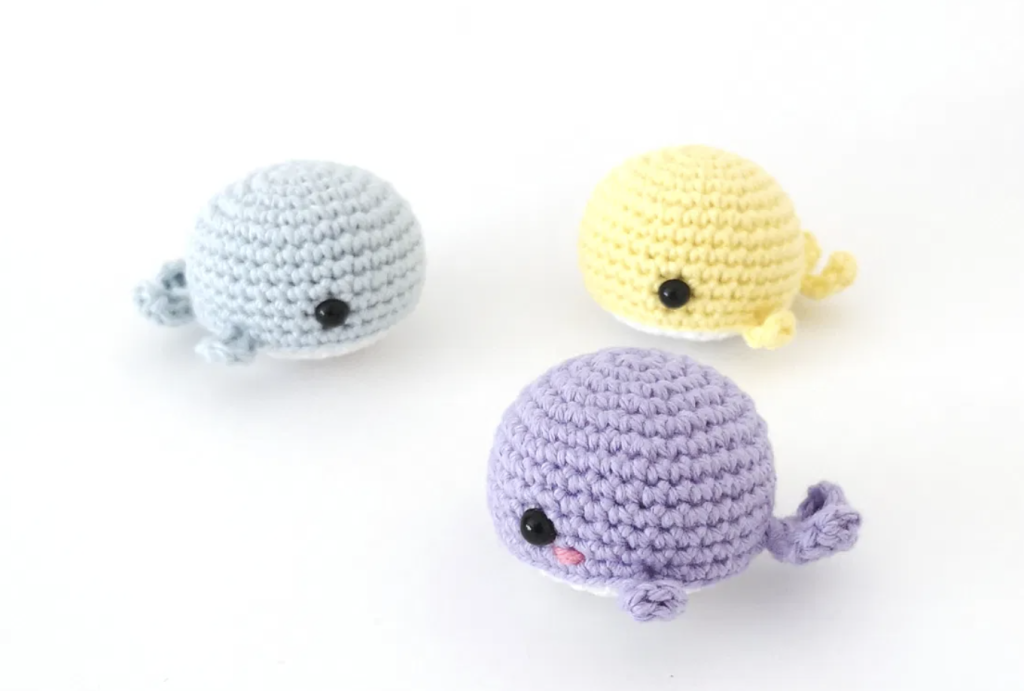
No-Sew Whale
Designer: Stitch by Fay
Yarn weight: (3) DK
Yarn suggestion: Patons Grace
This quick and easy no-sew whale is great for anyone who is just learning to make crochet animals. Everything is worked in the round, including the fins and the tail. Use any yarn weight to make different sized whales.
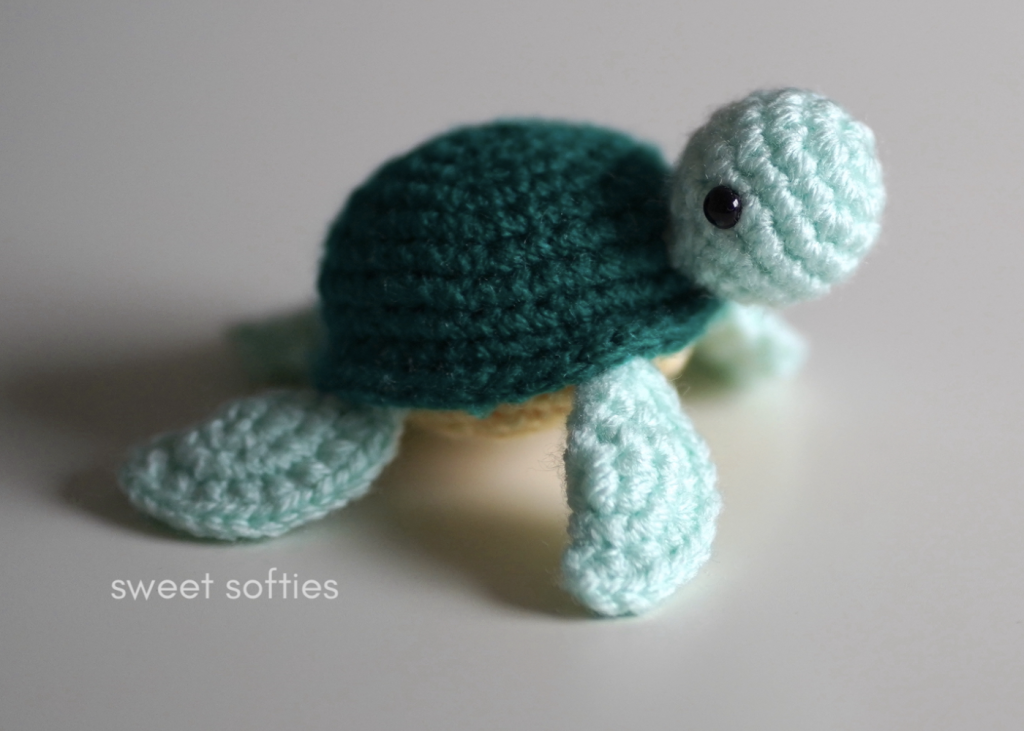
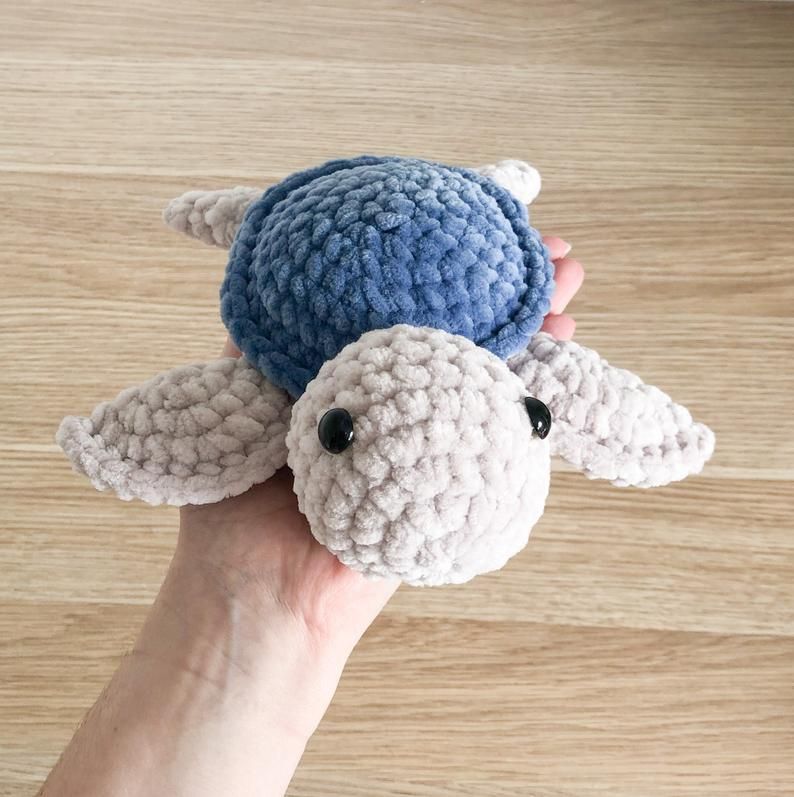
Tori the Turtle
Designer: Sweet Softies
Yarn weight: (4) Worsted
Yarn suggestion: Premier Yarns Premier Anti-Pilling Everyday Worsted
This adorable turtle stands on its own and makes a great keychain or a desk buddy. This quick, beginner friendly pattern allows you to get creative: customize it using different yarn weights, adding embroidery and embellishments, or just using different colors. It makes a great craft fair item or a special gift for any turtle-loving kid or adult.
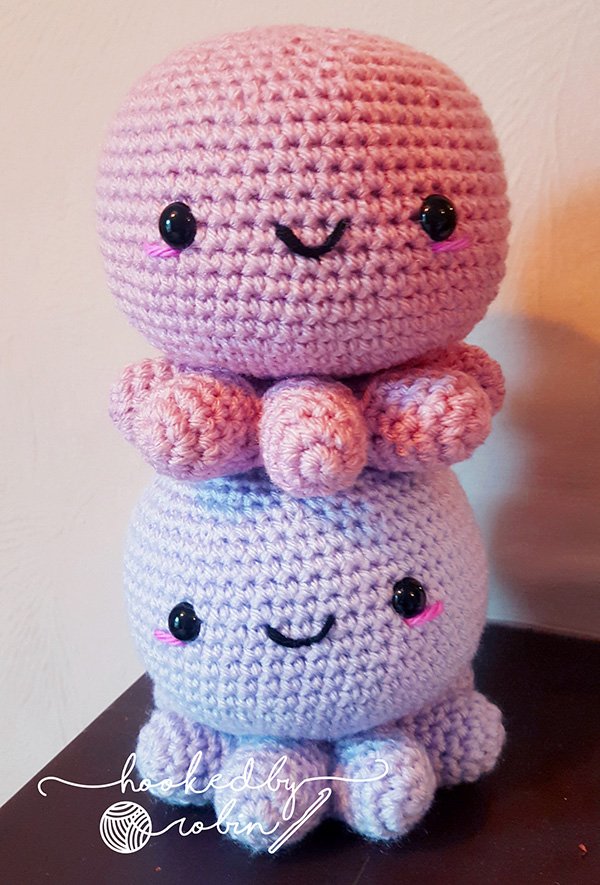
Amigurumi Chubby Octopus
Designer: Hooked by Robin
Yarn weight: (5) Bulky
Yarn suggestion: Knit Picks Brava Bulky
Made almost entirely in one piece, this no-sew crochet octopus is one of the easiest patterns a beginner can start making. Aside from step-by-step instructions, a video tutorial is also available to help you make your first amigurumi octopus. You can also find a helpful tip on making this octopus in different sizes.
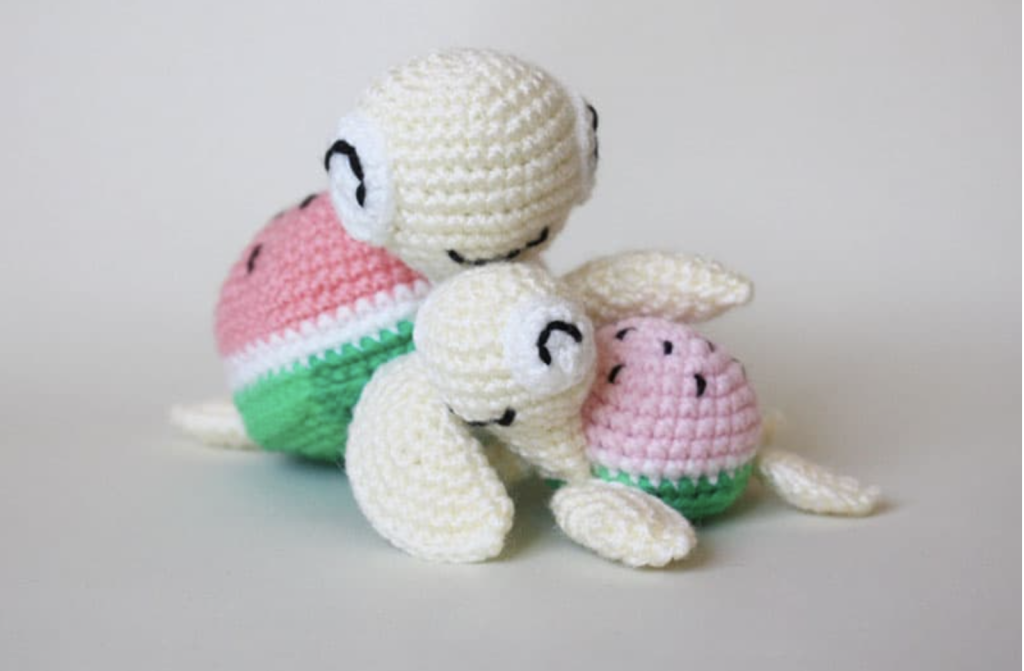
Watermelon Turtles
Designer: Amigurumi Today
Yarn weight: (3) DK
Yarn suggestion: Premier Yarns Premier Anti-Pilling Everyday DK
This adorable mom and baby watermelon turtle pair is ready for its next adventure. A great stash busting project, you’ll be making a whole nest of turtles in no time. Change up the colors and use your imagination to create different fruity turtles.
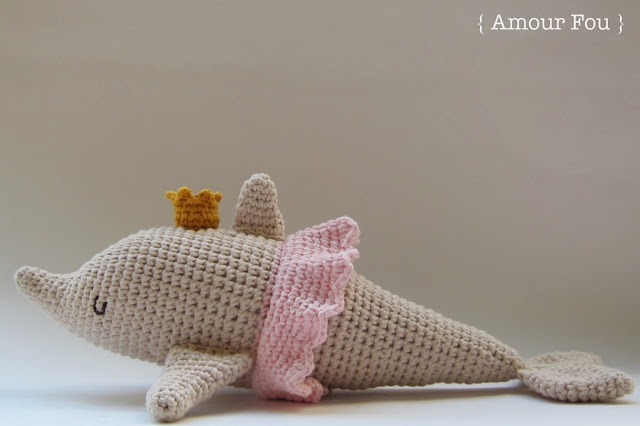
La Dauphine
Designer: Amour Frou
Yarn weight: (2) Sport
Yarn suggestion: YarnArt Begonia
Dolphins are known to be happy creatures, and La Dauphine is no exception. You have an option to make it with or without a skirt using basic techniques like single crochet in the back loop only. This is the perfect addition to a nautical or marine themed nursery.
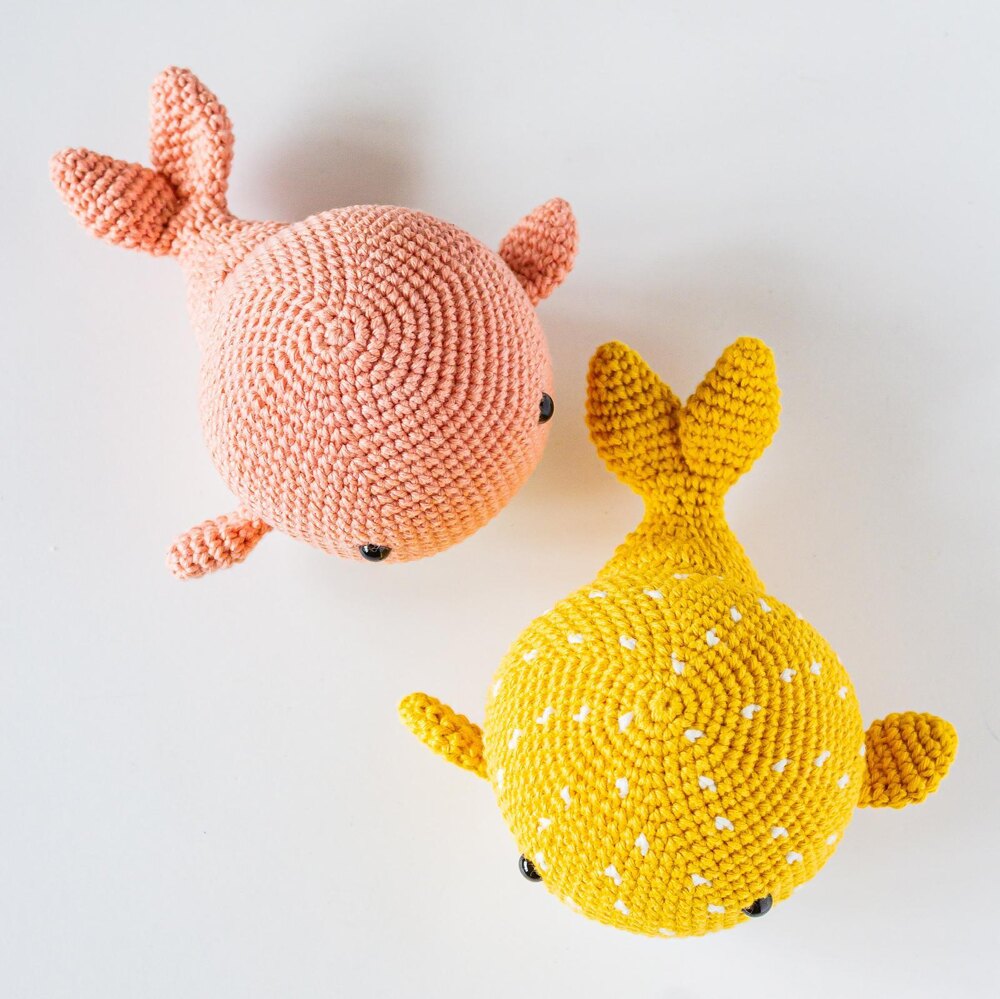
Wallace and Wanda Whale
Designer: Rupinder Kaur, via Ravelry
Yarn weight: (3) DK
Yarn suggestion: Sirdar Happy Cotton DK
Wallace and Wanda are a two for one deal – you’ll get the pattern for both of them in the free PDF. Wanda is a solid colored whale, while Wallace has a spotted body made with the Fair Isle technique. It’s a great pattern for beginners who want to try a new technique.
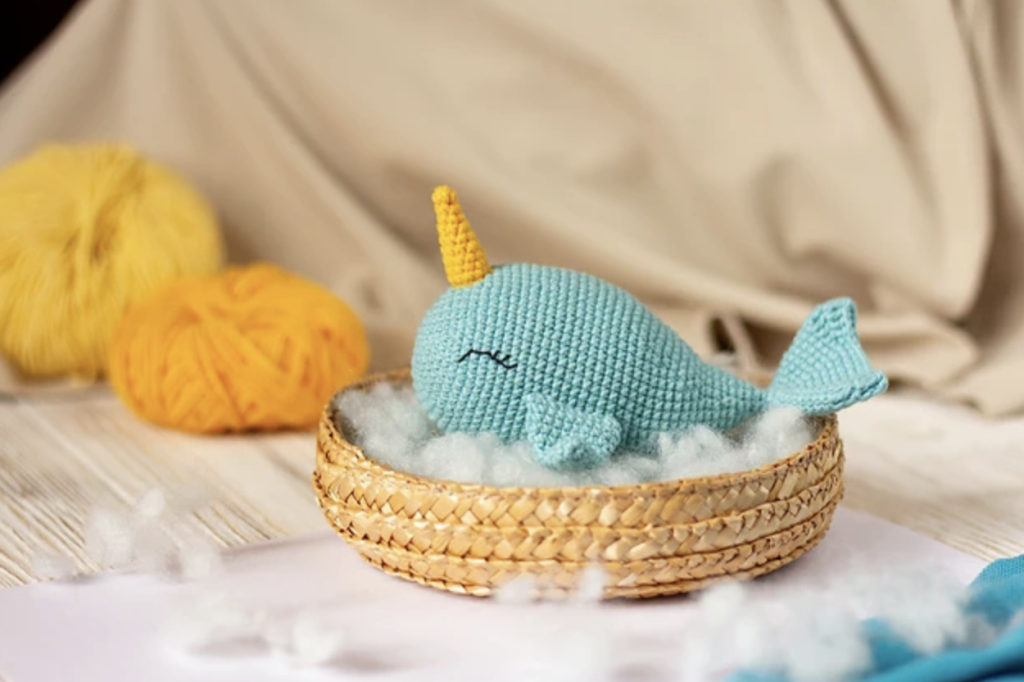
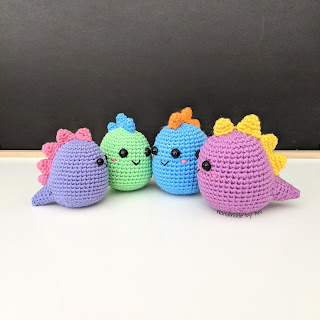
Crochet Narwhal Toy
Designer: Olya Samoseienko, via Ravelry
Yarn weight: (2) Sport
Yarn suggestion: YarnArt Jeans
Narwhals are known as the unicorn of the sea. You will need to know basic amigurumi techniques to be able to make this amigurumi animal. The pattern has step-by-step instructions with photos and a video tutorial as well.
Easy Crochet Turtle
Designer: Rose and Lily Amigurumi
Yarn weight: (6) Super bulky
Yarn suggestion: Premier Yarns Parfait Chunky
This soft and cuddly turtle is a great beginner project presented in a video tutorial. Super bulky yarn makes it super soft and cuddly, and quick to work up. Use safety eyes if making this for older kids, or embroider the eyes if giving to younger children.
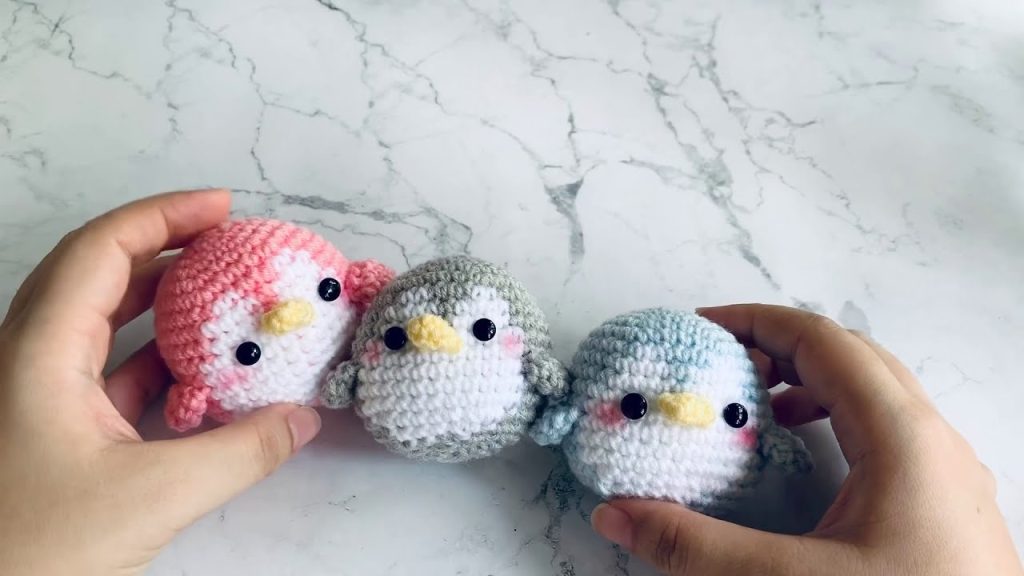
Baby Penguin Crochet Doll
Designer: Dream Crafts by Milia229
Yarn weight: (2) Sport
Yarn suggestion: YarnArt Begonia
These adorable baby penguins are a great project for practicing your color changes. Add a small keyring to turn them into keychains, or use a thicker yarn to make a huggable baby penguin. These small crochet animals make great gifts or craft fair items. This is a video pattern.
Crochet Patterns for Jungle Animals
Lions and tigers and bears are not as scary if they’re crochet amigurumi animals. These amigurumi patterns make cute and cuddly crochet animals that everyone will love.
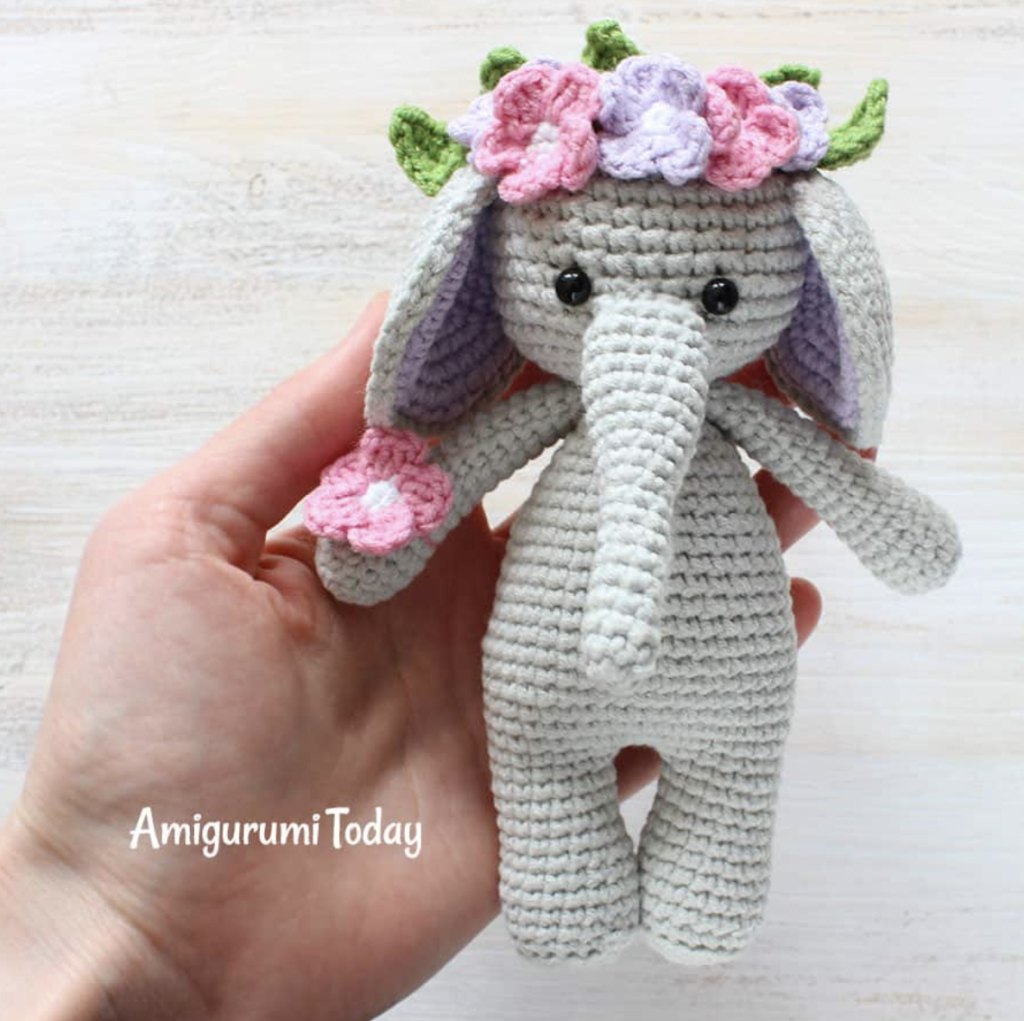
Cuddle Me Elephant
Designer: Amigurumi Today
Yarn weight: (2) Sport
Yarn suggestion: YarnArt Jeans
This cute elephant will make a great gift for your little ones. Lovely pastel flowers adorn her head, and make her the perfect cuddle buddy. This pattern is a part of the Cuddle Me series of animals from Amigurumi Today.

Mini Crochet Lion
Designer: Grace and Yarn
Yarn weight: (4) Worsted
Yarn suggestion: Red Heart Soft
The body and head of this amigurumi animal are crocheted in one piece, with the arms and ears attached afterward. The mane might take a while to make, but it definitely gives this king of the jungle its distinct look.
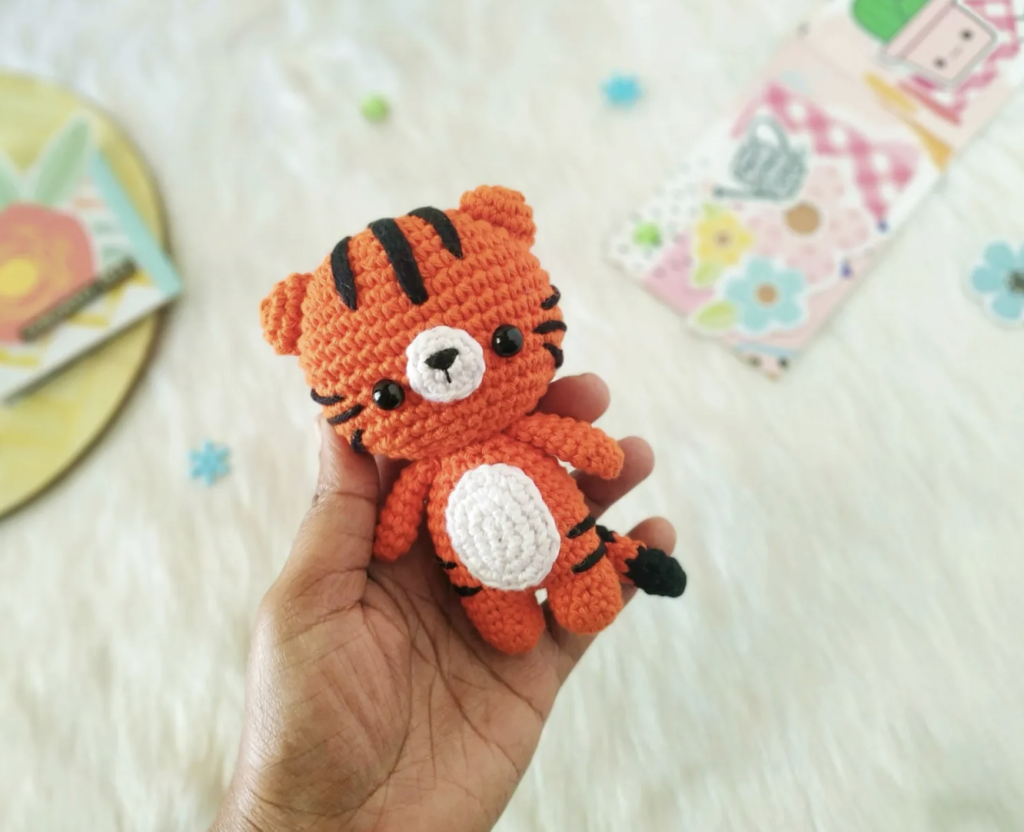
Amigurumi Tiger
Designer: A Little Love Everyday
Yarn weight: (2) Sport
Yarn suggestion: YarnArt Begonia
Don’t worry about making the stripes for this cute amigurumi pattern. Even if you haven’t mastered changing colors in amigurumi, you’ll be able to make this amigurumi animal. You’ll be crocheting this adorable tiger in one color, adding the stripes on with black yarn afterwards!
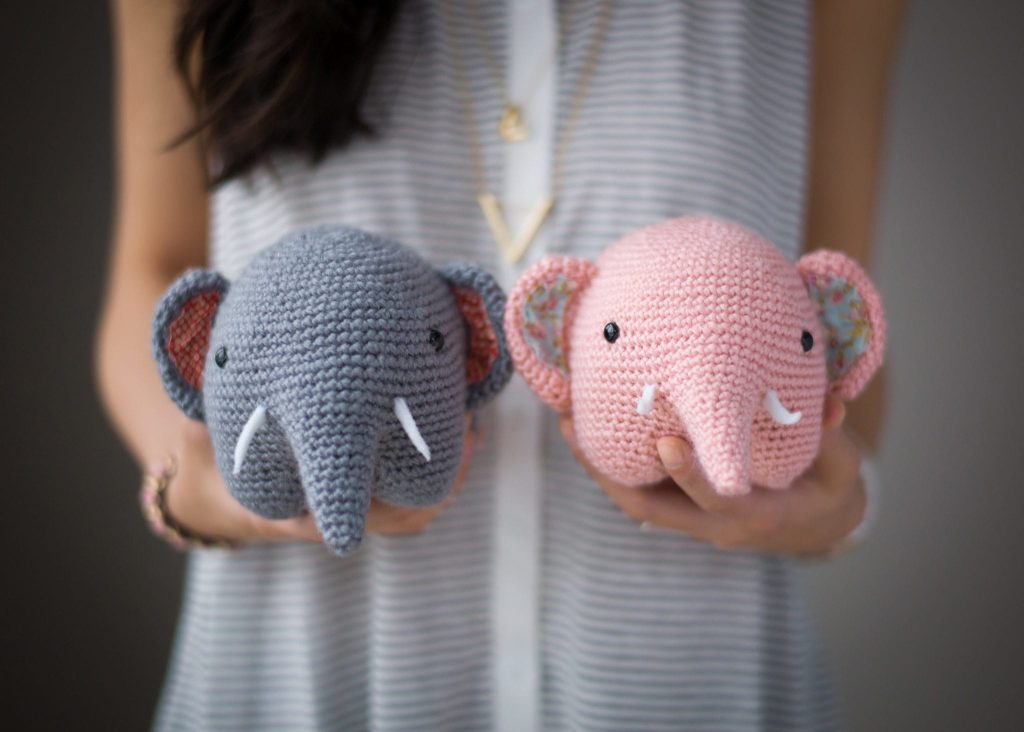
Crochet Elephant
Designer: Chisachi Kushima, via All About Ami
Yarn weight: (4) Worsted
Yarn suggestion: Lion Brand Vanna’s Choice
The construction of this cute elephant might be confusing at first, but once you get it, you’ll be amazed at the ingenuity of this pattern. The fabric lining for the ear adds a colorful and unique element to this amigurumi animal.
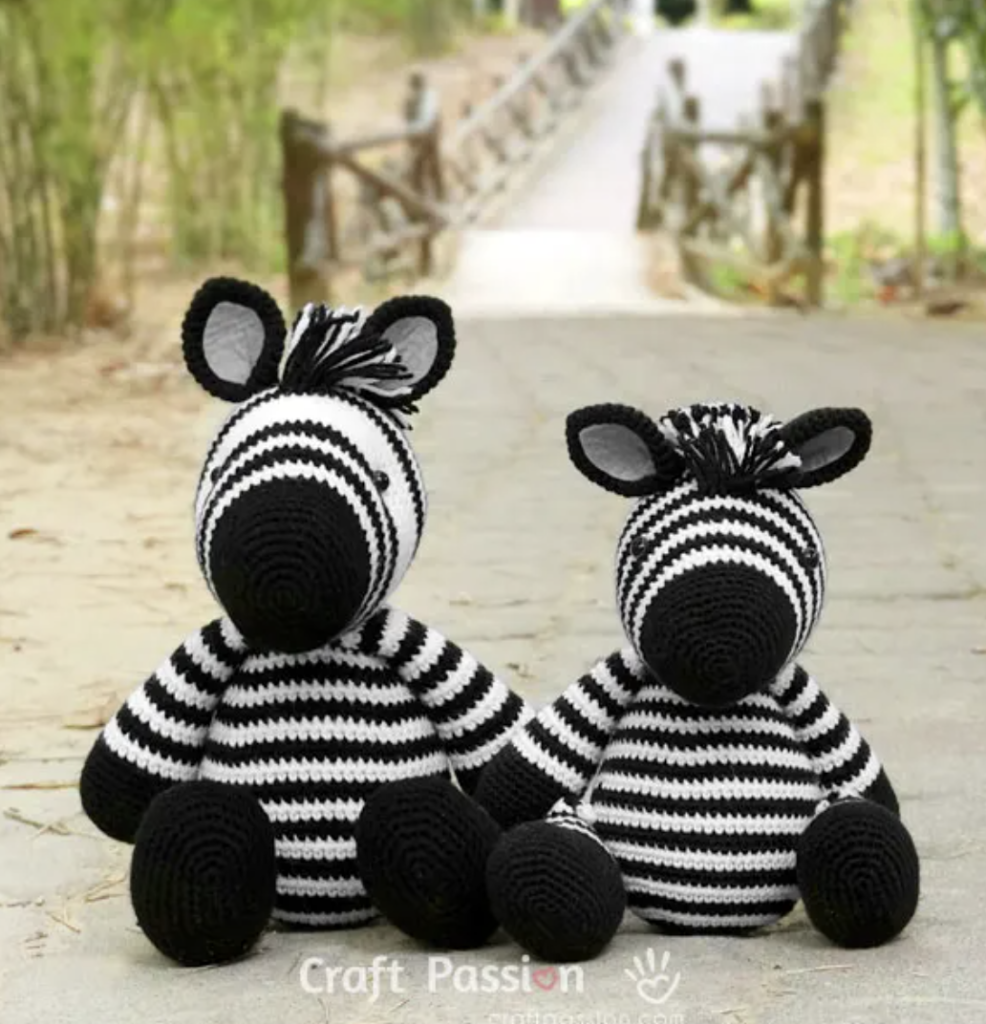
ZeeZee the Zebra
Designer: Craft Passion
Yarn weight: (3) DK for the adult zebra, (2) Sport for the foal
Yarn suggestion: Premier Yarns Premier Anti-Pilling Everyday DK and YarnArt Jeans
If you are up for a challenge, this amigurumi crochet pattern is for you. You’ll need to know how to create a jogless seam when changing colors to be able to make cleaner color changes. More for the adventurous beginner, these zebra patterns are great for practicing your favorite color changing techniques.
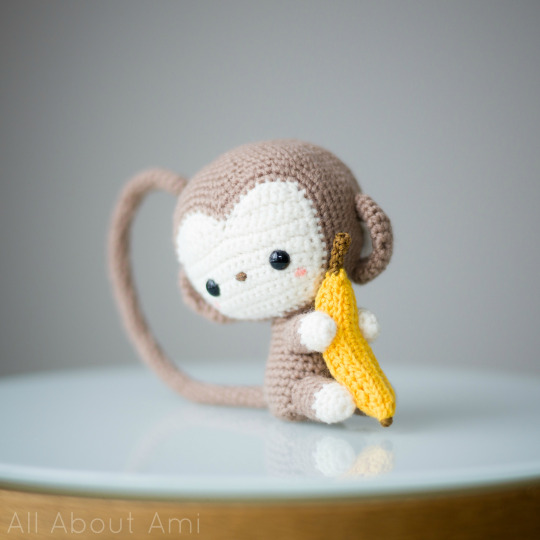
Kiko the Monkey
All About Ami
Yarn weight: (3) DK
Yarn suggestion: Patons Astra
Kiko the baby monkey loves his bananas! This cute crochet animal might be a bit of a challenge for beginners, as you will be working with some wire to support the tail, arms and legs. But with step-by-step instructions and photos provided in the pattern, you should be able to recreate this cute amigurumi animal.
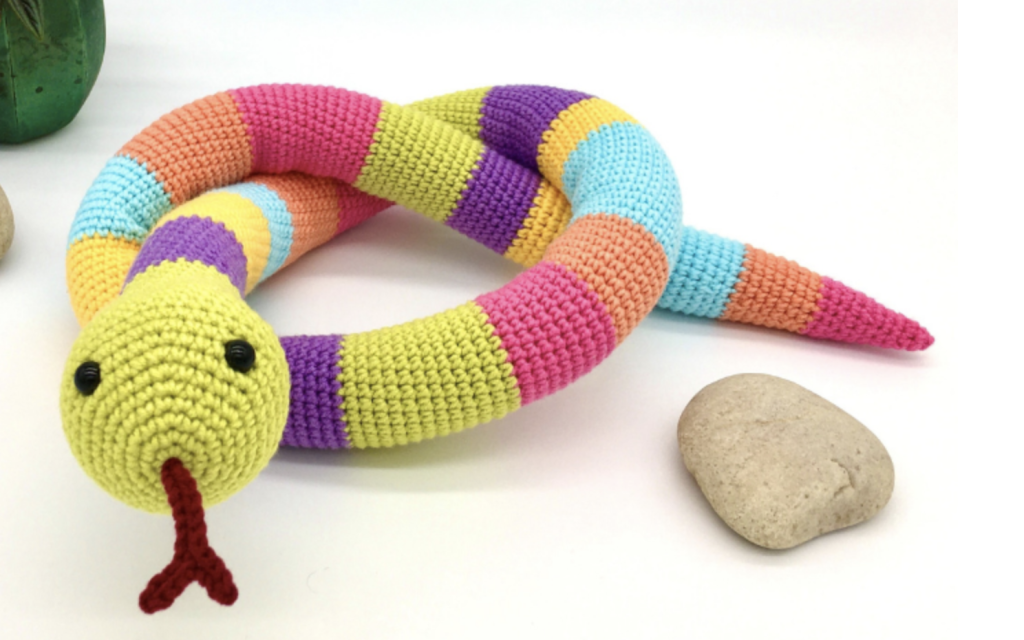
Sammy the Snake
Designer: Cuddly Stitches Craft
Yarn weight: (2) Sport
Yarn suggestion: YarnArt Jeans
This colorful creepy crawly is a great amigurumi project for using up your yarn scraps. Use as many colors as you want to make a colorful snake. The pattern is easy to customize, just crochet as many rounds as you need to get the length you want.
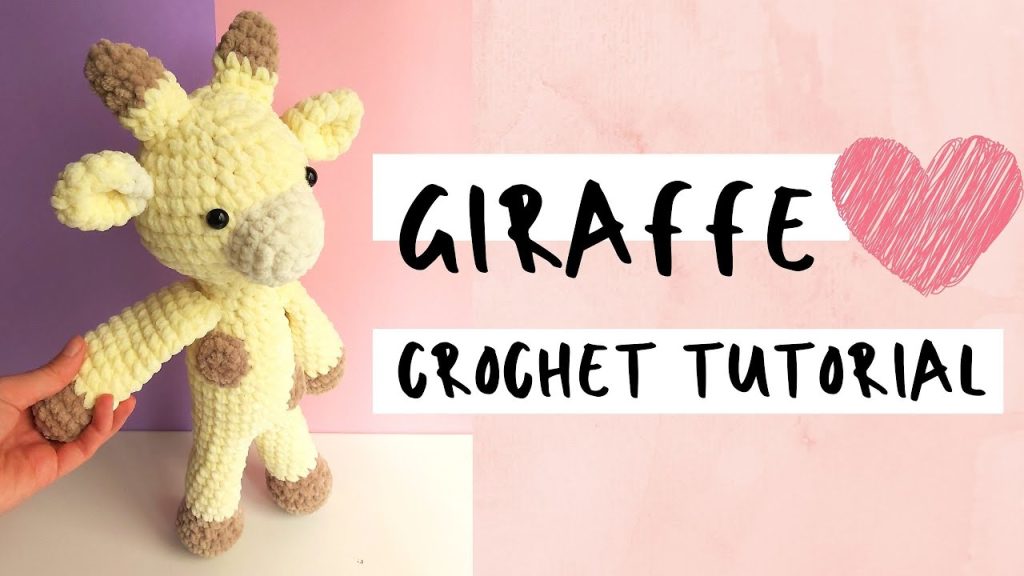
Giraffe Amigurumi Plushie
Designer: Amigurumi Forge
Yarn weight: (6) Super bulky
Yarn suggestion: Himalaya Dolphin Baby
This cute crochet giraffe works up pretty quick with super bulky yarn. The easy to follow video tutorial shows you how to make each part, including how to put the doll together. This will make a great gift for small children who need a soft cuddle buddy.
Forest Animal Crochet Patterns
Getting lost in the forest isn’t as scary if you have one of these cute crochet animals with you . These free crochet animal patterns are great for making craft fair items or as special gifts for loved ones.
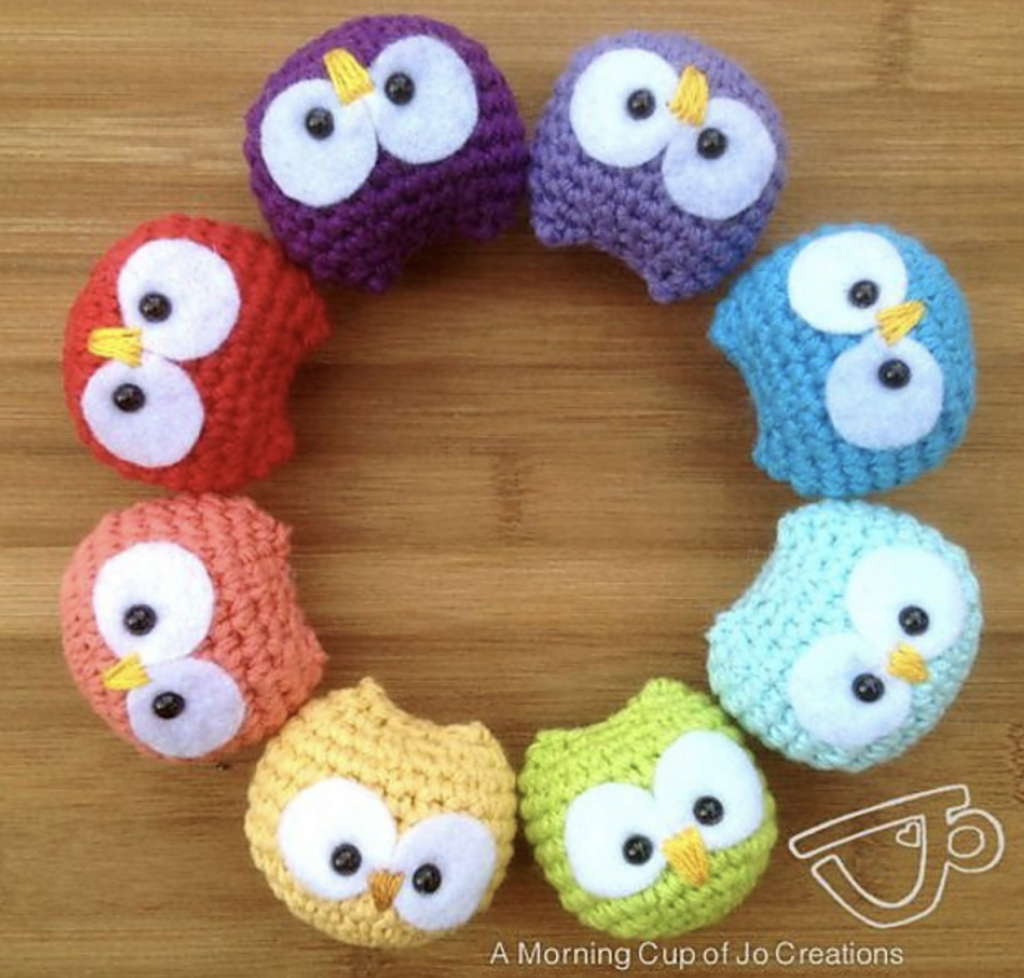
Baby Owl Ornaments
Designer: Josephine Wu, via Ravelry
Yarn weight: (4) Worsted
Yarn suggestion: Lily Sugar’n Cream
These adorable crochet owls are probably the easiest crochet animal you will ever make, and you will want to make a dozen of them! A great way of using scrap yarn, these two inch plushies make great gifts, giveaways, stocking stuffers, and craft fair items. Add a keyring to turn it into a cute keychain.
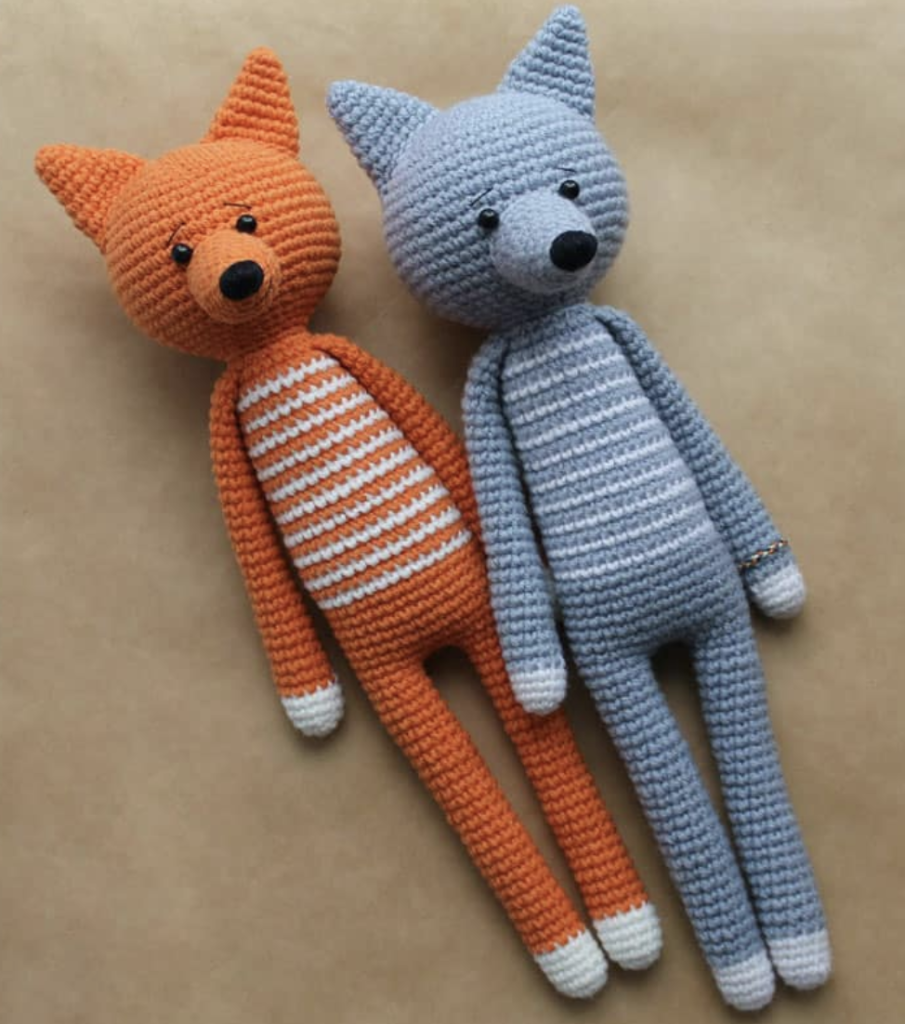
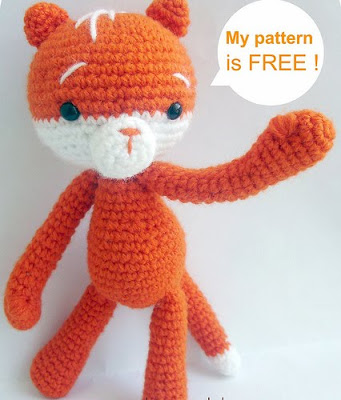
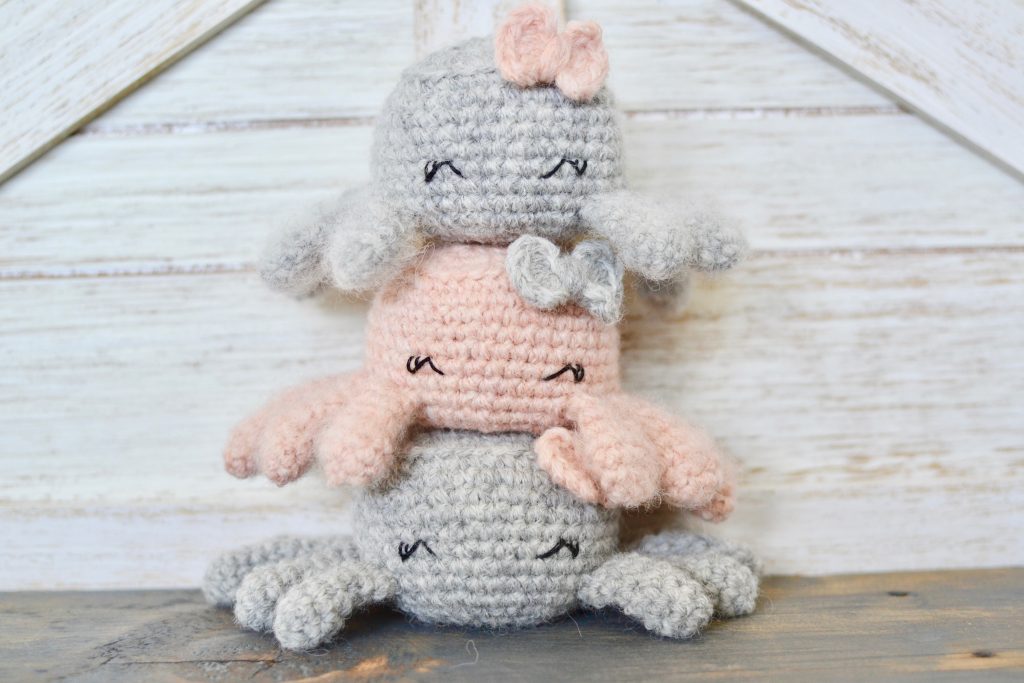
Long Legged Amigurumi Toys
Designer: Amigurumi Today
Yarn weight: (4) Worsted
Yarn suggestion: Lion Brand Wool-Ease
These long-legged toys are a great addition to a forest themed nursery, and are great companions for your small children. This pattern is easily customizable; you can change the snout and ears to turn it into a different animal.
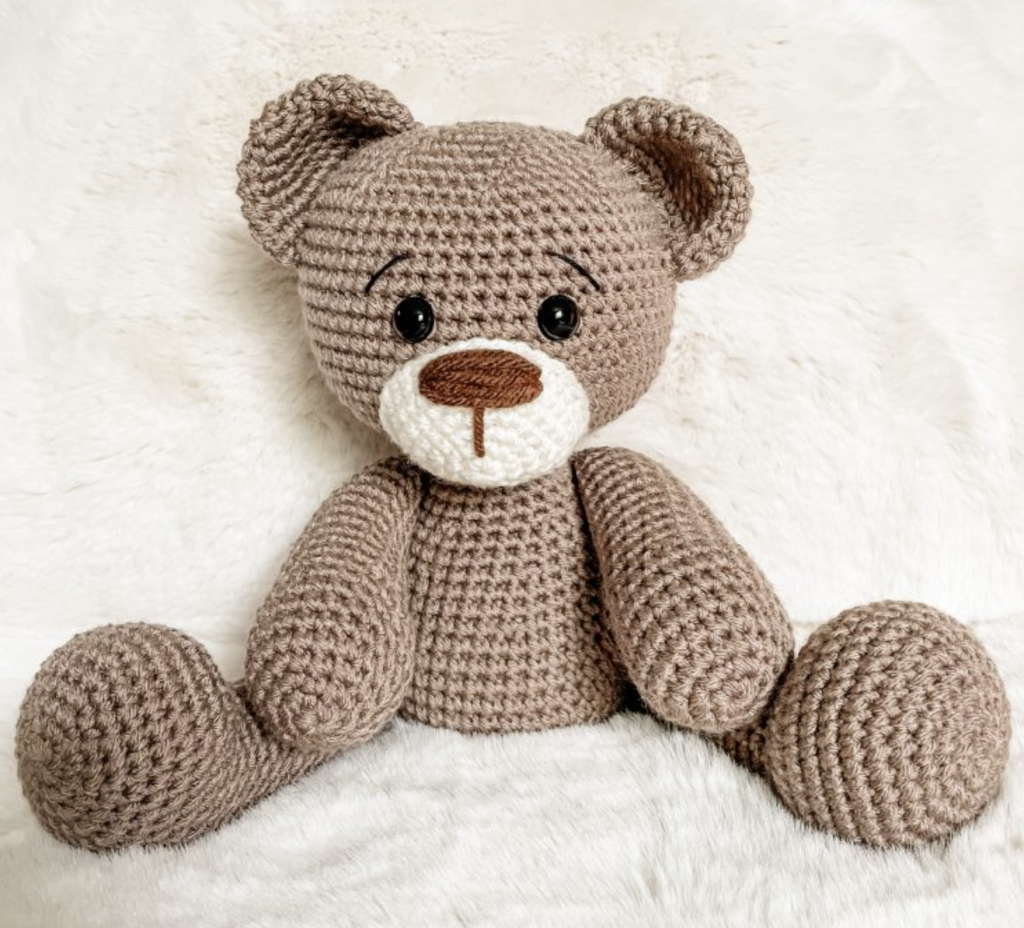
Crochet Teddy Bear
Designer: The Friendly Red Fox
Yarn weight: (4) Worsted
Yarn suggestion: Premier Yarns Premier Anti-Pilling Everyday Worsted
A classic stuffed toy, this teddy bear is the perfect size for kids of any age. It is a great pattern for advanced beginners, but doable even for beginners who are up for a challenge. This sweet teddy bear sits at around nine inches tall and can be made smaller or bigger depending on the yarn you will use.
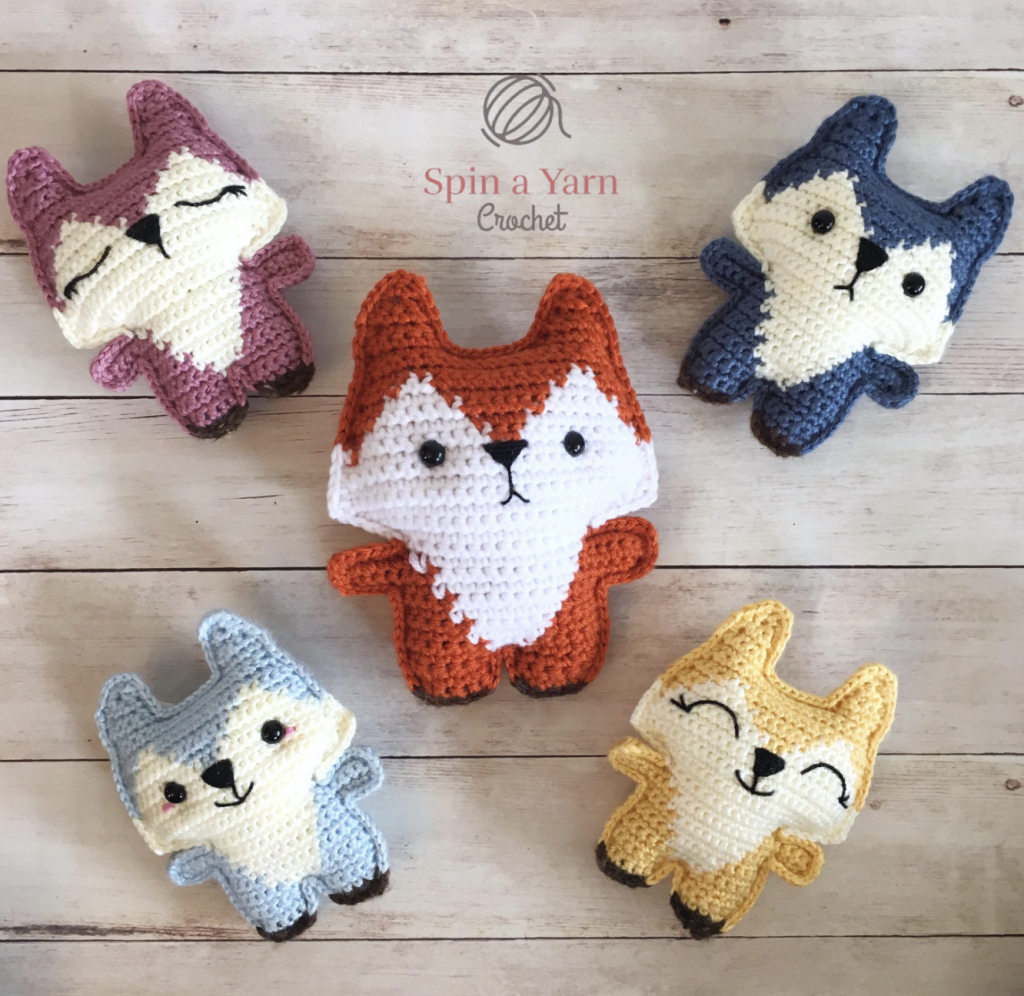
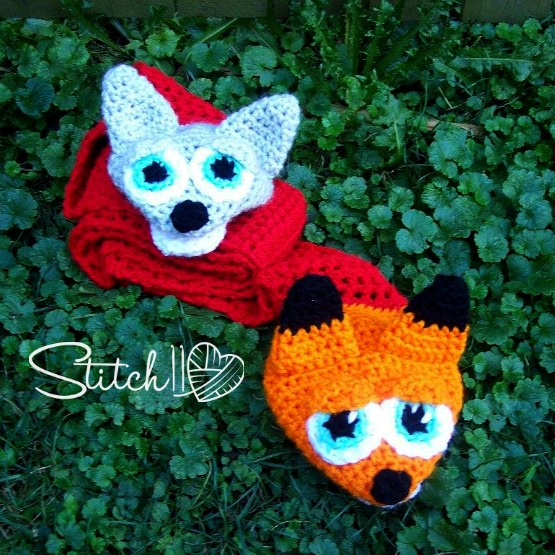
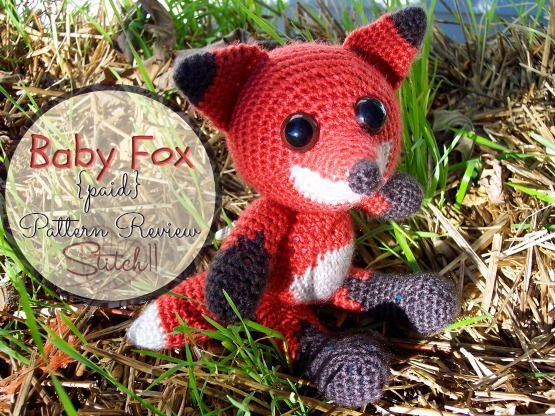
Pocket Fox
Designer: Spin a Yarn Crochet
Yarn weight: (4) Worsted
Yarn suggestion: Lion Brand Vanna’s Choice
These adorable crochet toys are super cute, and small enough to fit in your pocket so you can take them wherever you go. It is made in a ragdoll style, and is a great way of using up your yarn scraps. These pocket pals are sure to be a big hit with your small children.
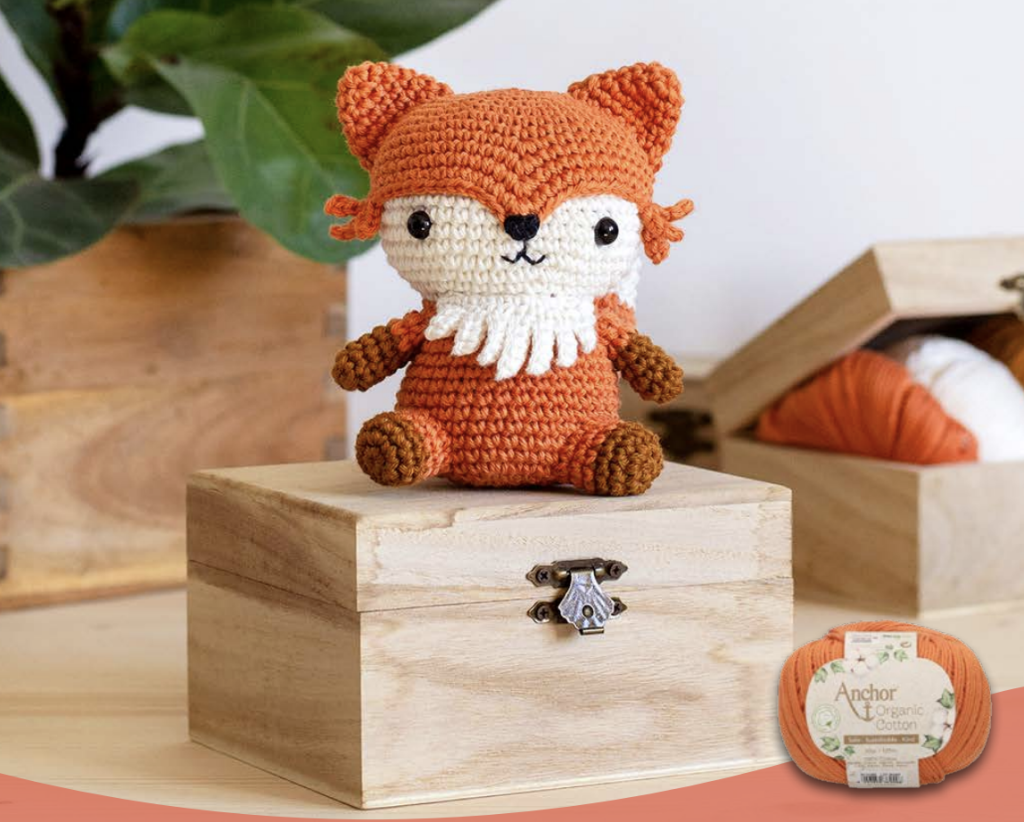
Francis the Fox
Designer: Airali Design for Anchor Crafts
Yarn weight: (3) DK
Yarn suggestion: Lion Brand 24/7 Cotton DK
This cute little fox sits at about five inches tall, and makes a cute desk accessory. The body and head are worked in one piece, and the other parts are sewn on afterward. Use a bulky weight yarn to make a huggable version of this adorable amigurumi animal.
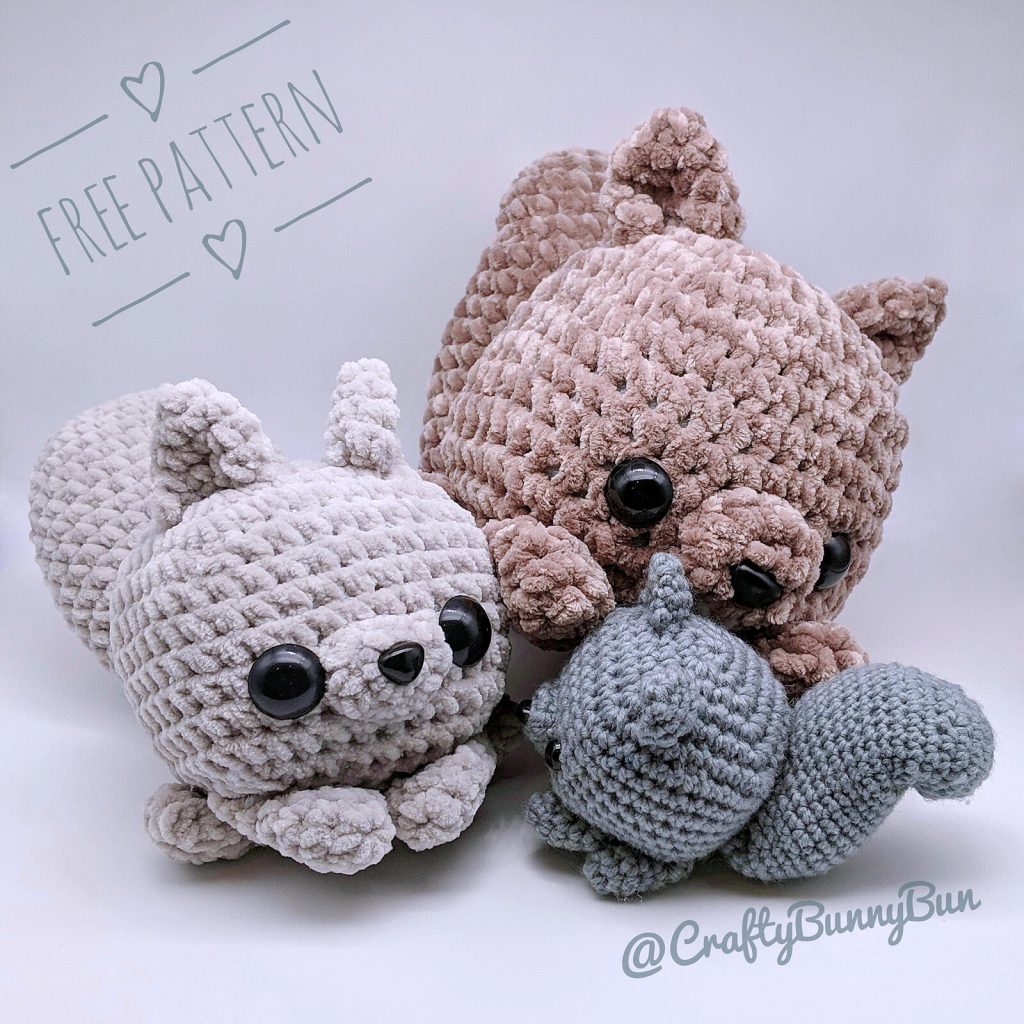
Little Cube Squirrel
Designer: Crafty Bun Bun
Yarn weight: (6) Super Bulky for the large size, (5) Bulky for the medium size, (3) DK for the small size
Yarn suggestions: Premier Parfait Chunky, Himalaya Dolphin Baby, Bernat Softee Baby
These adorable squirrels come in three different sizes, each of them just as cute as the other. Experiment with different yarn weights to create different sized squirrels. The pattern is easy to follow, and has photo instructions for assembling this cute squirrel.
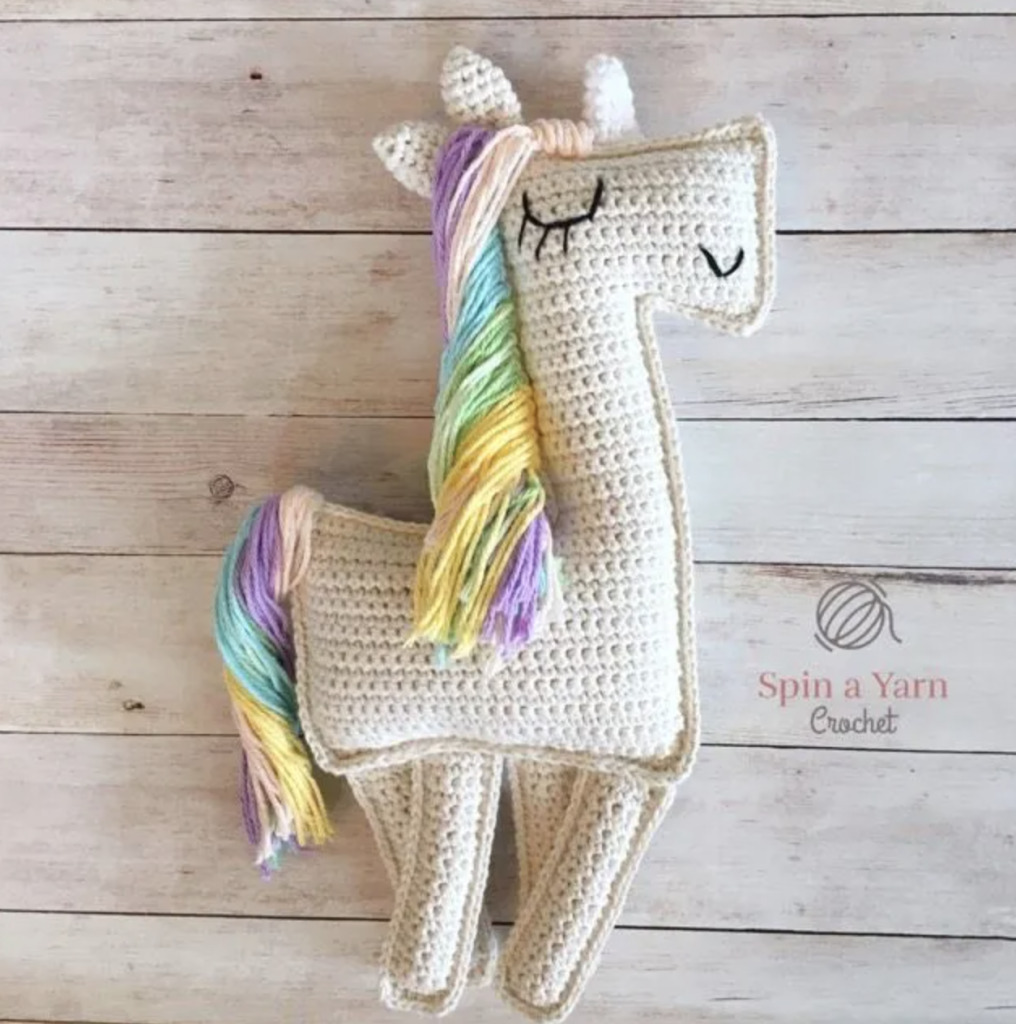
Ragdoll Unicorn
Designer: Spin a Yarn Crochet
Yarn weight: (4) Worsted
Yarn suggestion: Bernat Handicrafter
Made in a ragdoll style, this cute crochet unicorn makes a great gift for little ones. They’re perfect as cuddle pillows or even just as part of your room decor. Use your scrap yarn to make the hair, and create a unique unicorn.
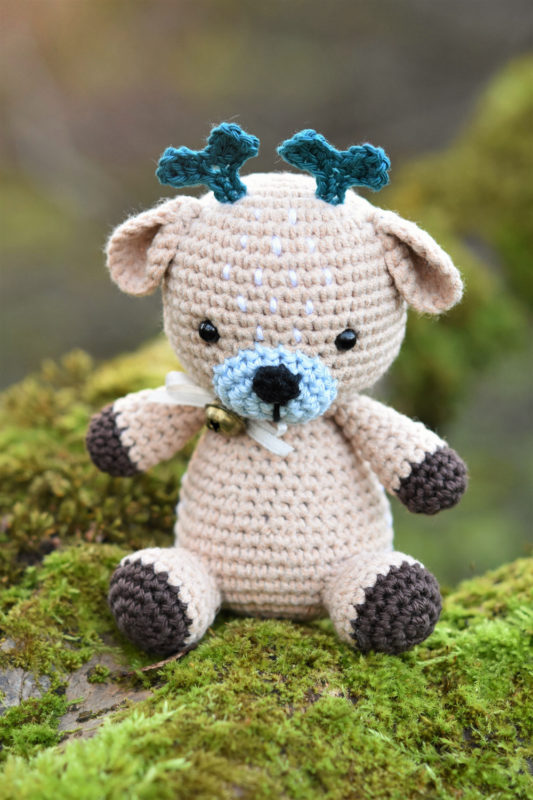
Sugarplum the Deer
Designer: Lille Liis
Yarn weight: (2) Sport or (3) DK
Yarn suggestion: Alize Cotton Gold and Scheepjes Catona
Oh deer! Make this easy amigurumi animal as a Christmas gift or as a part of your holiday decoration. Detailed photos show you how to assemble and decorate this adorable deer. Having this cute crochet deer will surely help spread the holiday cheer.
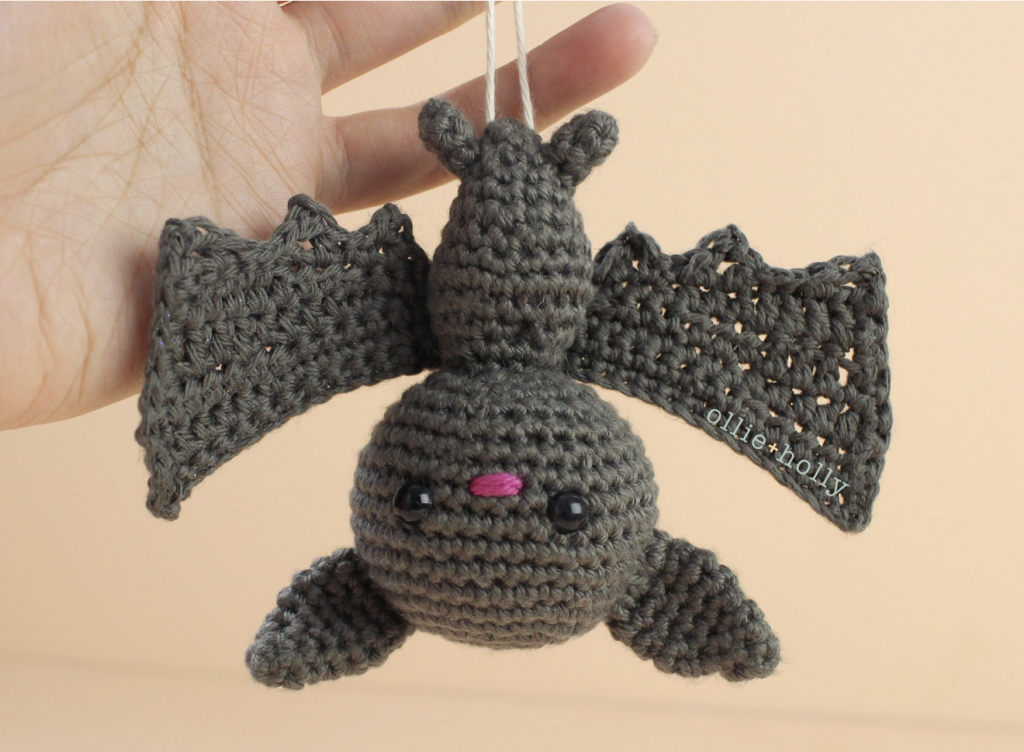
Bat Ornament Amigurumi
Designer: Ollie Holly
Yarn weight: (2) Sport
Yarn suggestion: Knit Picks Shine Sport
Sink your fangs into this free crochet amigurumi pattern and create this cute little bat. Add a string so you can hang it as part of your Halloween decor, or super size it with bulky yarn to make a huggable crochet toy.
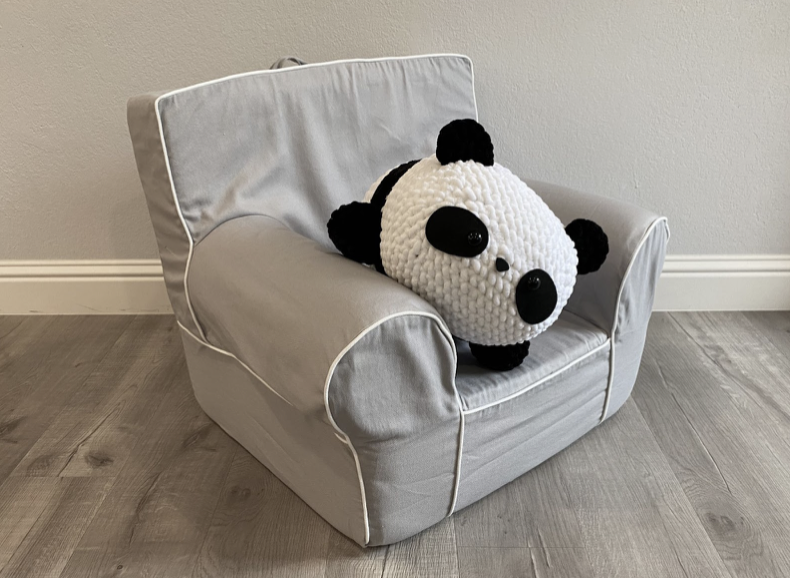
Ginger the Giant Panda
Designer: Curious Papaya for Clover USA
Yarn weight: (7) Jumbo
Yarn suggestion: Loops and Threads Sweet Snuggles
Jumbo yarn creates a soft and snuggly panda that is perfect for cuddling while watching your favorite movie. This cuddly panda works up quickly and uses up less than a skein of black and just over a skein of white jumbo yarn. Of course, you can size it down to create a smaller panda by using a lighter yarn weight.

Crochet Unicorn
Designer: Rose and Lily Amigurumi
Yarn weight: (6) Super bulky
Yarn suggestion: Premier Parfait Chunky
This crochet unicorn makes a perfect gift for kids, and you can easily customize them in different colors to match their personality! A very beginner friendly crochet amigurumi pattern, this crochet unicorn pattern comes in a two part video tutorial that is easy to follow. A written pattern is available for purchase on Etsy.
Farm Themed Crochet Animal Patterns
Get ready to crochet a barn full of these cute amigurumi animals. These free crochet animal patterns are great for making gifts for kids and adults alike.
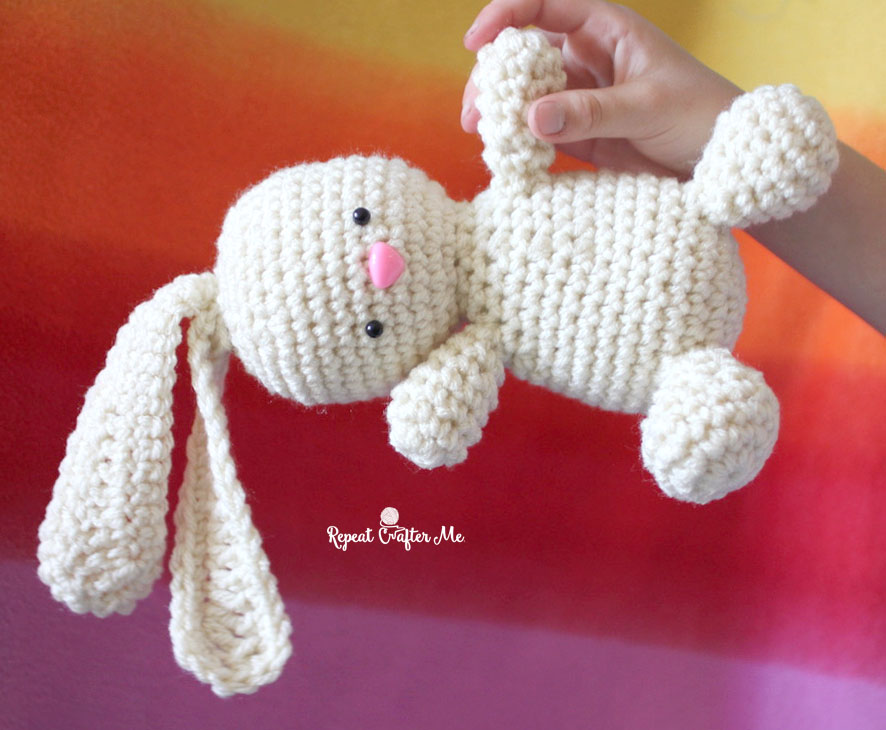
Easy Crochet Bunny
Designer: Repeat Crafter Me
Yarn weight: (4) Worsted
Yarn suggestion: Red Heart With Love
Many amigurumi beginners start with an easy, crocheted bunny. To make this doll, you will crochet the body, head and ears in one piece, then sew the arms and legs on. There is a video tutorial along with the detailed written pattern to help you create your first amigurumi animal.
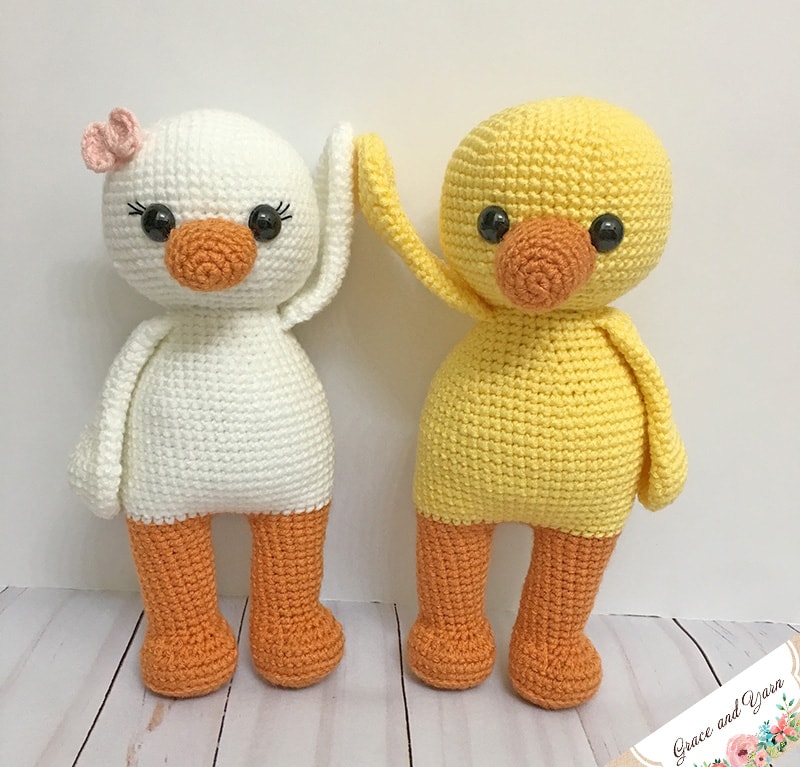
Amigurumi Duck
Designer: Grace and Yarn
Yarn weight: (4) Worsted
Yarn suggestion: Premier Yarns Premier Anti-Pilling Everyday Worsted
This beginner friendly crochet amigurumi pattern requires very little sewing. It works up to about 13 inches when using worsted weight yarn, the perfect size for a little one’s crochet toy. This project doesn’t have color changes on the body, so it’s perfect for beginner crocheters who want to try making crochet toys.
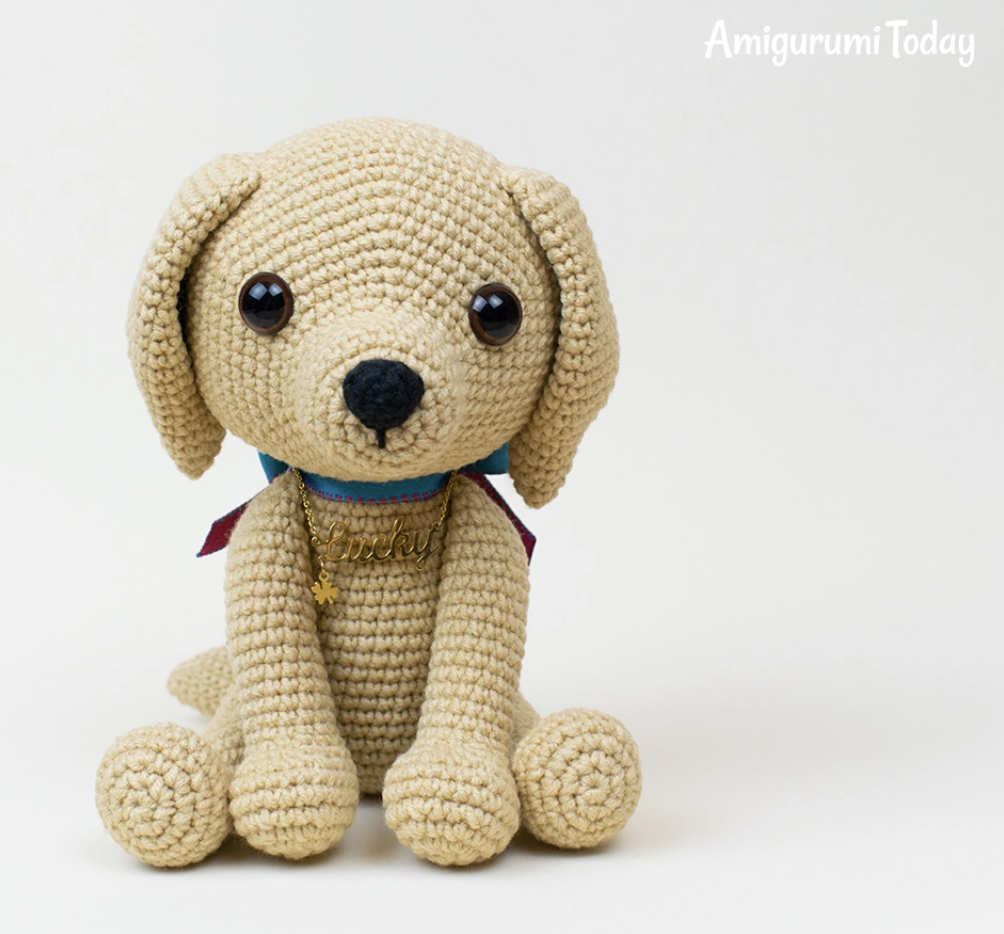
Lucky Puppy
Designer: Amigurumi Today
Yarn weight: (2) Sport
Yarn suggestion: YarnArt Jeans
Need a gift for a dog-lover? This cute little puppy is the perfect amigurumi pattern. This intermediate pattern is quite easy to customize for giving as gifts. You can even add a custom bow and name tag if you wish.
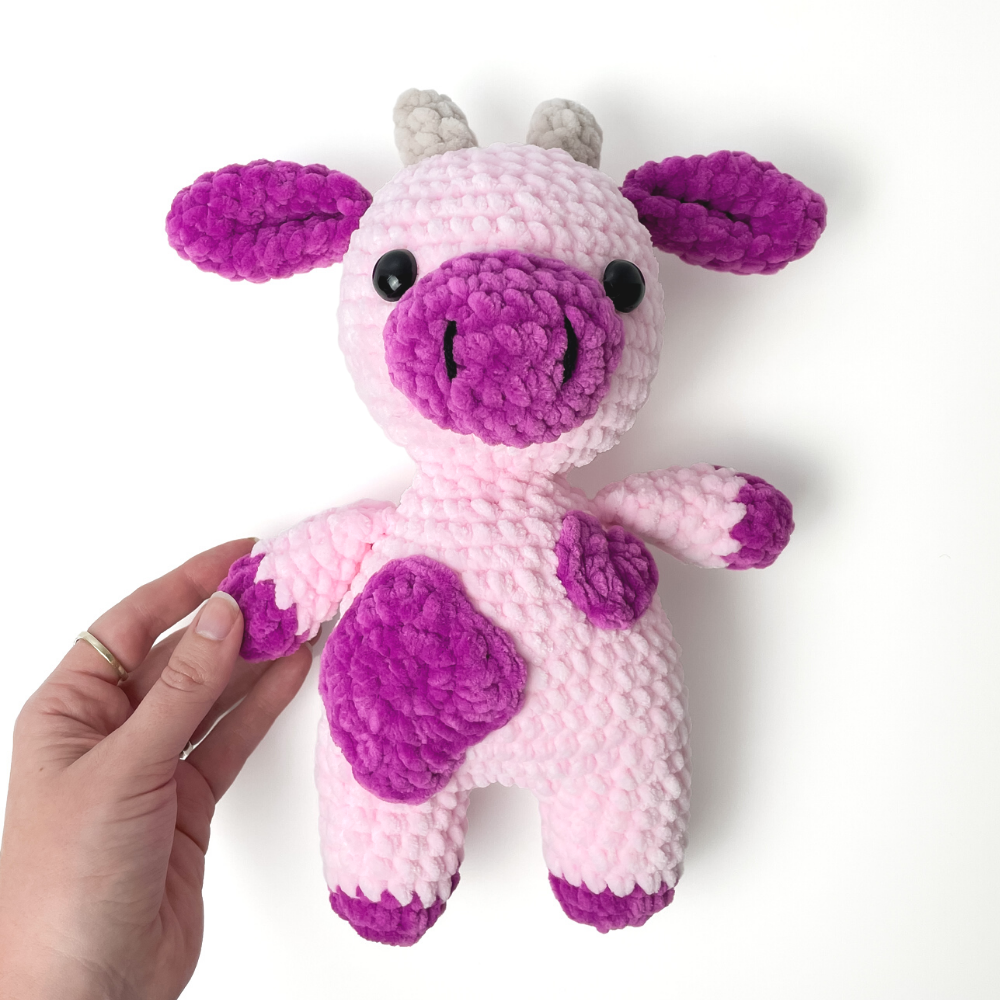
Strawberry Cow
Designer: Rose and Lily Amigurumi
Yarn weight: (6) Super bulky
Yarn suggestion: Premier Yarns Parfait Chunky
Where does strawberry milk come from? From strawberry cows of course! This cute and easy free crochet amigurumi pattern is great for beginner crocheters. It works up quickly with bulky yarn, and can easily be customized by changing the colors. Use blue for a blueberry cow, or brown for a chocolate cow. Let your imagination run wild and create your own cute cow!
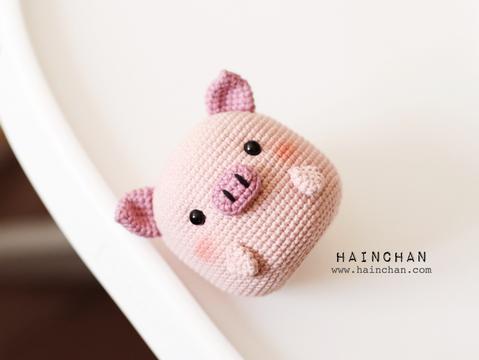
The Little Pig
Designer: Hainchan, via Ravelry
Yarn weight: (2) Sport
Yarn suggestion: YarnArt Jeans
This little piggy is great for anyone familiar with amigurumi basics, including beginner crocheters. It is quick and easy to make, and will make great gifts or giveaways. Turn your little pig into a huggable one by using a bulkier yarn weight.
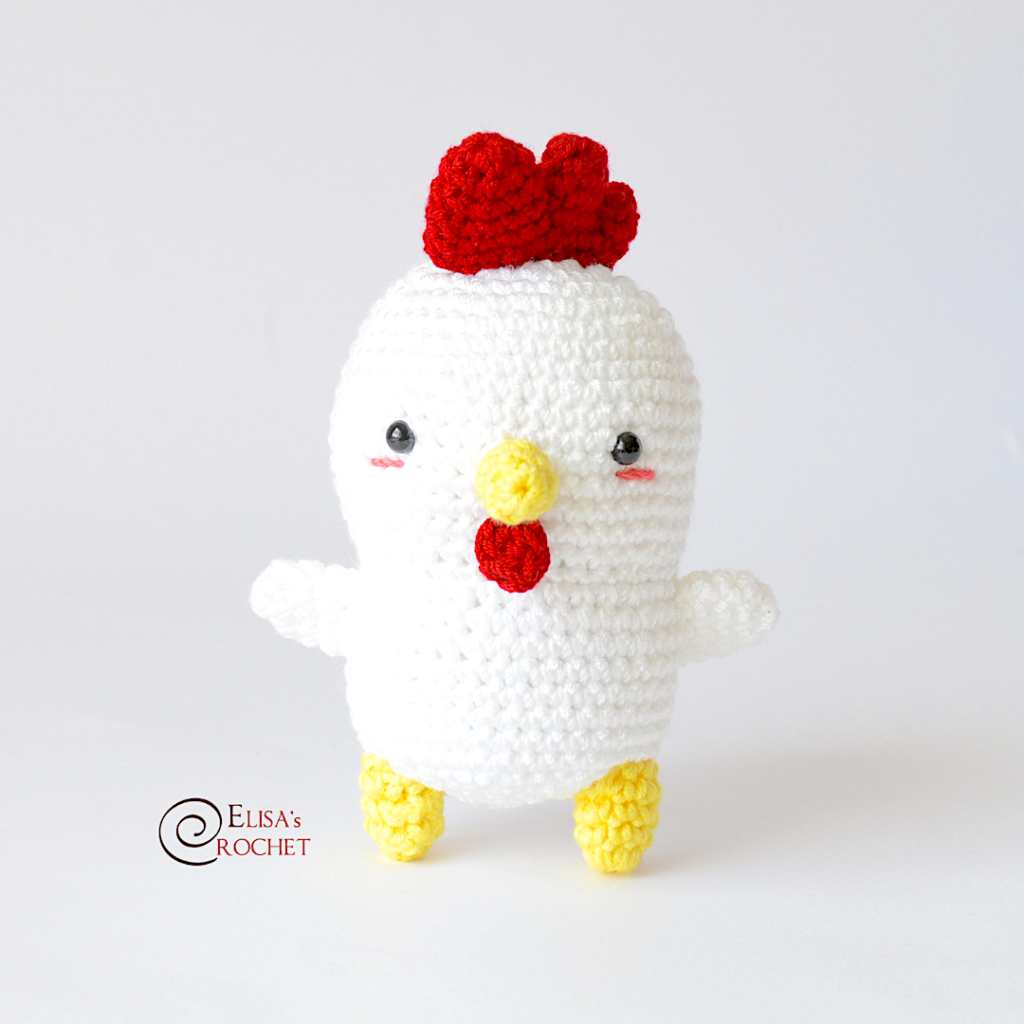
Baby Chicken
Designer: Elisa’s Crochet
Yarn weight: (4) Worsted
Yarn Suggestion: Lion Brand Basic Stitch
Chick out this cute and chubby crochet chicken that is a super easy amigurumi project. You will enjoy crocheting this five inch chick, and soon you’ll have a whole nest full!
Baby Chicken
Designer: Elisa’s Crochet
Yarn weight: (4) Worsted
Yarn Suggestion: Lion Brand Basic Stitch
Chick out this cute and chubby crochet chicken that is a super easy amigurumi project. You will enjoy crocheting this five inch chick, and soon you’ll have a whole nest full!
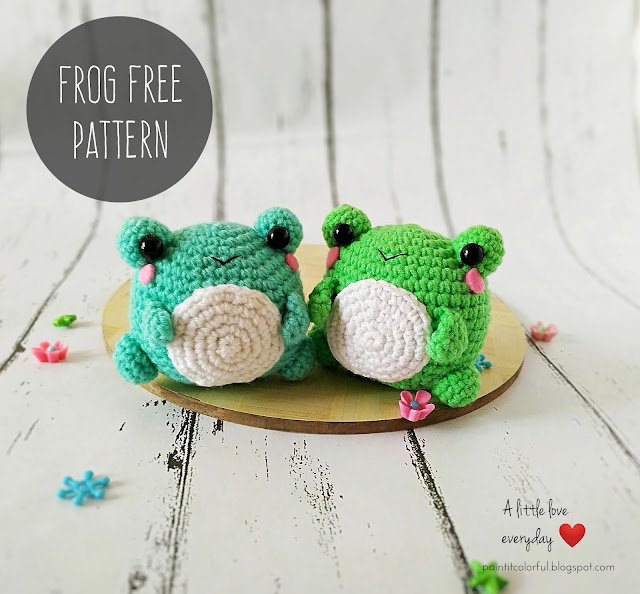
Amigurumi Frog
Designer: A Little Love Everyday
Yarn weight: (2) Sport
Yarn suggestion: YarnArt Begonia
Hop on to the frog trend with this cute amigurumi frog. It’s quick and easy to make, which makes them great craft fair items or last-minute gifts. Just be sure to use a stitch marker to keep track of your rounds so you won’t end up frogging your work.
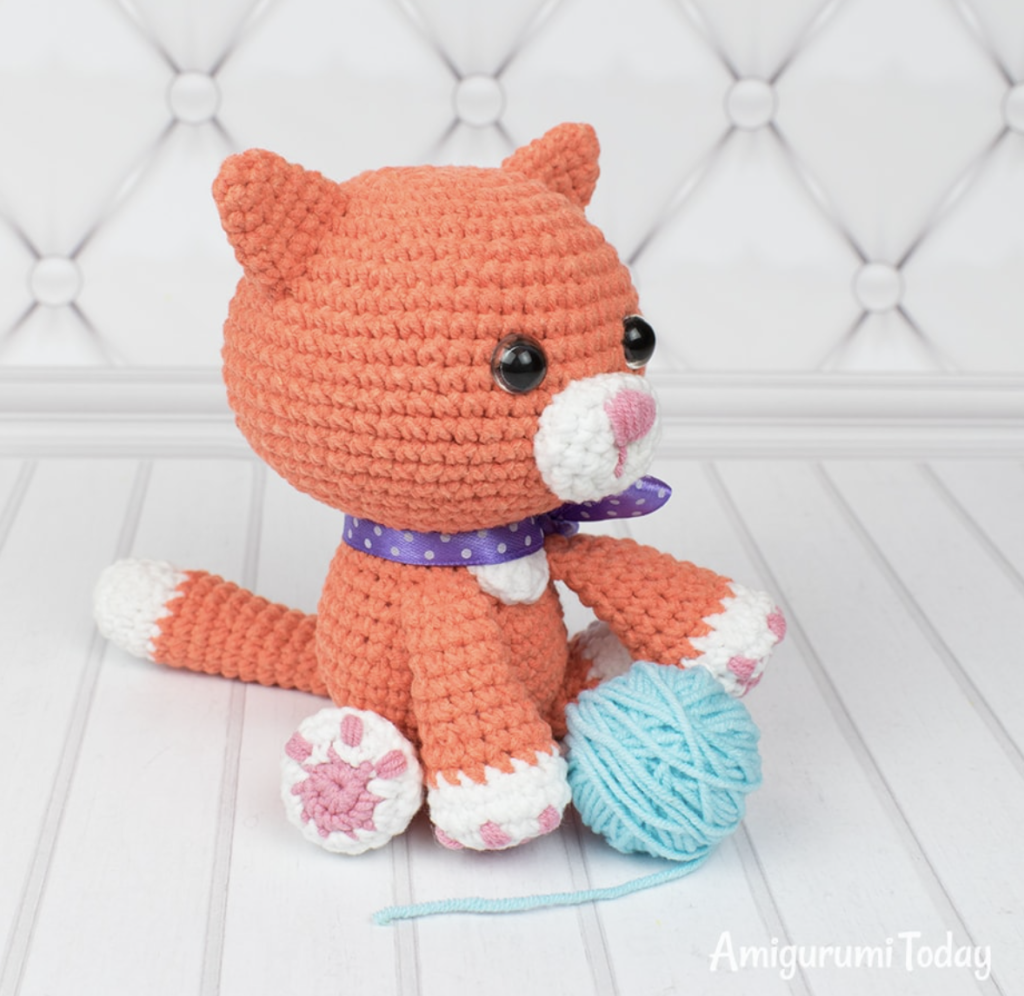
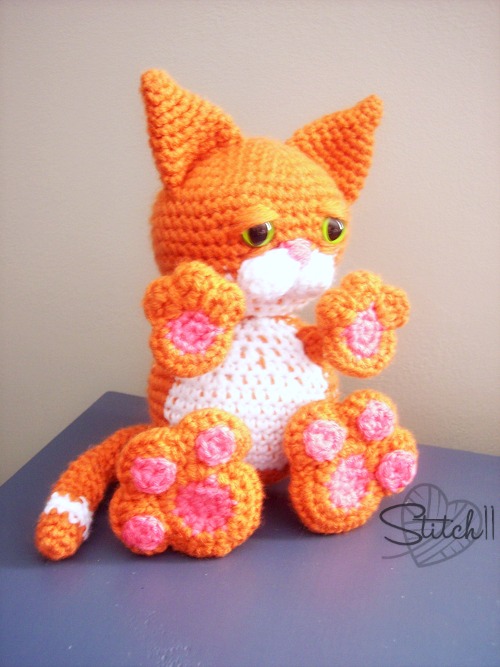
Ginger Cat
Designer: Amigurumi Today
Yarn weight: (2) Sport
Yarn suggestion: YarnArt Jeans
This little ginger cat is designed to give lots of hugs and cuddles to its owner. These bitty crochet kitties are just about 4.5 inches sitting up, but you can definitely make them bigger if you use a worsted weight yarn. Personalize it with accessories such as a cute collar and bow to make a special gift for cat lovers.

Cory the Giant Bunny
Designer: Airali Design, via Ravelry
Yarn weight: (6) Super bulky
Yarn suggestion: Premier Yarns Basix Chunky
This adorable crocheted bunny is designed for hugs and cuddles. Using super bulky yarn, it stands at 22.5 inches tall! Size it down by using a lighter yarn weight, and skip the fabric details for a more beginner-friendly version.
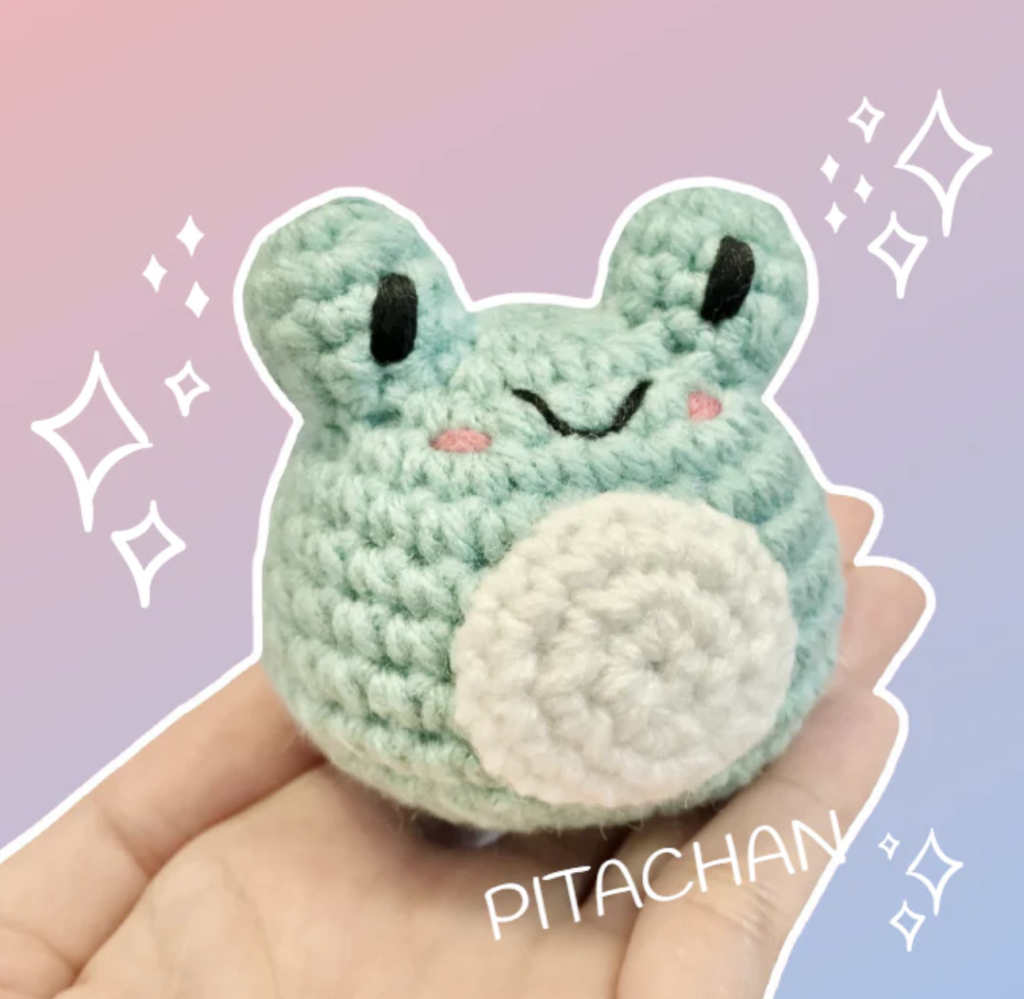
Easy Amigurumi Frog
Designer: Pitachan
Yarn weight: (4) Worsted
Yarn suggestion: Caron One Pound and Red Heart Super Saver
This hoppy little frog is super easy to make. It uses very little yarn, you’ll end up with an army of frogs from just one skein of yarn. The embroidered eyes make it perfect for small kids. The pattern is presented in a video tutorial.
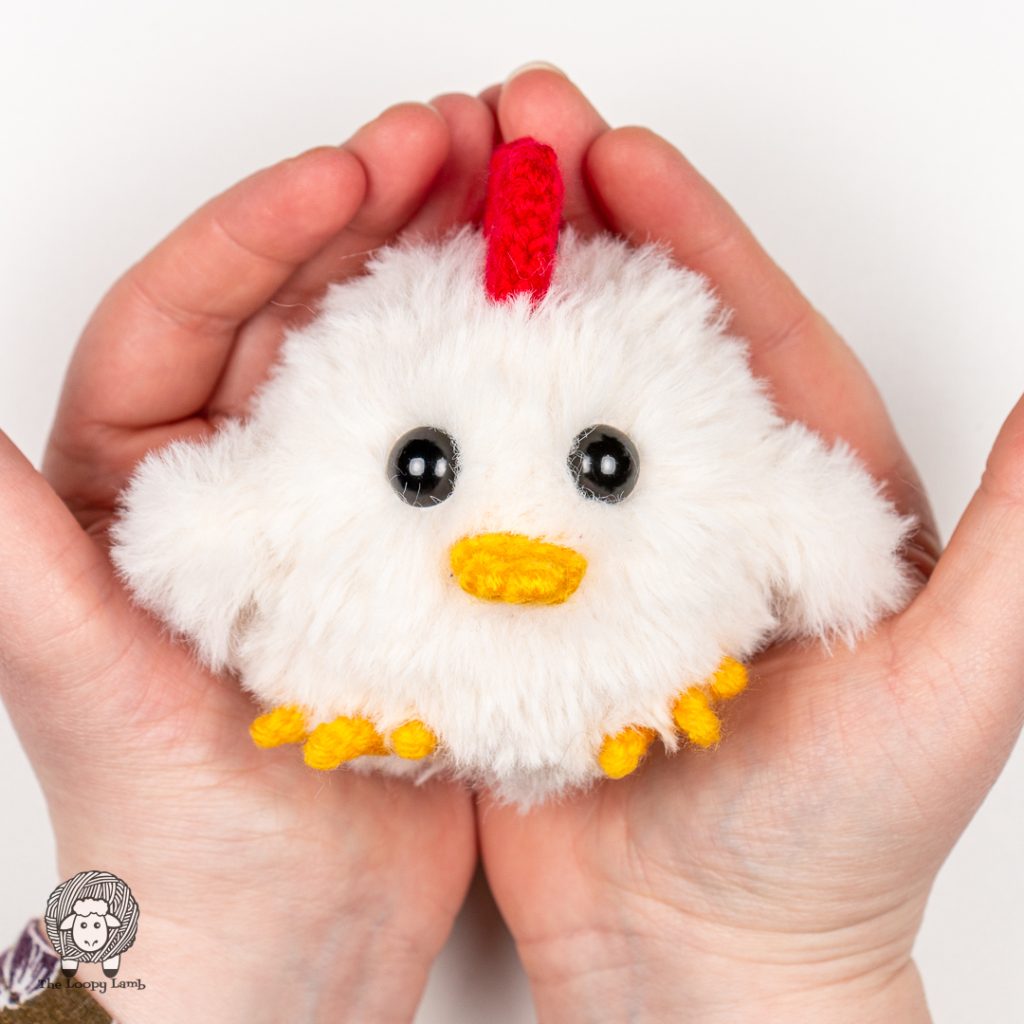
Sir Clucksalot Amigurumi Chicken
Designer: The Loopy Lamb
Yarn weight: (6) Super bulky
Yarn suggestion: Knit Picks Fable Fur
Fill your Easter basket with this furry crochet toy that will delight both kids and adults alike. A quick and easy project, you will only need to crochet 10 spiral rounds to make this adorable chick. You can also make a smooth version, Chick Jagger, if you are not a fan of furry yarn.
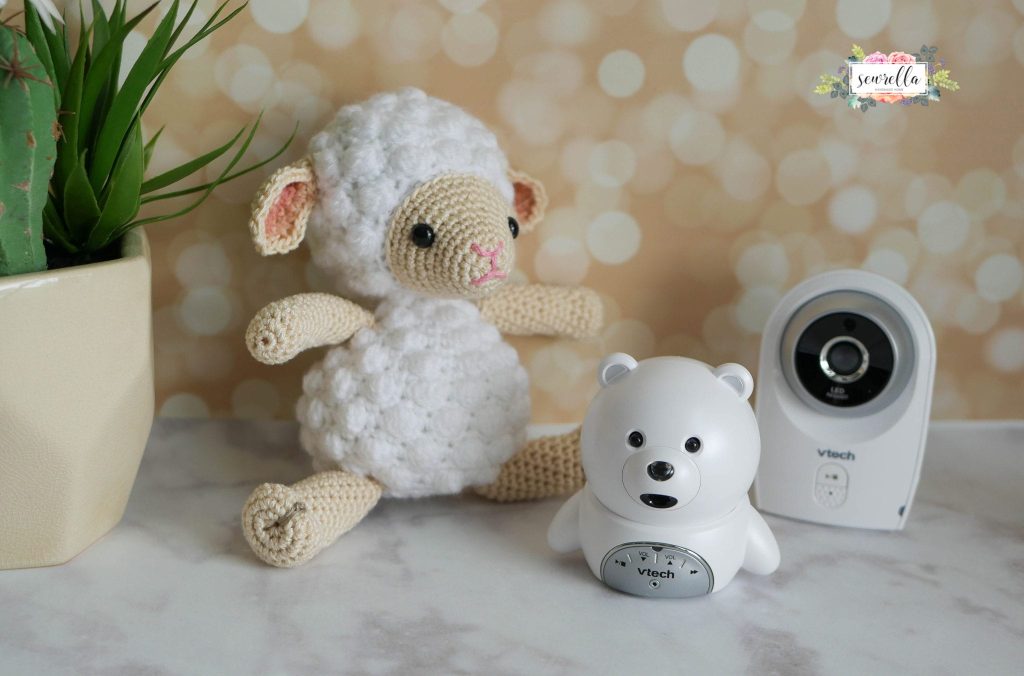
Little Crochet Lamb
Designer: Sewrella
Yarn weight: (4) Worsted
Yarn suggestion: Lion Brand 24/7 Cotton and Lion Brand Vanna’s Choice
A combination of smooth cotton yarn and fuzzy acrylic yarn gives this little lamb a distinctive look. Bobble stitches add an element of texture that also helps achieve that fuzzy wool look.
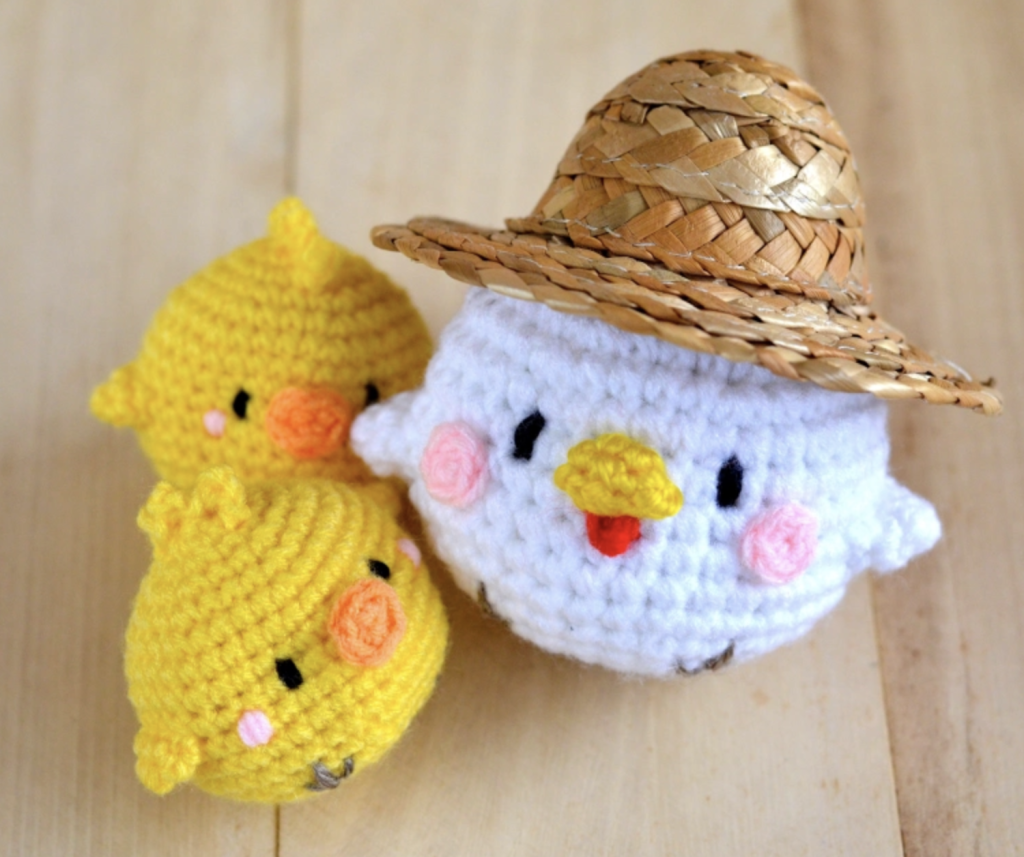
Hen and Chicks Amigurumi: Tori and Tama-Go
Designer: AmiguruMei for Craft Passion
Yarn weight: (2) Sport
Yarn suggestion: YarnArt Jeans
These adorable chickens are easy to make and take on your next adventure with your little one. Use two strands of yarn (or a heavier yarn weight) to make mama hen so she comes out bigger than the chicks.
Prehistoric Animals Crochet Patterns
These prehistoric creatures are making a huge comeback. Any dinosaur loving kid (or adult!) will love one of these adorable crochet animals.
Colorful Mini Dino
Designer: Handmade by Ani
Yarn weight: (3) DK
Yarn suggestion: Patons Grace
Bust out your yarn scraps to make these cute and colorful dinos. Mix and match different colors to create unique dinos. They are so easy to make, you’ll end up making a dozen of these cuties in no time!

Tanner the Triceratops
Designer: Nicole Chase
Yarn weight: (4) Worsted
Yarn suggestion: Knit Picks Brava Worsted
Tanner is one of the most popular dinosaur crochet patterns among crocheters and their little ones. This pattern is beginner friendly, you will work in the round to create the parts, then sew them together to assemble. Made with worsted weight yarn, Tanner stands at about 13 inches tall (10 inches when sitting), which makes him the perfect cuddle size for any dino-loving kid.
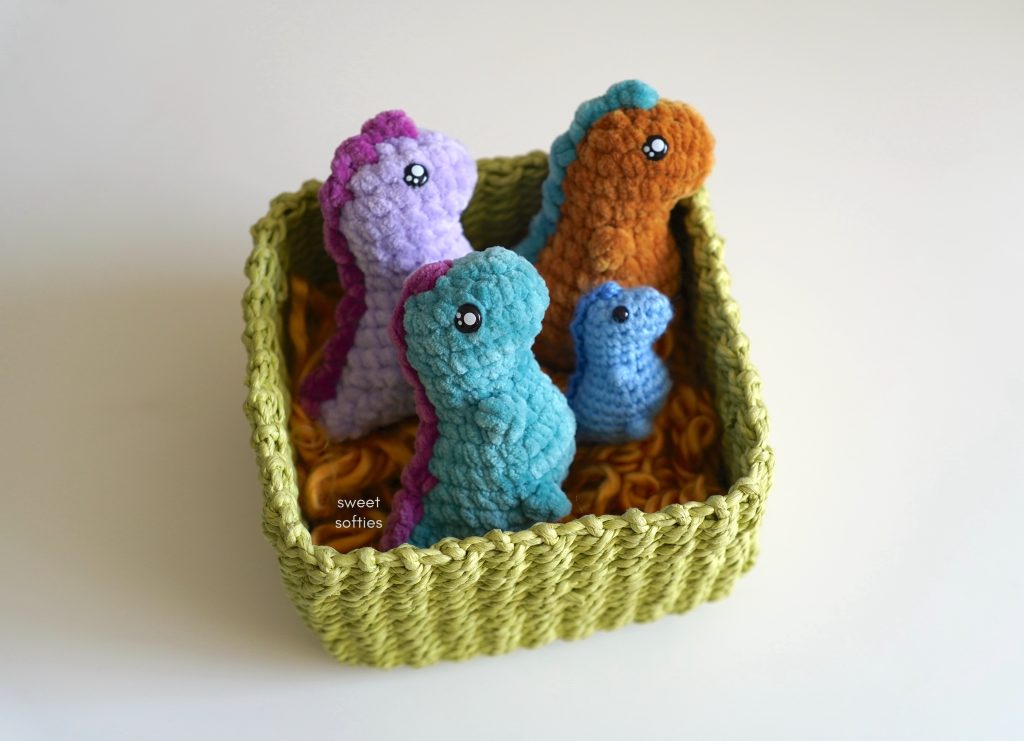
Tiny-Rex the Pocket Dino
Designer: Sweet Softies
Yarn weight: (6) Super bulky
Yarn suggestion: Premier Parfait Chunky
No-sew pocket dinos. What else can you ask for? These tiny T. rex are worked top down, with the arms, legs, and spikes crocheted directly onto the dinosaur’s body. They not only make great pocket friends, they’re also good for craft fairs, party favors, stocking stuffers, and even as a stress relief object.
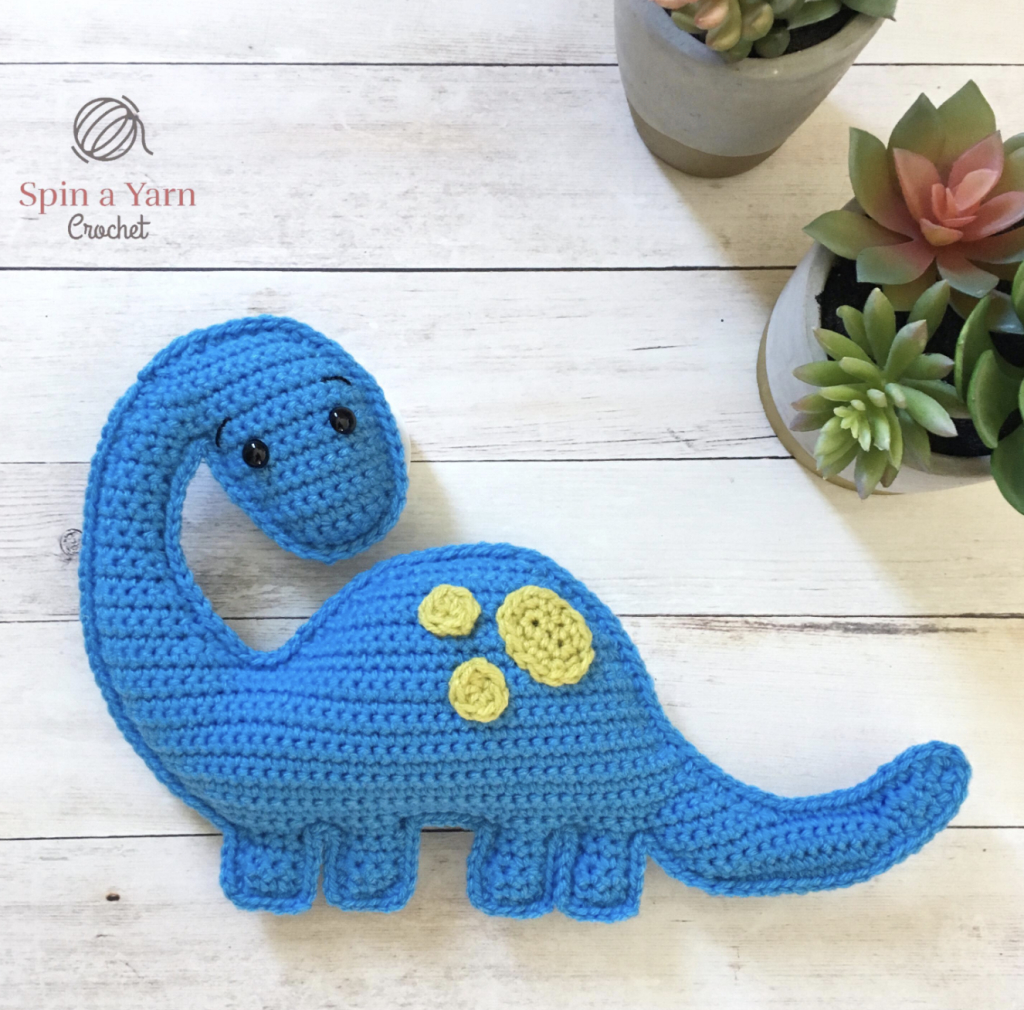
Brian the Brachiosaurus
Designer: Spin a Yarn Crochet
Yarn weight: (4) Worsted
Yarn suggestion: Bernat Super Value
Made with just five pieces (including three spots!), this pattern works up real quick and is probably the cutest Brachiosaurus you’ll come across. A very beginner friendly pattern, you will only need to sew the spots and face details (especially if you’ll be embroidering the eyes). This ragdoll style crochet toy will look great as part of your nursery decor, as a decorative pillow or as a stuffed toy to play with!
Crochet Animal Patterns for Bugs
You won’t be able to get enough of these cute critters. They make perfect companions for when you sing nursery rhymes or read storybooks to your little kids.
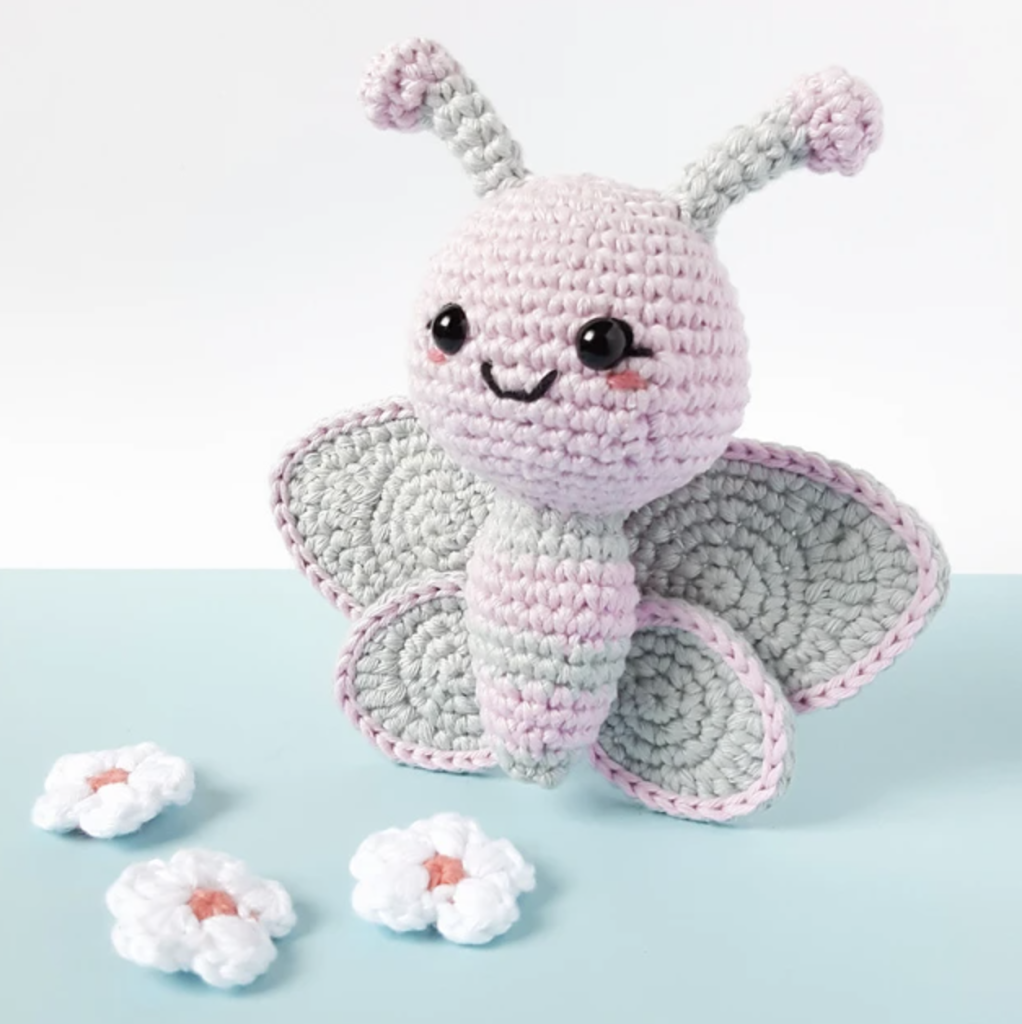
Ellie the Butterfly Amigurumi
Designer: Ana Veiga, via Ravelry
Yarn weight: (4) Worsted
Yarn suggestion: Knit Picks Dishie
This butterfly is ready to spread its wings and make new friends. You will need to know how to change colors if you want a colorful butterfly. This will look great as part of a kid’s mobile or as a stuffed toy to play with.
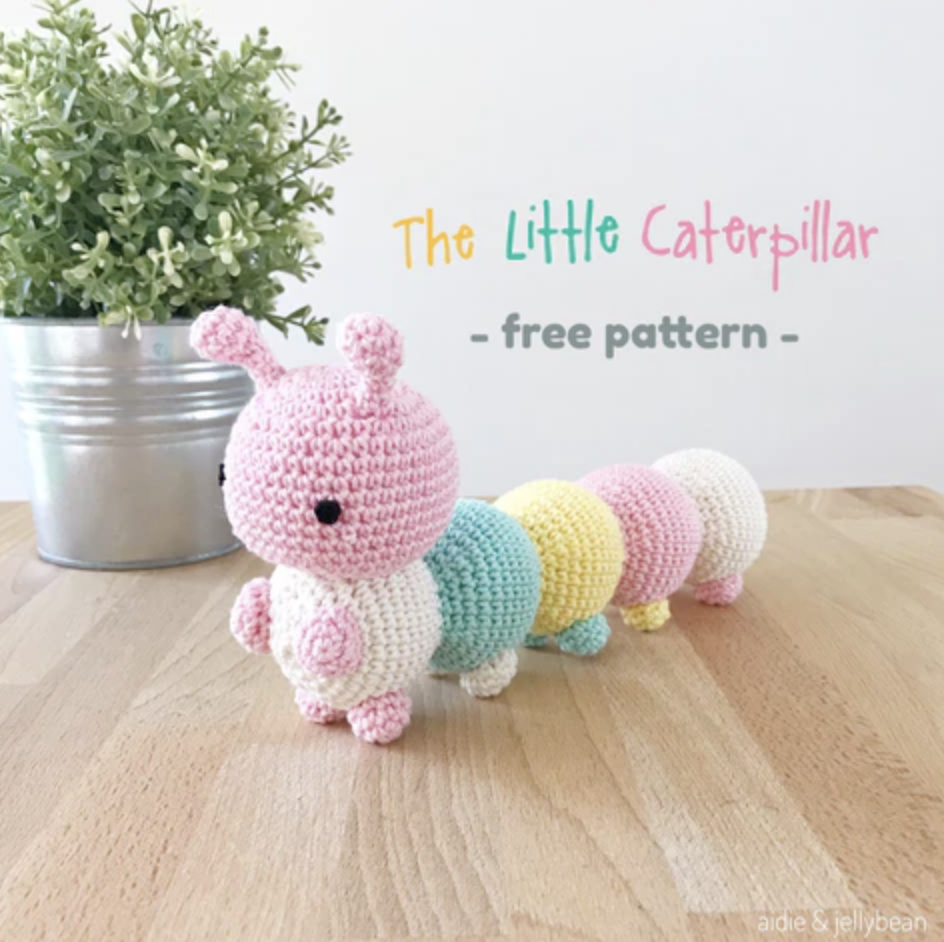
The Little Caterpillar
Designer: Aidie and Jellybean
Yarn weight: (2) Sport
Yarn suggestion:b YarnArt Begonia
This caterpillar is ready to explore the world with your little one. This pattern is great for amigurumi beginners who want to practice crocheting in the round. You can use your yarn scraps to create a caterpillar with different colors.
Sharlotte the Spider
Designer: Yarn Society
Yarn weight: (4) Worsted
Yarn suggestion: Lion Brand LB Collection Chainette
Not all spiders are scary. This cute spider pattern is easy to make, and you can use any type of yarn you have available. These are great for Halloween, to use as decor, or for giveaways. Use a pet slicker brush to fluff up the legs to make it more spider-like.
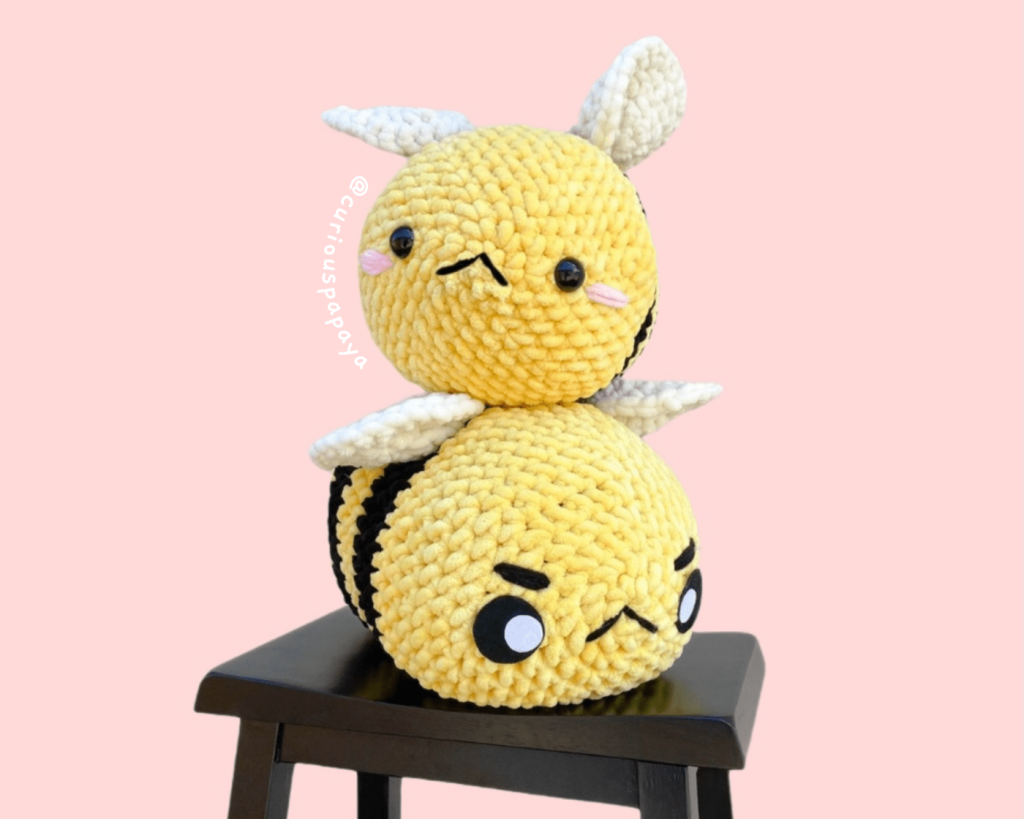
Jumbo the Bee
Designer: Curious Papaya
Yarn weight: (7) Jumbo
Yarn suggestion: Loops & Threads Sweet Snuggles
Crochet bees have been making a buzz online, and it looks like this trend is not going away anytime soon. This huge, cuddly and squishy bee works up quickly with a jumbo yarn, but you can use any yarn weight to create a different sized bee. There’s also an option to use felt eyes instead of safety eyes, which is perfect if you’re making his jumbo bee for small children.
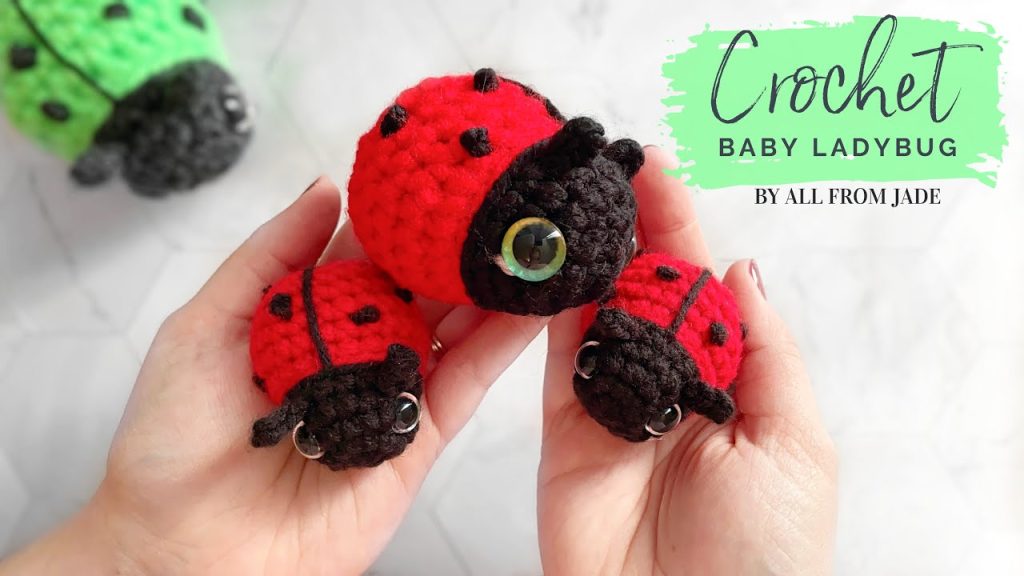
Crochet Baby Ladybug
Designer: All from Jade
Yarn weight: (5) Bulky
Yarn suggestion: Premier Yarns Basix Chunky
This no-sew crochet ladybug toy is easy to make and will keep small kids entertained. The bigger ladybug has a compartment at the bottom where you can keep the smaller one. The video tutorial uses a bulky yarn, but you can also use a jumbo yarn and a worsted weight yarn to make them in different sizes. This is a video tutorial.
Ready to Learn More about Crochet Amigurumi?
You don’t have to start with complicated amigurumi projects. There are a lot of beginner-friendly amigurumi patterns that will let you practice basic amigurumi techniques such as working in the round and changing colors. You will also find some no-sew amigurumi crochet patterns that are great for those who are starting to learn crochet amigurumi
If you want to know more about how to easily create cute crochet animals, check out our Amigurumi Masterclass where you will learn the basic techniques you need to be able to create an endless number of crochet amigurumi creatures.
The class covers all the techniques you need, plus gives you basic patterns you can stitch or alter to make your own sweet creations.