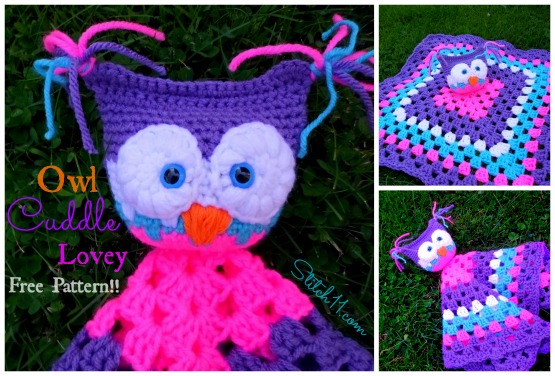
When new babies come into our lives, we want to shower them with all sorts of adorable, crocheted items, such as baby blankets, booties, and hats.
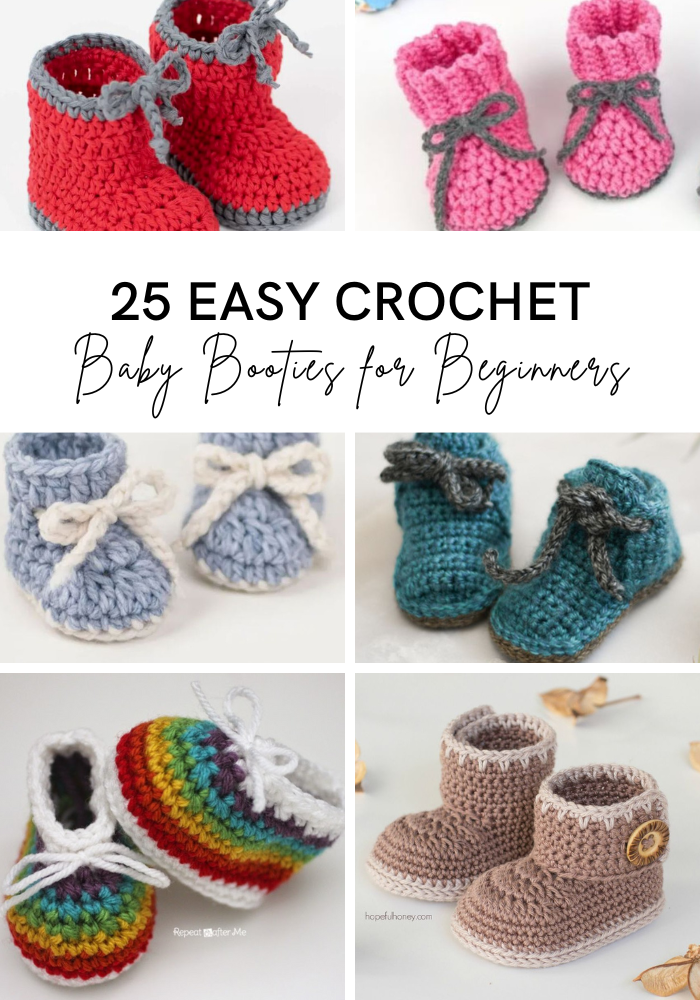
Crochet baby booties are one of the most popular and quickest to make baby gifts, and there are lots of options for keeping little feet warm. If you love crocheting baby items, then these easy crochet baby booties for beginners patterns will surely keep you busy!
What are Baby Booties?
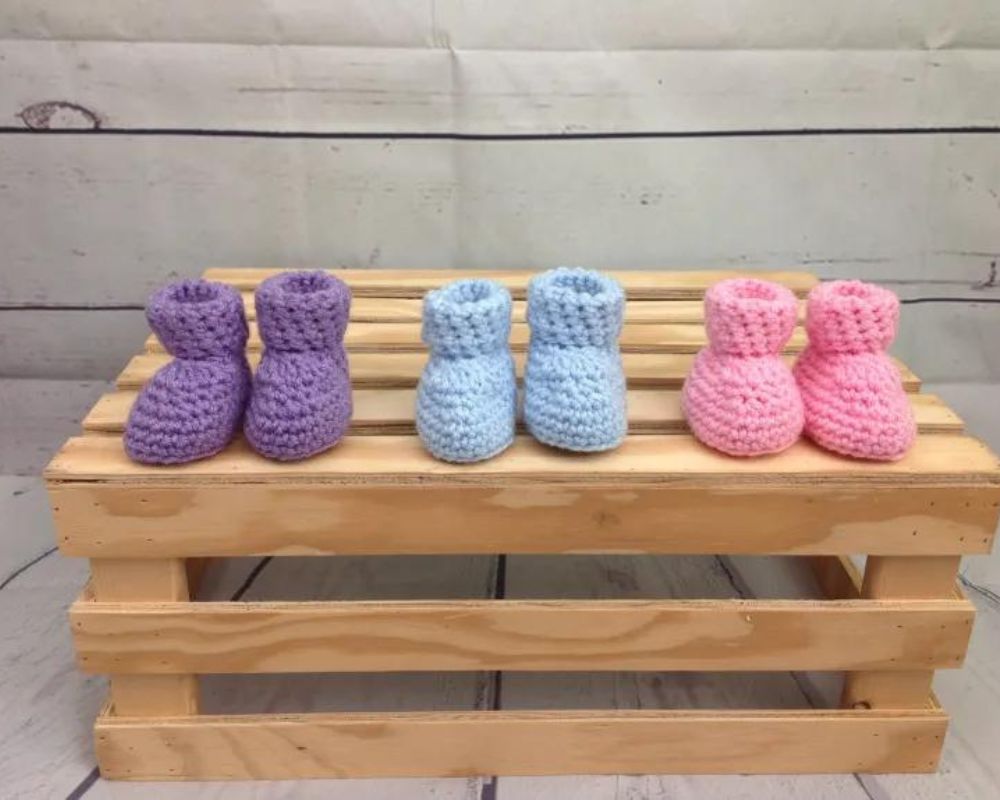
Baby booties (sometimes spelled bootees) are short, boot-like socks that are soft and warm. They can be knit or crocheted and are sized for newborns up to babies of about a year in age.
They can be worked flat, folded, and seamed to make a foot shape or worked in rounds.
Are Baby Booties Socks?
Although they may look like socks, baby booties are not socks nor are they shoes. They usually are a little bigger than socks and would not fit inside shoes.
Usually, booties are meant to be worn instead of socks or shoes for babies who do not yet know how to walk. In some designs, crochet booties will have gripper bottoms so babies can wear them when they’re practicing walking.
What Yarn Should I Use for Baby Booties?
As with other crochet projects, you can use just about any yarn you like to crochet baby booties. Baby items often use thinner yarn, and it’s a great idea to choose a yarn that is soft to the touch because these will be worn without other socks underneath.
Most new moms and dads also appreciate baby items that are machine washable, so check the label of any yarn you choose to make sure the care instructions are easy to follow.
What Other Materials Do I Need?
You will need a corresponding crochet hook in the hook size suggested in the crochet baby pattern you want to use, which will depend on the weight of the yarn used.
It’s a great idea to purchase a set of crochet hooks so that you have all the crochet hook sizes you might need, or you can purchase the sizes you need as you need them.
In addition to yarn and hook, you’ll need a measuring tape to ensure your booties are the correct size. You might want a stitch marker for marking the end of the round if you are making a bootie pattern that is worked in rounds.
Scissors and a yarn needle are always essential for finishing projects, but since many booties are sewn up after crocheting, you’ll definitely need one for these projects.
How Long Does It Take to Crochet Baby Booties?
Most baby booties are made with basic crochet stitches. If you are a beginner, then you can create a pair in no time. For advanced beginners who already know how to make the basic crochet stitches, it will take about an hour to crochet a pair of baby booties.
This of course depends on the size of the bootie you are making and the weight of yarn you are using. Projects worked in (4) worsted weight yarn will go a lot faster than those worked in (2) sport or baby yarn.
Crochet Stitches Used in Baby Booties
While baby booties may seem intimidating because of their construction methods, they’re actually pretty quick and easy projects that often use basic crochet stitches.
To do these cute garments, you’ll need to familiarize yourself with crochet stitches like chain (ch), single crochet (sc), slip stitch, half double crochet (hdc), and double crochet stitch (dc) as they are the most common stitches used in making baby booties.
If you need a little help with any of these techniques, or anything in the pattern you choose doesn’t make sense, take a look at our Crochet Fundamentals workshop. This video collection will teach you all the basics of crochet so you can make booties, or anything else, quickly and easily.
Easy Crochet Baby Booties for Beginners
So, now that you know the basic crochet stitches and the essentials you need for crocheting baby booties, get your yarns and hooks ready, and check out these awesome easy crochet baby booties for beginners patterns that you can try today!
Newborn Baby Booties
Easy Crochet Baby Booties Pattern
Designer: Okie Girl Bling ‘n Things
Yarn weight: (4) Worsted
Suggested yarn: Knit Picks Comfy Worsted
This baby bootie crochet pattern is so easy, anyone can do it. If you are a beginner in crochet, this pattern is perfect for practicing your crochet skills. They’re worked in rounds and mostly using single crochet stitches.
Parker Crochet Booties
Designer: Sewrella
Yarn weight: (4) Worsted
Suggested yarn: Lion Brand Vanna’s Choice
These cute little booties are easy to make and are named after the creator’s son, Parker! You can choose to crochet these booties alone or add a diaper cover to match them.
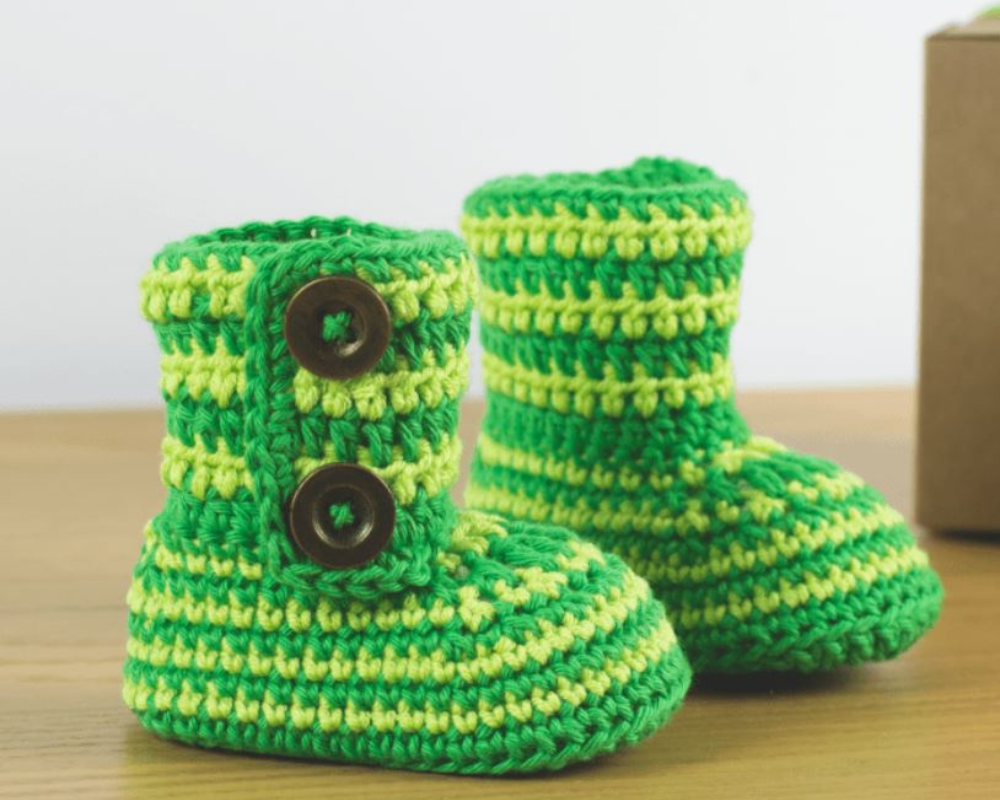
Winter Snowflake Crochet Baby Booties
Designer: Croby Patterns
Yarn weight: (5) Bulky
Suggested yarn: Knit Picks Brava Bulky
These sweet little boots are extra cozy and super-fast to stitch since they’re made with bulky yarn. They’re the perfect booties to keep your little warm this winter or for baby shower gifts!
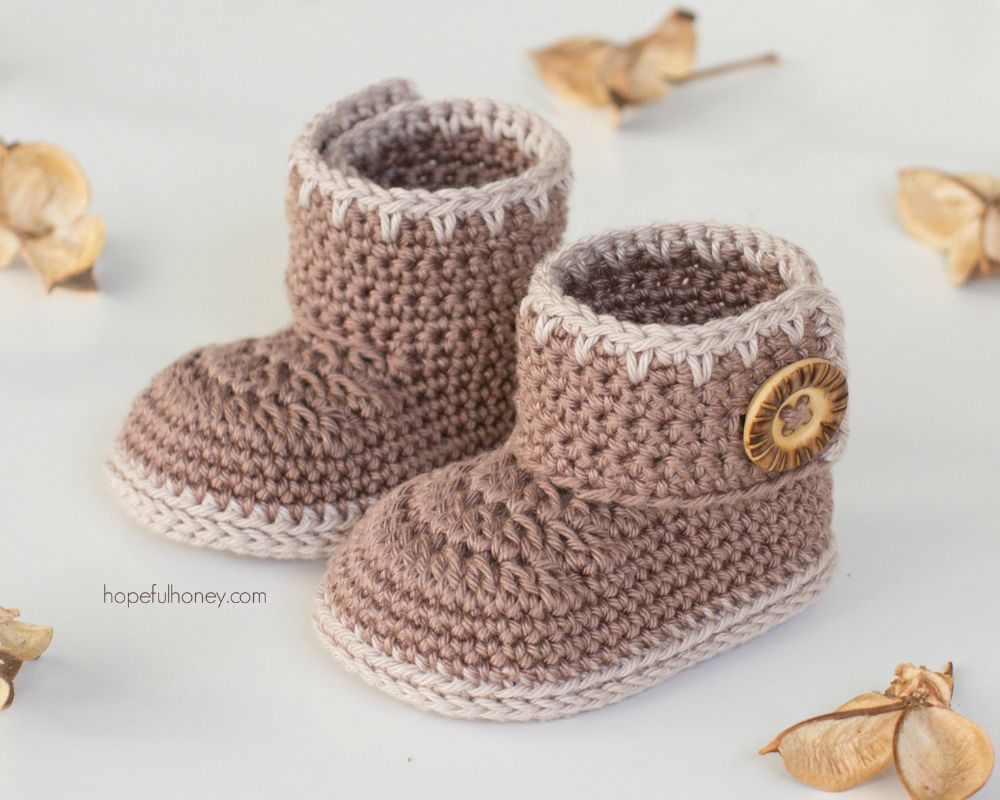
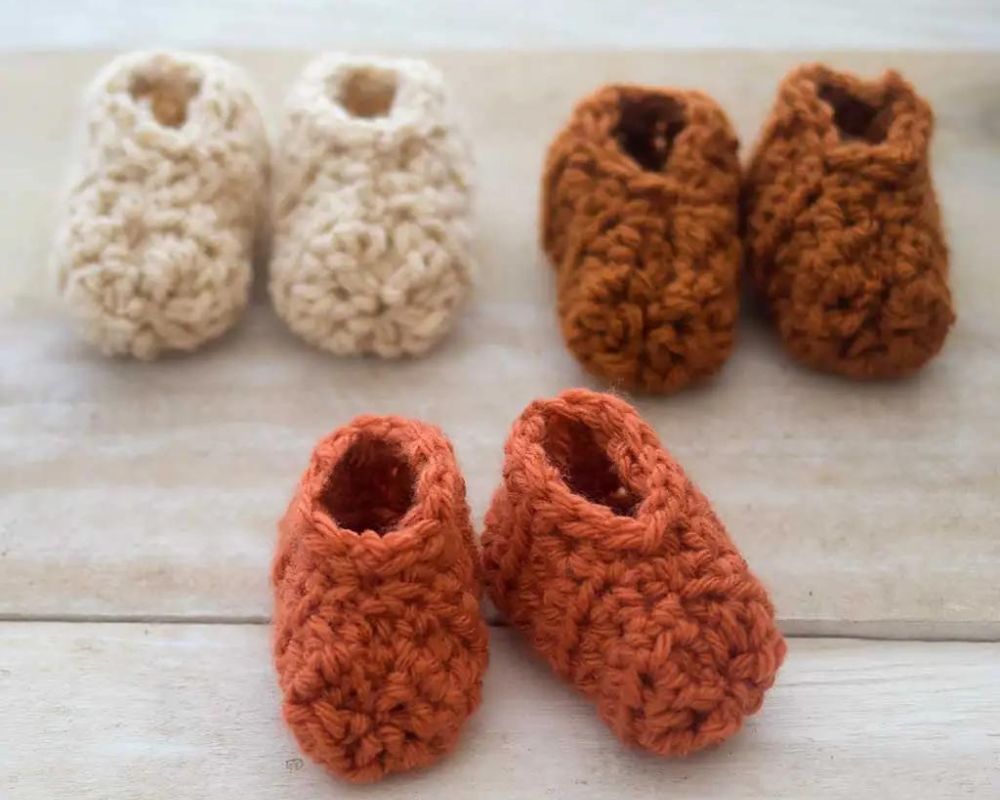
Cocoa Baby Booties
Designer: Hopeful Honey
Yarn weight: (3) DK
Suggested yarn: Lion Brand 24/7 Cotton DK
These ankle crochet baby boots are inspired by the warm tones of autumn. This is a beginner pattern that you’ll surely love crocheting, and two sizes are available for newborns and older babies.
Super Easy Baby Booties Crochet Pattern
Designer: Adore Crochet
Yarn weight: (4) Worsted
Suggested yarn: Premier Yarns Premier Anti-Pilling Everyday Worsted
This Super Easy Baby Booties Crochet Pattern is perfect for beginner crocheters! These quick and easy crochet baby booties are crocheted flat and shaped through some well-placed seams.
0-3 Months Old Baby Booties Patterns
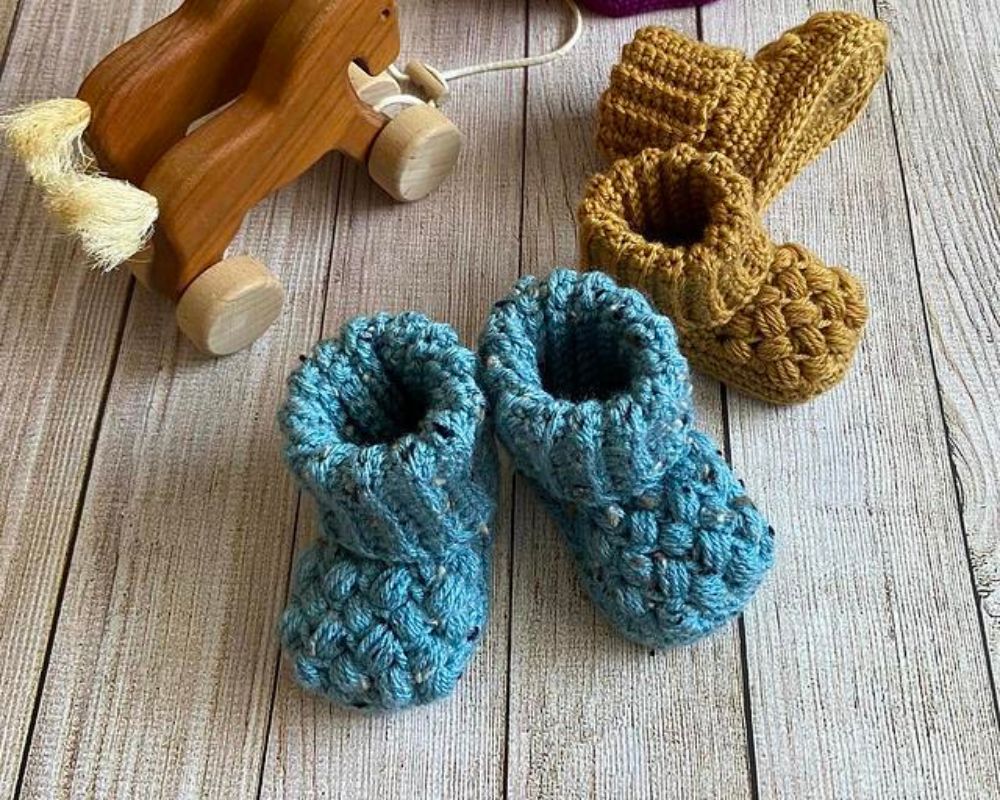
Baby Bean Booties
Designer: Creative Crochet Corner
Yarn weight: (4) Worsted
Suggested yarn: Knit Picks Comfy Worsted
These cute baby booties are a great addition to your baby’s wardrobe! The puff stitches add a lot of texture and give them a different look from a lot of booties out there. You can make them for newborns up to 12 months old.
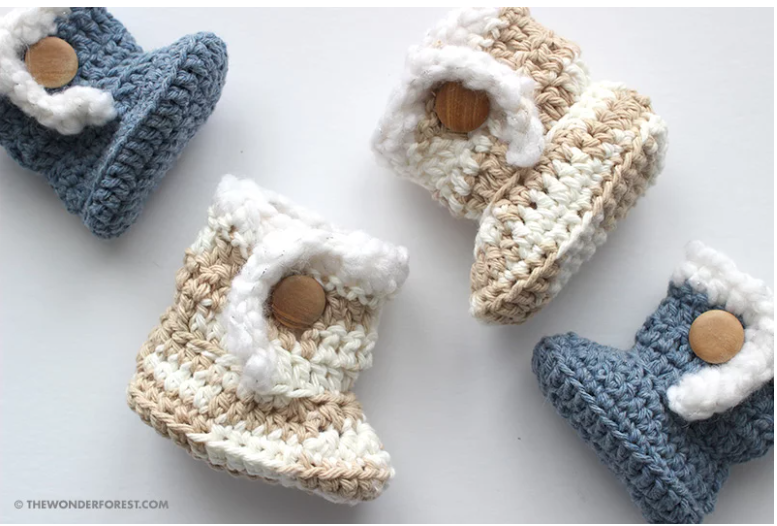
Sheepskin Style Baby Bootie Crochet Pattern
Designer: The Wonder Forest Blog
Yarn weight: (4) Worsted
Suggested yarn: Lily Sugar’n Cream
This is one of the cutest crochet baby boot patterns out there! These booties are cozy, cute, and really quick to whip up. To add the trim, use fuzzy or chenille yarn. They resemble tiny sheepskin boots once they’re done and are an adorable baby shower gift to give!
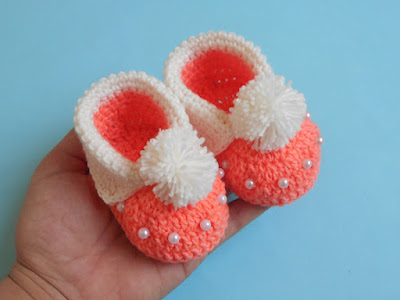
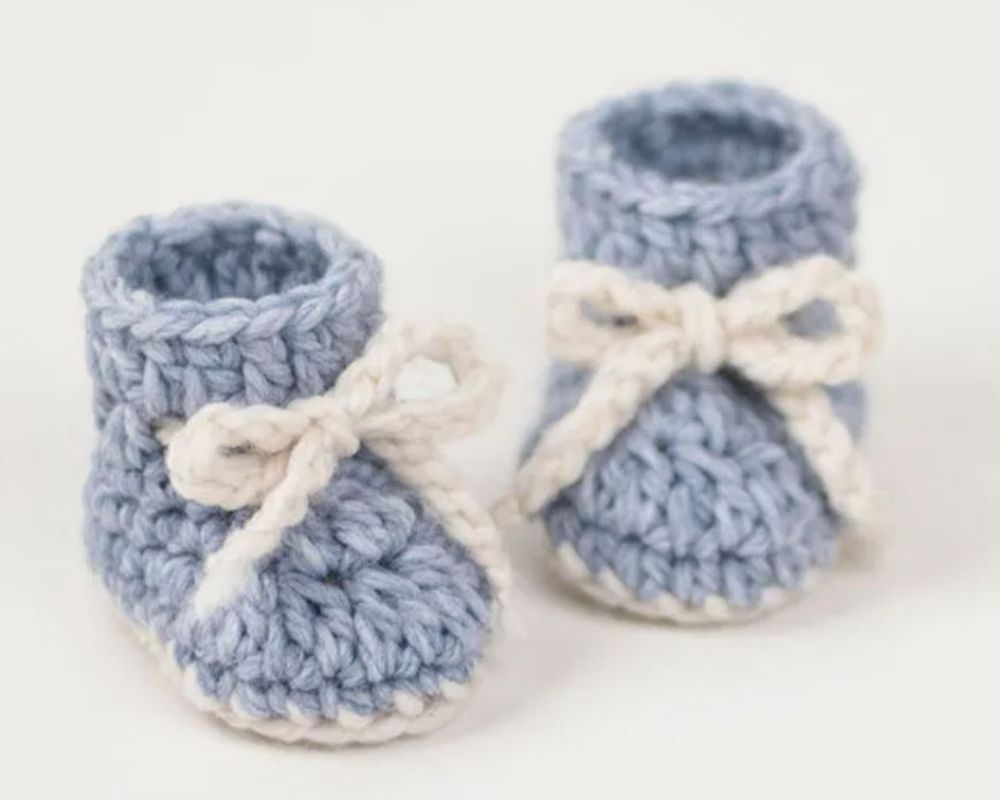
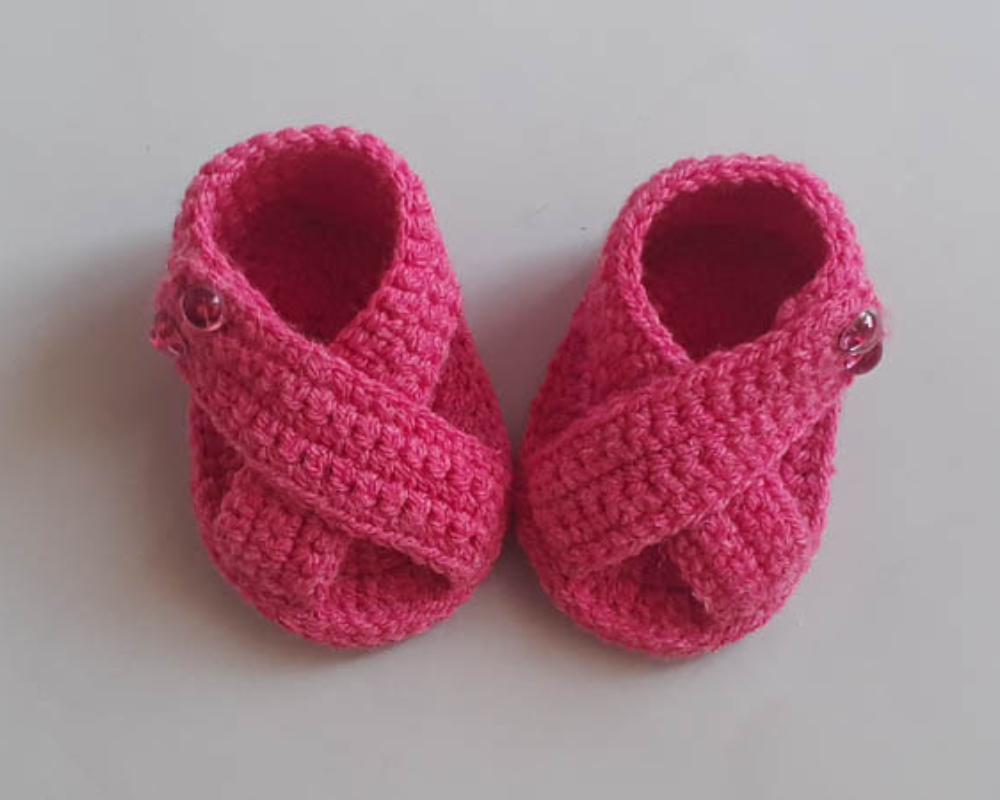
Easy Baby Cuffed Booties Free Pattern
Designer: Crochet Crosia Home
Yarn weight: (3) DK
Suggested yarn: Premier Yarns Premier DK Colors
These sweet slippers have so many cute details, from the two-color styling to beads, a turned down cuff, and that tiny pom-pom. Stitch these up to bling your baby or wow at your next baby shower.
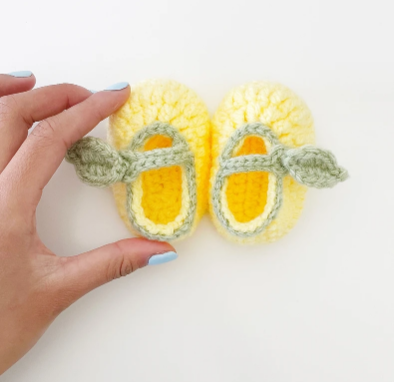
Easy Peasy Lemon Booties Crochet Pattern
Designer: Mel Crochets
Yarn weight: (4) Worsted
Suggested yarn: Ewe Ewe Heather's Heathers Worsted Weight Merino
This baby bootie is the cutest! It’s designed to look like a yellow lemon and has a leaf as the button to secure your little one’s feet. This is a super sage option, too, since there’s no button to pull off and become a choking hazard.

Vintage Mary Jane Baby Booties Pattern
Designer: Hopeful Honey
Yarn weight: (3) DK
Suggested yarn: Lion Brand 24/7 Cotton DK
It’s everyone’s favorite Mary Jane shoes with a sweet floral twist! This pattern is easy to follow, and your little shoes will be done in no time.
3-6 Months Old Baby Booties Patterns
Basic Baby Booties
Designer: Love Life Yarn
Yarn weight: (4) Worsted
Suggested yarn: Lion Brand 24/7 Cotton DK
These adorable shoe-like baby booties even have a little tie-on top. They’re one of the cutest pairs I’ve seen, and you’ll love them too!

Pink Lady Baby Booties Pattern
Designer: Hopeful Honey
Yarn weight: (3) DK
Suggested yarn: Lion Brand 24/7 Cotton DK
Give a baby girl some sweet, feminine booties with this quick and easy pattern. Or leave off the lace portion and you’ve got a great basic bootie any baby is sure to love.

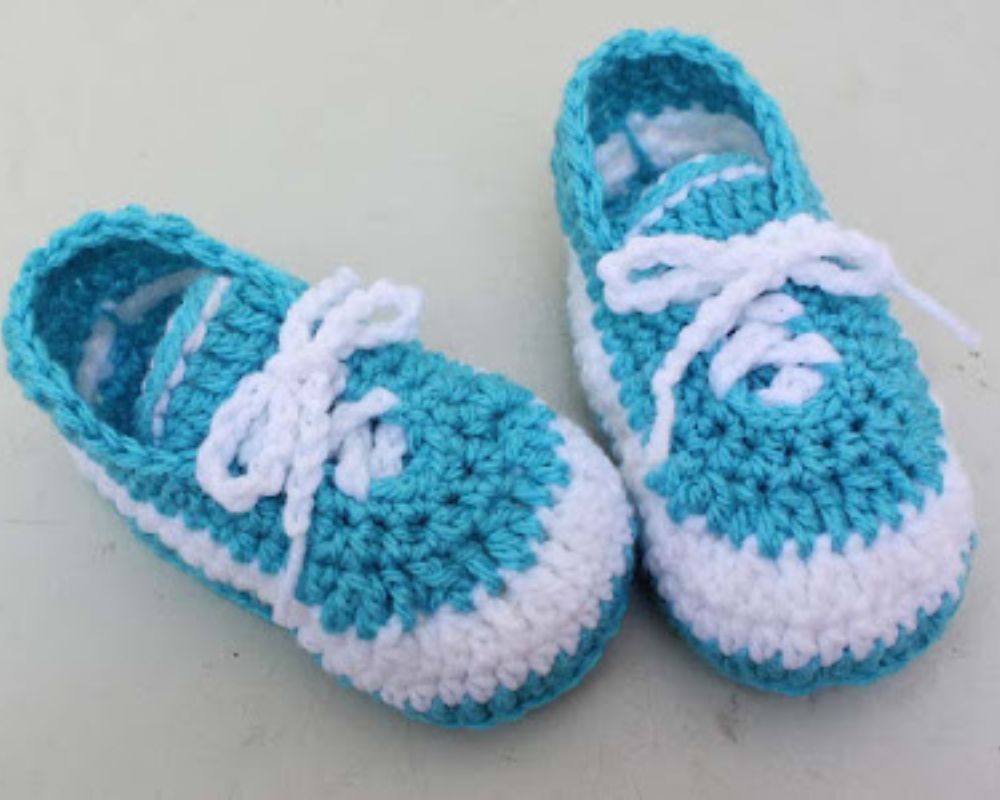
Baby Converse Crochet Pattern
Designer: Loopysue Designs, via Ravelry
Yarn weight: (4) Worsted
Suggested yarn: Red Heart With Love
Make your little one their first pair of kicks with these crochet baby shoes inspired by classic Converse sneakers. You can even make them the same color as your favorite pair so you can match.
Laced-up Baby Booties Crochet Pattern
Designer: Crochet Crosia
Yarn weight: (3) DK
Suggested yarn: Lion Brand 24/7 Cotton DK
These little booties look like sneakers, down to the tiny laces. If you love the two-color look, this designer also has a sweater and hat in the same style so you can stitch a whole matching ensemble.
6-12 Months Old Baby Booties Crochet Patterns
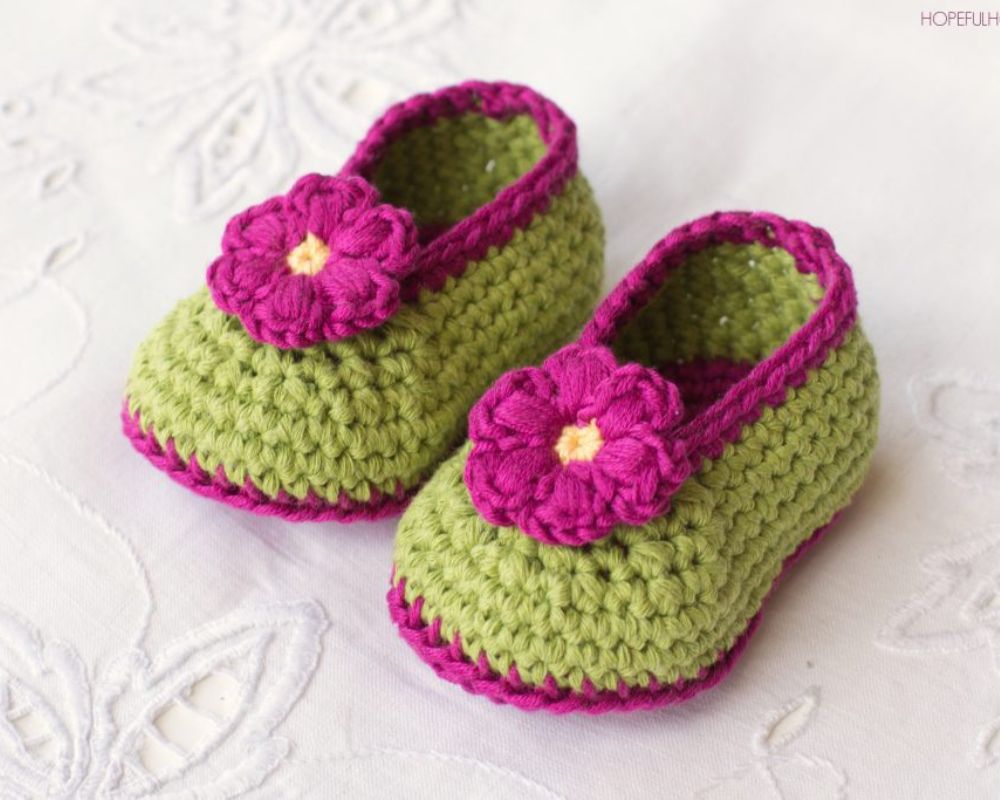
Fairy Blossom Booties Crochet Pattern
Designer: Hopeful Honey
Yarn weight: (3) DK
Suggested yarn: DROPS Muskat
They’re vibrant in color and so fun to stitch. These little crochet slippers are so cute with the flower embellishment, but you can leave it off if you’d rather. Either way they’re a quick, easy, and adorable project for older babies.
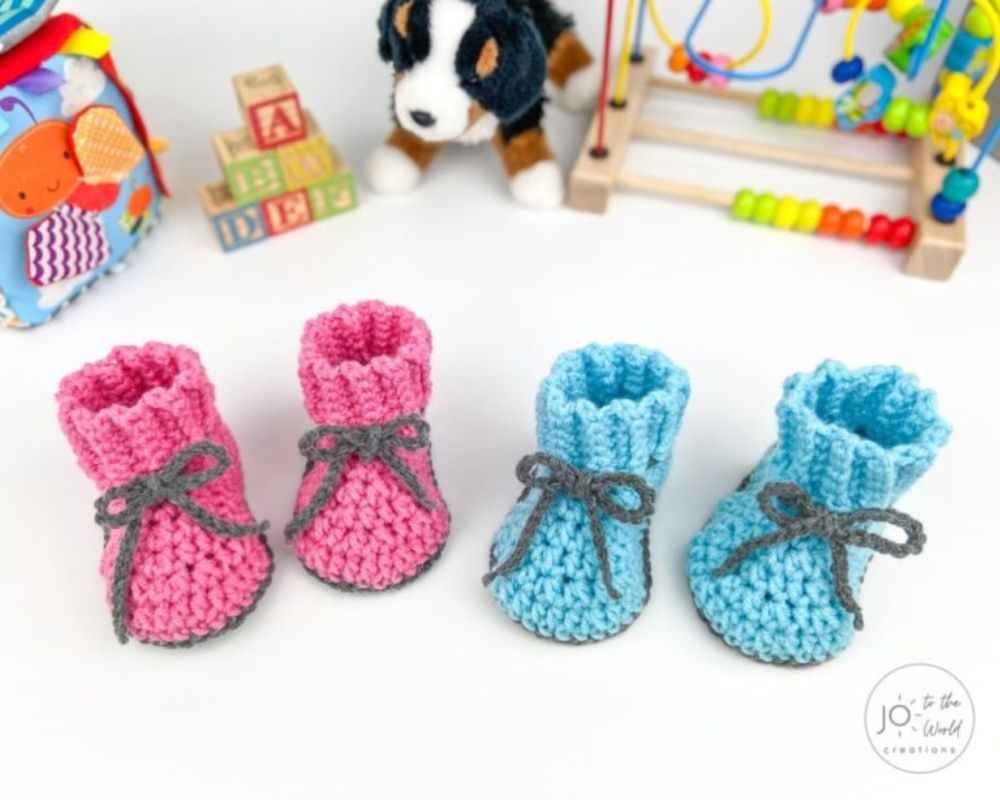
Crochet Baby Booties Crochet Pattern
Designer: Jo to the World
Yarn weight: (4) Worsted
Suggested yarn: Caron Simply Soft
This pattern offers options for newborns up to one-year-olds, with the smaller booties worked with a lighter weight yarn. For older babies, worsted weight yarn is used to make these little boots in a flash.

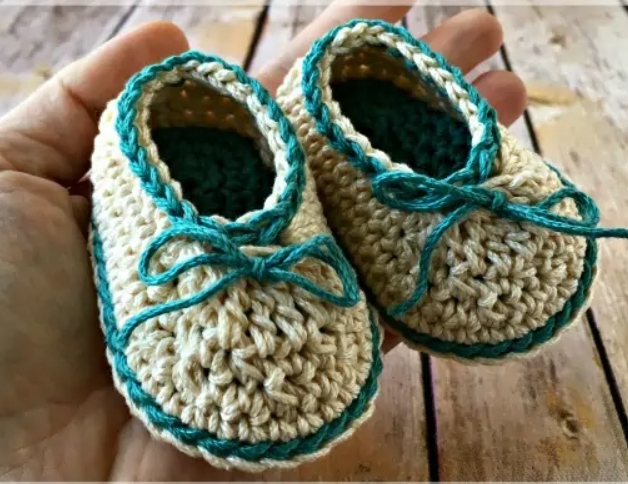
Bitty Mocs Modern Crochet Baby Booties Pattern
Designer: Whistle & Ivy
Yarn weight: (4) Worsted
Suggested yarn: Lion Brand Heartland
These cute modern crochet baby booties would be perfect for both baby boys and girls. There are three sizes available from newborn to one-year-old. Use scraps for the ties and soles to give a contrasting look.
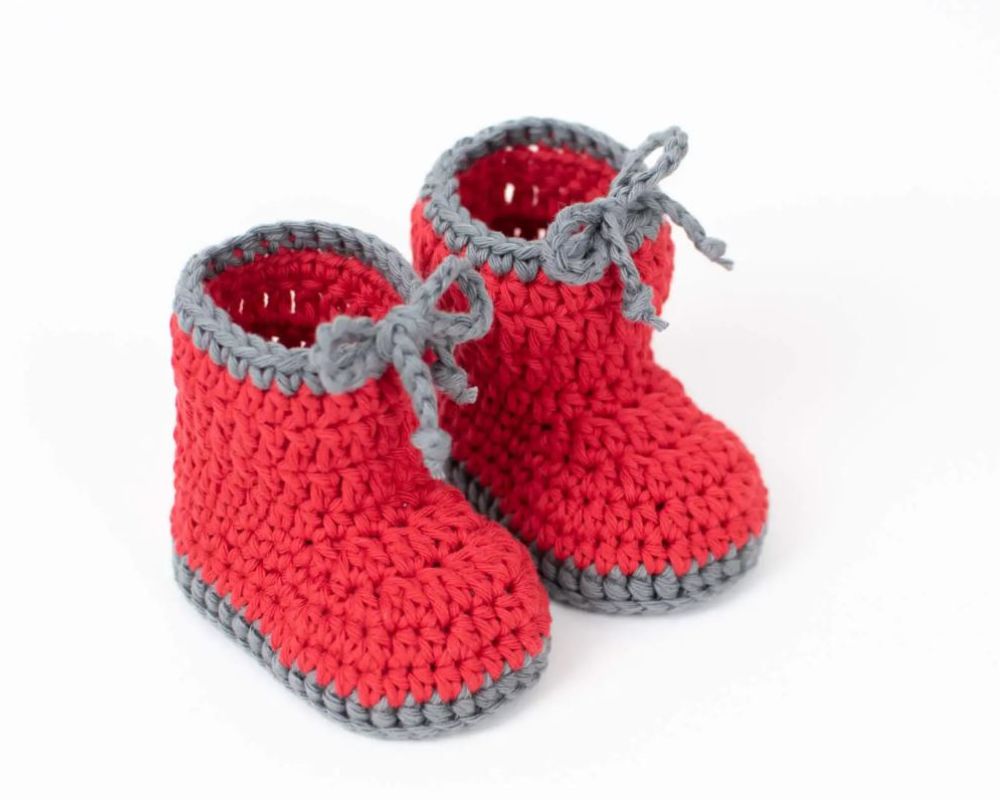
Rain Baby Booties Crochet Pattern
Designer: Croby Patterns
Yarn weight: (4) Worsted
Suggested yarn: Lily Sugar’n Cream
This pattern is very simple and easy to do. There are no complicated stitches at all in these sweet little rain boot-inspired booties.
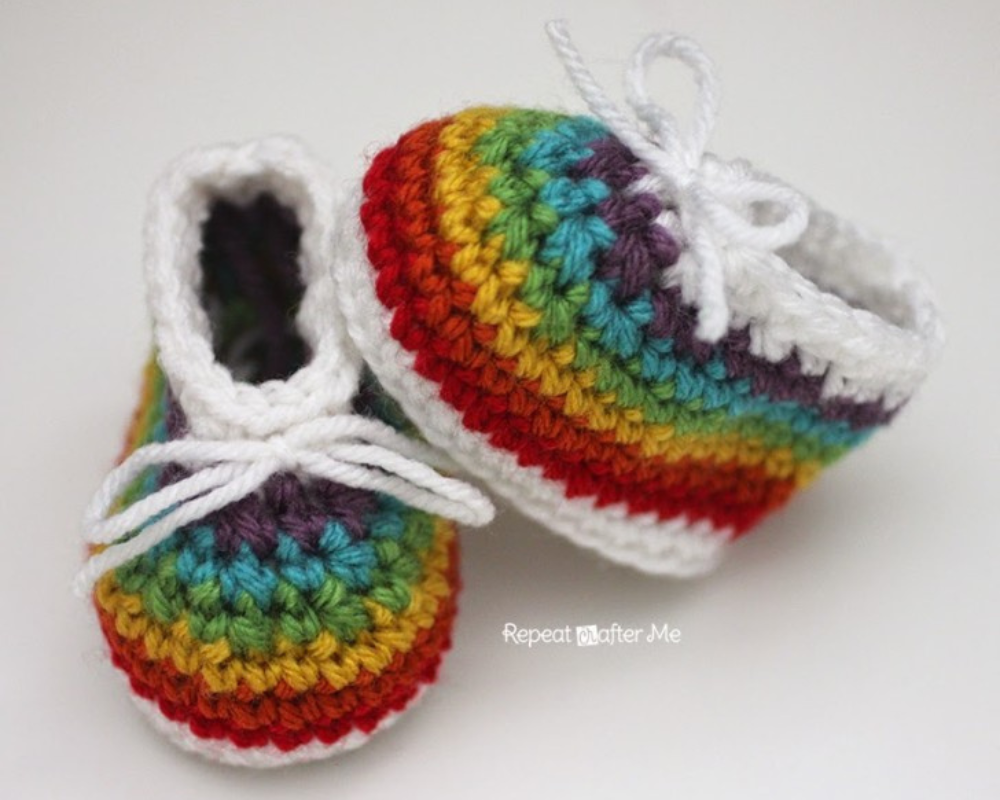
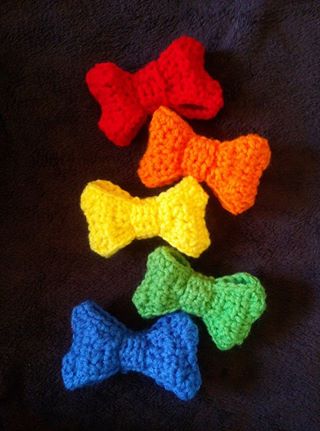
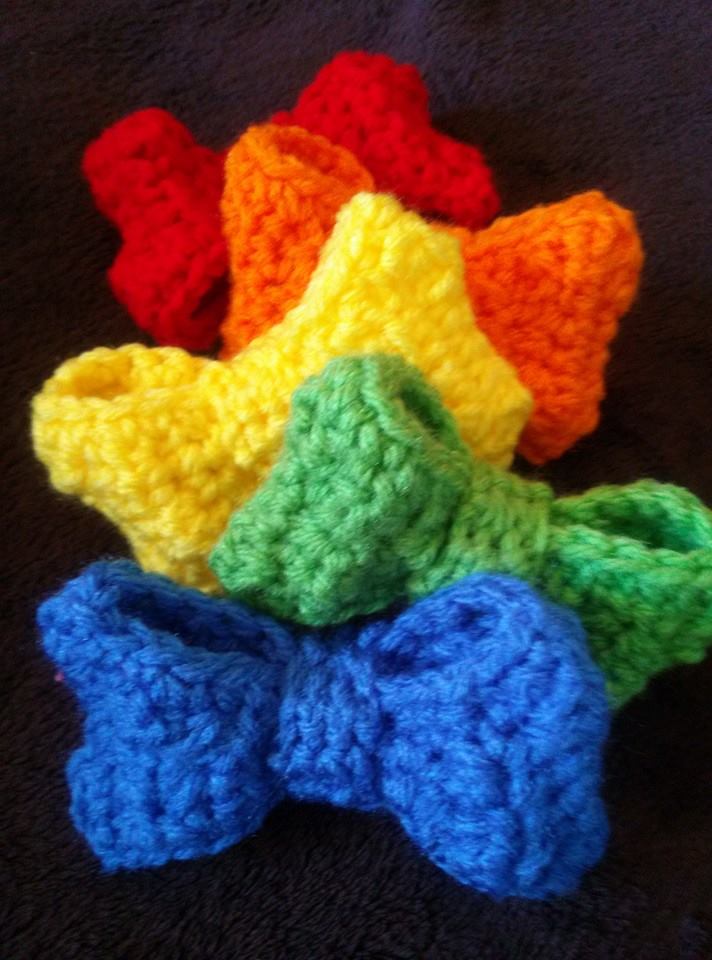
Rainbow Baby Booties Crochet Pattern
Designer: Repeat Crafter Me
Yarn weight: (4) Worsted
Suggested yarn: Lion Brand Vanna’s Choice
We love the colors of the rainbow, and here you can add them all to your crocheted baby booties. This pattern is super easy to follow but turns out adorable!
Bonus Crochet Shoes and Sandals
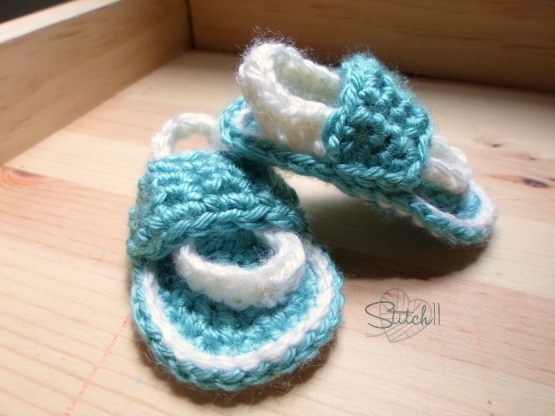
Super Fast Baby Shoes
Designer: Crochet Crosia
Yarn weight: (3) DK
Suggested yarn: Premier Yarns Premier Anti-Pilling Everyday DK
Baby booties aren’t the only kind of footwear you can make for a baby. Consider these super easy crocheted sandals for a summer baby.
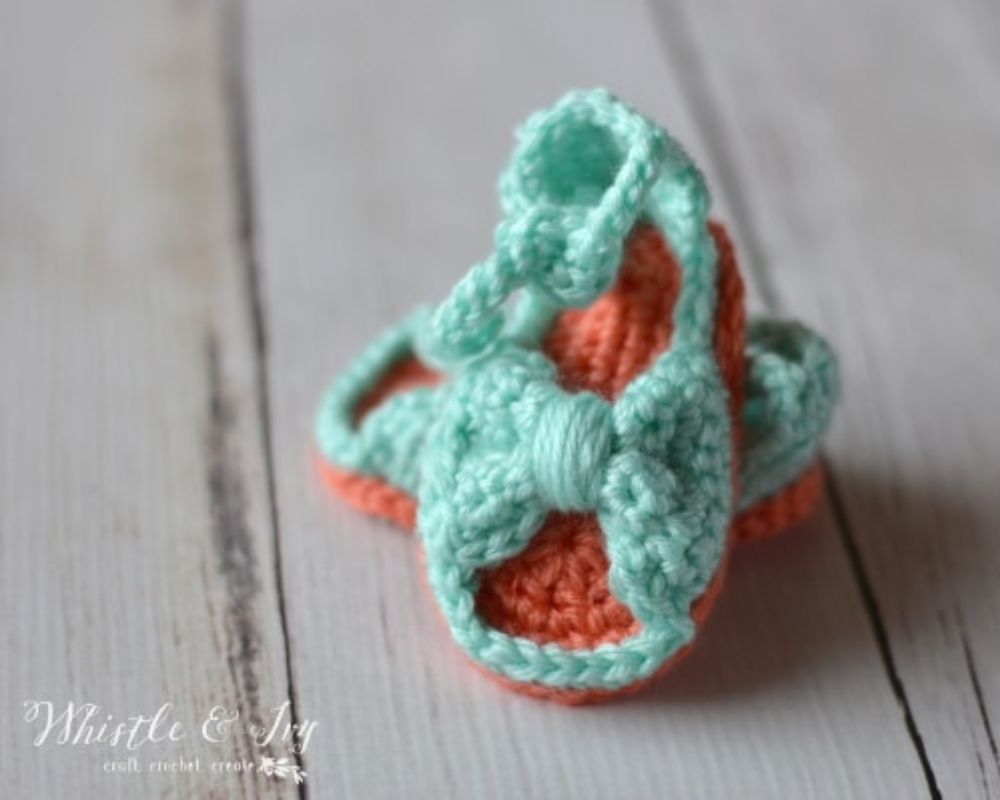
Bitty Bow Baby Sandals Crochet Pattern
Designer: Whistle & Ivy
Yarn weight: (4) Worsted
Suggested yarn: Knit Picks Mighty Stitch
These bowed baby sandals are easy to do and the cutest once you’ve assembled all the parts. They use such a small amount of yarn you can use leftovers from other projects to make these.
Crochet Baby Booties Green Zebra Pattern
Designer: Croby Patterns
Yarn weight: (3) DK
Suggested yarn: Sirdar Hayfield Bonus
This two-colored baby bootie pattern is easy to follow. They’re mostly worked in single crochet and half double crochet, so the only skill you need to master is changing the colors, which isn’t really hard at all.
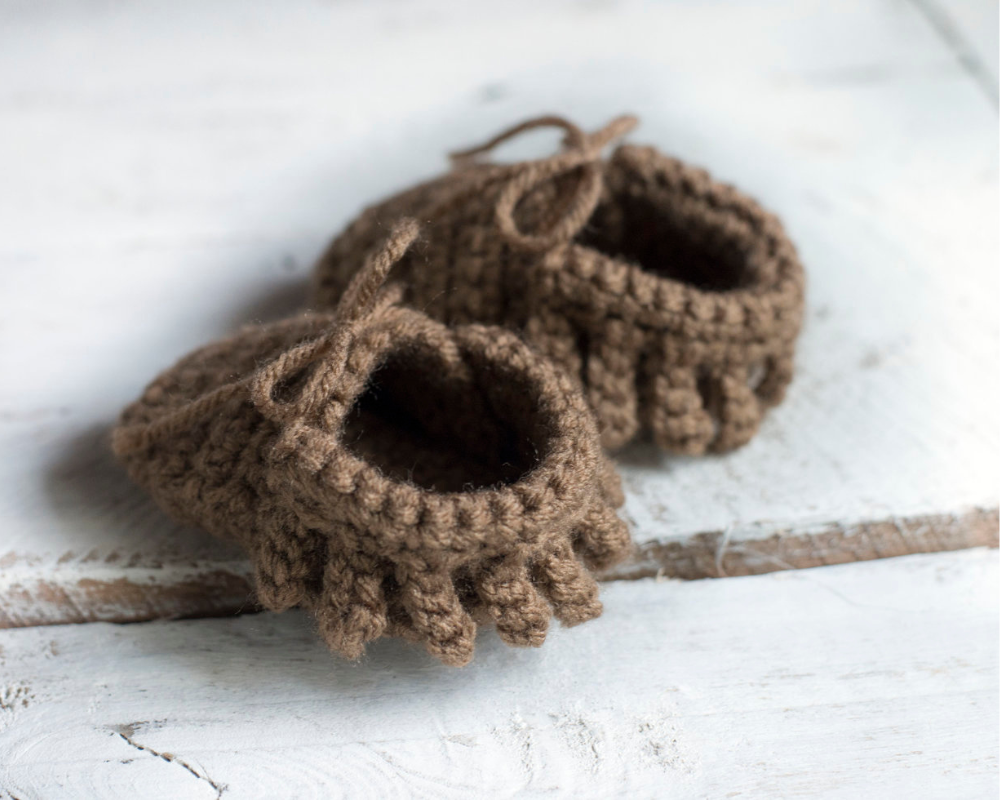
Crochet Baby Moccasins Pattern
Designer: Megmade with Love
Yarn weight: (4) Worsted
Suggested yarn: Caron Simply Soft
Moccasins are everywhere these days, and these baby booties are perfect! They’re easy to follow and quick to finish.
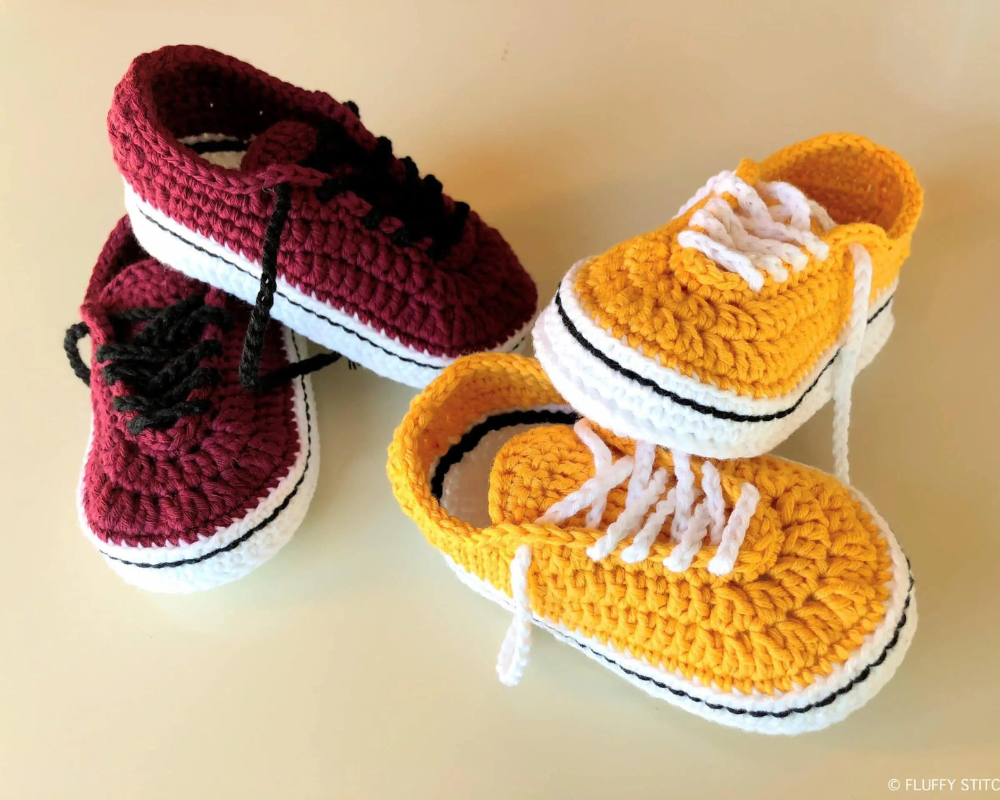
Crochet Baby Vans Pattern
Designer: Fluffy Stitches
Yarn weight: (4) Worsted
Suggested yarn: DROPS Safran
These Vans-inspired baby crochet shoes are a wonderful idea and so, so cute! If you love Vans and already have a pair, you can crochet one for your baby to match outfits with!
Are You New to Crochet and Need Extra Help Crocheting Booties?
Many of these patterns are great for beginners, but if you need help understanding what the pattern is asking you to do or just need a refresher in the basics, our Crochet Fundamentals course is for you.
This collection of quick video tutorials covers holding your hook and your yarn, making basic stitches, terms like front loop and back loop, increasing and decreasing, and so much more. It’s everything you need to know to get started crocheting and to keep going on the right track, so your finished projects end up looking as good as the photos you find online.
If you'd like some more inspiration for crochet patterns, take a peek at some of my other blog pages here: 47 Fantastic Crochet Slippers Patterns