
After searching the web for hockey helmets, I decided to give it a try. This free pattern is for size 12 months. In this picture, my daughter is wearing it and she is 15 months old. Since its made from cotton, it stretches real nice. This is not one of my easiest paterns to follow. So, if anyone has any questions I would be more than happy to help all that I can. Happy crocheting!!
Supplies:
4 ply Black Cotton ( I used Peaches and Creme)
5mm (H/8) hook
Abbreviations:
CH – Chain
SC- Single Crochet
HDC – Half Double Crochet
DC – Double Crochet
Instructions:
STEP 1:
Round 1: Magic Ring, CH 3, DC 10, pull ring tight, join to top CH of CH 3
Round 2: CH 3, 2 DC each DC around. Join to top CH of CH 3. (20 DC)
Round 3: Ch 3. *2 DC in next DC, DC in next DC, repeat from * around. Join to top CH of CH 3. (30 DC)
Round 4: CH 3. *2 DC in next DC, DC in next 2 DC, repeat from * around. Join to top ch of ch 3. (40)
Round 5: CH 3. *2 DC in next DC, DC in next 3 DC, repeat from * around. Join to top CH of CH 3. (50 DC)
Round 6: CH 3, DC around, Join at the top of CH 3
Round 7: CH 3, *2 DC in next DC, DC in next 9 DC, repeat from * around (55 DC)
Round 8-11: CH 3, DC in each DC around, Connect to top of CH 3
Finish off

STEP 2:
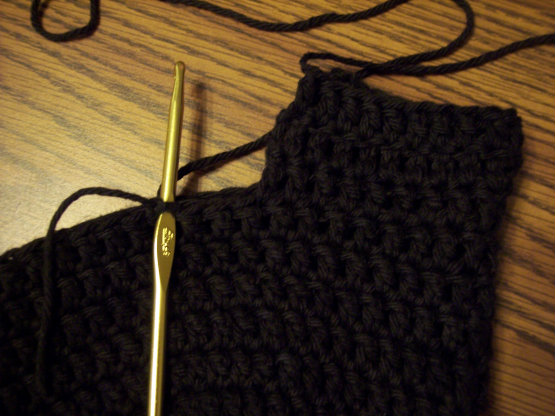
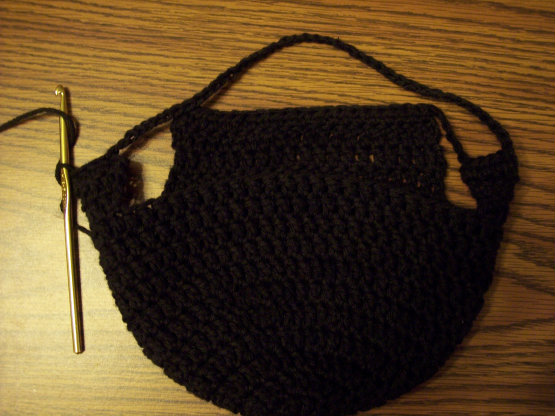
Holding the hat with the seam facing you. Connect your yarn to the 9th stitch to the right of the seam. Like in the picture above.
Row 1: CH 3, DC in next 19 stitches
Row 2: CH 3, Turn, DC in next 19 stitches
Row 3: CH 3, Turn, DC in next 19 stitches
Finish off
STEP 3:
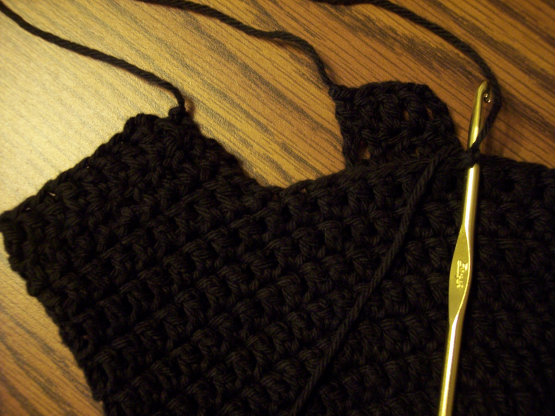
Attach the yarn into the 3rd stitch to the left of the the back (where you just crocheted) Like in the photo above.
CH 3, DC in next 4 stitches
Turn, CH 3, DC in next 4 stitches
Finish off
STEP 4:
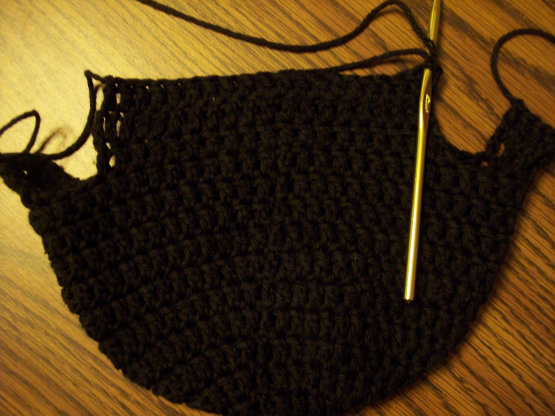
Attach the yarn into the 7th stitch to the right side of the the back. Like in the photo above.
CH 3, DC in next 4 stitches
Turn, CH 3, DC in next 4 stitches
Finish off
STEP 5:
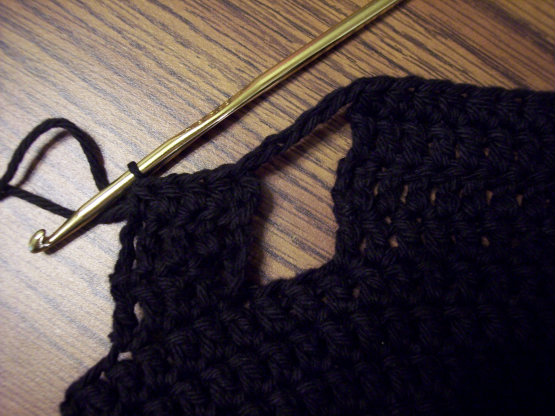
Attach yarn to the last stitch of the back of the hat like in the photo above
CH 2, HDC across the back of the hat, CH 6, DC across step 3 (look at picture below for reference)
CH 43(you can do more or less CH here for a shorter or longer chin strap, I made mine kind of long), DC across step 4 (look at picture below for reference)
CH 6, DC over other ear piece (step 4)
Connect to top of CH 2
STEP 6:
Slip stitch across the back of the hat. HDC around through the chains and DC's of the last step 5. Slip stitch into first Slip stitch in the back of the hat.
Finish off
Aaaand my camera died. I really wanted to get pictures of these next couple steps. I am sorry that I cant have them. I would stop and wait to continue until the camera is charged…. but I dont have the patience 🙂 . If you do not understand something in my directions feel free to contact me or msg me on my facebook fanpage. 🙂
STEP 7:
Here, I used SC across the front of the hat. Starting at the start of the chin strap, across the front and down to the end of the chin strap (not actually stitching on the chin strap, just the front of the helmet)
Finish off
STEP 8:
SC through round 9 of step 1. To do this I attached the yarn on the back side of the helmet, around the post of the stitch, Then I put the hook under the post and back out the other side of the post, so that the post is over my hook, I wrapped the yarn around the hook, pulled the hook through and did a SC. I continued this around the hat. slip stitch into the first SC, finish off and connect and do the same to round 11 of step one.
Finish off and weave in all your ends. wallah!

Dont ya just love this face 🙂 lol

Thanks for the great pattern! Just finished making a newborn size. Love it! Thanks again!
Thanks so much! Made this for a newborn using 3.5 hook and satin yarn. Same amount of rounds and it turned out great. Thanks again for posting the pattern.
Hi can you tell me if you have adult sizes please x
I’m sorry, but I don’t.