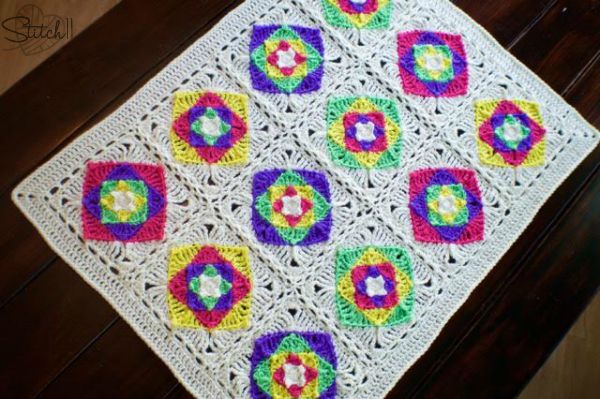
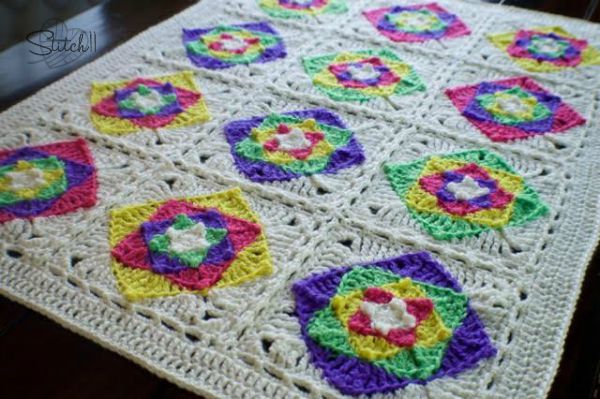
This isn't your average granny square blanket! Get to work on this small masterpiece and make in any color you like! Scroll down for the complete free pattern or get the ad-free, printable PDF here.
Get the Ad-free Printable PDF Pattern Here
The Optical Illusion Baby Blanket is designed for my new baby cousin Gracie. But, with a change of colors, you can customize this free blanket crochet pattern for any baby or even change up the size!
What I love about this pattern is you can take individual squares and seam them together to make a full blanket. I can also teach you how to take rectangles and hexagons and crochet almost any pattern. My video course Crocheting Anything with Rectangles and Crocheting Anything with Hexagons will help you master the skills you need to use basic shapes to stitch together larger patterns! You are going to love these courses and how easy they are! Check them out now and learn free for 2 days.

NOTE- You can choose to use the joining method and “join as you go” to minimize your yarn ends for weaving in. I didn't do this.. because I wasn't sure how I was going to join until after I finished the squares. But using and learning the Scallop Join, made me realize I could have saved time and yarn by just doing it before finishing off the yarn after the last round of each square.
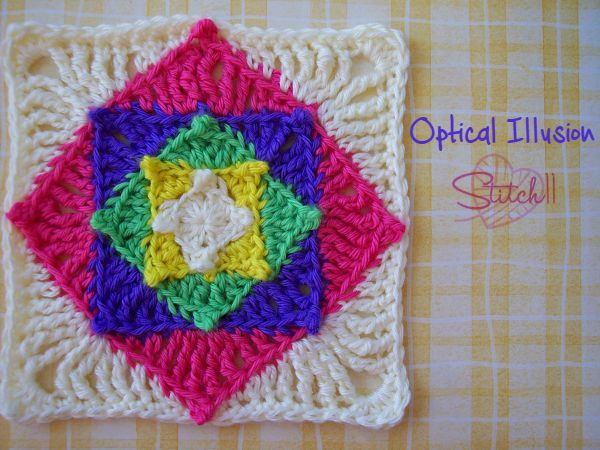
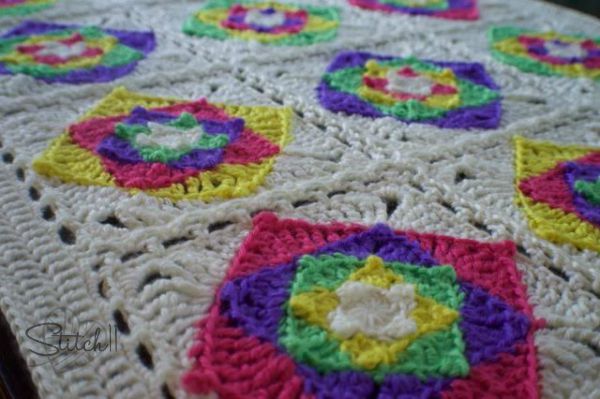
To crochet the Optical Illusion Baby Blanket, you will need to crochet you desired amount of THIS SQUARE PATTERN. I made 12.
The first edging before joining your squares.
Join yarn to corner TR. CH 1, SC into same stitch. CH 3. SC into same stitch.{ *CH 3, skip 2 stitches, SC into next stitch. Repeat from * 5 more times. SC into TR. CH 3. SC into same stitch.} Repeat from { to } 2 more times. **CH 3, skip 2 stitches, SC into next stitch. Repeat from ** 5 more times. Join to first SC.
After finishing your first edging, You will use this —-> SCALLOP JOIN by Gourmet Crochet. You will continue with the same edging you used with the first square, besides on the sides you are joining.. that is where you need the Scallop Join.

NOTE- After the first row of joining. When joining in corners, I slip stitched into the same slip stitch as previous corners.
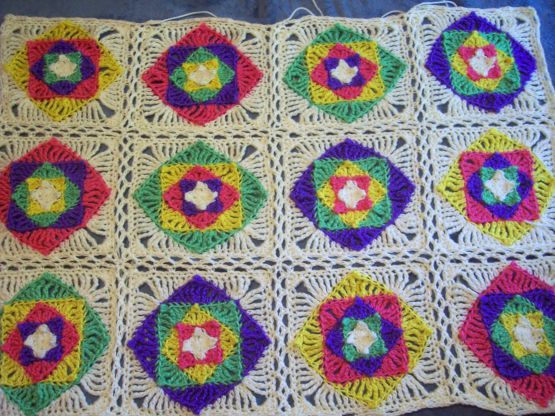
Below is a progress photo from after I joined my squares.
Border
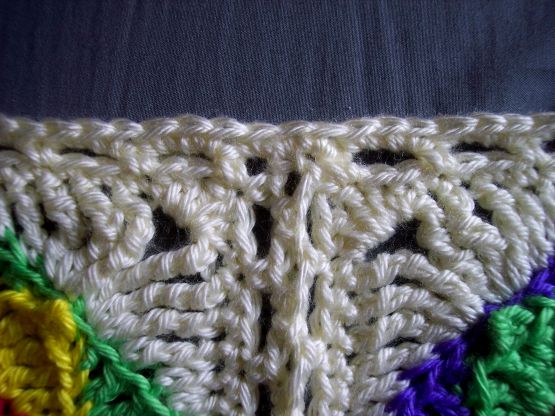
Round 1: Starting in any CH 3 space, CH 1. 3 SC into CH 3 space. You will be putting 3 SC into every CH 3 space (while skipping every SC). In the corner CH 2 spaces, you will {SC, CH 2, SC} all into the corner CH 2 space. When you reach each area of joins, you will work 1 SC into each of the 3 spaces. (The Ch space, the side of the SC that joins the CH space and the next CH space.) I have a photo below to help.
Once you get back to your starting stitch, join to the first SC.
Get the Ad-free Printable PDF Pattern Here
Round 2: CH 3 (counts as first DC). DC into each SC around. On the corner CH 2 spaces, you will {2 DC, CH 2, 2 DC} all into the CH space. Once you get back to the starting CH 3. join to the top CH.
Round 3: CH 3 (counts as first DC). DC into each DC around. On the corner CH 2 spaces, you will {2 DC, CH 2, 2 DC} all into the CH space. Once you get back to the starting CH 3.
Round 4: CH 1. SC into each stitch around. On the corners you will be crocheting 3 SC into the CH 2 spaces. Join to first SC.
Weave in your ends.

Love your blankets.
Lovely blanket! Very colorful 🙂
Love this! Colorful illusion…a HAPPY little blankie 🙂
Corina, I’m going to make this darling afghan for my niece… what are the demensions of the one you made with the 12 Sqares? I like to make mine crib size and generally have to enlarge patterns. If I’m reading your instructions correctly, the scallop join is not included… I need to go find that.
Also, How much yarn did you need for the primary white body of the blanket? Thank you so much.
Love this design.
The free pattern on the blog would not load. just the border and joining pattern came up in the blog. Please help! This is adorable and I have a new gt-grandbabie coming in October that I’d love to make it for. Thank you !