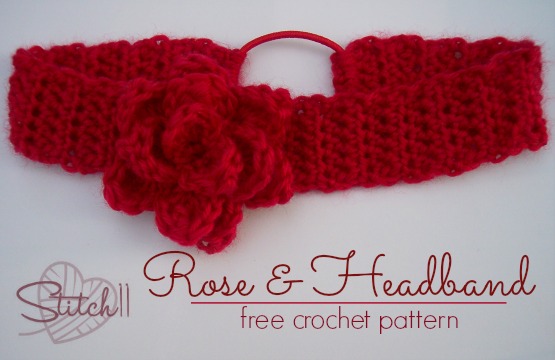
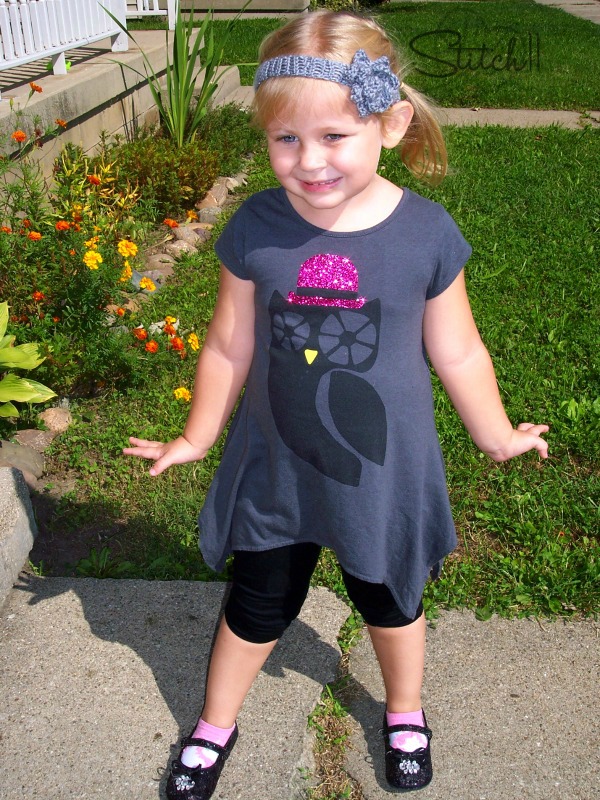
Have your first mommy-baby twinning moment with these headbands! The beauty (aside from the cute rose at top) of it, is it's perfect for anyone. The size is easily adjustable, and would look adorable on long hairs, short ones, curly, straight, all of them! The free pattern's below for you to use, or get the ad-free printable PDF patterns here.
I recently started wearing crochet headbands when I would try to pull off the “Elsa Braid”. Without one, my hair on one side would slowly fall down. It didn't take long before my daughter started begging me to make her headbands also.
Crochet headband sizes can be a little tricky so if you do not know what the measurements are for the person you will be making the headband, check out >>>this<<< chart. It's by far my favorite! You can also try this crochet headband pattern out with different yarns and hook sizes too to get just the right feel and fit.
By the way, if you enjoy crocheting projects for the little ones in your life, If you enjoy crocheting toys for the little people in your life, check out these incredibly cute stuffies in the Crochet Anything with Hexagons class.
Skill Level: Easy
Materials:
Yarn:
100 yds DK weight yarn.
Hooks:
US size F/5 (3.75mm) crochet hook or size needed to match gauge
US size G/6 (4.25mm) crochet hook, or one size larger than your other hook.
Notions:
Scissors
Yarn needle
Elastic hair tie
Gauge: 16 sc x 16 rows = 4”. Exact gauge is not critical for this pattern.
Sizes:
Width: 1.5”
Can be made to any length/circumference
Pattern uses US crochet terms
ABBREVIATIONS DESCRIPTION ch Chain dc Double crochet dtr Double treble crochet hdc Half double crochet sc Single crochet sl st Slip stitch st(s) Stitch(es) tr Treble crochet
*Looking for more great crochet stitches to try in other projects. Click here to see the Ultimate Crochet Stitch Library.
Note: Join rnds where indicated with a sl st in the first st of the rnd.
Get the ad-free printable PDF patterns here
Rose
With larger hook, Ch 19.
Row 1: Sc in 2nd ch from hook and in each ch across. (18 sc)
Row 2: Ch 1, turn, 2 sc in each st across. (36 sc)
Row 3: Ch 1, turn, sl st in first st, (2 dc, tr, dtr, tr, 2 dc) in next st, sl st in next st (petal made), [sl st in next st, (2dc, tr, dtr, tr, 2 dc) in next st, sl st in next st] across. (12 petals)
Fasten off, leaving a long tail.
Roll the rose up so that the petals spiral around each other. When you look at the bottom of the flower, you will see the first row of sc going in a perfect spiral.
Using the long tail and your yarn needle, sew the layers together securely at the bottom so that it can’t unroll. Do not weave in end.
Headband
Join yarn to hair tie by working a slip stitch into it (the same way you would work a slip stitch into a circle of chains).
Row 1: Ch 1, 6 sc into hair tie circle, do not join. (6 sc)
Row 2: Ch 1, turn, hdc each st across. (6 hdc)
Repeat row 2 until desired length. Make sure you consider the stretch of the yarn, and the headband. Allow for about 5-7 inches of stretch, depending on your yarn.
Joining Row: Ch 1, turn, put the other side of the hair tie along the row of stitches, working over the hair tie, sc in each st around.
Finishing
Using remaining long tail, sew rose onto front of headband.
Weave in all ends.
For my daughter, her head measures 20 inches. I made the headband 13 inches long. (6.5 inches folded) For myself, I made mine 16 inches long. If you are using a different yarn weight, hook, or headband.. you will want to test your stretch. If you do not know the measurements of the head you are crocheting for, >>>THIS<<< is my favorite head measurement chart.
So, what do you think? I bet you're going to make this project in so many colors. While I've got you here, if you're looking to add a new repertoire of stitches to your knowledge base, you have to check out the Ultimate Crochet Stitch Library. You'll have all the stitches you need to crochet anything you've ever wanted to. These are the foundational stitches for the majority of patterns out there!
Get the ad-free printable PDF patterns here

Looking forward to making this for my niece and her daughters.
The link to the chart is broken. Super cute headband! Thanks
Oops, it’s working for me now. My bad. 🙂
I’ll be making this for my grand-daughters . Thank you, your daughter is adorable.