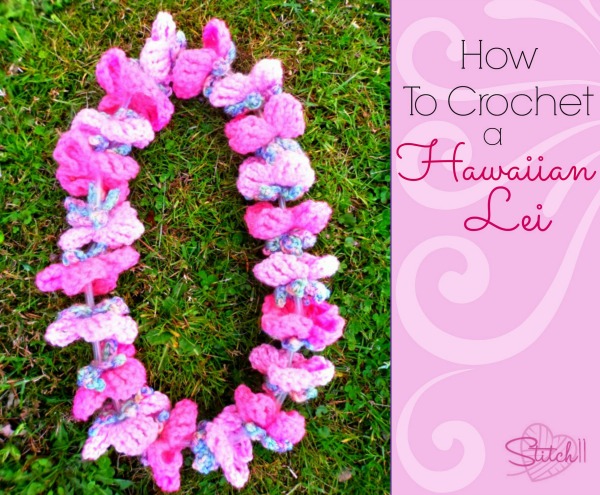
I have been in what many people call a “Crochet Rut”. It seems like every time I have felt this way…. I am actually just waiting for the right inspiration to boost me back into the hook of things. After weeks.. maybe even months of waiting for that right idea to pop into my head, I remembered one of the things I wrote on my invisible “to crochet” list- a crochet Hawaiian Lei!
The reason this was one of the first things on my list is because I have made them before, just out of fabric cut outs of flowers and fake flowers I found at yard sales. I even made a giant one that my MIL still uses as a decoration around her Hawaiian themed bathroom.
I loved the fabric ones, but the fabric flowers were so thin, it didn't give me the look I had pictured.
When learning how to crochet, flowers were the second thing I taught myself how to do (ear flap hats being the first). So, naturally I thought of the Hawaiian Lei instantly.
I now know why I was in the rut… I needed to back up about 2 years on that invisible list I keep! 😉
This Hawaiian Lei has many possibilities. Have fun with your yarn choices. Dig through your stash and get creative!
Supplies
3 colors- your choice of yarn – I used Medium/Worsterd -4ply
5mm crochet hook (or use a hook that is fitting for your yarn choice.)
Yarn Needle
4 clear Straws
Stitches Used
CH- Chain
Slip Stitch
HDC – Half Double Crochet
TRE – Treble Crochet
DTR – Double Treble Crochet
Do you know the correct way to weave in your yarn ends? This video tutorial by Moogly will help you learn the stress free technique!
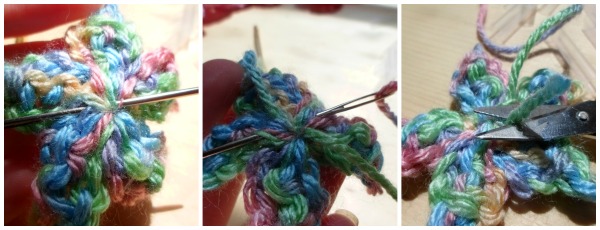
Small – 1 Round – 5 Pointed Petal – Hawaiian Flower
I made 20 of these flowers, all in the same Caron Variegated Simply Soft yarn.
CH 4. Working in the 4th CH from your hook. (This Chain will be the center of your flower)
TRE into center of flower. CH 2, Slip stitch into the top of your TRE. CH 3. Slip stitch into the center of the flower.
**CH 3, TRE into center of flower, CH 2, Slip stitch into the top of your TRE.
Ch 3. Slip stitch into the center of your flower. Repeat from ** 3 more times.
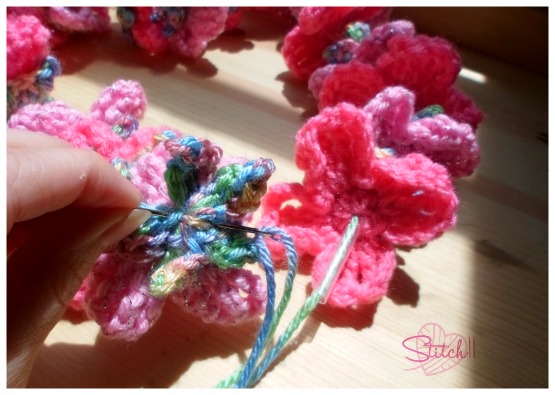
You will have 5 petals. Finish off your yarn and weave in your ends. You may have to tug on your starting end to make sure the hole is closed before you weave it in to secure it closed. Make sure it is closed- If it is too open, the straw will slide through it.
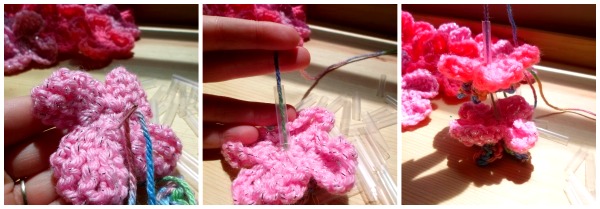
Medium – 2 Round – 4 Rounded Petal -Hawaiian Flower
I made 20 of these flowers. 10 in a Red Heart Super Saver pink, and 10 flowers in a I Love This Yarn pink with sparkles.
Round 1: Magic Circle. CH 1, 8 HDC into magic circle. Pull ring tight. Join to first HDC.
Round 2: **CH 4, 2 DTR in same stitch, 2 DTR into next stitch. CH 4, slip stitch into same stitch. Slip stitch into next stitch. Repeat from ** 3 more times.
You will have 4 large petals for this flower. Finish off and weave in your ends.
Now for the really fun and quick part!
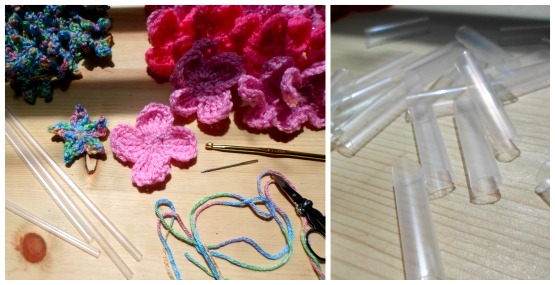
Here (in the photo above) is what your “workspace” should look like. All of your flower ends are wove in. You have 4 straws, cut them into about 1 inch pieces. You have your yarn needle and your scissors. Take a long piece of yarn. Longer than you would want your lei. Thread one end of the yarn needle with that piece of yarn.
With the threaded yarn needle, go across the bottom of the 5 petal flower. Skip one stitch and go back across. You may want to go back and forth a couple times. Then you cut that little yarn end off.. leaving the end with the needle still attached.
Put your yarn needle through the center of one of the 4 petal flowers. Then through a straw. You will now create a pattern with the flowers. *
5 petal flower, 4 petal flower, straw. Repeat from * until you have all the flowers on the yarn.
With your yarn needle and starting flower, weave the yarn back and forth on the other side of the starting flower until it is secure. Finish off your end!


This is soo cool!! Definitely going to making some of these with all my left over scraps for summer parties! Thanks for your pattern
This is super cute! Perfect for the upcoming summer. Thanks for sharing!
très beau ce collier merci pour le pas a pas a bientôt biz
Thank you very much for the pattern. It turned out great!