I have joined together with the Red Heart Joy Creators to celebrate Christmas in July. (Which also happens to be my BIRTHDAY! Woohoo!)
We were wanting to run with the theme “joy”. What better way to celebrate a joyful Christmas in July than giving a Joyful Star Teething Ring to a fussy teething baby nearest & dearest to you!? (say that 5 times fast)
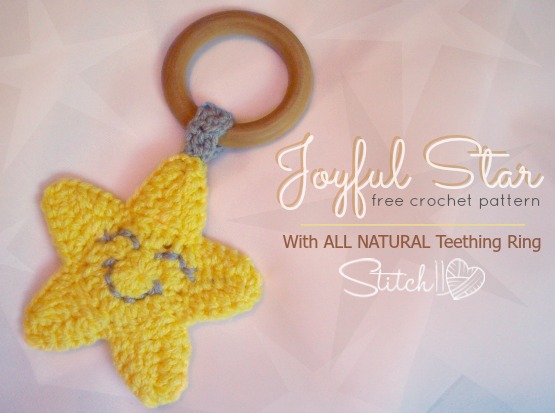
Below, you will see how to purchase the all natural teething rings. I REALLY love these! I can imagine this project selling like CRAZY at craft fairs. They will be great for baby showers and surprise gifts for babies suffering from teething pain.
I have also fallen in LOVE with the Red Heart Baby Hugs yarn. It's soft, works up clean, and is easy on your hands. Perfect for hooking up projects for babies. This yarn would also be great for amigurumi and could possibly completely replace your “go to” medium weight yarn!
Be sure to check out the other Red Heart Joy Creators of this fun celebration. The list will be located bellow the pattern.
Supplies
Baby Hugs – Red Heart (Medium Weight)
5 mm crochet hook
Natural Wooden Teething Rings
Yarn Needle
Stitches Used
Magic Circle
Slip Stitch
CH – Chain
SC – Single Crochet
HDC – Half Double Crochet
DC – Double Crochet
TRE – Treble Crochet
Let's crochet the star!
Make Two.
Round 1: Magic circle. CH 1. 10 DC into magic circle. Join to top of first DC.
Round 2: CH 1. 2 DC into each DC around. Join to first DC.
Round 3: *CH 5. Skip 1 CH. SC into next CH. HDC into next CH. DC into next CH. TRE into next CH. Skip 2 stitches. Slip stitch into next 2 stitches. Repeat from * around.
Round 4: *HDC up next 4 CH (side of star point). 3 SC into tip of star point. HDC into next 4 stitches (down other side of star point). Slip stitch into next 2 stitches. Repeat from * 4 more times.
Finish off. Weave in your ends.
Piece for connecting to teething ring
Using a contrasting color.
Row 1: CH 3. Skip 1 CH. HDC into next 2 CH.
Row 2-8: CH 1. Turn. HDC into next 2 stitches.
Fold piece around your teething ring. join both ends together.
CH 1, Turn, SC through both ends into the next 2 stitches, attaching them.
Finish off and weave in your ends.
Using your yarn needle, embroider a happy face on your joyful star.
Using your yarn needle, attach the stars together with the Whip Stitch. At the tip of one star point, you will want to tuck in the end of the piece attached to the teething ring. You will attach the star together directly though this piece.
Be sure to check out all the other Red Heart Joy Creators that are celebrating Christmas in July!
Wednesday, July 6: Stitch11
Friday, July 8: Jessie at Home
Monday, July 11: Beatrice Ryan Designs
Wednesday, July 13: Snappy Tots
Friday, July 15: ELK Studio
Monday, July 18: Marly Bird
Wednesday, July 20: Myhobbyiscrochet
Friday, July 22: Oombawka Design
Monday, July 25: Simply Collectible
Wednesday, July 27: Cre8tion Crochet
Friday, July 29: Pattern Paradise

Love your starfish teething ring!