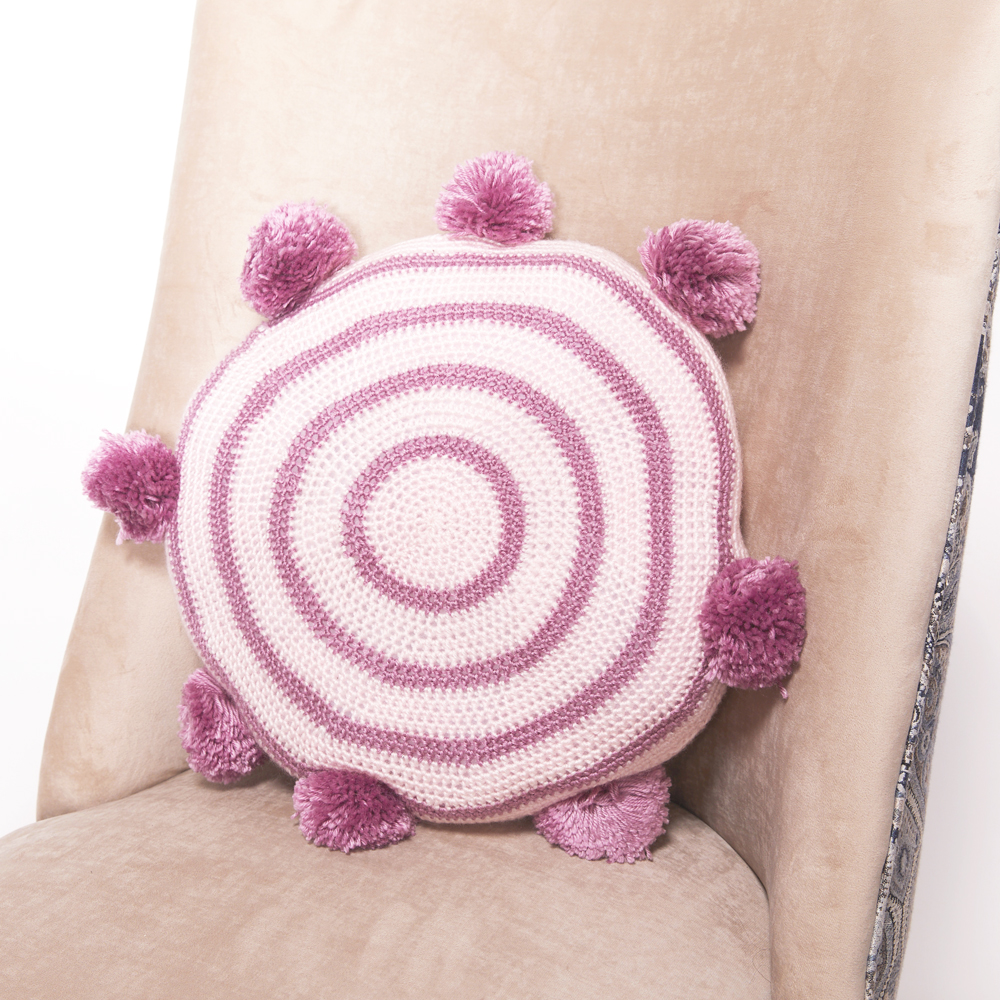
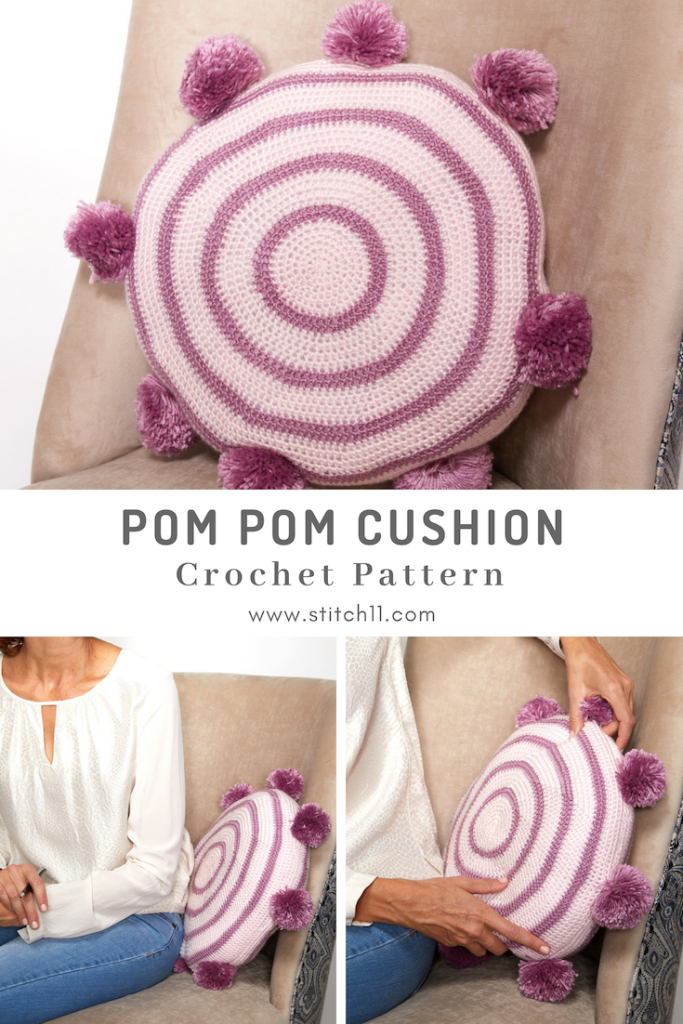
The pom poms and the colors on this cushion adds an extra fun element to any room it's in! The pattern is pretty simple and straightforward, with light worsted yarn to make it washer-safe and extra snuggly. Follow the free pattern below or get the ad-free printable PDF pattern here.
Pom Pom Cushion Crochet Pattern
Lately, I’ve been obsessed with pom poms! They’re such an easy way to add some extra flair to any design.
That’s why I’m loving this Pom Pom Cushion!
It’s a decorative crochet cushion that makes an absolutely wonderful housewarming gift or statement piece for your home.
It’s a simple, straight-forward crochet pattern that has just the right amount of boho flair.
It’s worked up in the magic ring with the pom poms attached at the end. It’s not too complicated either, which makes this an ideal crochet project for all levels.
I used Cascade Cherub DK in Mauve Orchid and Baby Pink, which gave this pillow the perfect amount of softness and boho color.
This light worsted yarn gives this cushion a beautiful stitch definition and is washer safe, so you don’t have to worry about any accidental spills.
It’s a nylon-acrylic blend, so it’s great for anyone who is sensitive to natural fibers, without sacrificing any of the softness.

Get the ad-free printable PDF pattern here
Skill Level: Basic
Materials:
Yarn: DK weight yarn
- 360 yds light pink (A)
- 300 yds dark pink (B)
Hook:
US Size F/5 (3.75 mm) crochet hook or size needed to obtain gauge
Notions:
- Scissors
- Tapestry needle
- 4 stitch markers
- 18-inch circular pillow form, or about
- 10 oz of fiber fill
- Pom pom maker (3.5 – 4 inches) or 4-inch-wide piece of cardboard.
Size:
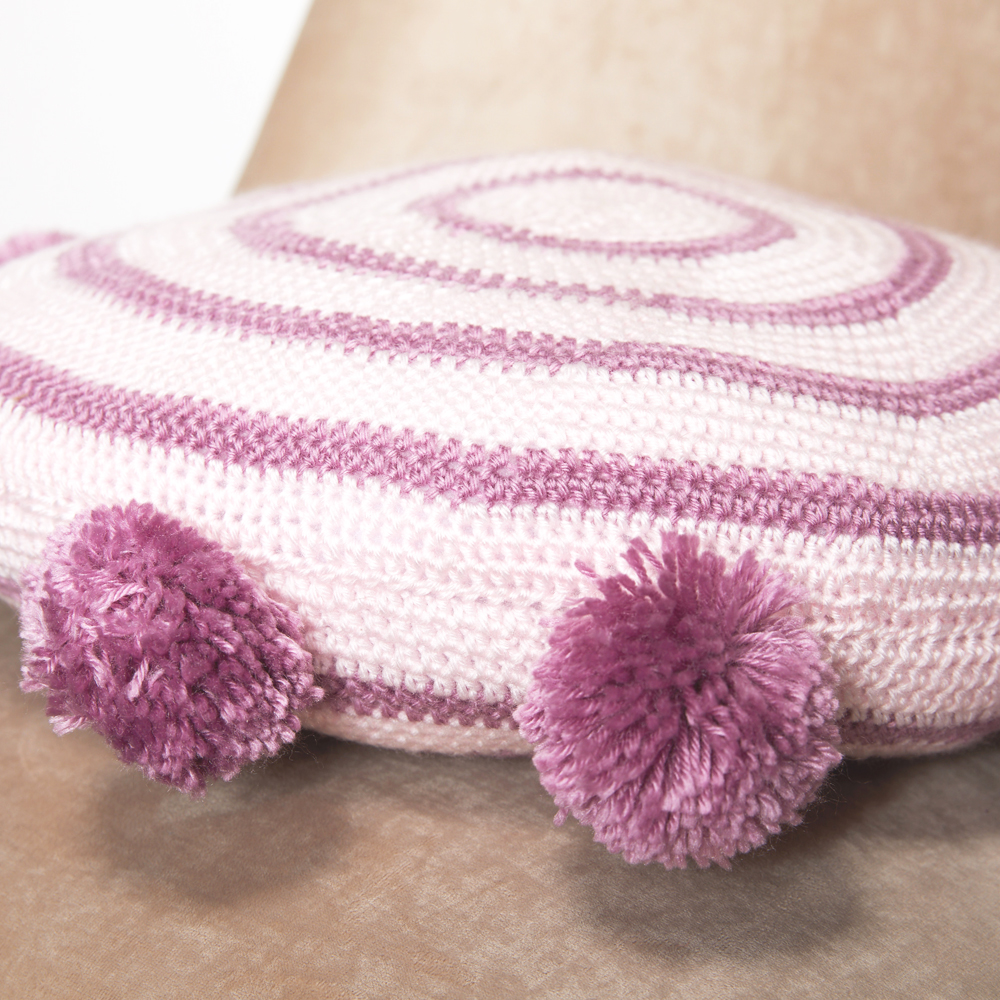
18.5 inches diameter, not counting pom poms.
Gauge:
11 hdc x 13.5 rnds = 4 inches
This pattern uses US crochet terms
ABBREVIATIONS DESCRIPTION ch Chain hdc Half double crochet rnd Round RS Right side(s) sc Single crochet sk Skip sl st Slip stitch st(s) Stitch(es)
PATTERN:
Join rnds where indicated with a sl st in the first st of the rnd
Pillow Panel (Make 2)
With A, make a magic circle.
Rnd 1 (RS): Ch 1, 10 hdc in magic circle, close magic circle, join. (10 hdc)
Rnd 2: Ch 1, hdc in first st, 2 hdc in next st, [hdc in next st, 2 hdc in next st, place st marker in last st made] around, join. (15 hdc, 4 markers placed)
Rnd 3: Ch 1, hdc in first st, 2 hdc in next st, [hdc in each st across to next marker, 2 hdc in marked st, move marker to last st made] 4 times, hdc in each remaining st, join. (20 hdc)
Get the ad-free printable PDF pattern here
Every repeat of rnd 3 adds 5 more hdc to the stitch count.
Rnds 4-7: Repeat rnd 3, change to B at end of last rnd. (40 hdc)
Work should now measure 3 inches in diameter.
Rnds 8-9: With B, repeat rnd 3, change to A at end of last rnd. (50 hdc)
Rnds 10-13: With A, repeat rnd 3, change to B at end of last rnd. (70 hdc)
Rnds 14-31: Repeat rnds 8-13 3 times, do not change colors at the end of rnd 31. (160 hdc) Fasten off
Remove all markers.
Weave in all ends.
Pom Poms (Make 8)
Make pom poms using a pom pom maker OR
Cut a 12-inch length of B and set aside – this is your yarn tie.
Wrap B around cardboard about 300 times.
Using a hook or needle, slide the 12-inch yarn tie underneath the wraps on one end of the cardboard. Tie in a tight knot around the wraps.
Keeping the ends of the yarn tie clear, cut wraps directly opposite the knot. Sew each end of the yarn tie back and forth through the knot several times but do not trim the ends.
Assembly:
Place pillow panels with RS together.
Whipstitch panels together around the edge, leaving a 6-inch opening.
Turn pillow RS out and insert pillow form or stuffing.
Sew the opening closed.
Evenly space pom poms along the seam. Use long tails to sew in place.
Weave in any remaining ends.
With its soft color palette and simple striping, this pattern is a winner. Plus, it’s a simple pattern that you can work up just about anywhere.
Make it for a friend or work one up for your own home. This cushion is an easy way to add a little extra flair to any room.
I can’t wait to see your cushions!
Get the ad-free printable PDF pattern here

Hi, I loved this pattern I made it with Size 5 yarn and velvet yarn, turned out great!!! I was a little confused on the pattern format, though. To hdc, inc, do you do it around or just one hdc, inc? (I interpreted as around). Could you specify? Thank you!!!
I tried to subscribe and it wouldn’t allow it. I then tried to email my request but again it wouldn’t allow it. Can you help?