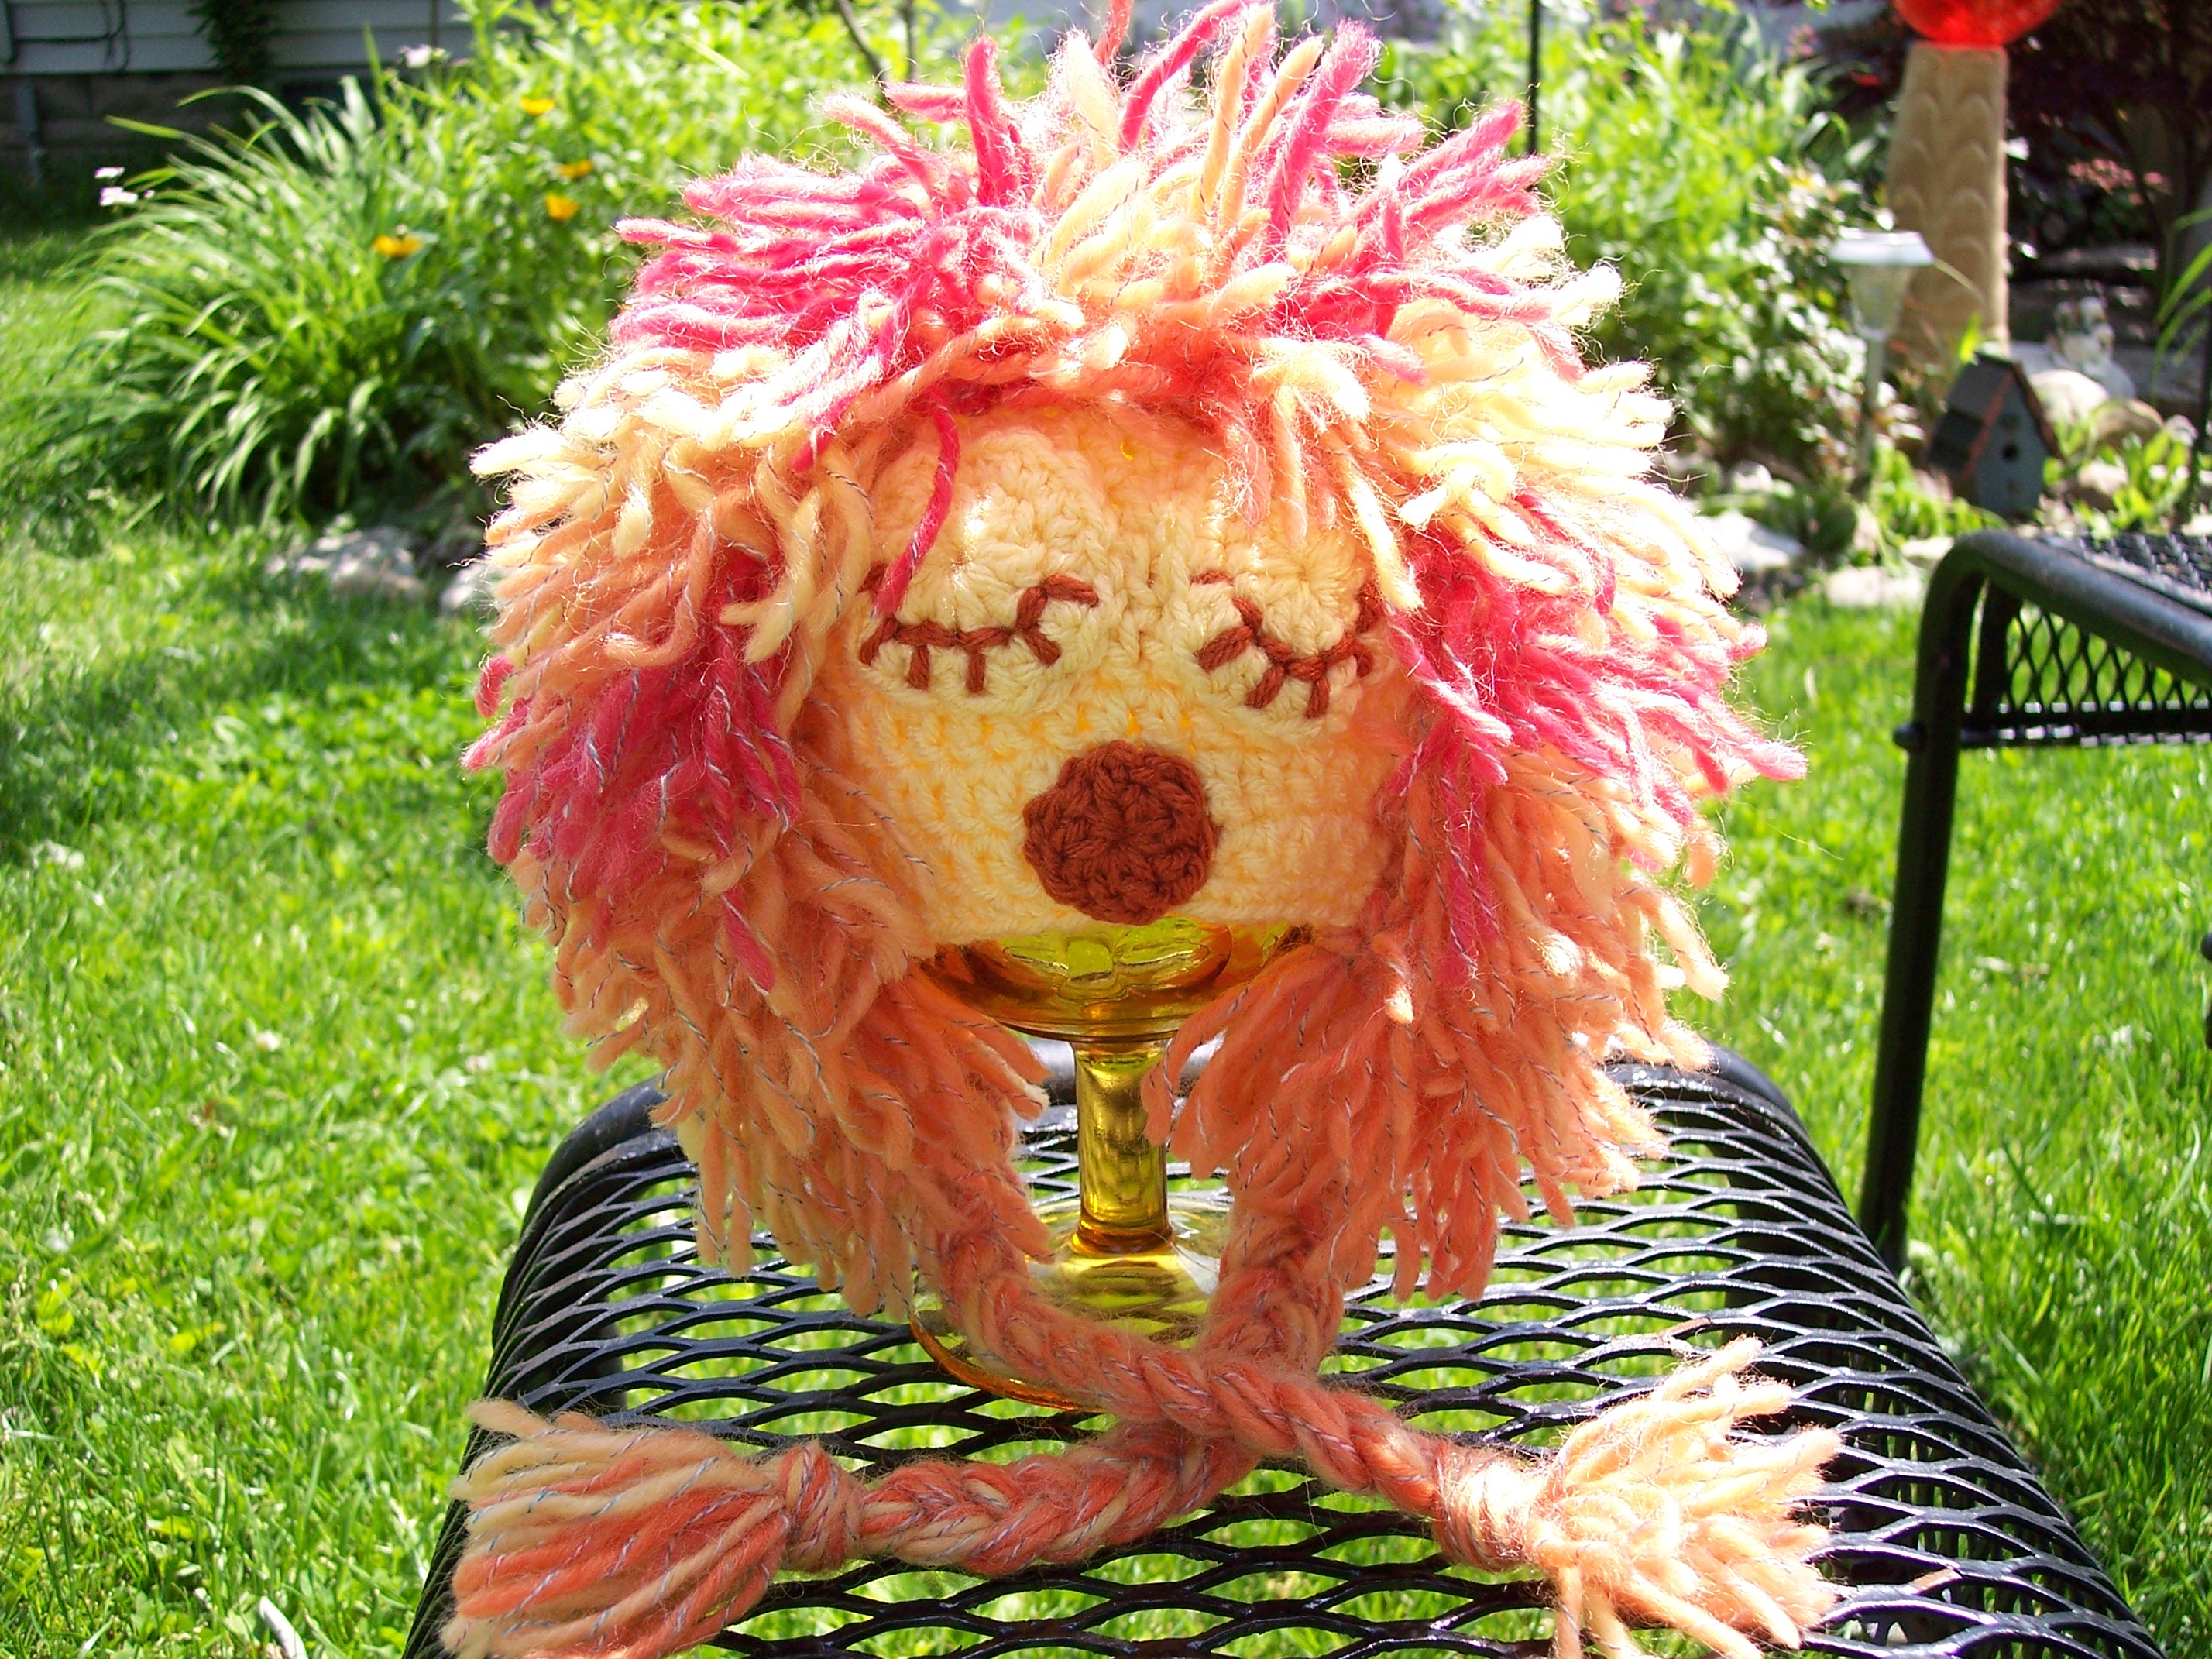
This lovely lion hat pattern is in size 0-3 months. In this photo, it is being worn by a life size newborn doll <3 Looks so real doesn't it?! I tried to make this free pattern as simple and easy to follow as possible. And I must say, “I absolutely love it!!” I will be making many more of these in the future. Crochet on my hookers! Check out the latest version of this lion hat!
Supplies:
5mm hook
Yarn Needle
I used The brand “Yarn Bee” for my lion mane, its called “Sunset,
Rainbow wool”
Medium weight/4 ply “I Love this Yarn” in the colors Buttercup, and Burnt Pumpkin
Abbreviations:
CH – Chain
SC – Single Crochet
HDC – Half Double Crochet
DC – Double Crochet
CH 3 does not count as a double crochet
Instructions:
Round 1: Magic Ring, CH 3, DC 10, pull ring tight, join to top ch of CH 3
Round 2: CH 3, 2 dc each CH around. Join to top CH of CH 3. (20 DC)
Round 3: CH 3. *2 DC in next DC, DC in next DC, repeat from * around. Join to top CH of CH 3. (30 DC)
Round 4: CH 3. *2 DC in next DC, DC in next 2 DC, repeat from * around. Join to top CH of CH 3. (40 DC)
Round 5: CH 3. *2 dc in next DC, dc in next 7 DC, repeat from * around. Join to top CH of CH 3. (45 DC)
Round 6-10: CH 3, DC in each DC around. Join to top CH of CH 3.
Do not finish off.
First Earflap:
Ch 1
Row 1: SC in next 10 stitches
Row 2: Turn, Skip first stitch, SC in next 9 stitches
Row 3: Turn, Skip first stitch, SC in next 8 stitches
Row 4: Turn, Skip first stitch, SC in next 7 stitches
Row 5: Turn, skip first stitch, SC in next 6 stitches
Row 6: Turn, skip first stitch, SC in next 5 stitches
Row 7: Turn, Skip first stitch, SC in next 4 stitches
Row 8: Turn, Skip first stitch, SC in next 3 stitches
Row 9: Turn, Skip first stitch, SC in next 2 stitches
Row 10: Turn, skip stitch, SC in next stitch, CH 1, finish off
Attach yarn (counting from the seam of the hat, to the right) into
the 19th stitch.
Second Earflap:
Ch 1
Row 1: SC in next 10 stitches
Row 2: Turn, Skip first stitch, SC in next 9 stitches
Row 3: Turn, Skip first stitch, SC in next 8 stitches
Row 4: Turn, Skip first stitch, SC in next 7 stitches
Row 5: Turn, skip first stitch, SC in next 6 stitches
Row 6: Turn, skip first stitch, SC in next 5 stitches
Row 7: Turn, Skip first stitch, SC in next 4 stitches
Row 8: Turn, Skip first stitch, SC in next 3 stitches
Row 9: Turn, Skip first stitch, SC in next 2 stitches
Row 10: Turn, skip stitch, SC in next stitch, CH 1, Do not finish off
SC around the edge of the hat, Join to CH 1. Finish off

Braids:
Cut 30 three foot long strands of yarn (the same yarn you used for the mane)
Fold yarn in half (15 strands for each braid)
Put your hook into the bottom of the earflap from the inside to the outside of the earflap. hook onto all 15 stands, pull loop through,
open loop and pull the strands of yarn through the loop, tug on all strands to make sure its nice and tight. Braid down, and tie at the bottom of braids. Cut the bottom to make look nice and clean.
How to Make a Lion Mane
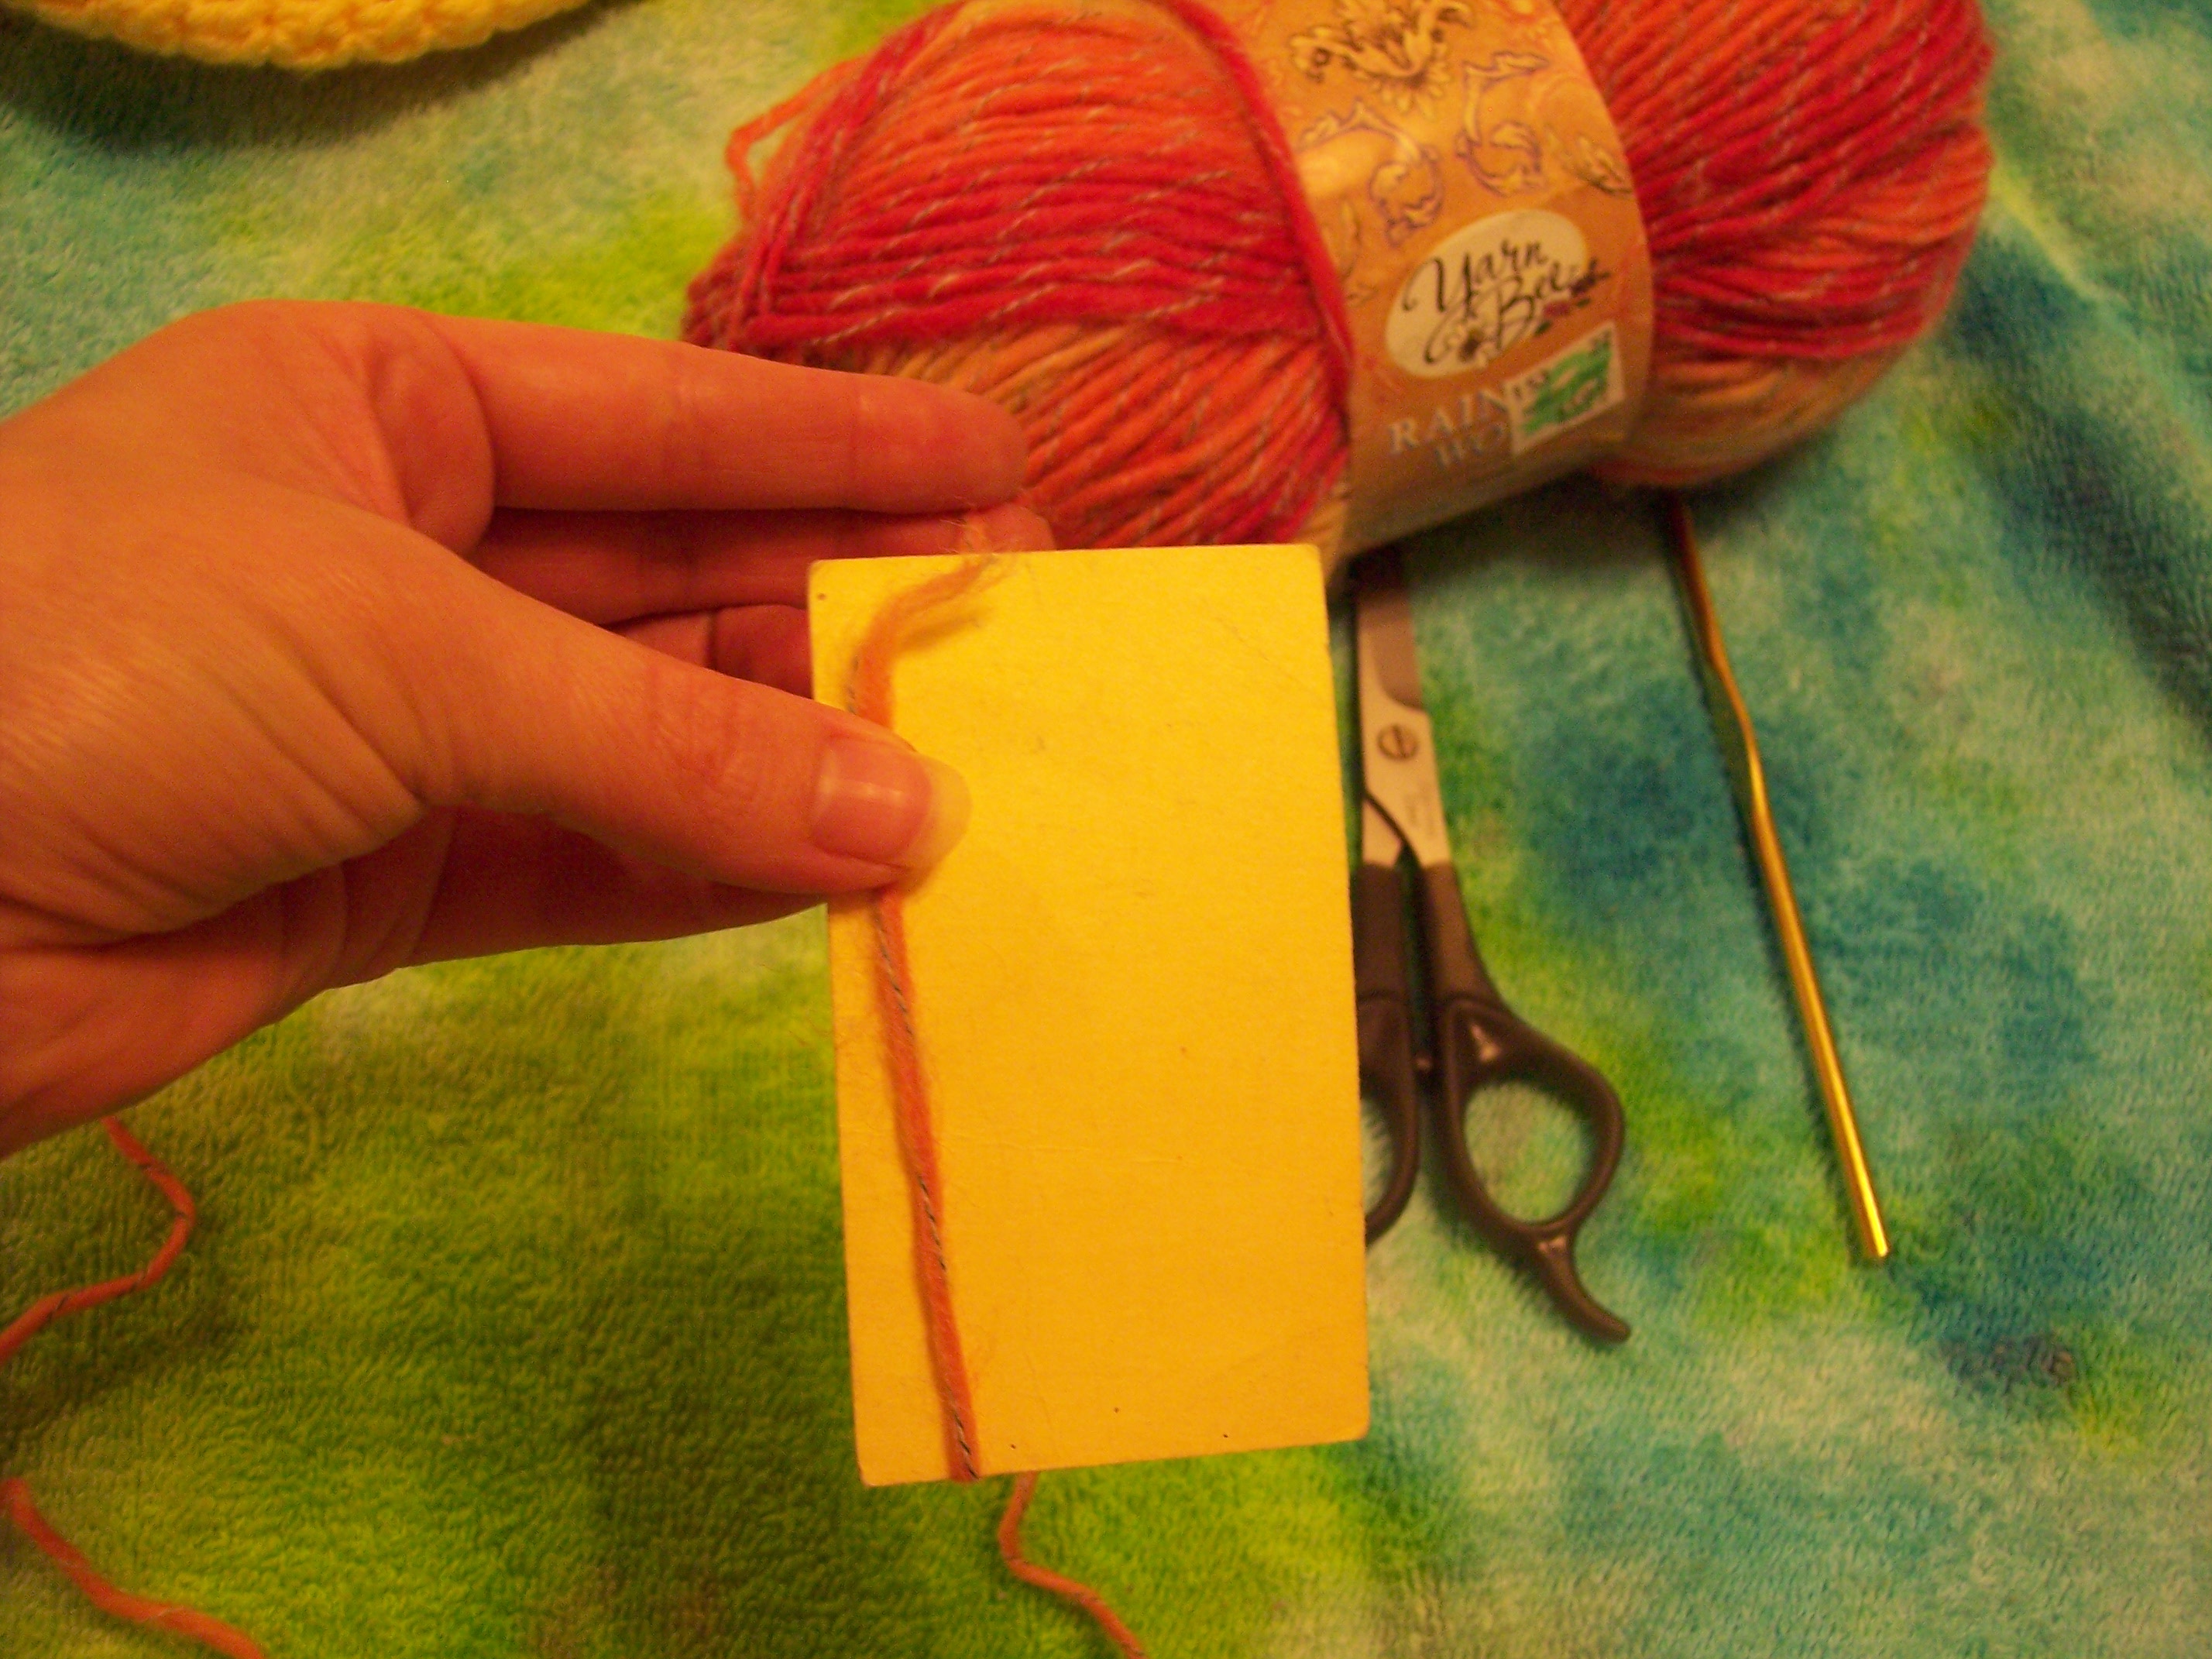
You will need your yarn, a business card, scissors, and hook

Wrap the yarn around the card and cut it at one end like in the picture above. This will help you make all your strands the same length.


I laid out yarn where I wanted the inside of the mane to be on the hat. Notice how I have it just on the edge of the earflaps.
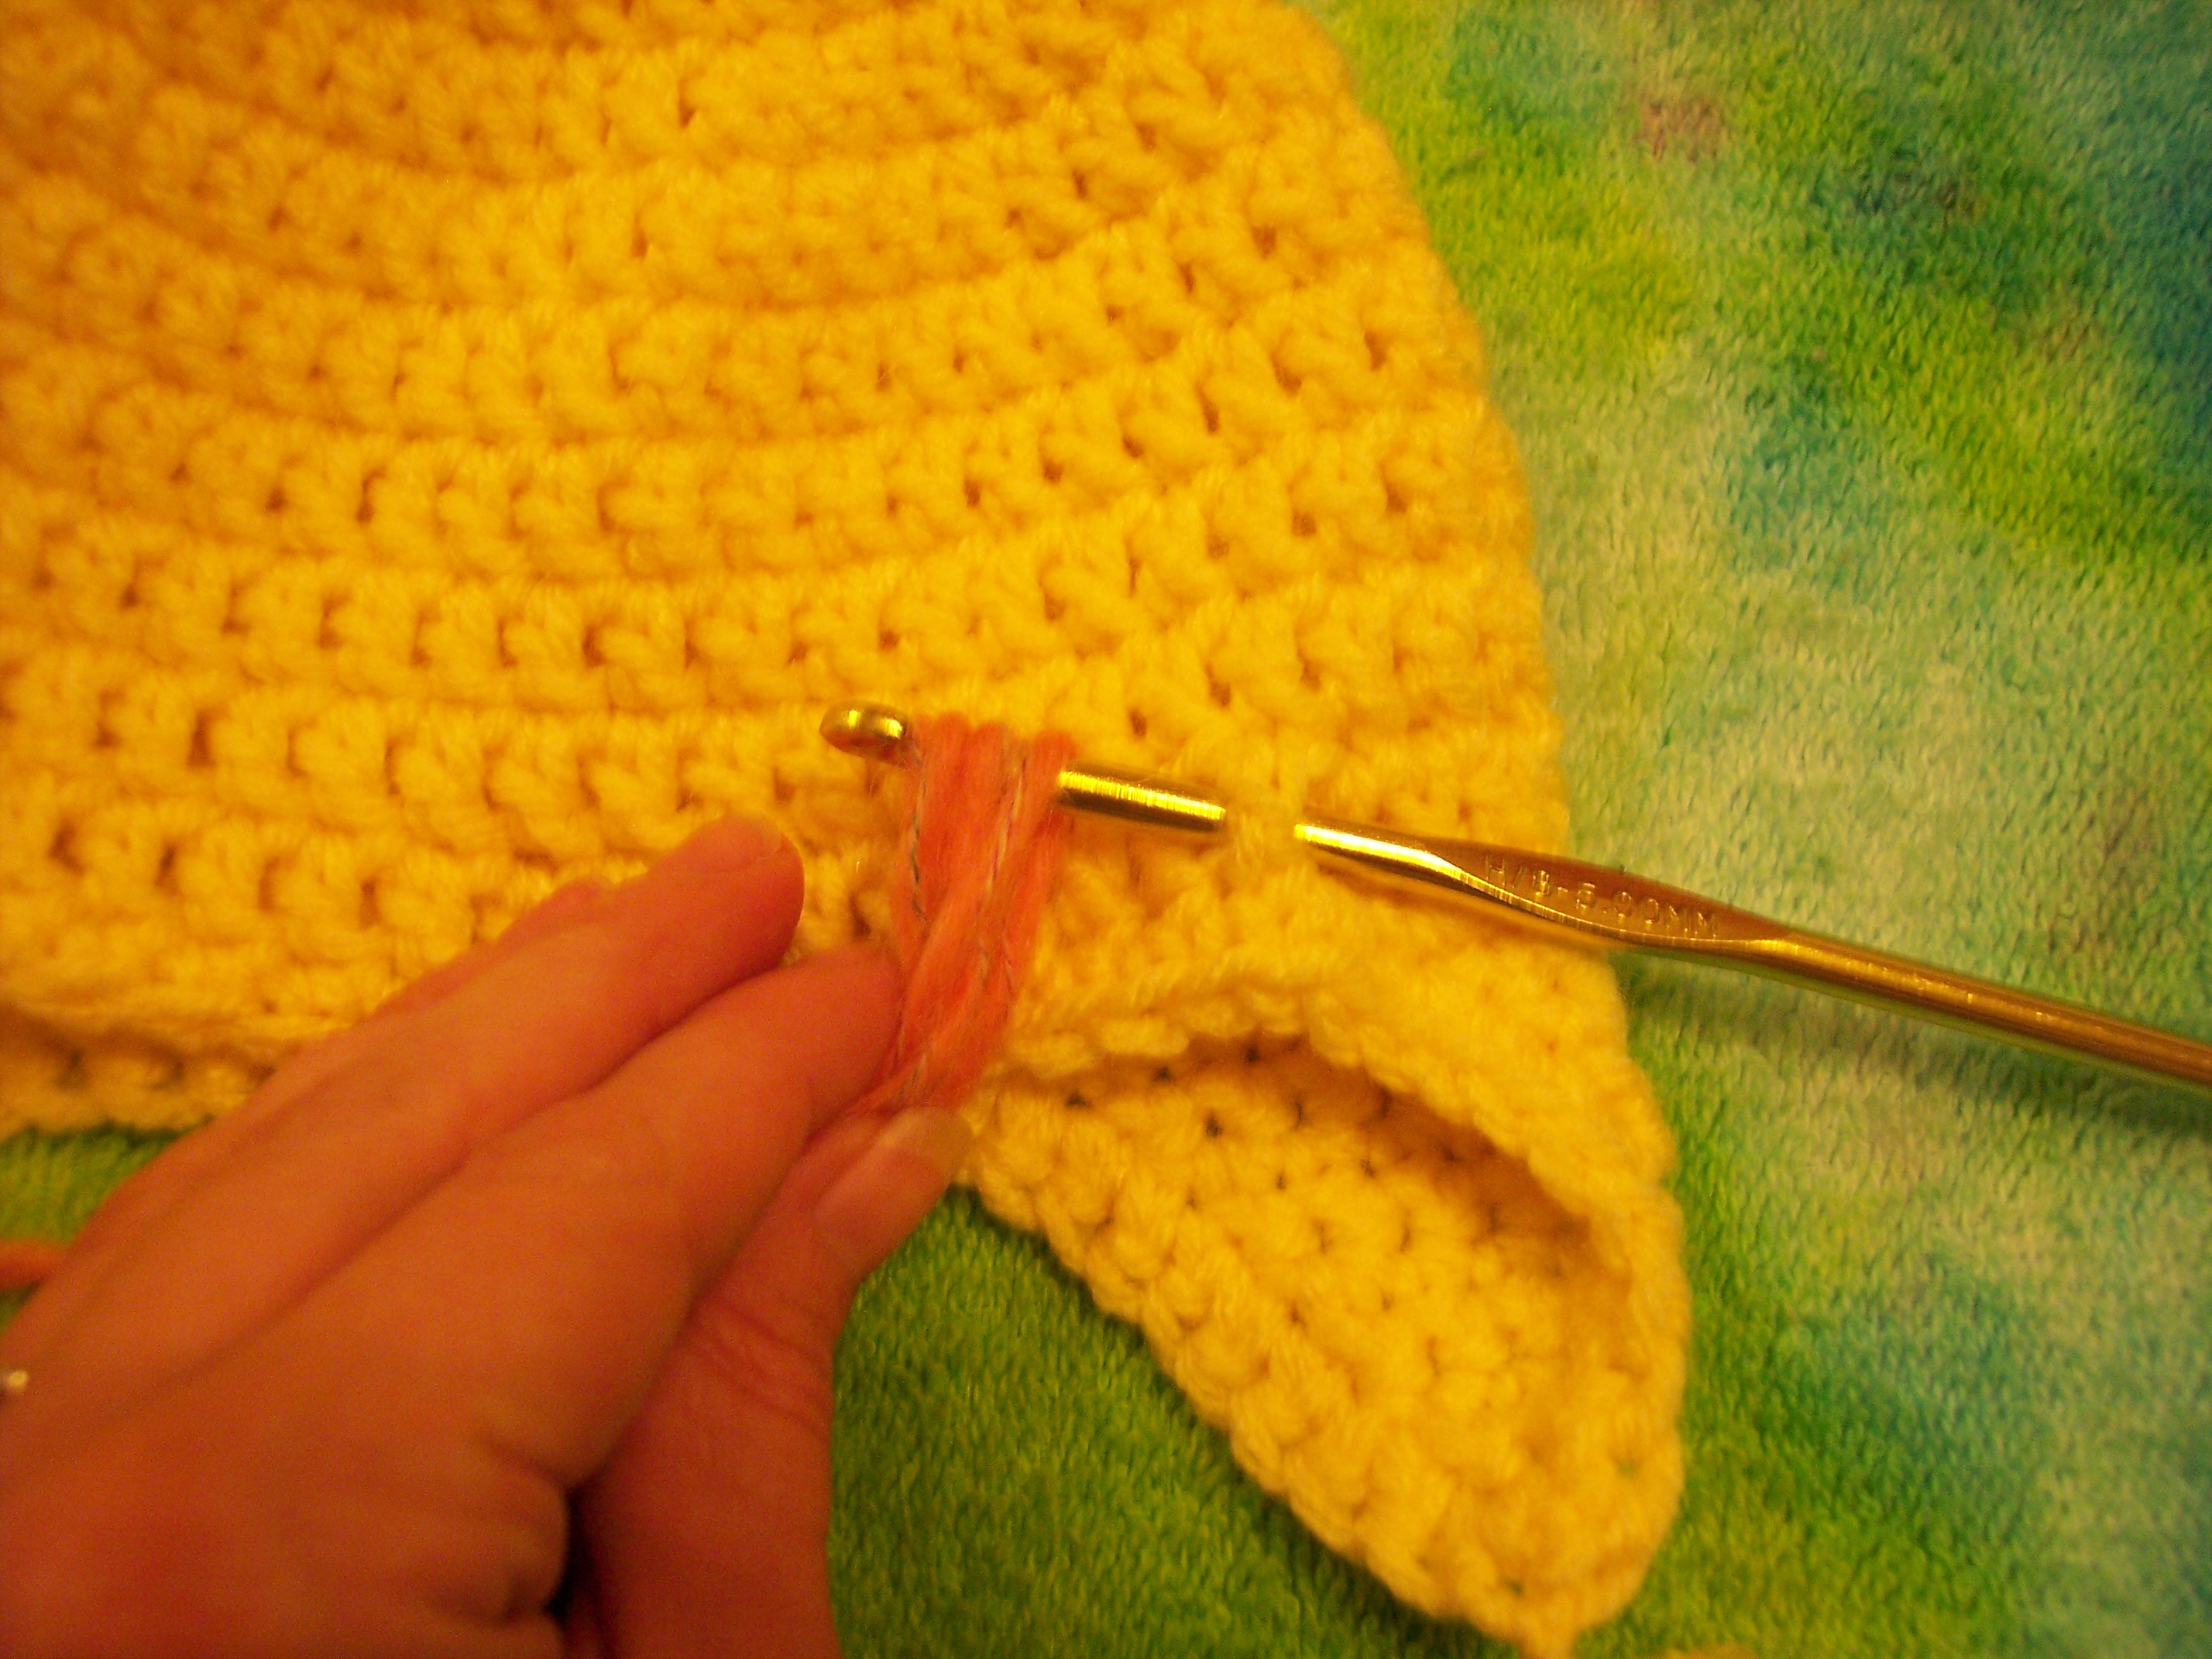
Put the hook through the post of the DC. Wrap 4 strands of yarn around the hook.
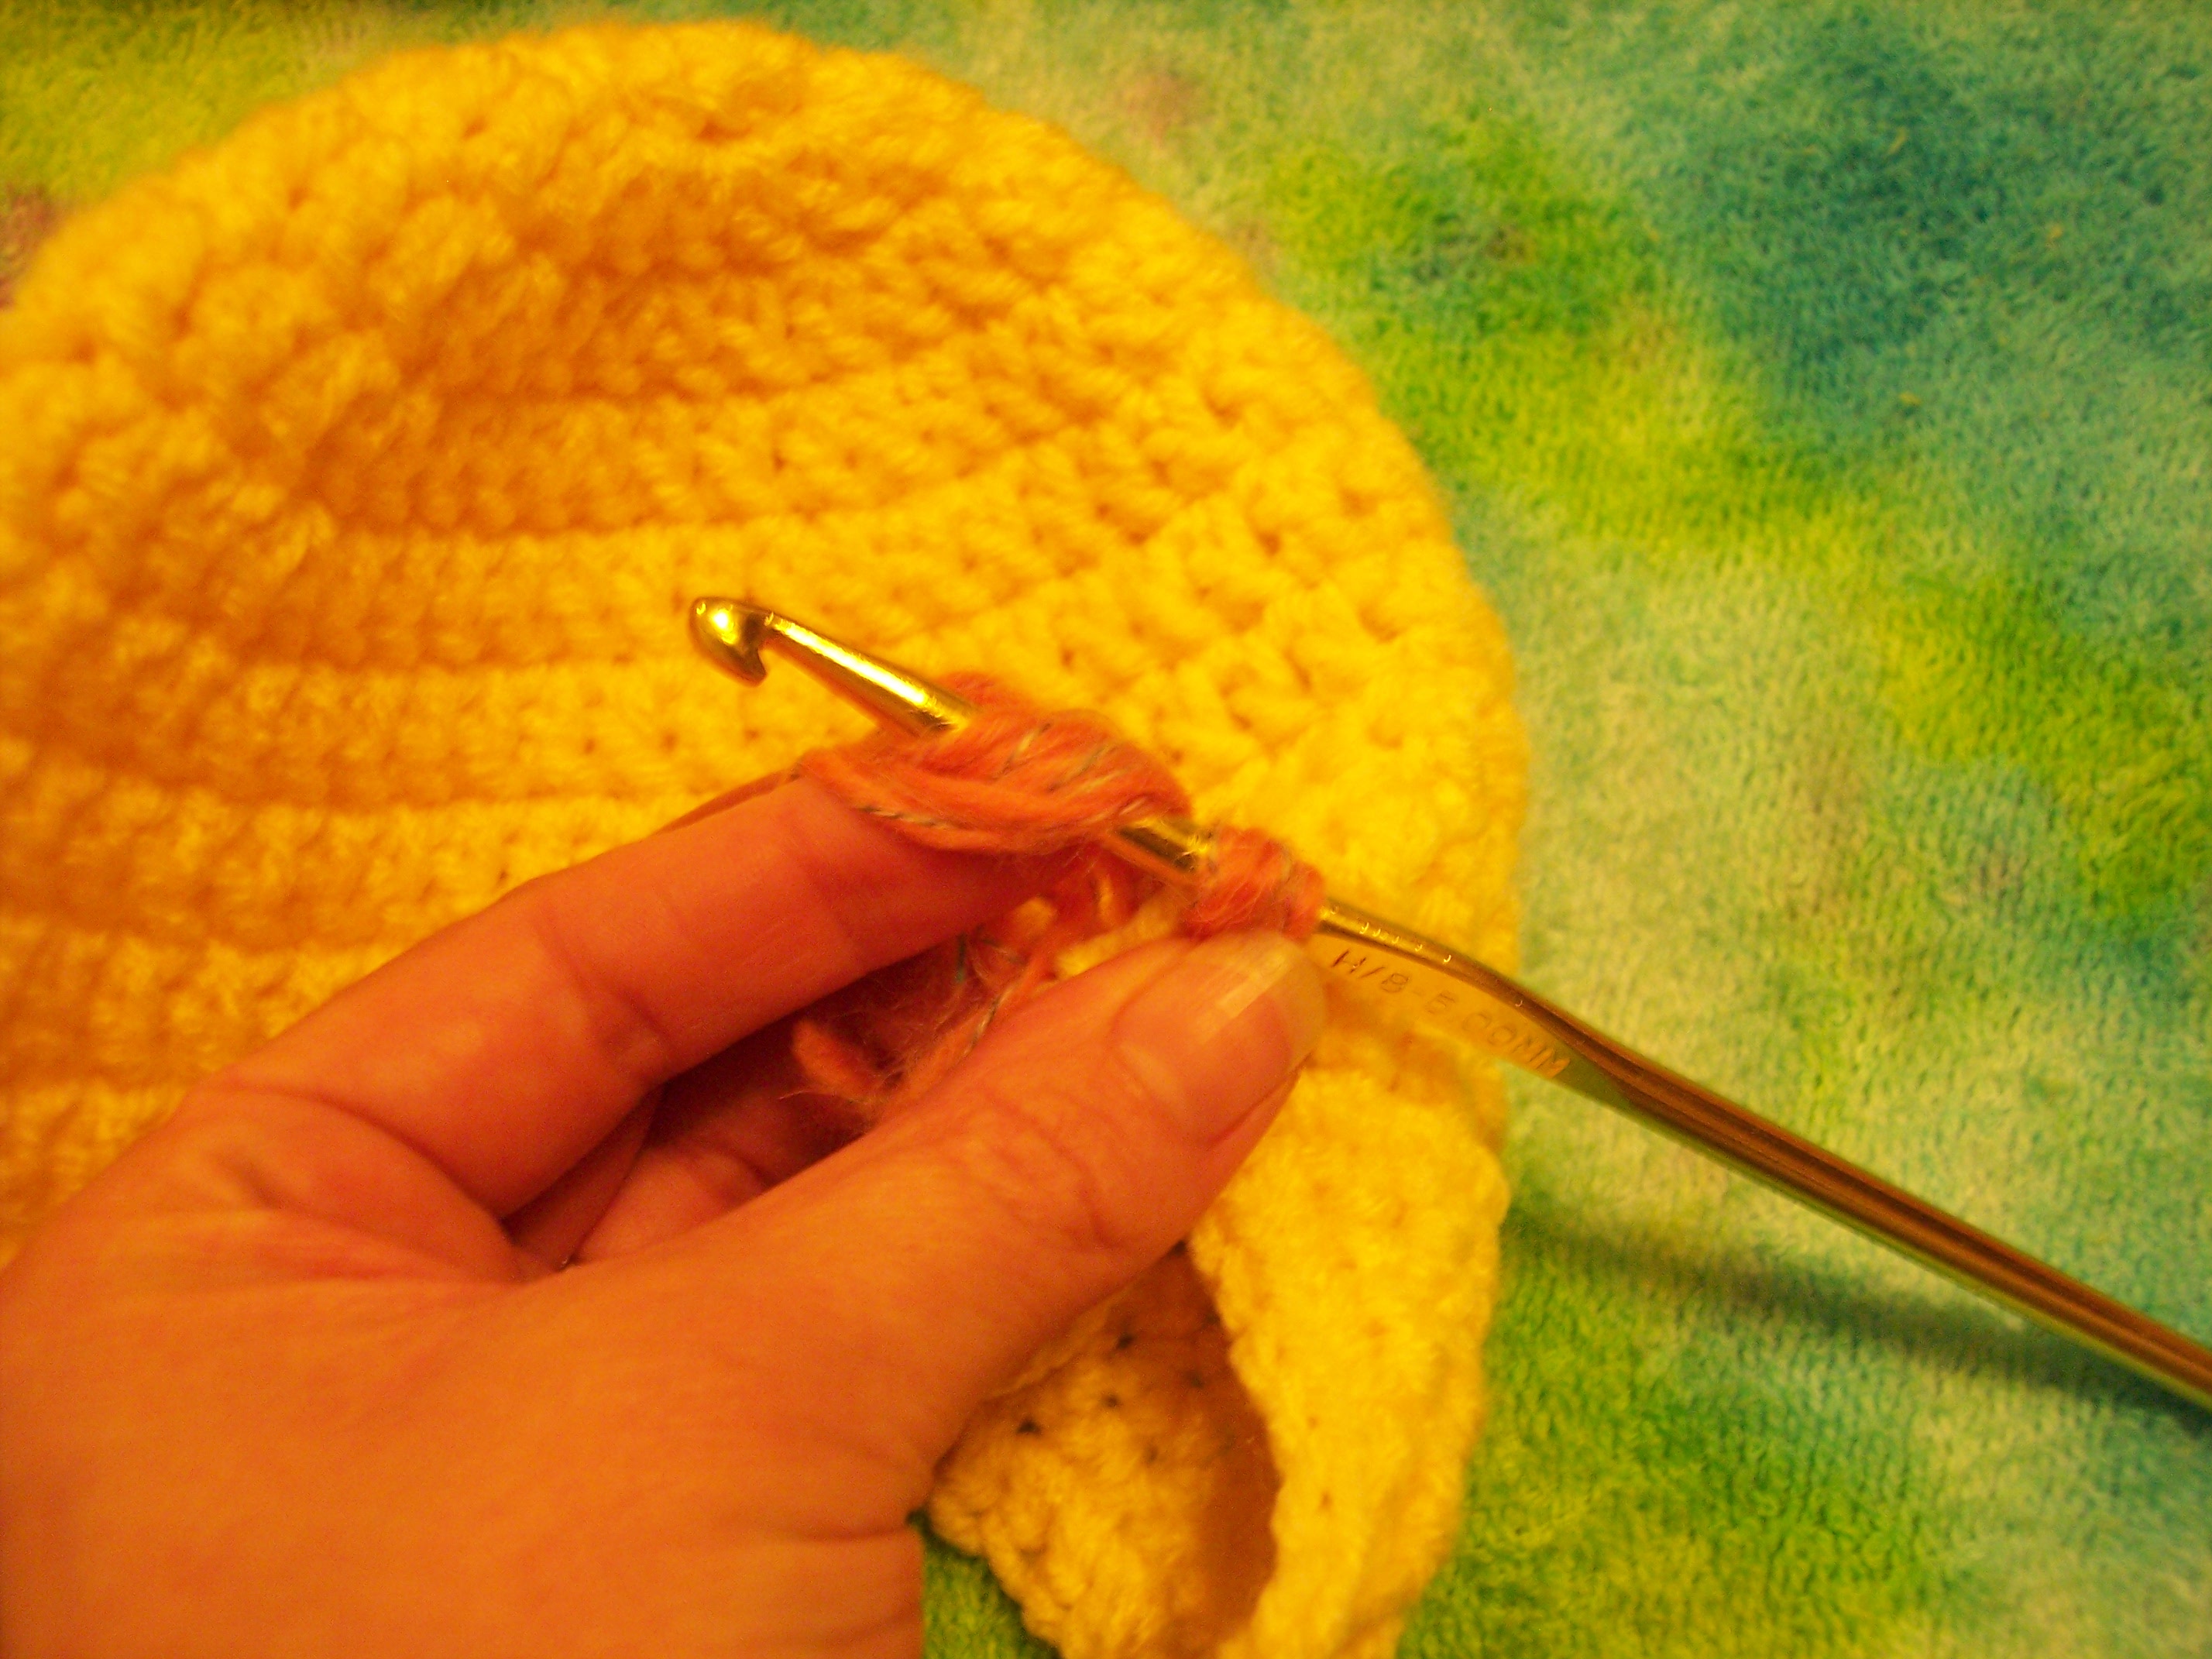
Pull the yarn through, making a loop on the hook. Wrap yarn ends around the hook.

Pull the ends through the loop.
tug on ends to make it nice and snug

In the picture above, you can see where I made my three rows. I cant really tell you a right or wrong way to do this. This is something that's easier to do as you go. But I hope my pictures make that easier for you.

I also added one row of mane down the front side (through the SC that you crocheted around the hat) of the earflaps. Making it so the mane looks like it wraps around the baby's face

When I was adding the mane, I went straight across when reaching rounds 2 and 3. I only made two rows for the mane when going across. You can see in this picture above how I left Round 1 empty. Depending on what kind of yarn you use you might want to fill it. But since I used a fluffy wool, it covers it up nicely.
Eyes:
Round 1: Magic Ring,CH 3, 10 DC inside of ring, join to top of CH 3.
CH 2. 2 HDC in each DC around. Join to the top CH of CH 3.
finish off
Repeat for 2 eyes
Here is a great video to show you how to make the sleeping eyes.
Nose:
Magic ring, CH 3, 2 DC inside ring, CH 1, 3 DC inside ring, CH 1, 3
DC inside ring. CH 1, connect to top of CH 3 and pull ring tight.
finish off
Attach eyes and nose to the front of your hat. When I attach mine, I like to use a yarn needle and the same color of yarn as the piece being attached. I work the needle through the outside loops of the piece.
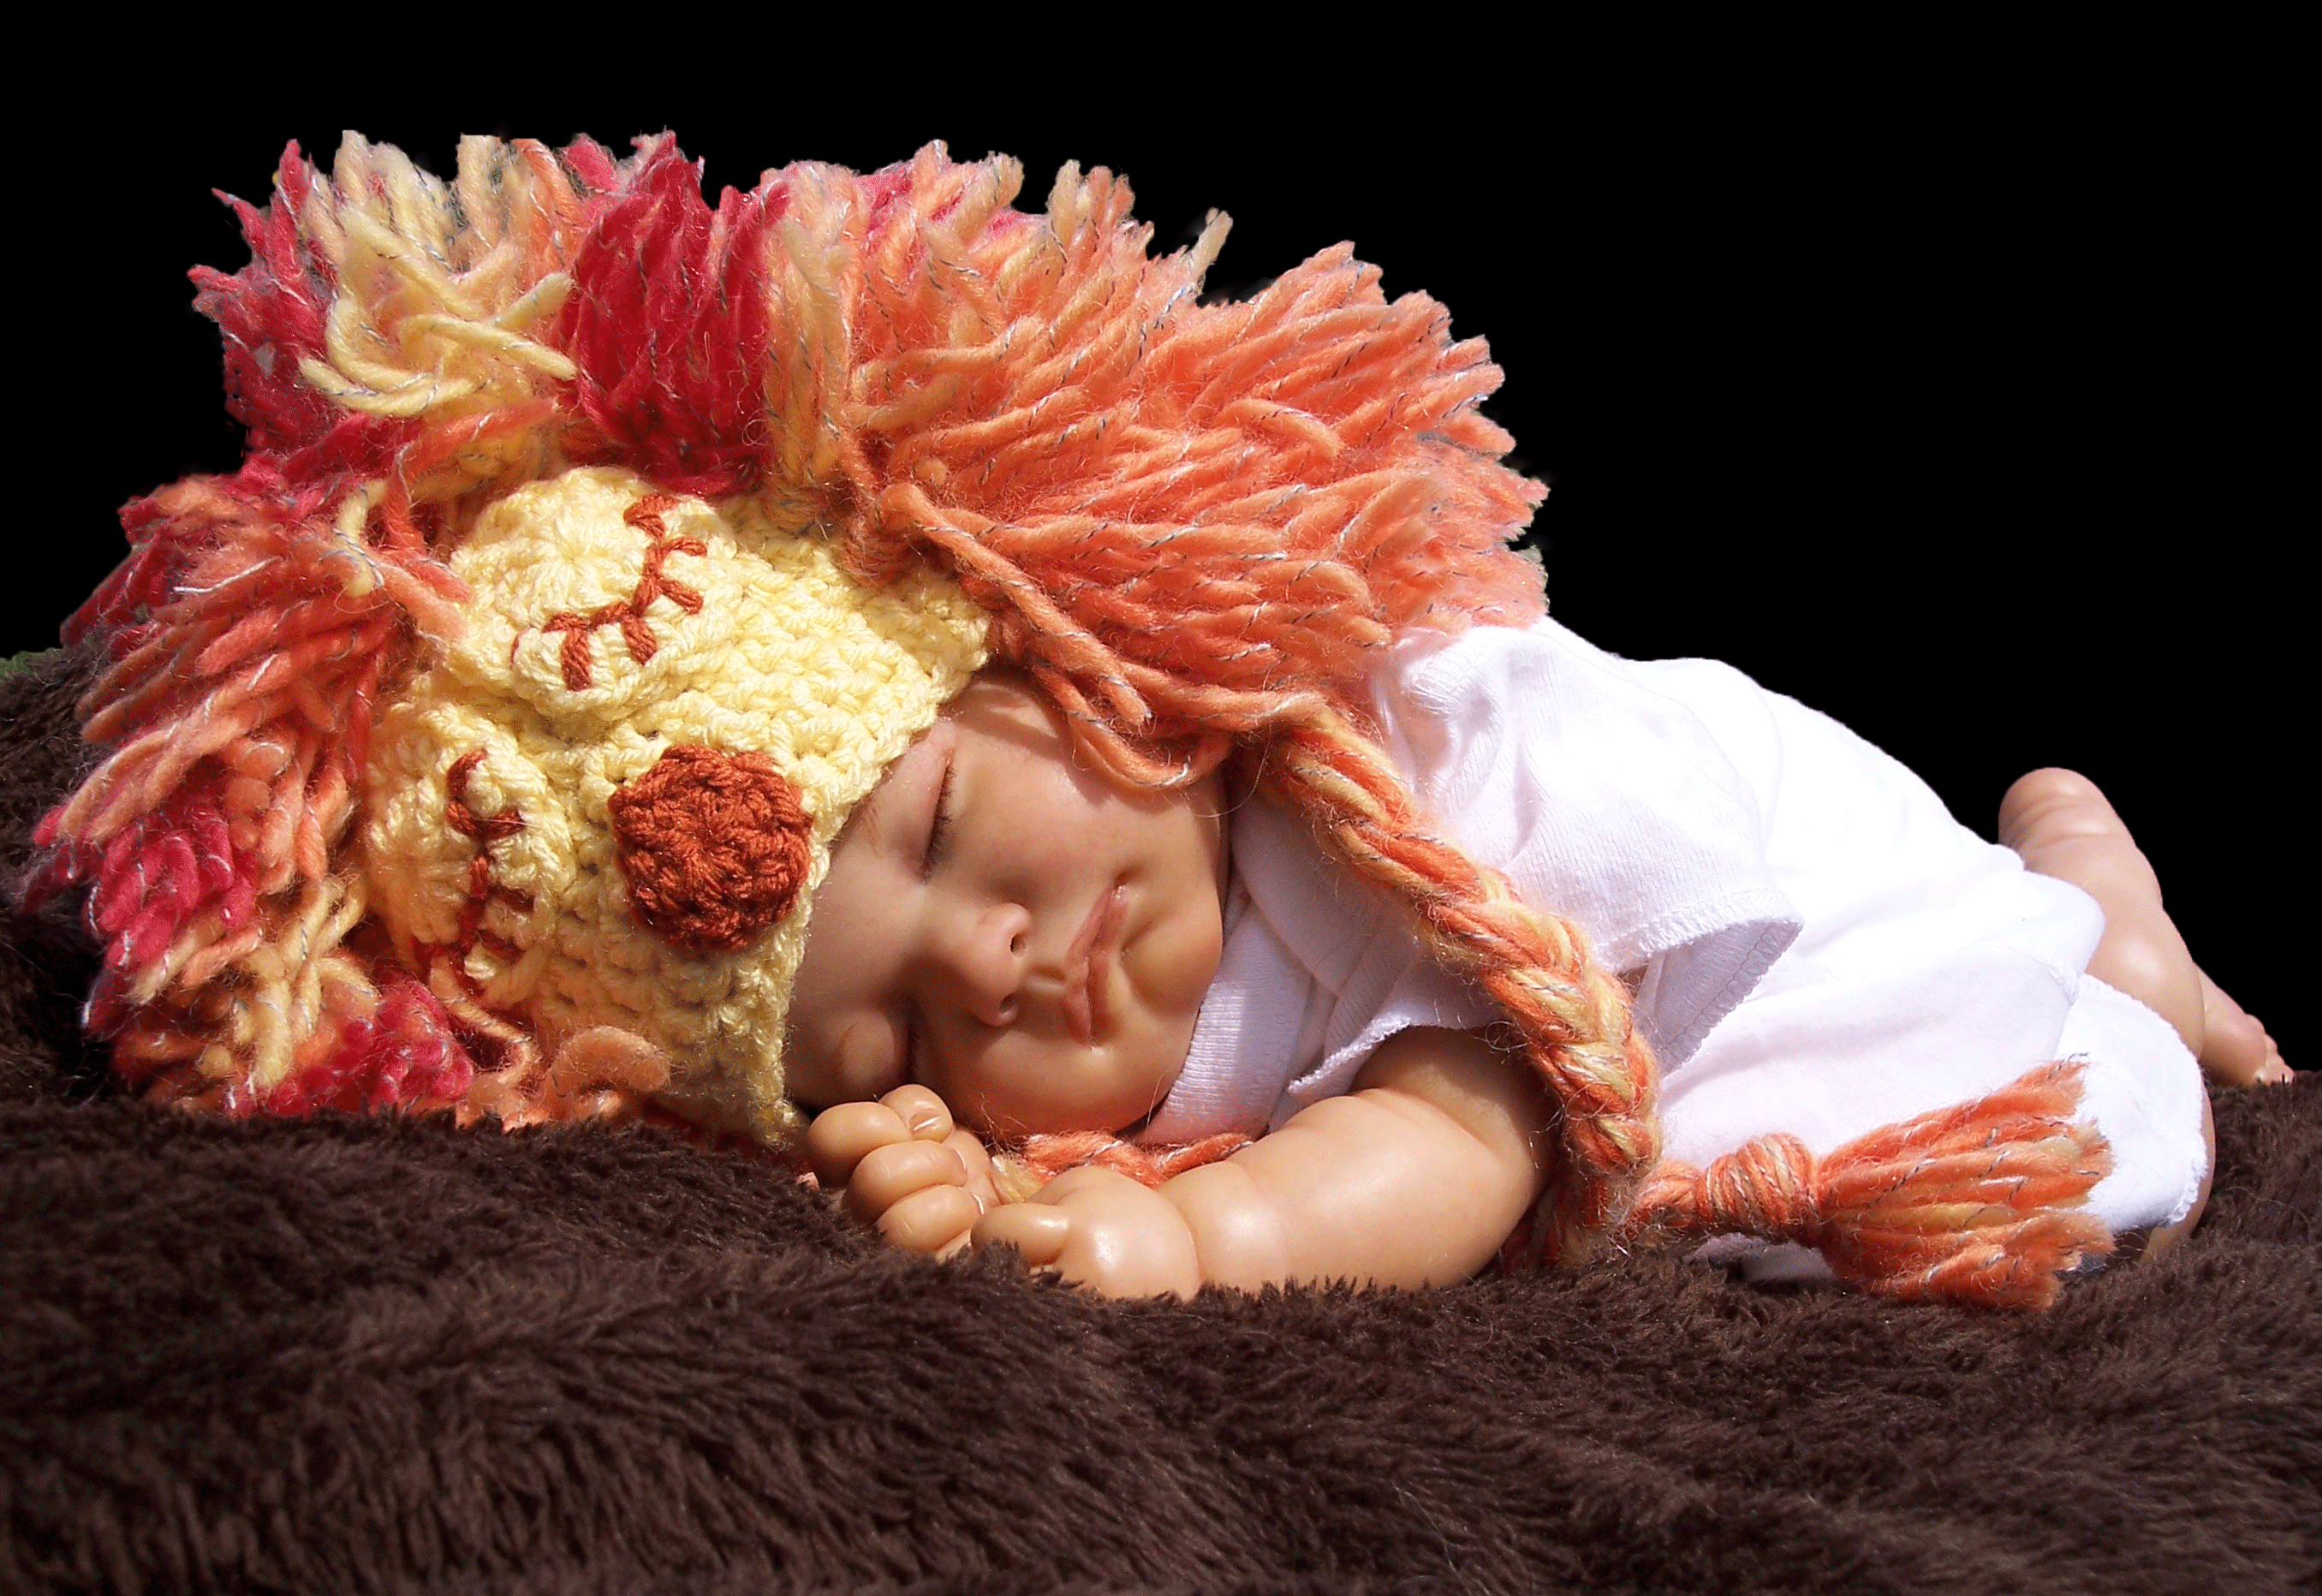


So cute! What a great tutorial. And I love the reborn baby doll who’s modeling! Thank you for your time and talents and for sharing this pattern.
How would you suggest making the hat larger? I’m hoping to make this for my daughter in Detroit Lions colours, Daddy’s favourite team 🙂 it would be for a 12m size.
I would use a pattern for a 12 month earflap hat 🙂 Here is a great free pattern http://allicrafts.blogspot.com/2011/12/free-pattern-earflap-hat-9-12-months.html
Thanks for your reply! I ended up following your pattern, but adding an extra row with the same increase by ten, and the last increase row I did 2 DC together after every 10 DC so I ended up with 55st around. I just kept getting my girl to try it on lil
I absolutely love your patterns but for the life of me I can not figure out how to download them or print them off I don’t sit at the computer to crochet I prefer to have a hard copy to refer to can you please help me thank you Terry
I do not have a download option but if you want to print.. click the print icon at the bottom of the pattern 😀
Love it! Shared on Moogly today! http://www.mooglyblog.com/baby-crochet-halloween-costume/
😀 Thank you!!!
I cannot copy and paste
My virus software tells me not to download the pdf offered on the page
how do I get this lion (mighty jungle) bpattern?
thanks, judy
At the bottom of each pattern you will see a “cleanprint” button. You can use that button to get the pdf version.
I just finished this hat for my nephew, he’s 4 months, and this fit him pretty much perfectly, although I had to add 3 rows to the bottom so that it covered his whole head. Thank you for such a wonderful pattern.
Thank you so much for this amazingly easy pattern, even as a beginner I followed with no problem at all. This is so adorably cute, I can’t wait for my new grandchild to make its appearance so we can do a photo shoot. Thanks again !!!