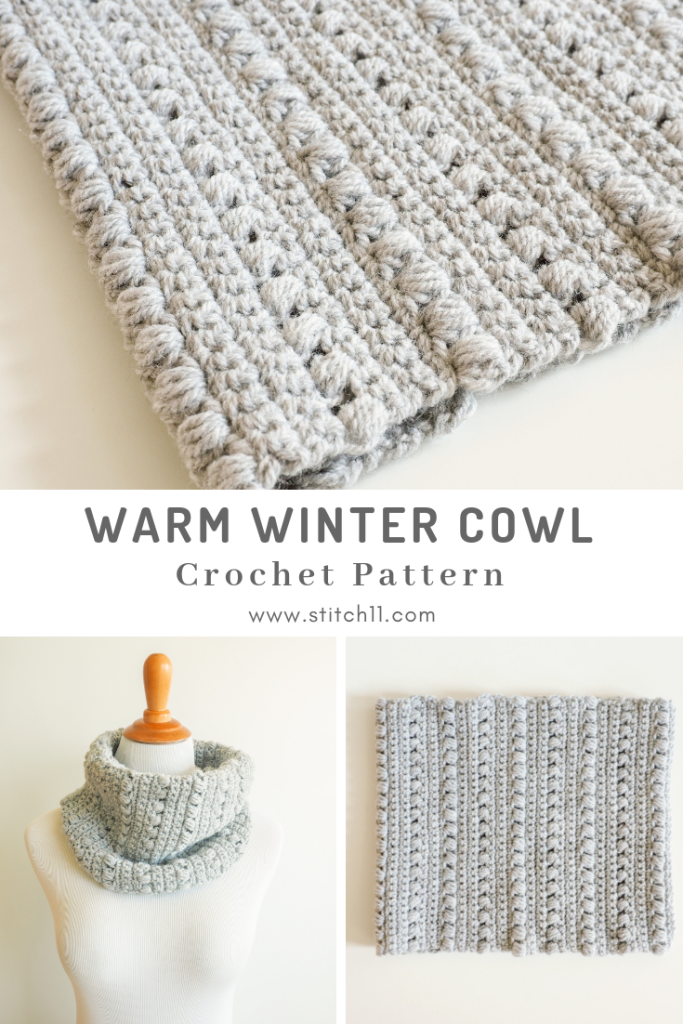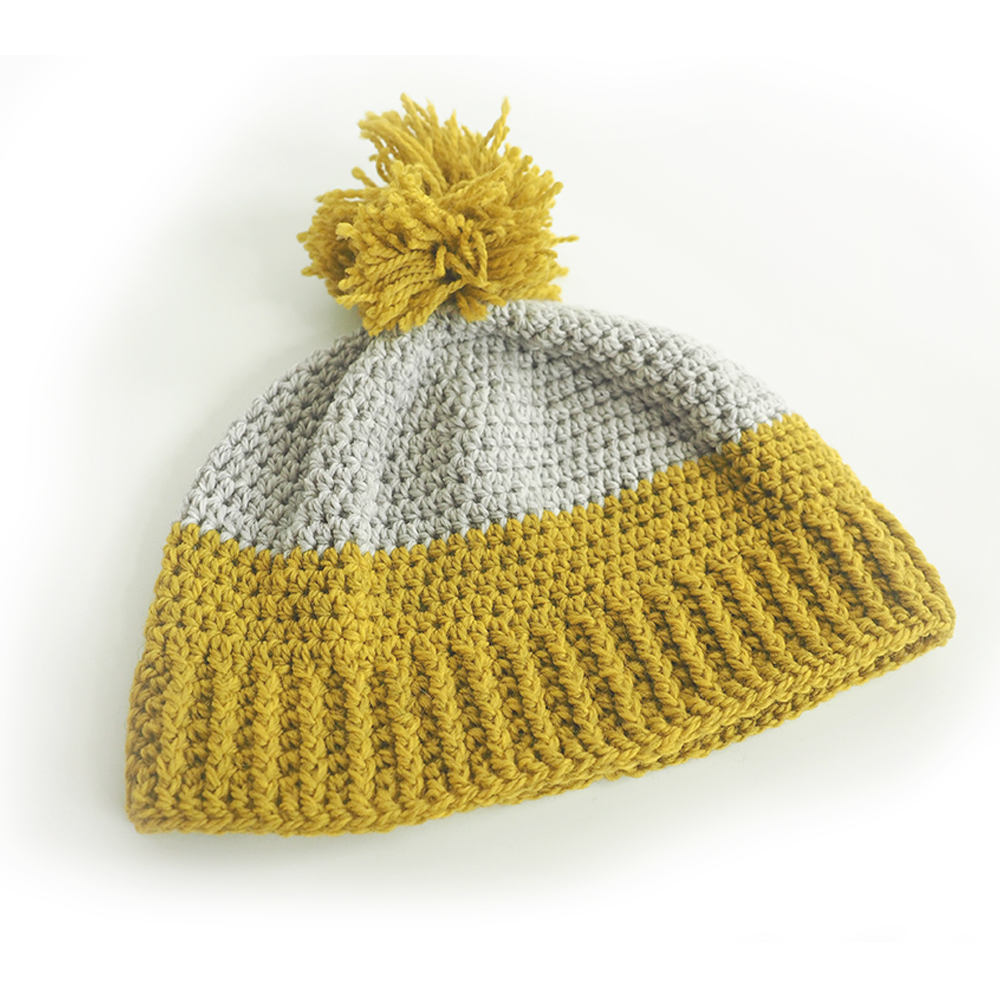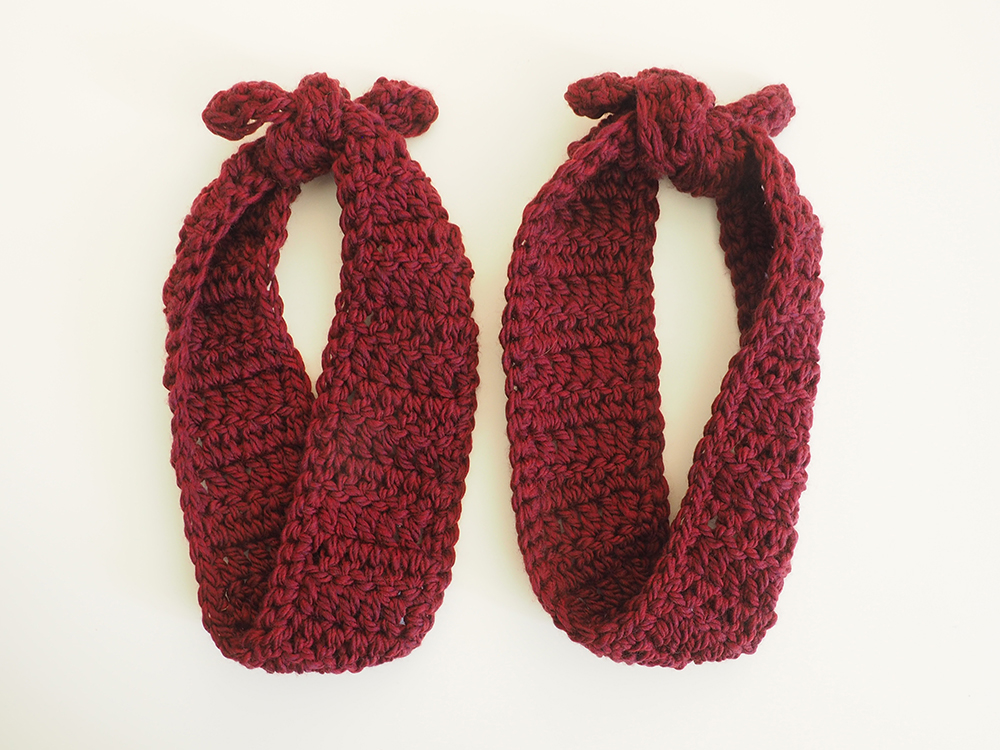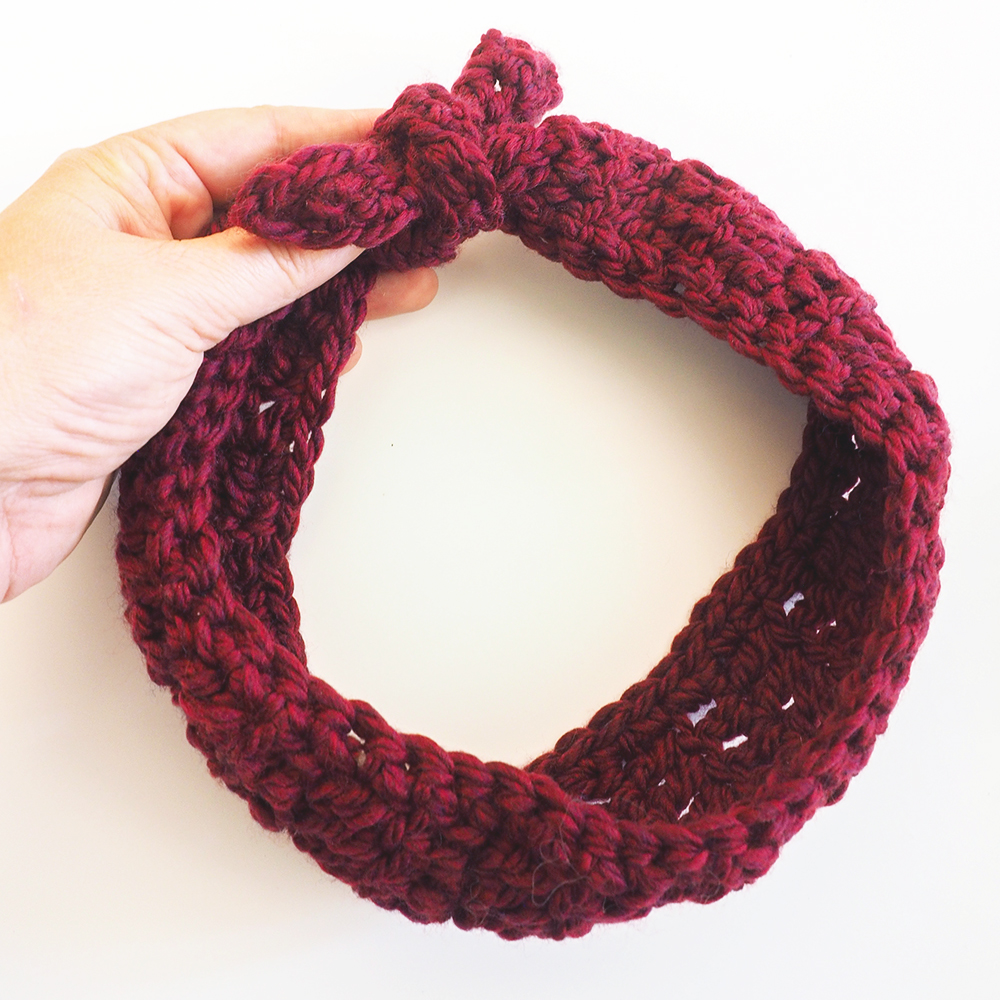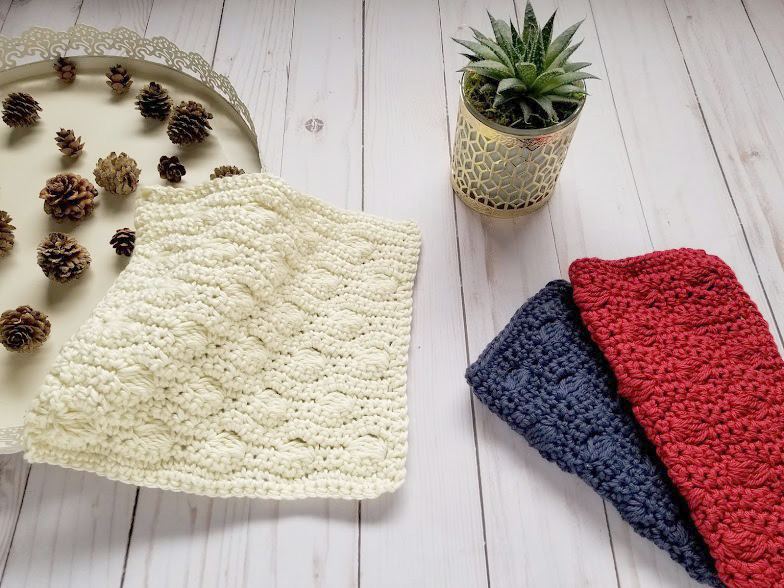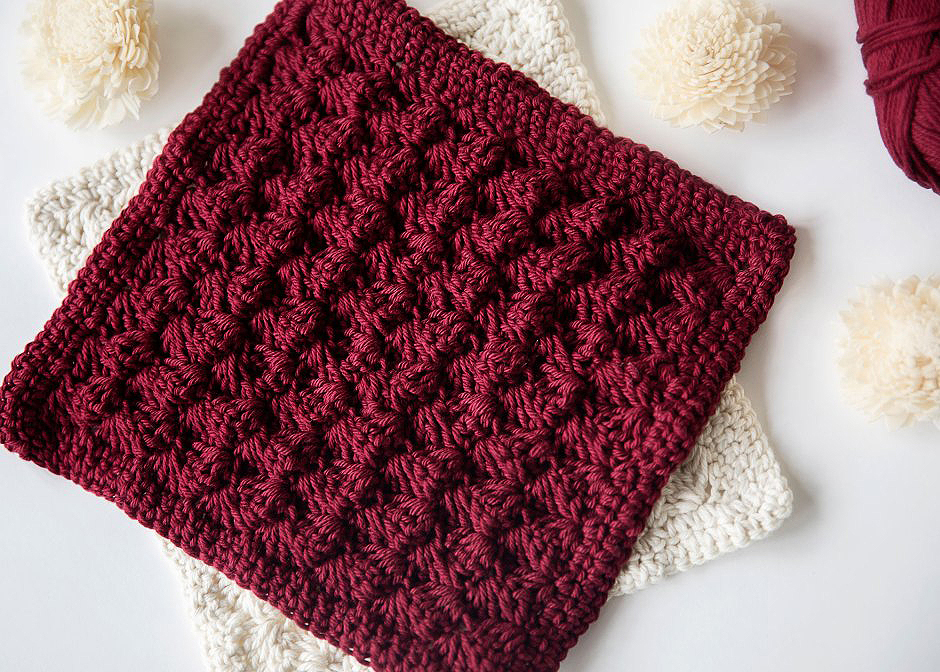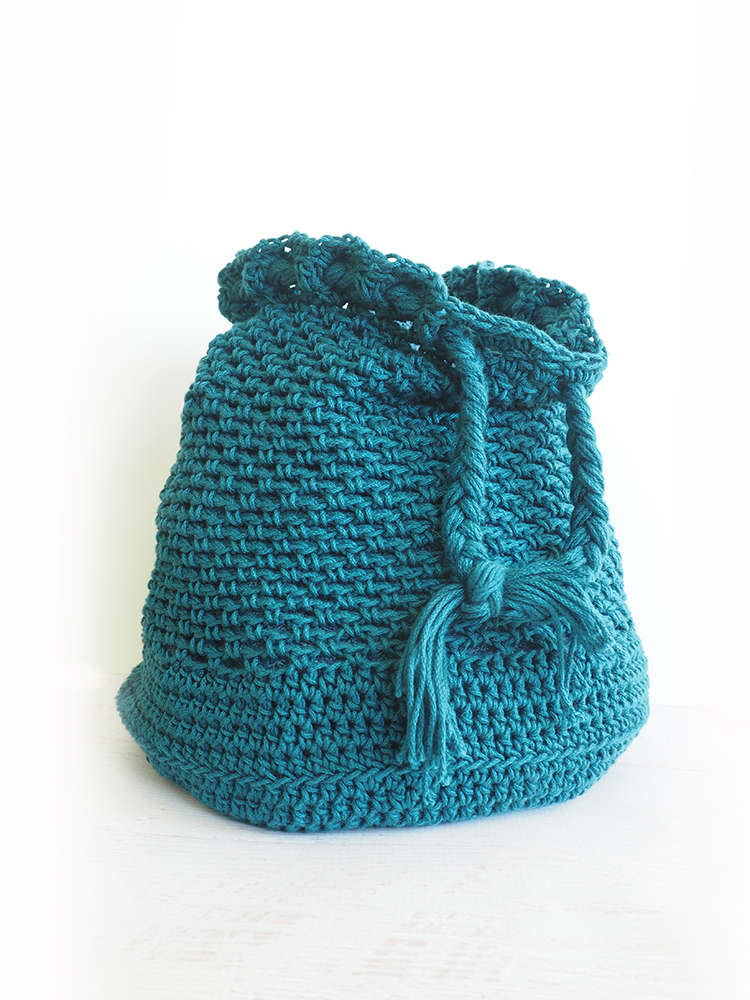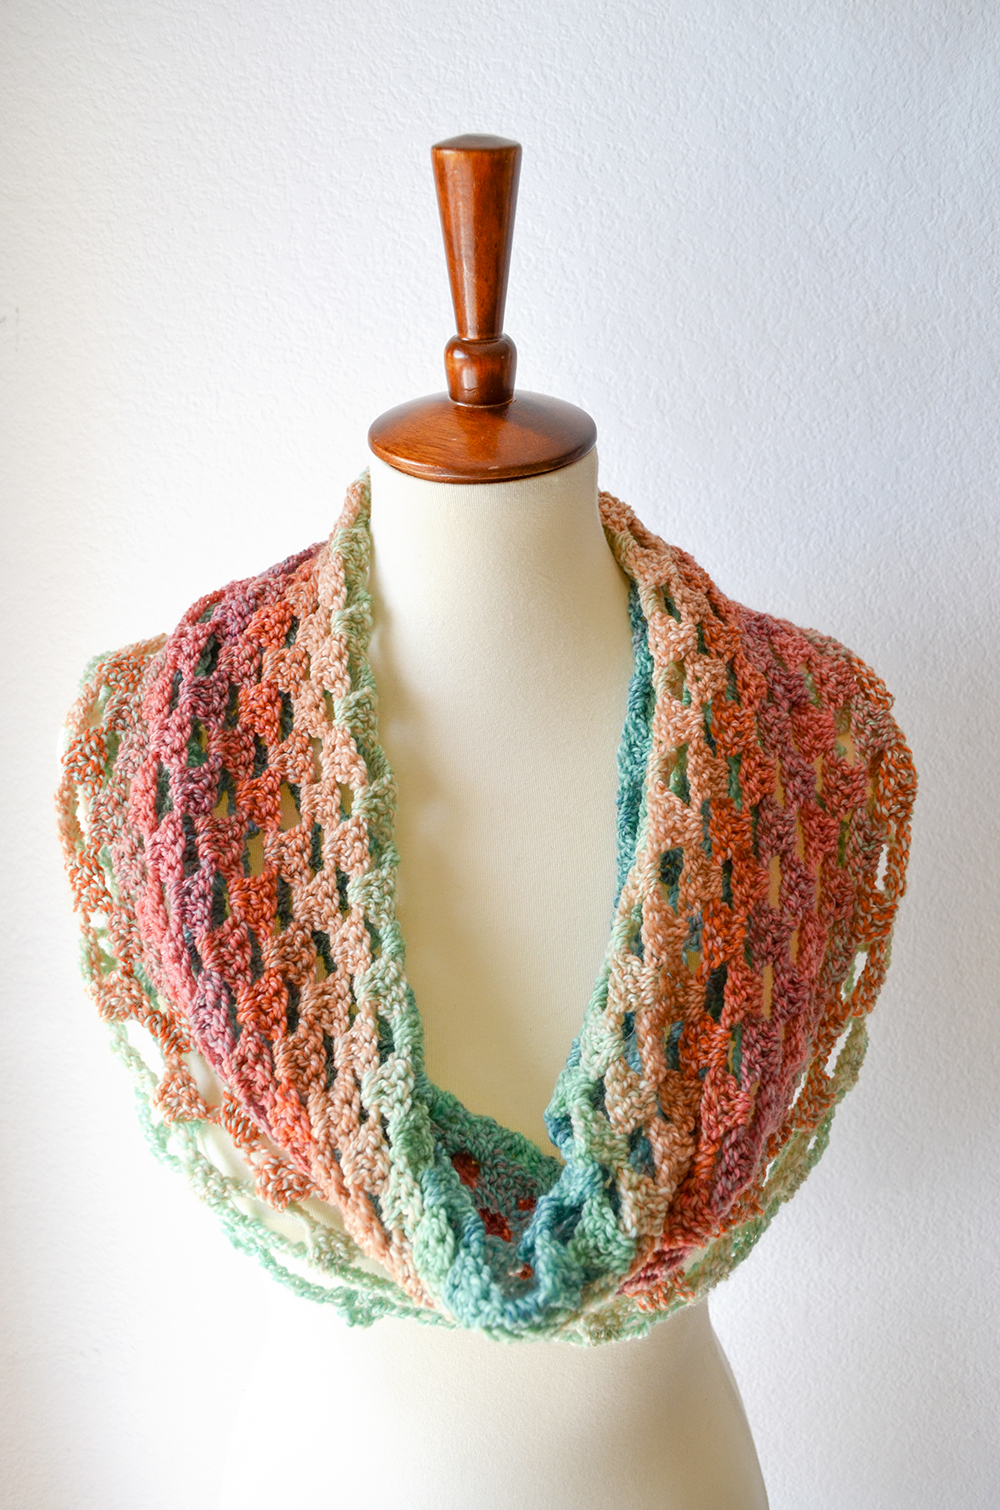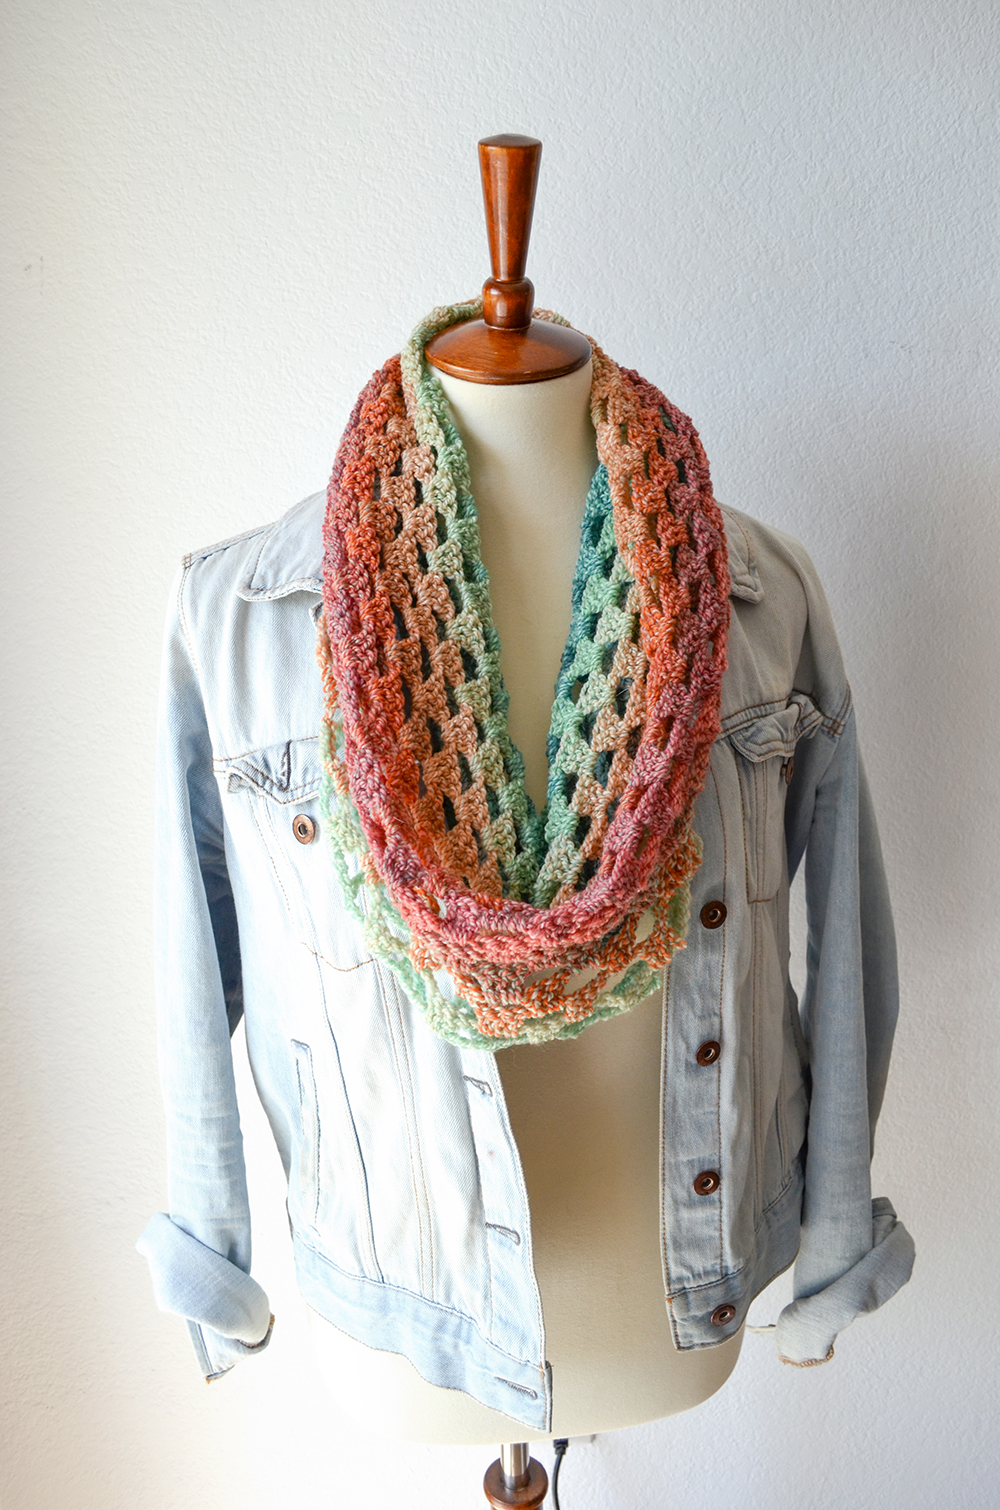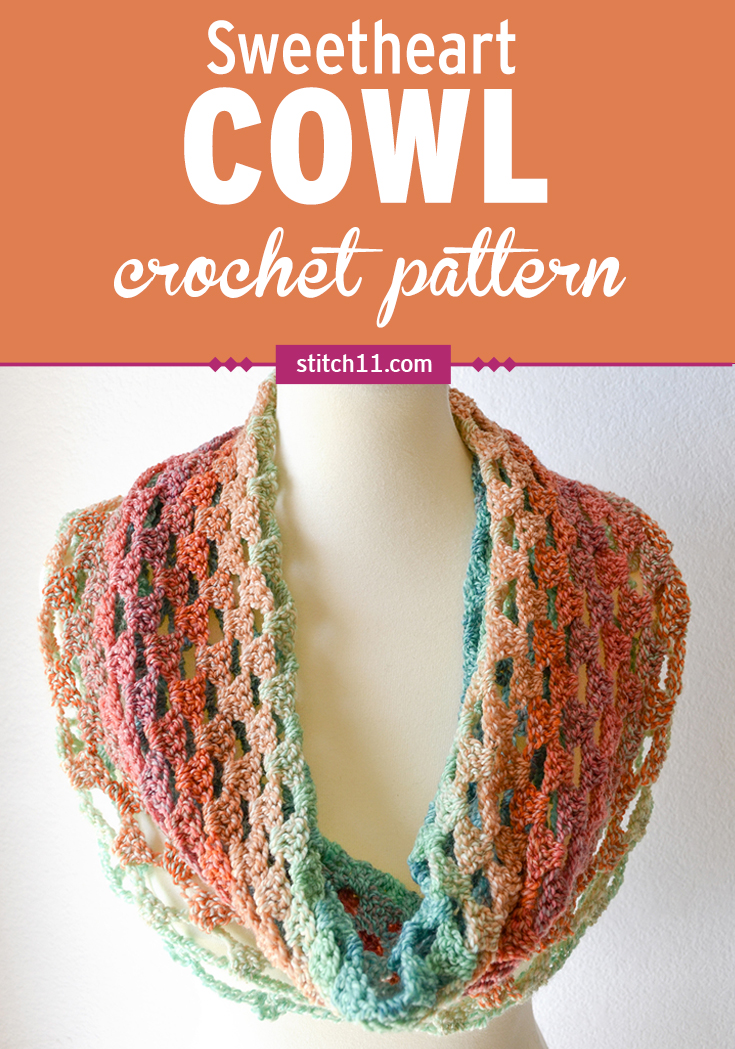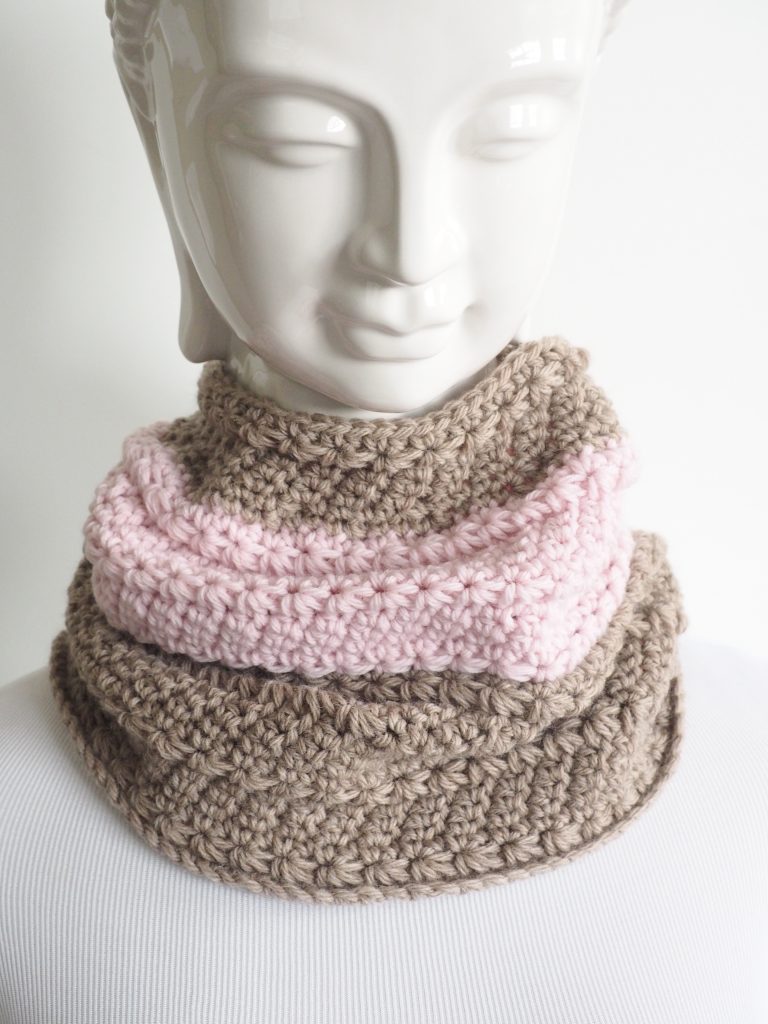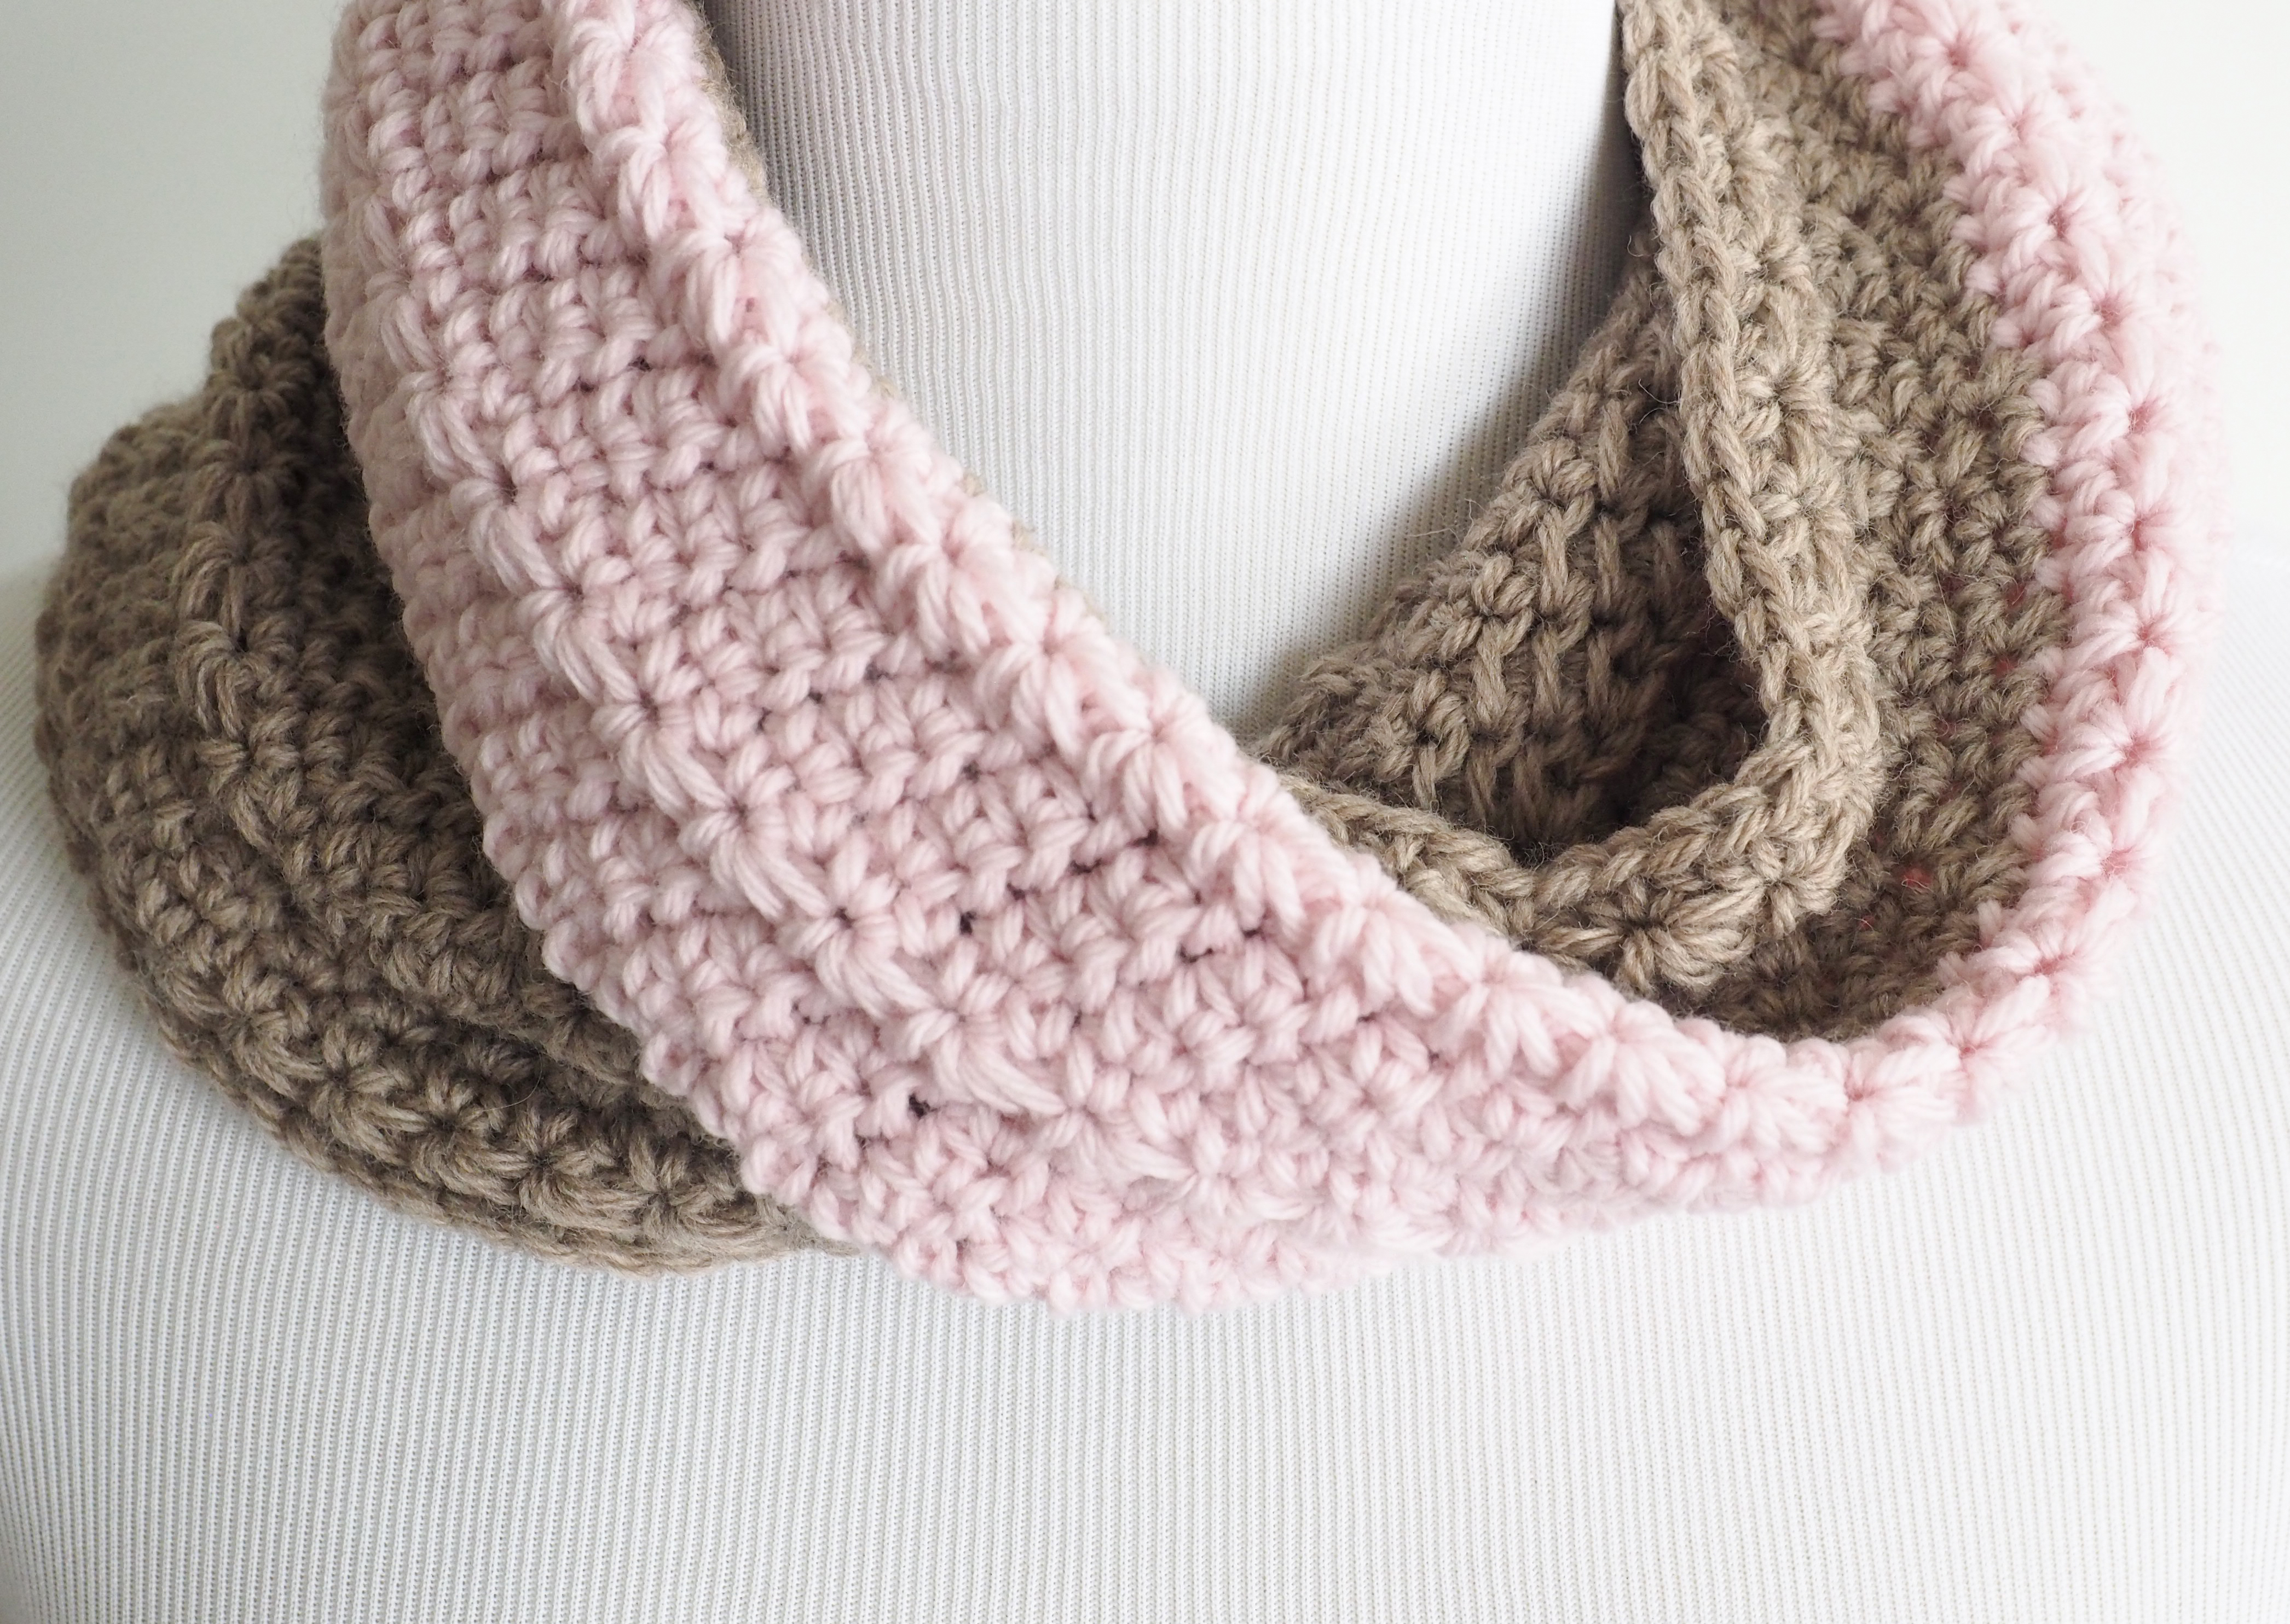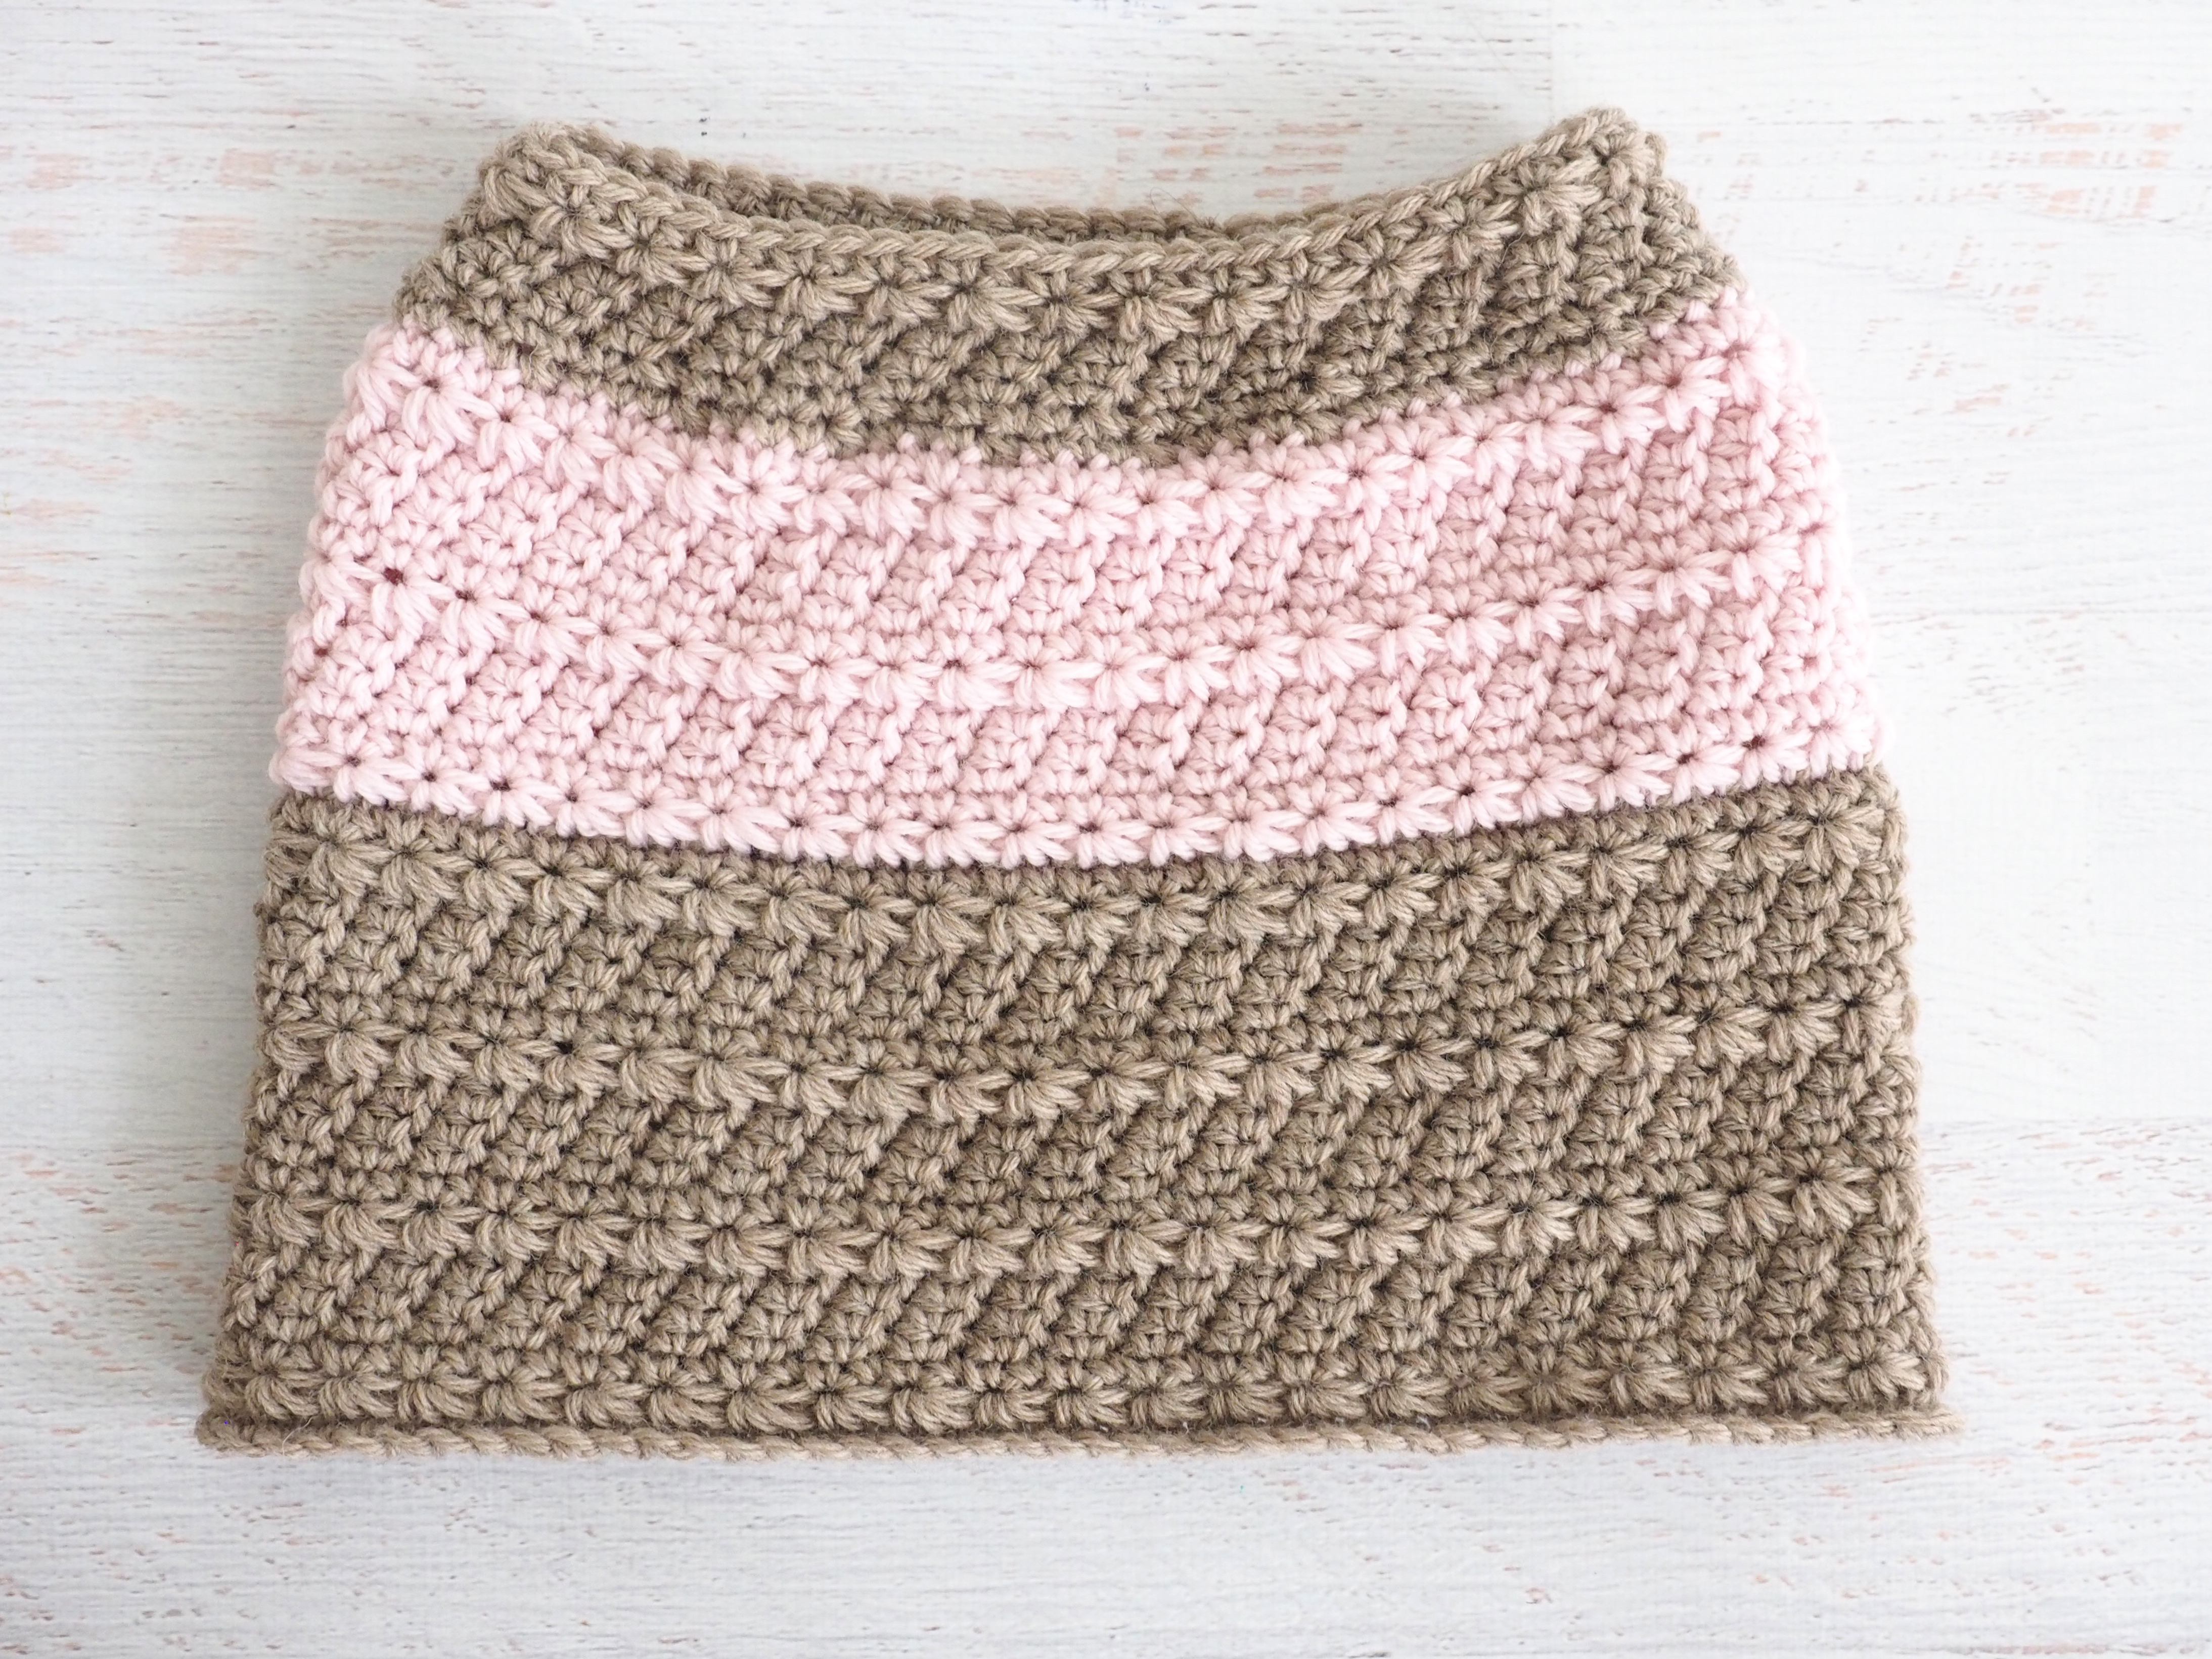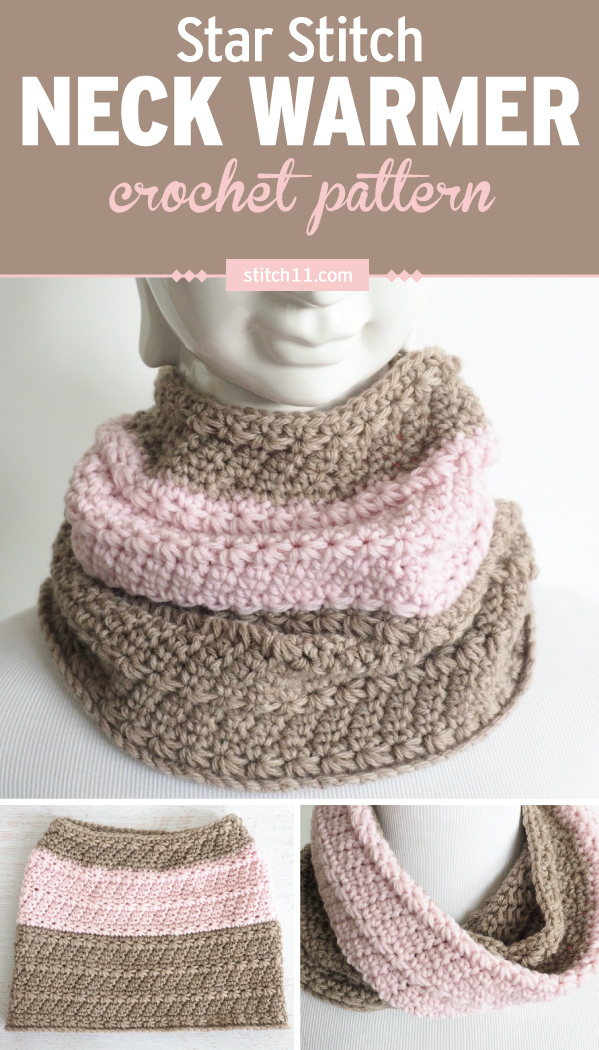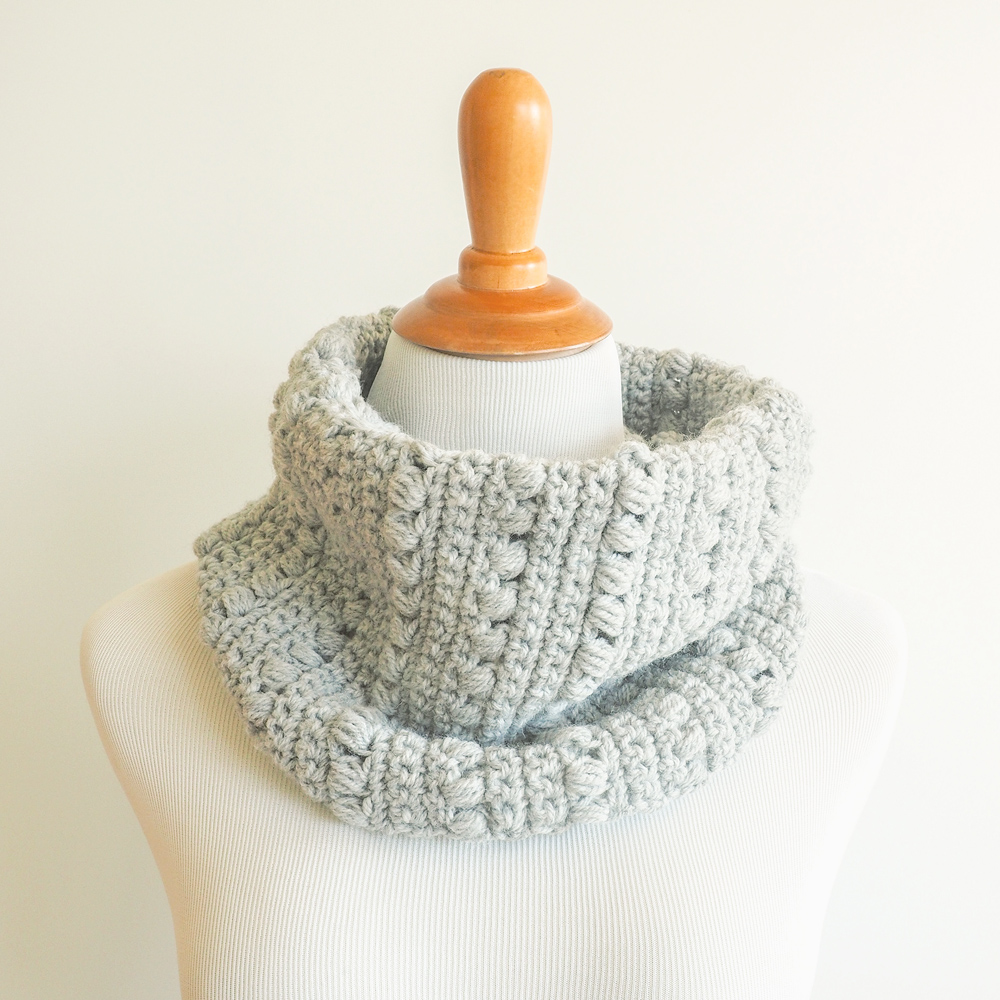
Warm Winter Cowl Crochet Pattern
Winter will be here soon, and I’ve got just the thing.
If you’re looking for something to grab on your way out the door, the Warm Winter Cowl is perfect.
It will keep you warm and cozy outside in the cold. But it’s small enough to throw in your purse once you’re inside. No unnecessary bulk like with some scarves.
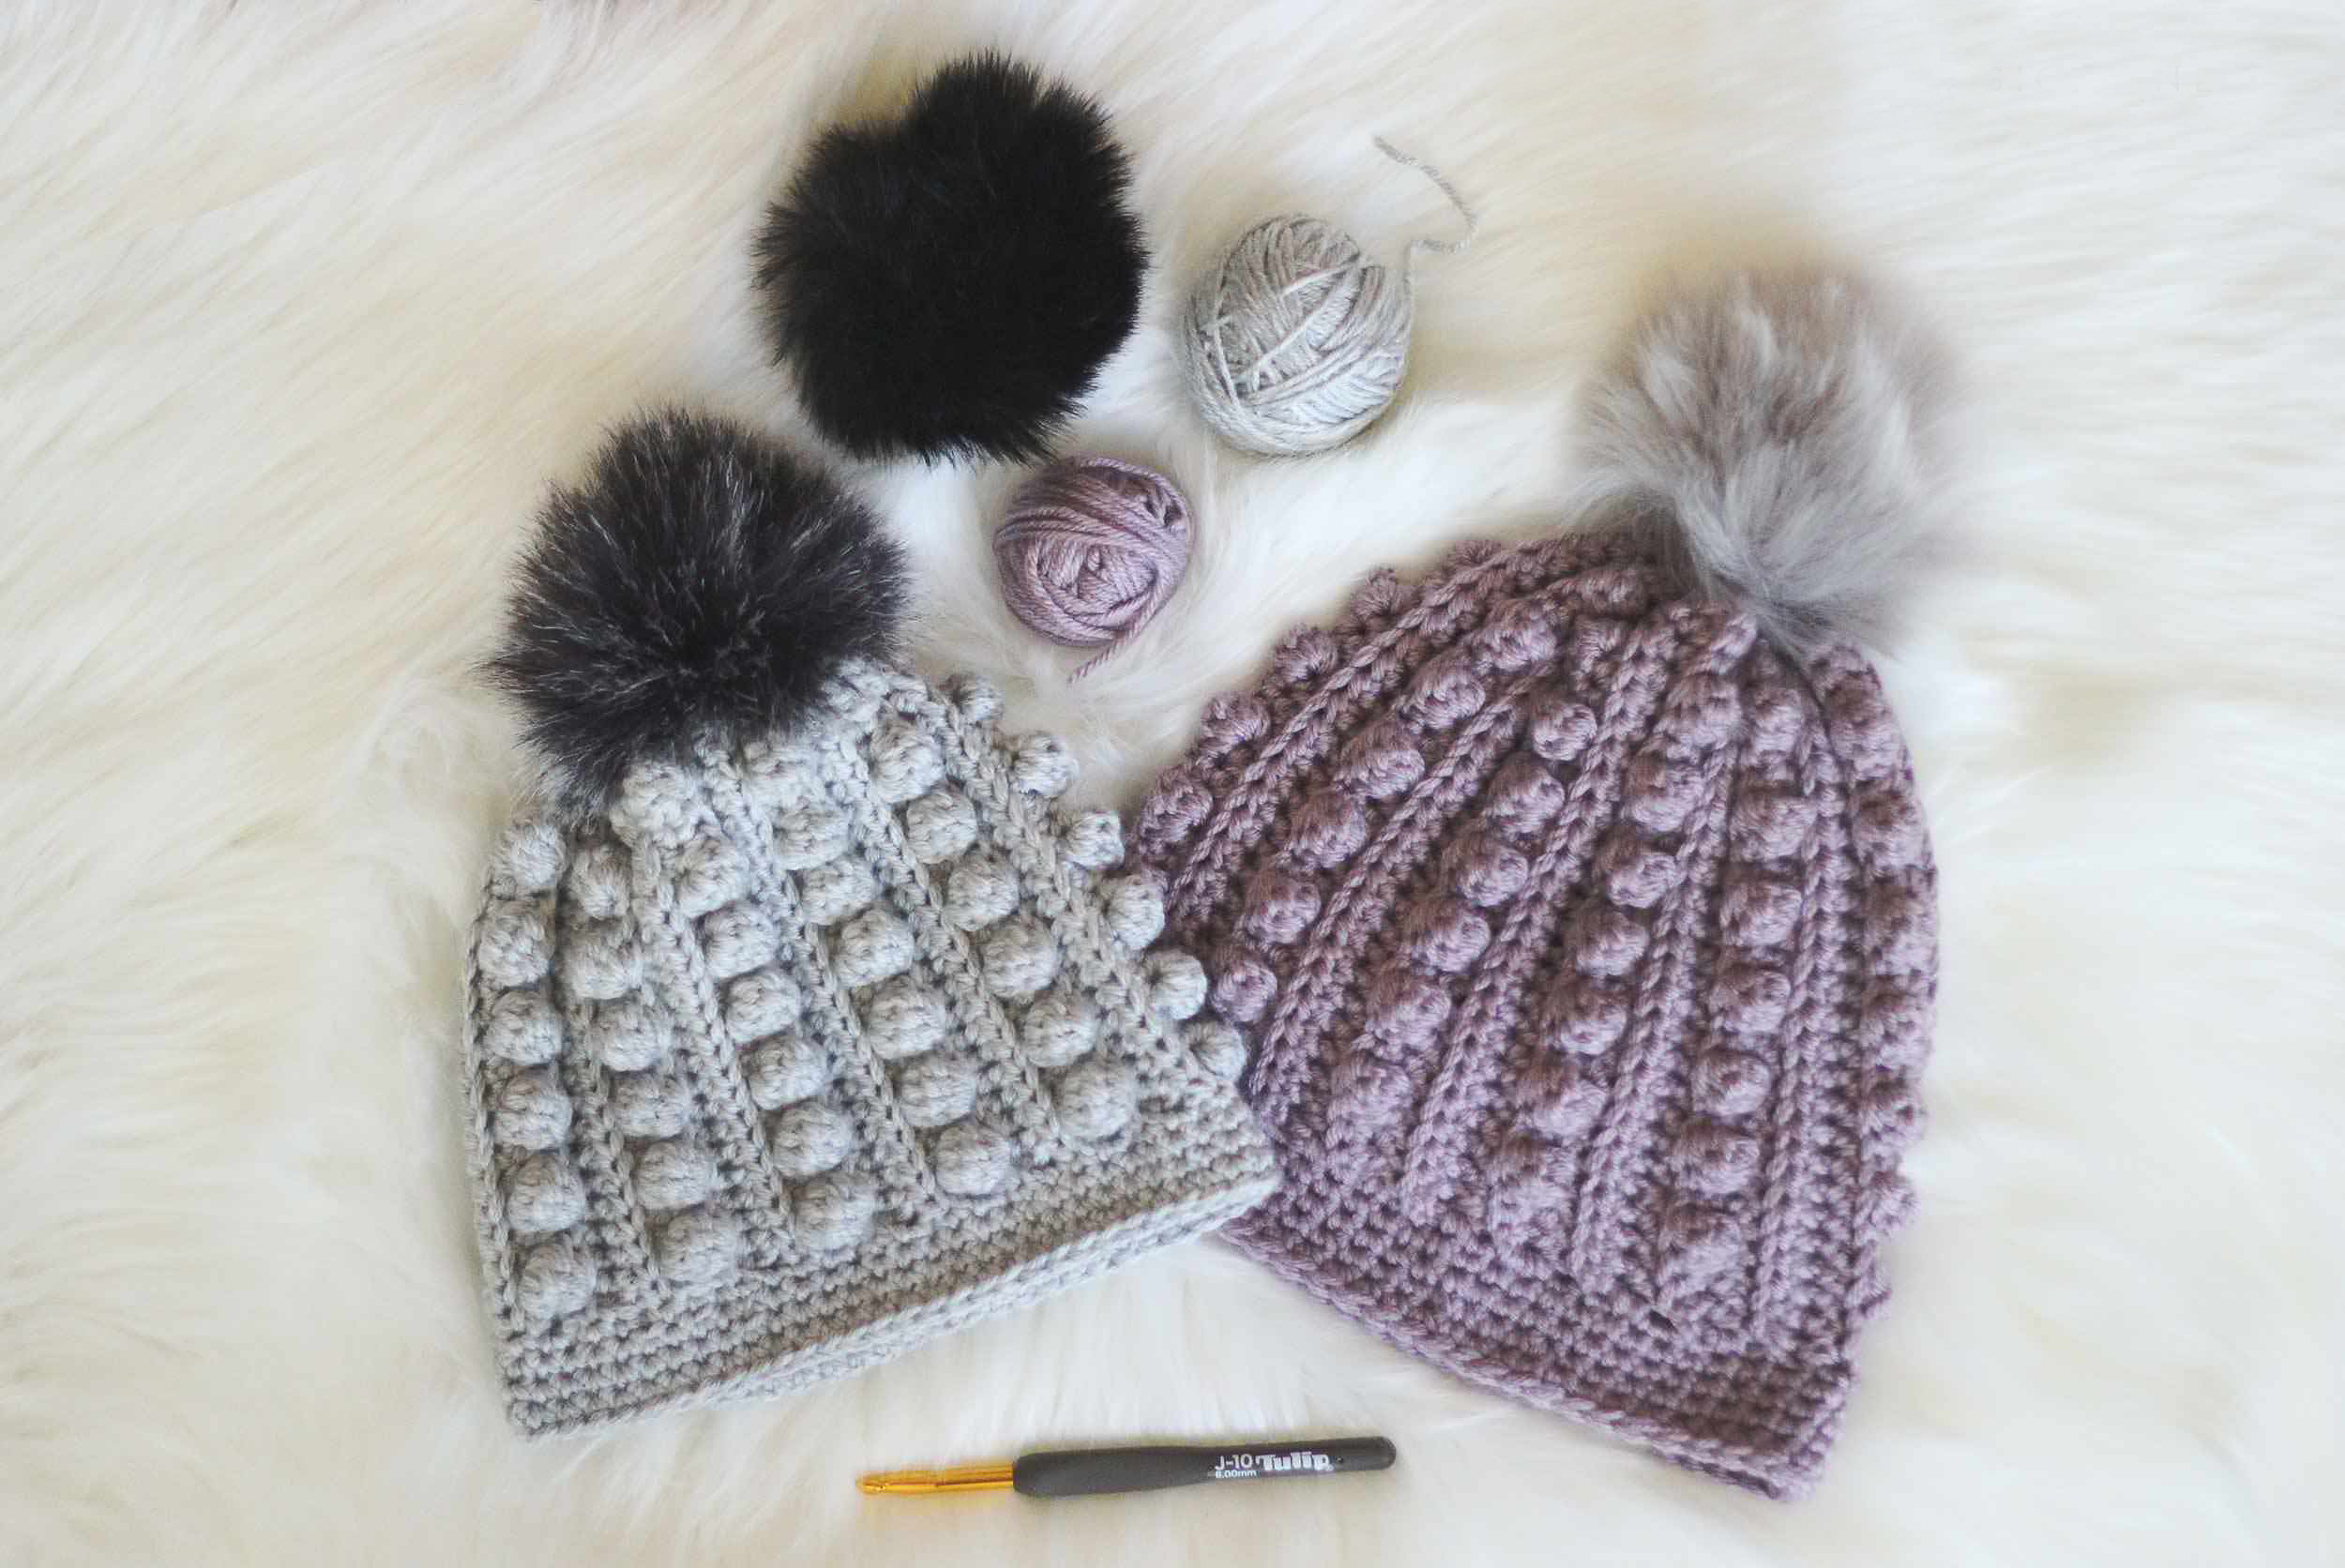
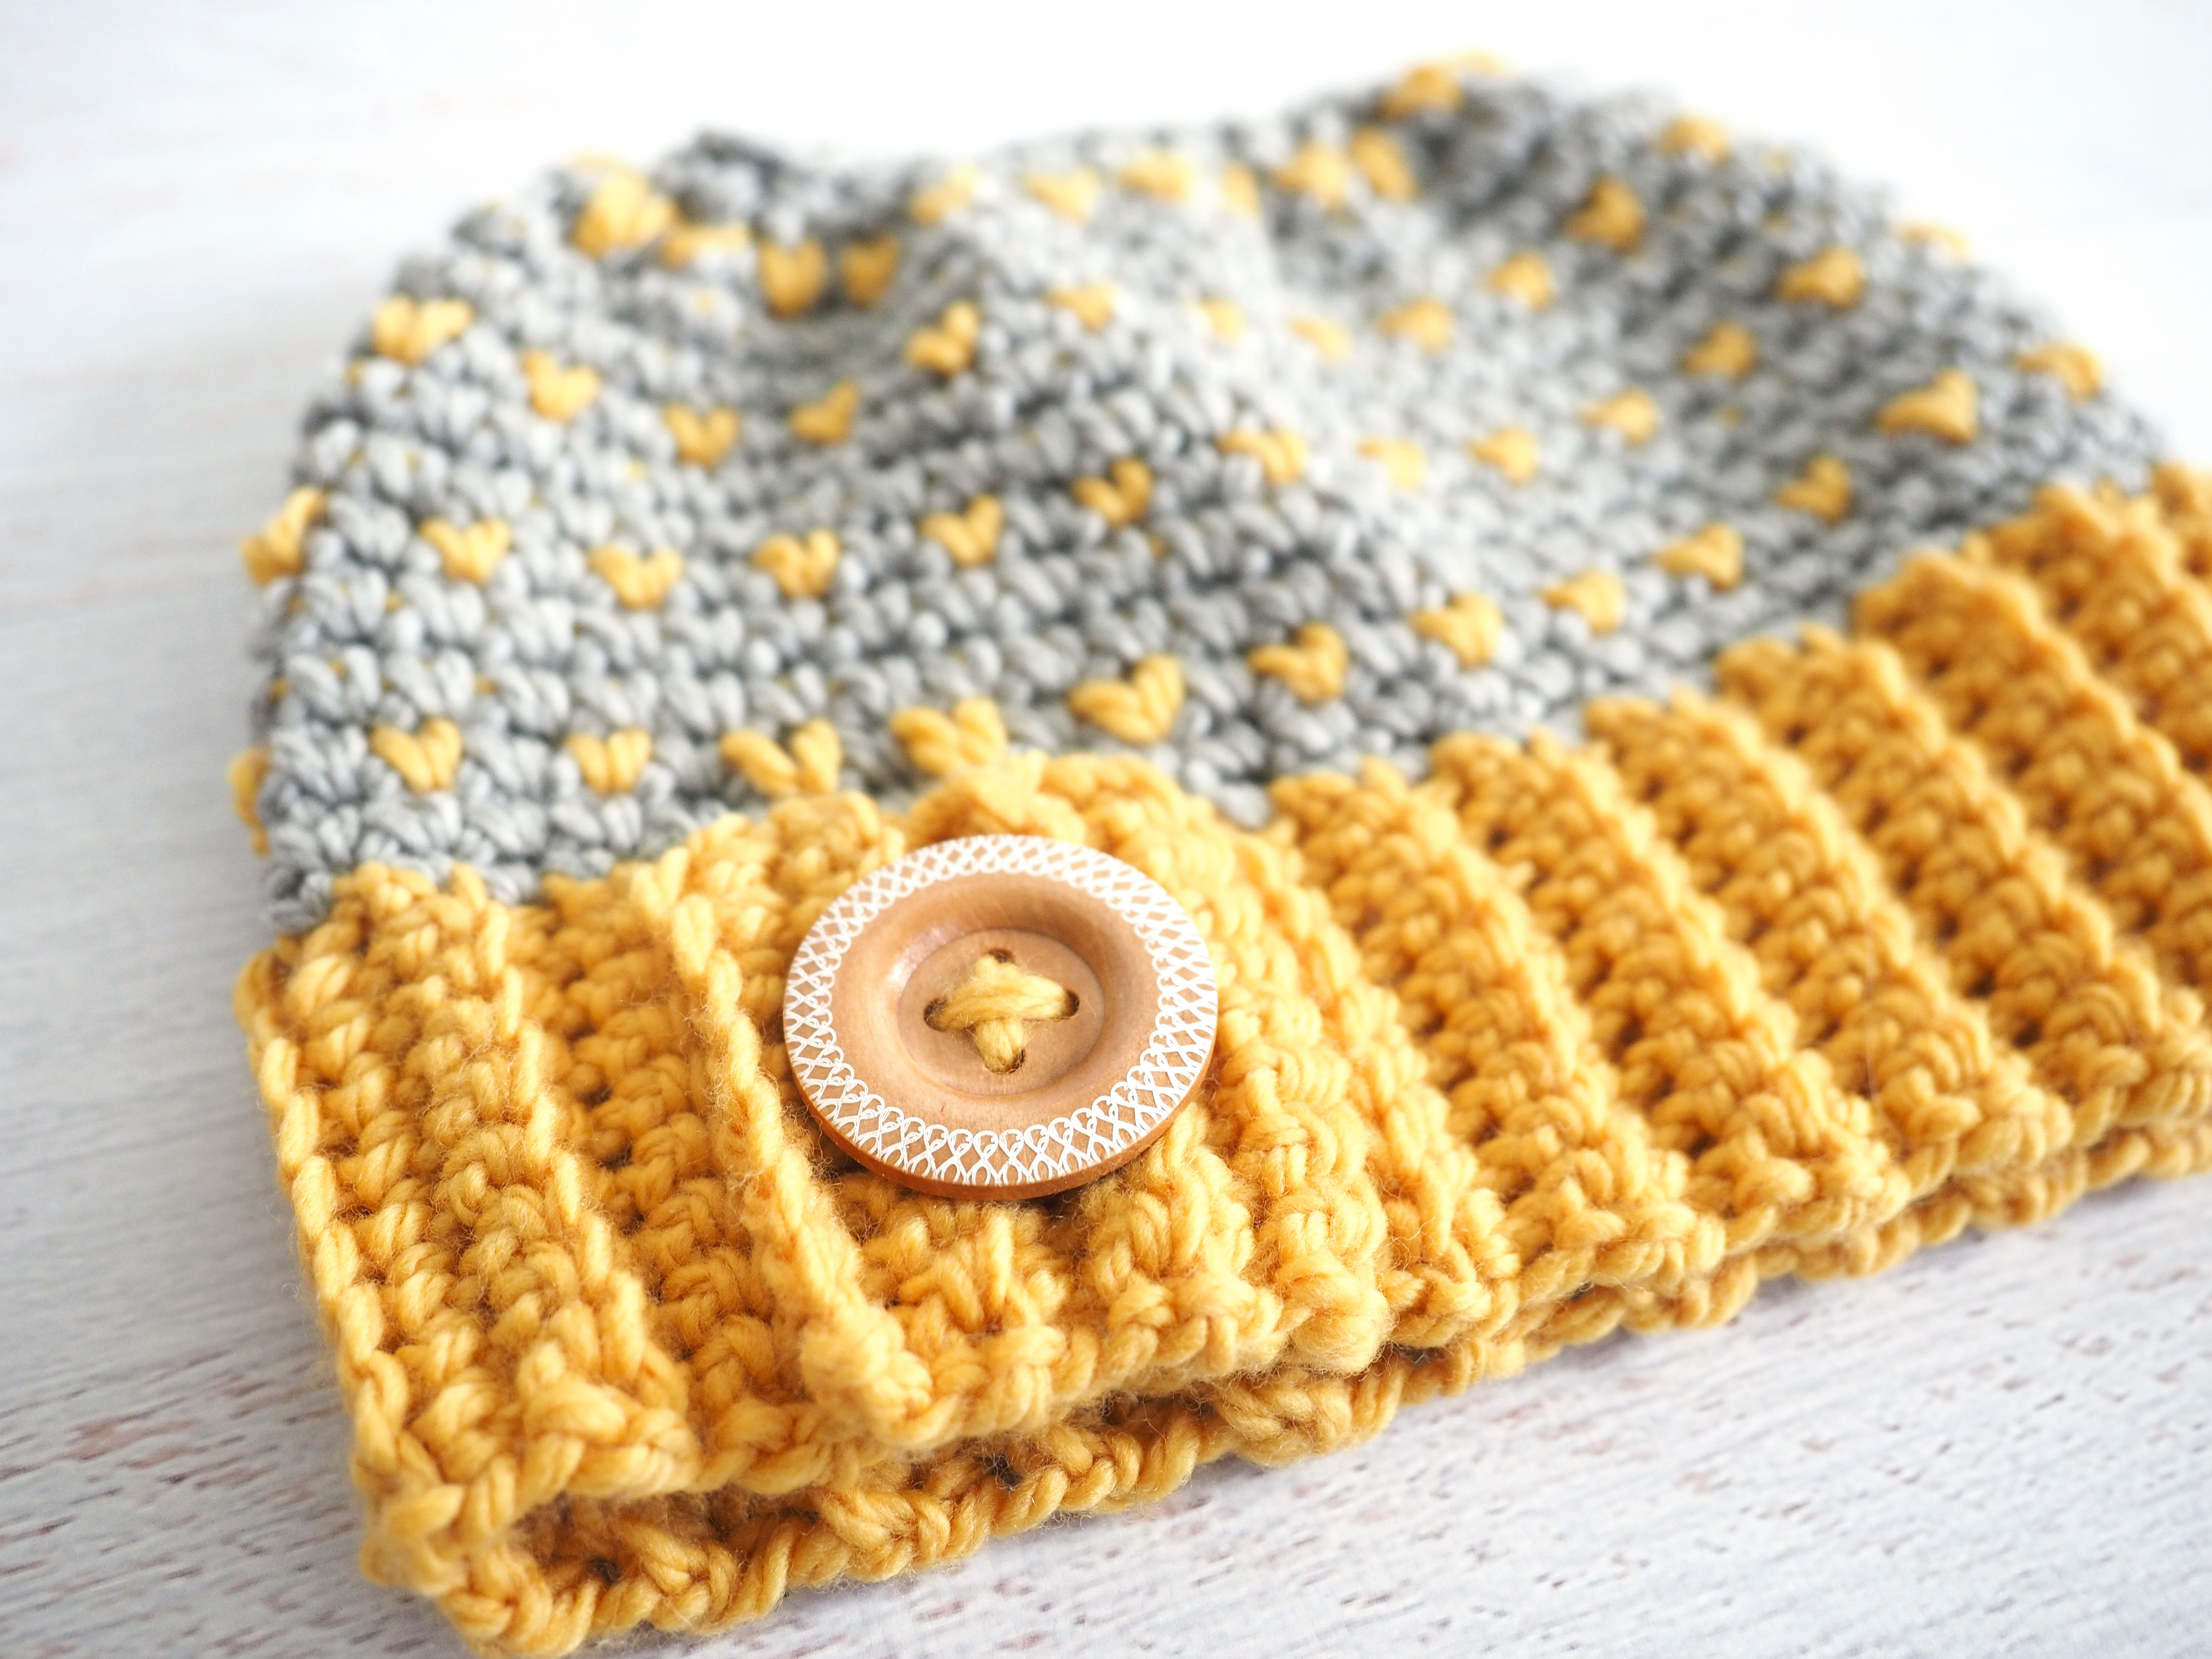
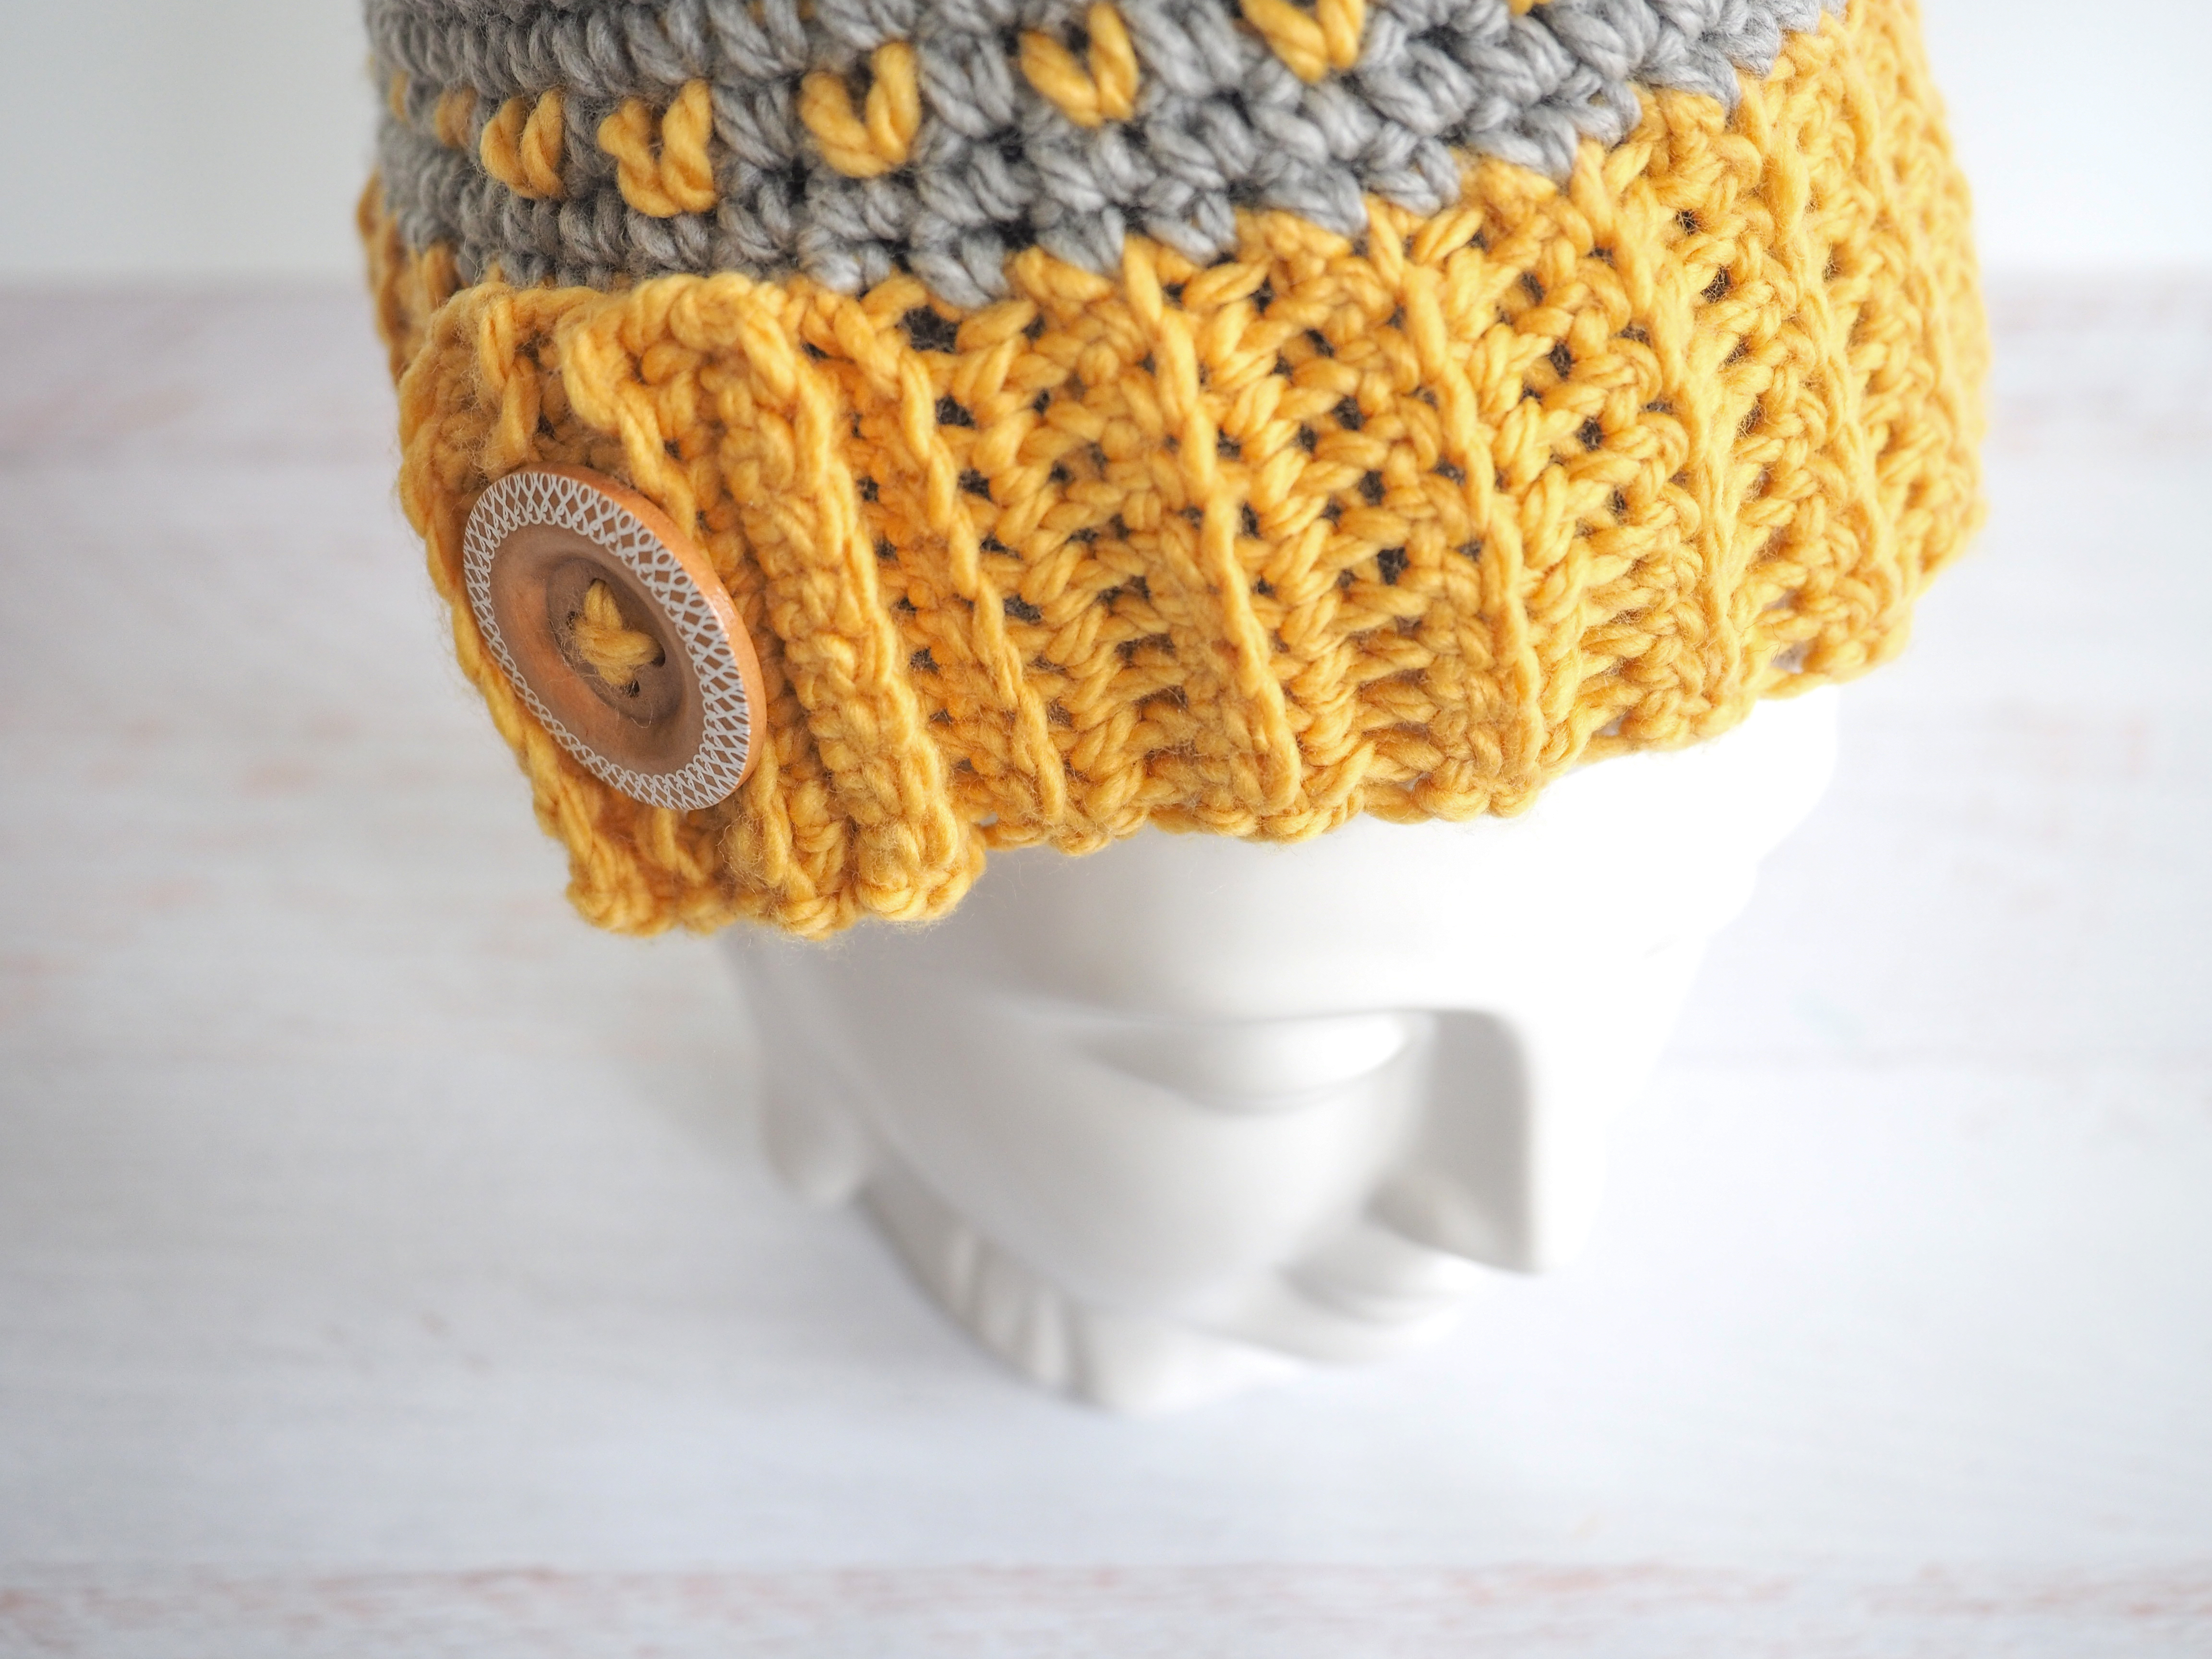
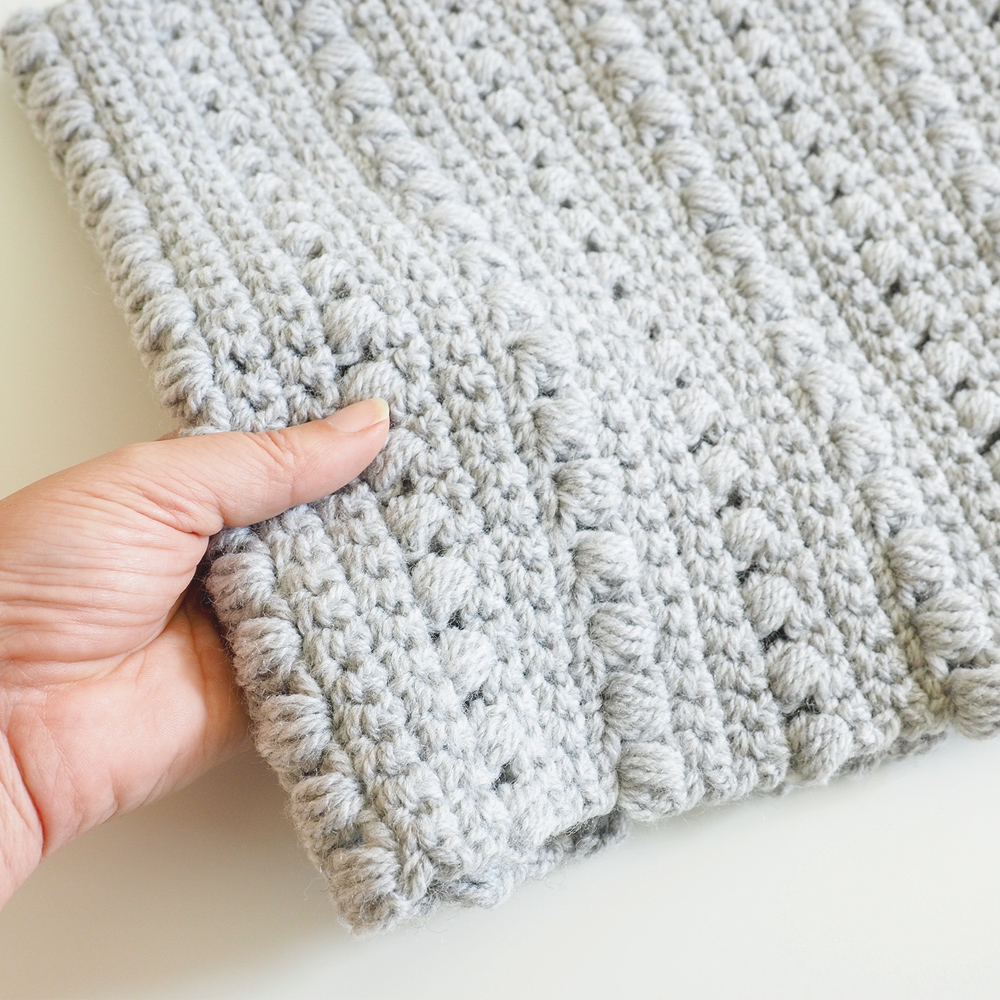
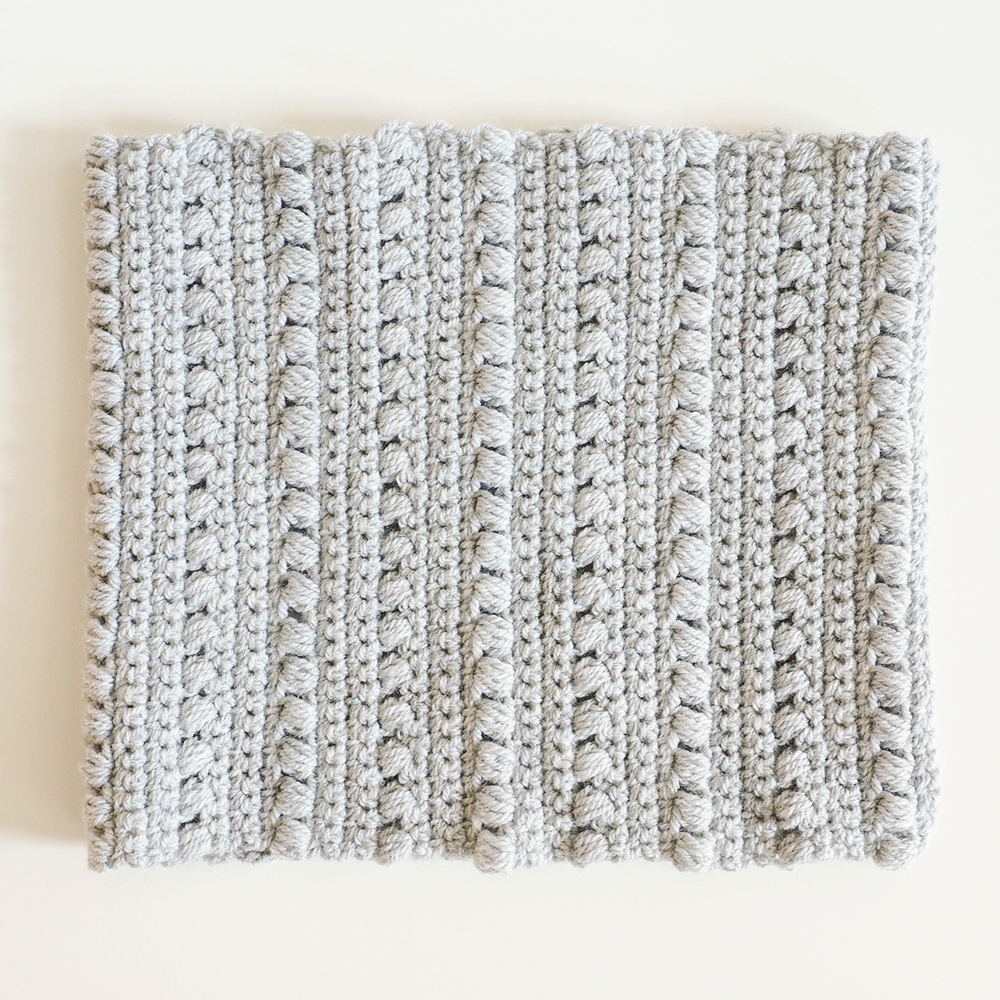
The best part about this cowl is the decorative puff stitch. It’s easy to get the hang of and looks beautiful whenever it’s used. It’s made out of plymouth encore yarn that’s an acrylic wool blend. It’s durable and soft making it perfect for this plushy cowl.
It’s simple and fun, and perfect for cold weather.
Skill Level: Easy
Materials:
Hook(s) size: 5.5mm
Yarn weight: Worsted
Preferred type of yarn: Acrylic/wool blend
Suggested yarn: Plymouth Encore; Color: 6007 Light grey heather
Yarn Yardage: 280 yds (4.9 oz)
Tools – scissors, tapestry needle
Approx. finished dimensions: Width: 14” Height: 11”
Gauge: 4” = 6 bobble sts
Special notes:
-
- Fdsc – Foundation single crochet, ch – chain, sc – single crochet, st(s) – stitches, yoh – yarn over hook
-
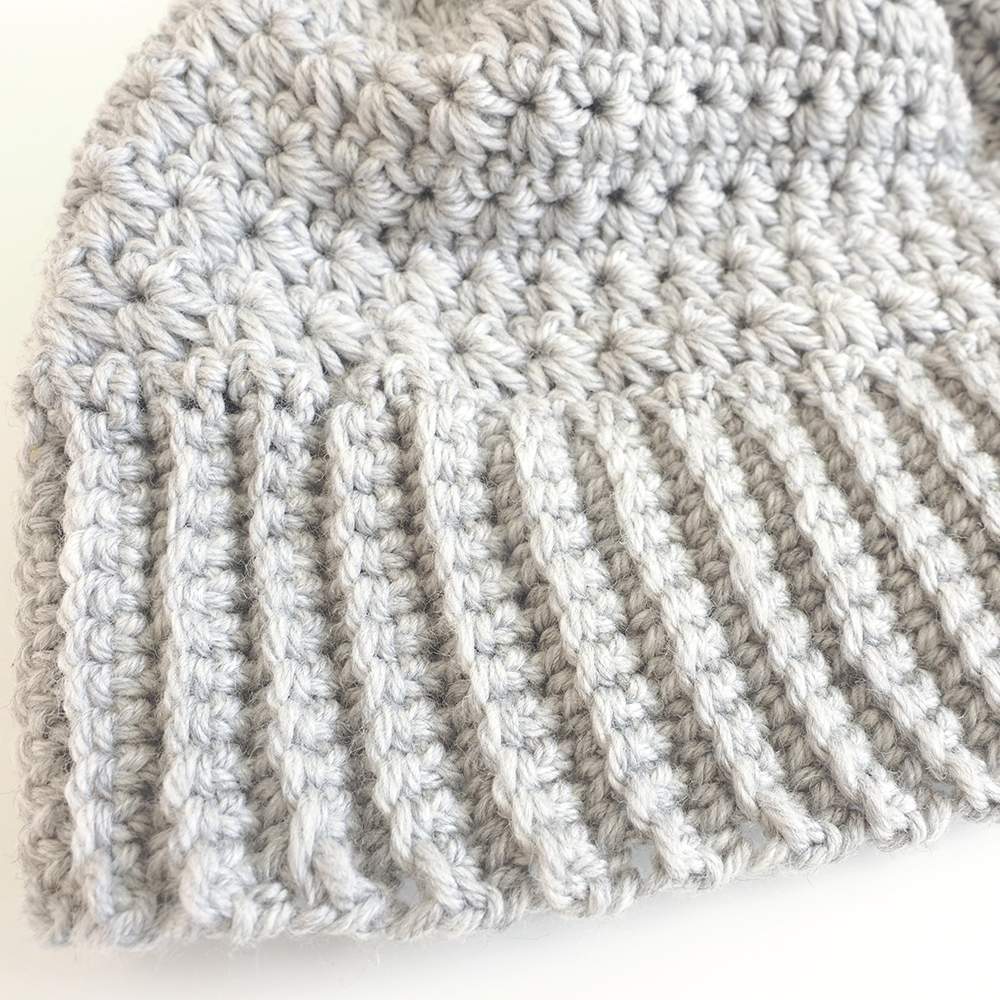
- Puff stitch – *Yoh, insert into st, pull up a loop* repeat 3 times. You will now have 9 loops on your hook, yoh and pull through all 9 loops.
- Ch 1 does not count as a st
The pattern
Row 1: Fdsc 35, sc into the second ch from the hook and into each ch across
Row 2-4: Ch 1, turn. Sc into each st. – 34 sts
Row 5: Ch 1, turn. Puff st into first st, ch 1, skip 1 st. *Puff st into next st, ch 1, skip 1; repeat from* across. Puff st into the last st. 18 puff sts
Repeat rows 1-5, 18 times.
Cut yarn leaving a long tail. Fold project in half and whip st together.
The Warm Winter Cowl is a fast project that will look great with everything. It’s perfect to take on the go, and the pattern even walks you through a unique decorative stitch. Make one for your loved ones or keep it all for yourself. Whatever you do, it’s sure to become a classic.