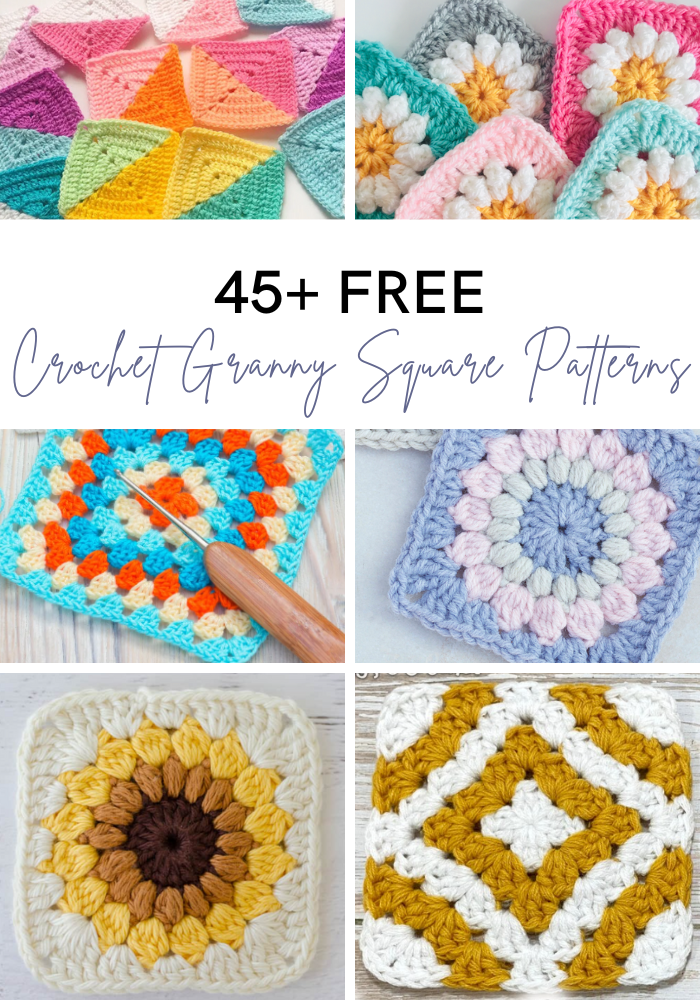
Introduction to Crochet Granny Square Patterns
Welcome to our collection of free crochet granny square patterns. The granny square is an iconic crocheting pattern that has been around for generations.
Crochet granny square patterns are an excellent choice for beginner and experienced crocheters alike. This type of crochet pattern is easy to learn and simple to master. Granny squares are also a perfect way to use up your yarn scraps.
There are thousands of patterns for granny square projects, but these granny square patterns will get you started on some new designs that you may not have seen before. We’ve prepared a collection of our favorite free granny square patterns for you below.
Looking for some fun stitches to add to your next granny square project? I have you covered with my collection of 45 Crochet Stitches! And you can access FREE now for the next 2 days! Register now.
What is a Granny Square?
Whether you are an advanced or a beginner crocheter, most likely you've already encountered or made a granny square.
Traditionally, a granny square is a combination of three double crochets (DC) all worked in the same stitch. They’re usually worked from the center out with stitches strategically placed to make a square.
Nowadays, the granny square has already expanded into different kinds of designs and shapes. Yes, there are various ways to crochet granny squares. And do you know what's interesting about it? Granny squares are not all “squares.” There are granny squares that are circles, rectangles, hexagons, and more.
Speaking of crocheting with hexagons. I have a course that teaches you exactly how you can crochet anything with hexagons! That's right! I show you how to put together a bunch of cute animal toys with hexagons to get down the basics and then you can continue your new skills with additional patterns like blankets, cardigans and totes. Register to gain your 2 day free access here.
What is the History of Granny Square?
According to the book The Woman’s Day Book of Granny Squares, “granny squares are one of the most traditional and American forms of crochet.” This form was so popular in America in the early 1900s that European crafters called the pattern “American crochet.”
During those times, yarns were not as easy to get and as inexpensive as they are today. They were very precious and expensive. So to save those yarn scraps, Americans made use of those scraps to make something beautiful. These Afghan blankets and home decor projects were known as the “ultimate yarn stash saver.”
Have you ever wondered why granny squares are called “granny” squares? This question also popped into my mind when I started crocheting. I always thought that maybe it was called that way because an old woman “granny” designed the pattern. I’m pretty sure that’s what you thought as well. Am I right?
Crocheting was not as popular among younger people in the past compared to today. So it was said that an older woman designed the pattern. It’s also said that the pattern got its name because older people were mostly the ones making the designs, and they were so easy even grannies could make them.
Why Are Granny Squares Popular with Crocheters?
It was never a secret that “granny square” is one of the most popular patterns used in different kinds of crochet projects. It’s easy, versatile, portable, and cost-effective. It can also be used in an endless number of project categories.
Granny squares have been around for more than a hundred years and have continued to evolve in terms of style, shape, and color. They give each crocheter a way to express themselves and use every scrap of leftover yarn along the way.
One of the things that I like about these squares is that I can bring them anywhere without having the entire project shoved into my bag. I can just bring a few yarns with me and make a few squares in the coffee shop while having my morning coffee or during my lunch break at the park. It’s so relaxing and meditative.
Above all things, granny squares are very cost-effective because of their reputation as stash/scrap busters. Most of us have a box or bag at the back of our yarn collection full of yarn scraps, right?
We don’t just want to throw those away as they cost us dollars too. This is where these squares make a grand entrance. With all those scraps laying around, you can make granny square afghans, coasters, or dishcloths pattern.
What Types of Crochet Projects Can I Use Granny Squares for?
Alright, now that you already have an idea about the history of granny squares, let’s take a look at some of the most popular, cute, and fun projects that you can do with these squares.
Granny Crochet Cardigans
We have to bring this first thing on the list – a granny crochet cardigan. While granny cardigans are perennially popular, they’re especially trendy right now. A line of granny squares on the back can give your cardigan sweater a unique look, or make the entire back – or the entire sweater – out of grannies for a colorful, boho look.
Granny Square Crochet Hat or Beanie
There are many variations of crochet hats/beanies out there, but it’s always been a granny square crochet hat that’s my favorite. I love the boho chic look that it creates. You can make a hat out of just two squares so it’s a really fast project, too.
Granny Square Scarf
Get creative with the different color combinations for your scarves. Just stitch together about fifteen 4×4 granny squares, and you’ll have an instant scarf for the winter season. And don’t forget to add some fringe on both ends.
Granny Square Blanket
Ane of course there’s the most popular project for using granny squares: afghans. Granny afghans are the first thing that will get into your mind when it comes to these squares. Just a bunch of granny squares with different sizes, colors, or even designs, put together, is a classic that always looks beautiful.
Granny Placemats, Potholders, Coasters
Granny squares are an easy way to liven up your kitchen and dining room. Two squares joined together can make a placemat, or sew them in a stack to make a potholder. Smaller squares (or grannies of other shapes) can be used as coasters and make a quick, colorful gift.
Granny Square Mosaic (Pixel Art)
This is a more creative and challenging kind of crochet stitches. Mosaics are made with a bunch of small granny squares sewn together to form a picture or an image. This is a pretty cool art to make and a fun challenge to design.
Granny Square Tops and Dresses
As a crocheter, I love to wear my creations. One best way to do that is to wear it as a top/dress. Granny squares are very stylish and very fun to wear. These styles are often easy to stitch because they are just squares with no shaping, or you can make smaller squares or half squares where you need less fabric.
Granny Square Tote Bags
Granny tote bags are so cute! You’ll love to use them at the beach, mall, or at market. They are timeless, fashionable, and most important of all can go with anything you wear.
Once you start making some simple granny square crochet patterns, you’re sure to come up with many more ways to use them!
Supplies Needed to Crochet a Granny Square
Choosing the Perfect Yarn to Crochet a Granny Square
What makes it fun when it comes to making a granny square is that you can use whatever yarn you desire. The lighter the yarn weight the smaller your squares will be, while a heavier yarn will make bigger squares.
Always keep in mind that the end project should always be taken into consideration when choosing your yarn. If you’re planning a cardigan for the summer then you’ll want to use lightweight yarn, for example. Granny square potholders or coasters should be made of cotton to withstand heat or soak up sweat from your glass.
Do you still need help choosing the best yarn for your project? Here are a few of our favorites in different weight categories.
1. Superfine/Fingering
2. Fine
3. Light/DK
4. Medium/Worsted
5. Bulky
6. Super Bulky
Crochet Hook for Crocheting a Granny Square
If you are working from a free crochet granny square pattern, the correct hook size to use will be indicated in the pattern.
If you are making your design or just practicing with the yarn you have, the yarn label should tell you the suggested hook size. If you’re using scraps and don’t have the label but you know what weight the yarn is you can estimate based on the standard yarn weights. For instance, if you know you have worsted weight yarn you’d probably want to use a hook in the 5.5-6.5mm range.
Notions and Tools Needed to Crochet a Granny Square
As with any other project, these essential crochet tools are also needed to make crochet granny squares.
- A tapestry needle is necessary to weave the yarn tails upon finishing your work and to sew squares to each other.
- A few stitch markers come in very handy when it comes to marking the start of each round.
- A good sharp pair of scissors is essential for cutting your yarn.
- A tape measure will help you make sure your squares are a consistent size.
Blocking Tools
Blocking is a process of relaxing the fibers after crocheting that allows you to shape a project to the desired size. Even with the same kind of yarn, pattern, stitches, and hook size, there will be a slight deviation in your tension such that your squares might come out in slightly different sizes.
To ensure all your granny squares have an even size and that it stays the shape that you want, using a blocking board is extremely useful. You’ll also need to have blocking pins to affix your squares in place.
We’ll talk more about exactly how to block granny squares below.
How to Crochet a Classic Granny Square
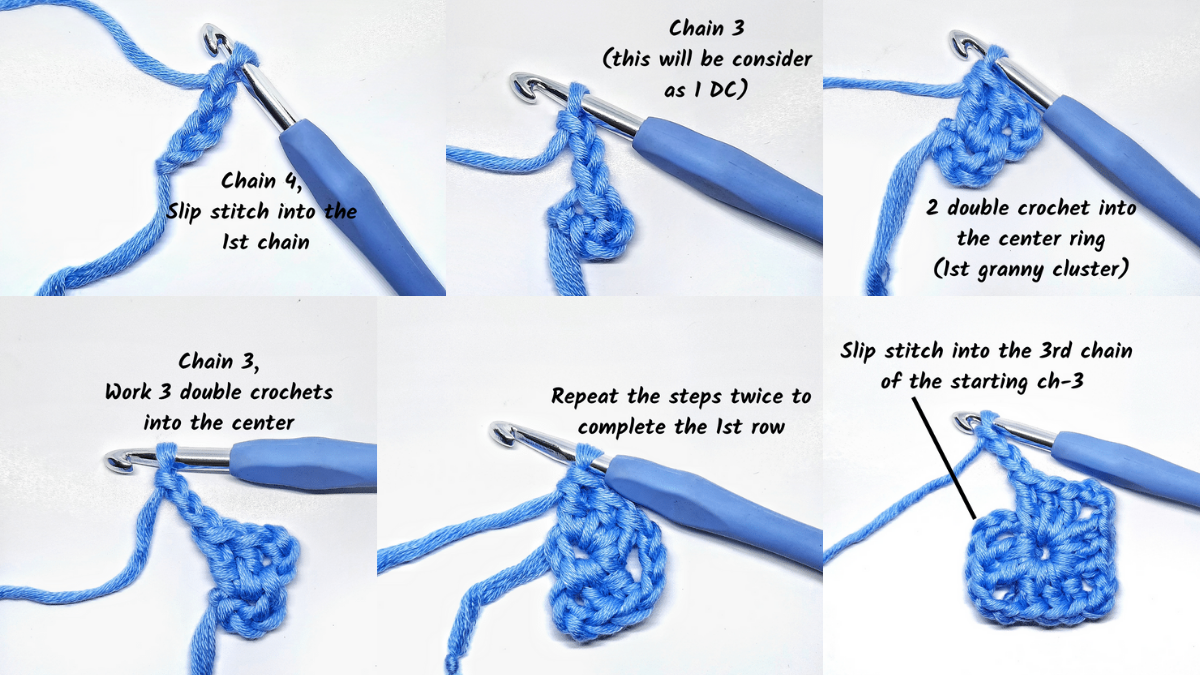
Now that you have an idea of what a granny square is and the tools needed to make one. Let’s learn how to make the classic granny square. For this demonstration, we are using a chain made into a circle as the center of the square.
Foundation Ring
Chain 4. Insert the hook into the first chain you made and make a slip stitch to join the chain to make a circle.
Round 1
Ch 3. This will count as a double crochet throughout.
Work 2 dc into the center of the circle. This set of 3 stitches is your first granny cluster.
Ch 3. This will be the corner space. Work 3 dc into the center ring. Repeat twice more.
Sl st into the third chain of the starting ch 3. Now you have a tiny square!
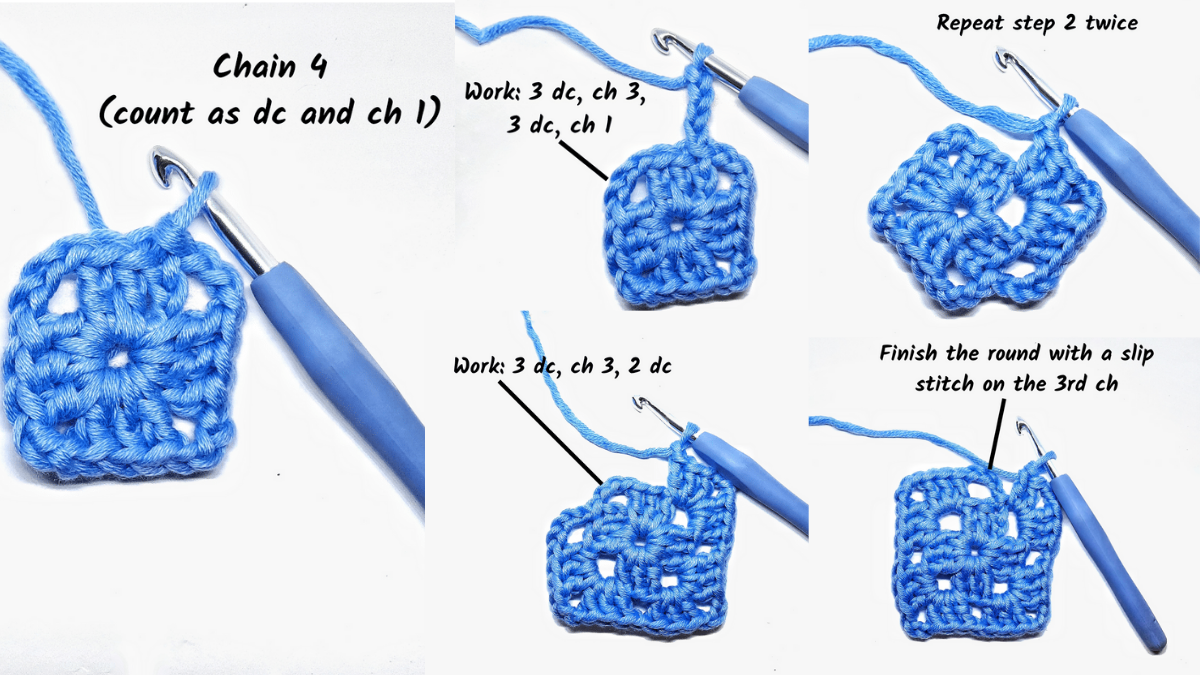
Round 2
Chain 4. This will count as a dc and ch 1.
In the corner space, work 3 dc, ch 3, 3 dc, ch 1. Repeat this twice.
Work 3 dc, ch 3, and 2 dc into the last corner space. Sl st into the third ch of the beginning chain stitches.
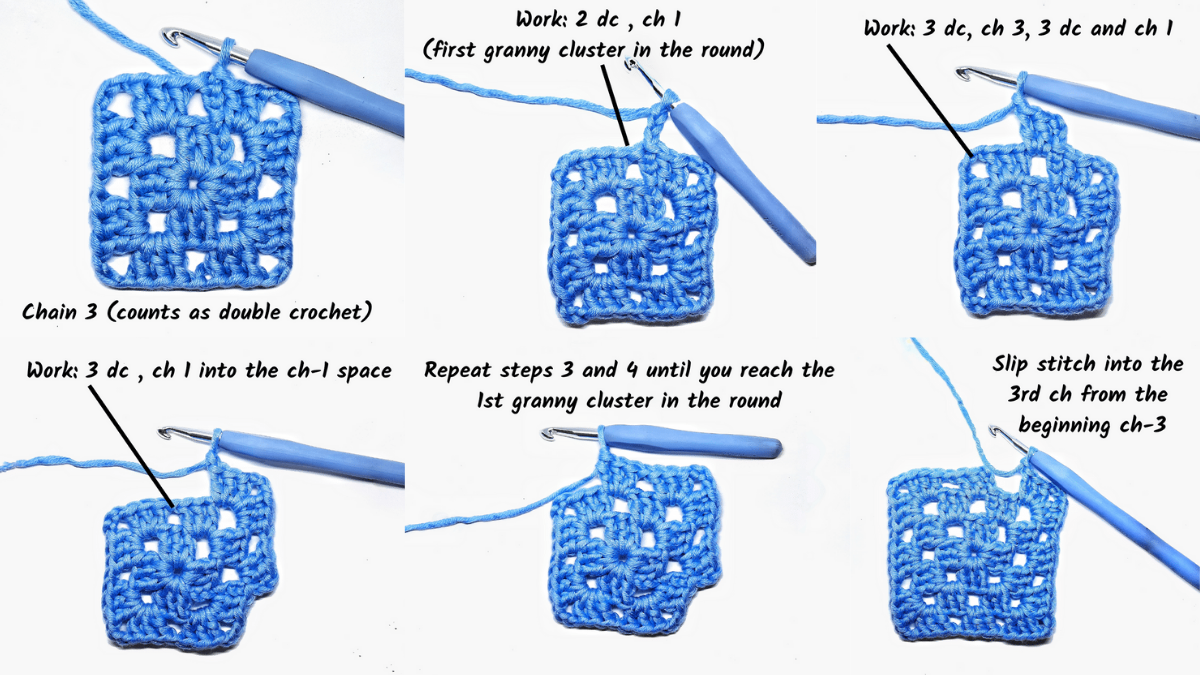
Round 3
Chain 3. This counts as a dc.
Work 2 dc into the ch-1 space of the previous round, then ch 1. This will be the first granny cluster in the round.
Into the corner space, work 3 dc, ch 3, 3 dc, ch 1. Into the next ch 1 space, work 3 dc, ch 1. Repeat these moves until you reach the first granny cluster in the row.
Sl st into the 3 ch from the beginning ch 3.
Round 4
Ch 4. This counts as 1 dc and ch 1.
Into the ch 1 space, work 3 dc, ch1. Into the next ch 3 corner space, work 3 dc, ch 3, 3 dc, ch 1.
Repeat around until you reach the last corner space. Into the last ch 1 space, work 2 dc.
Finish the round with a sl st in the third ch from the beginning ch 4.
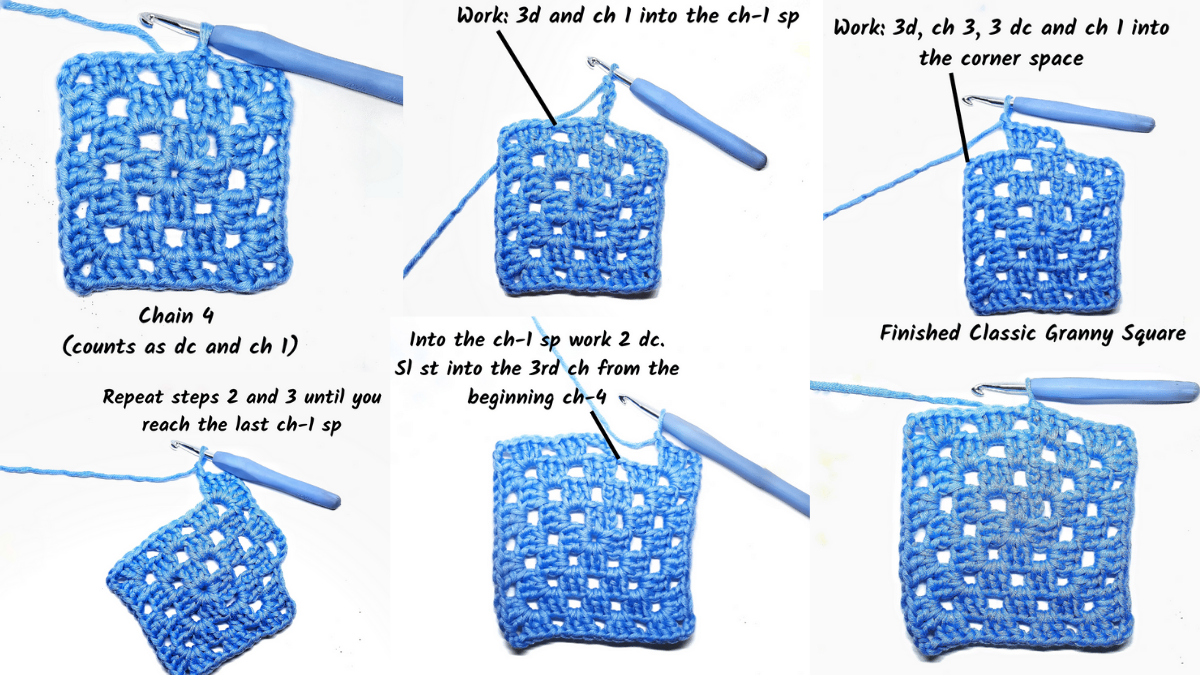
You can continue working in this manner to make a square as big as you like. You can even make whole afghans that are just one square worked in this exact method.
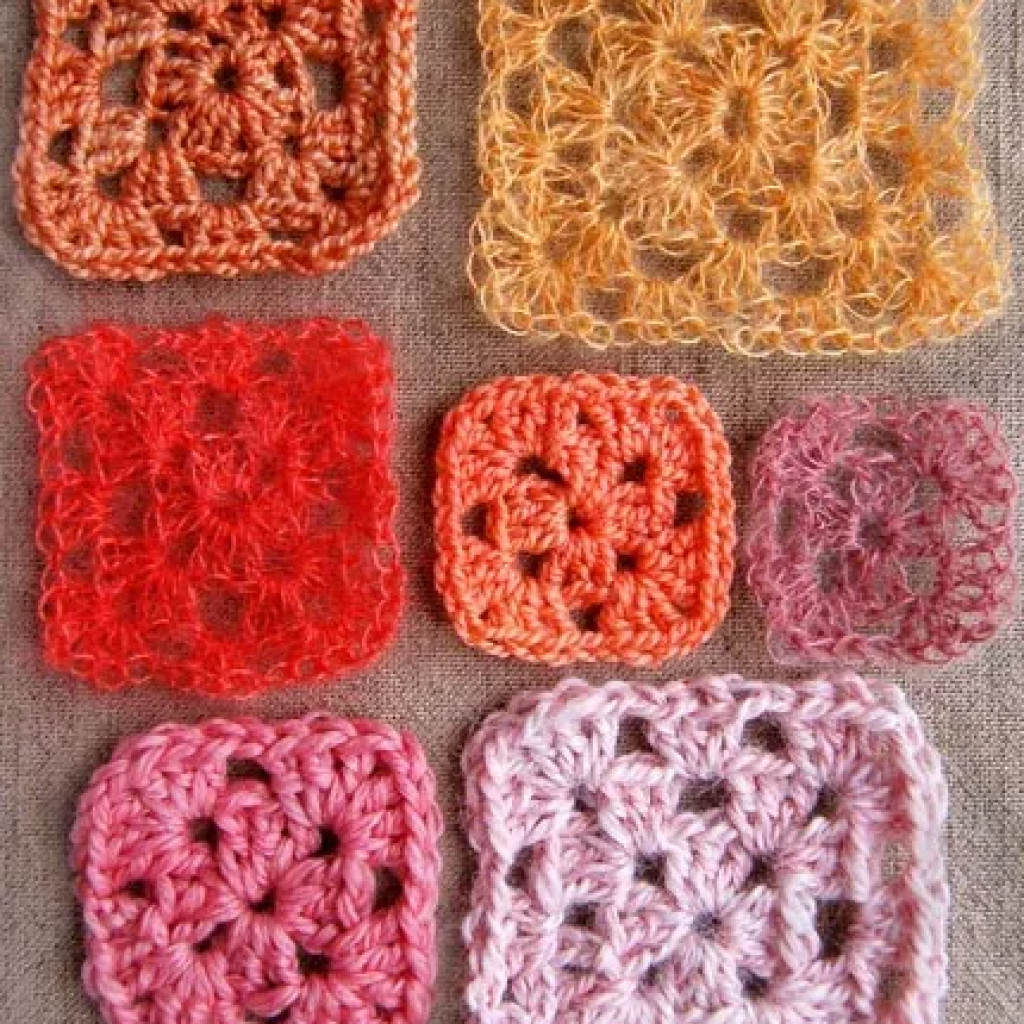
Common Variations of the Traditional Granny Square
Countless granny square patterns have been developed over the years and no doubt are still being made. Here are a few of the most common traditional granny square variations.
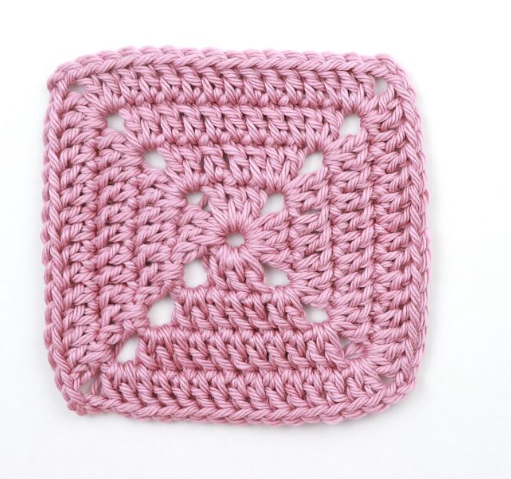
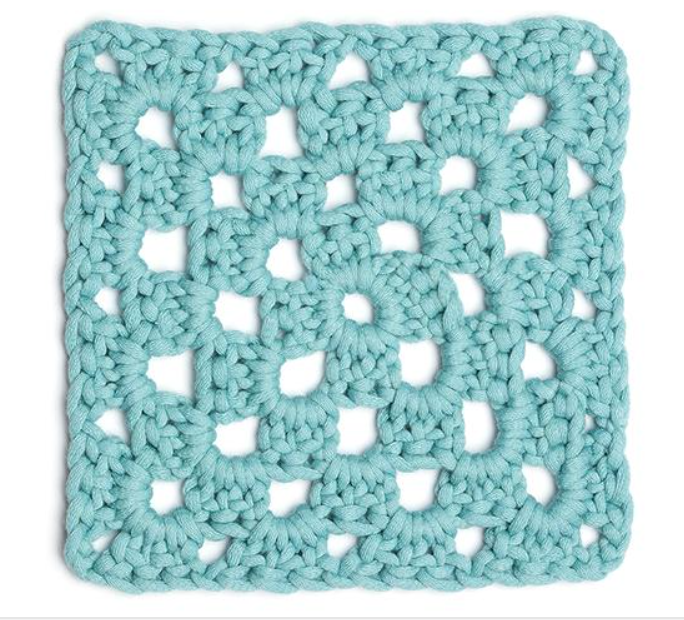
Solid Granny Square
This solid granny square is one of the most basic granny square patterns out there. This is made with double crochets that form a solid square with corner spaces. It’s not completely solid because there are still chains at the corners.
Check out this video tutorial from Sirin’s Crochet to see how it’s done.
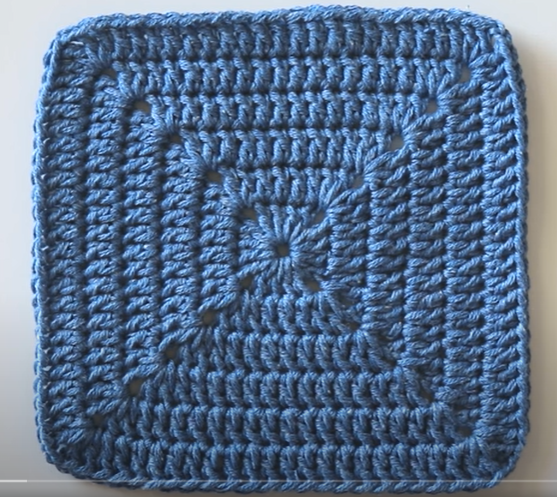
Solid Granny Square with No Gaps
This variation on the solid granny uses double crochets in the corners instead of chains for a truly solid granny square with no gaps. Raffamusa Designs has a great tutorial on this one.
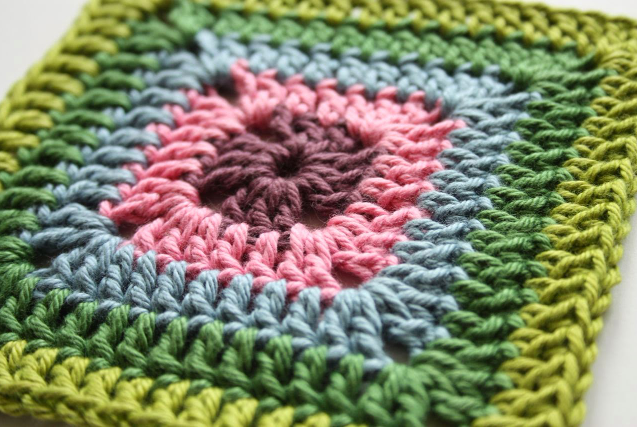
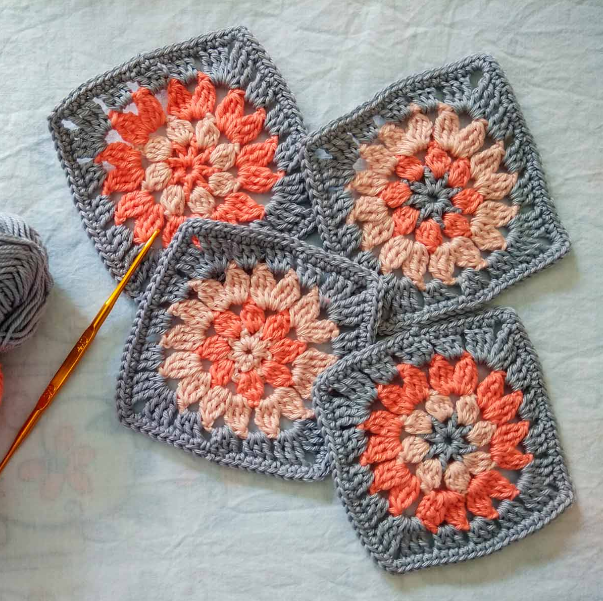
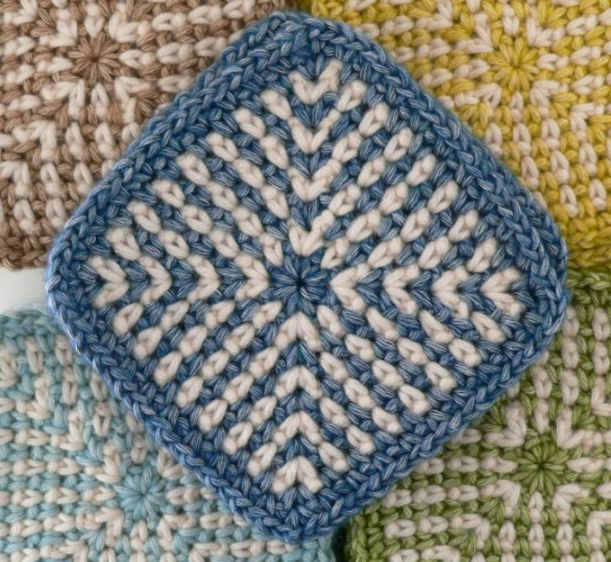
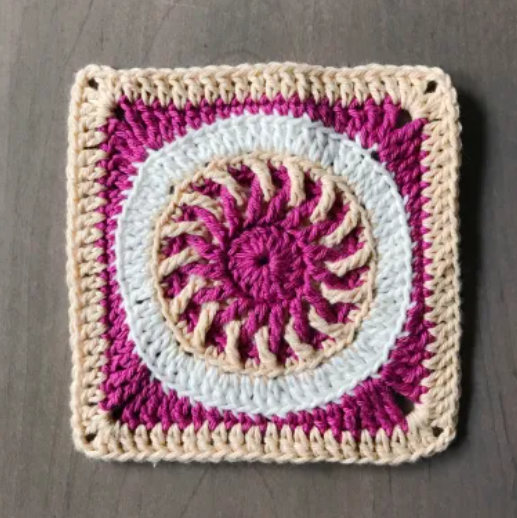
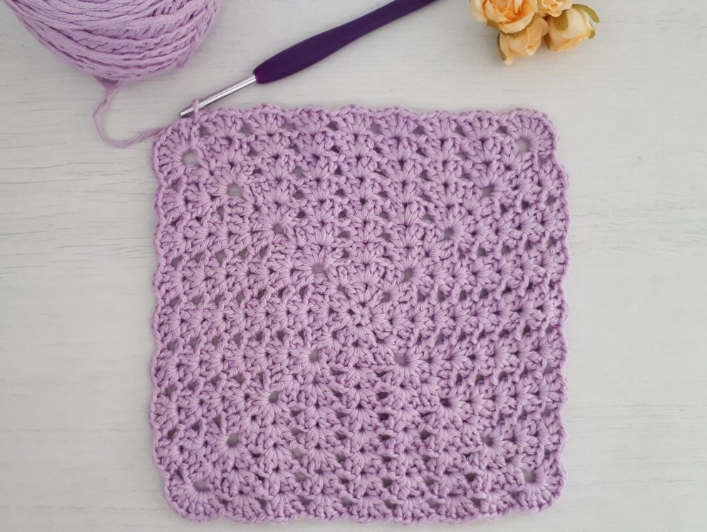
Sunburst Granny Square
This granny square variation is my personal favorite. The sunburst granny square creates a flower-like design in the center, usually a sunflower like this one from Sarah Maker, which makes it different from other grannies.
Hexagon Granny Square
The hexagon granny square is a modern classic version of the traditional granny because of its hexagon shape. As the name suggests, it has 6 sides and 6 corners. Learn how from Make & Do Crew.
Granny Square FAQs
What’s the Best Way to End Each Granny Square?
There are multiple easy ways to end a granny square. The most frequently used method is simply slip-stitching into the top of the starting chain of the previous row.
But if you do prefer a more seamless work, using an invisible join is the answer. To do it, you just need to cut the yarn and make sure it's long enough to weave the ends. Use a darning needle, and insert it under both loops of the first stitch of the completed row. Then, insert the needle into the middle of the last stitch.
And there you have the invisible join. Just effortless, right?
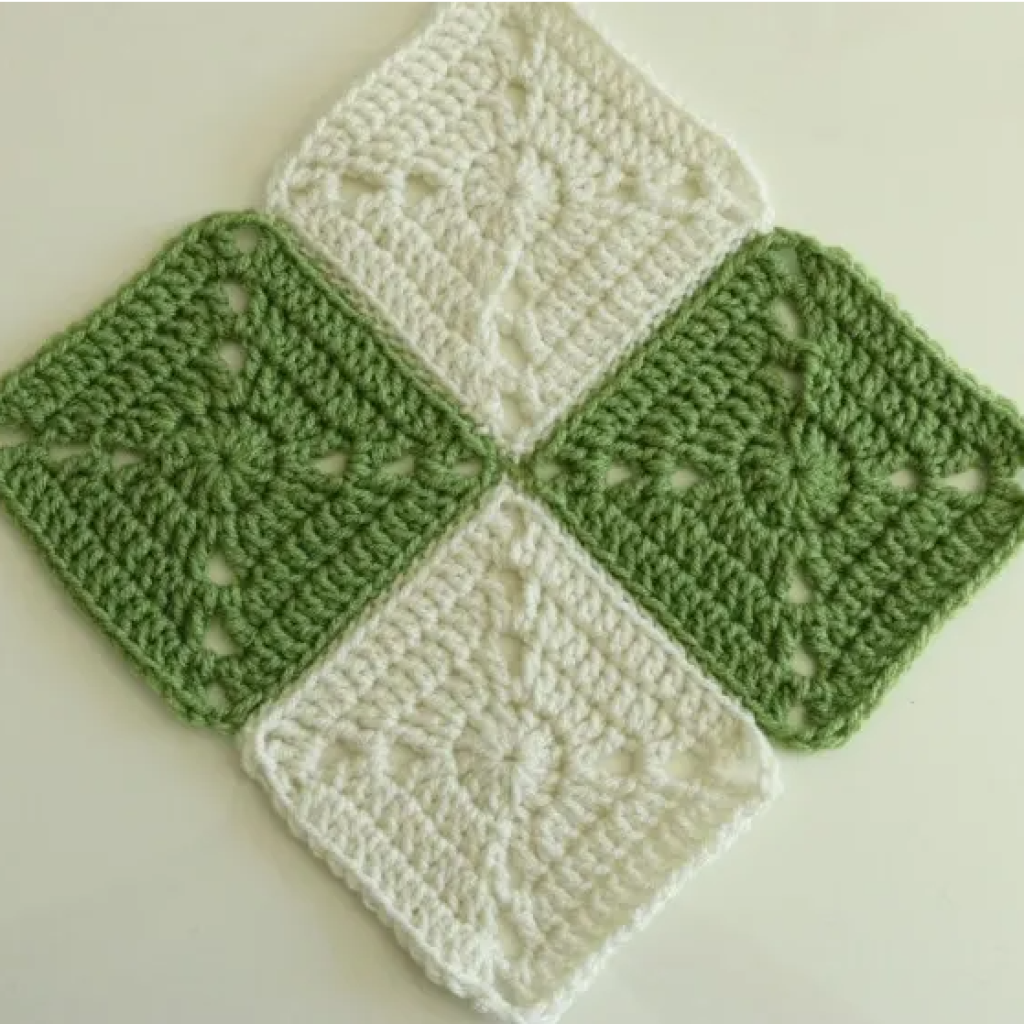
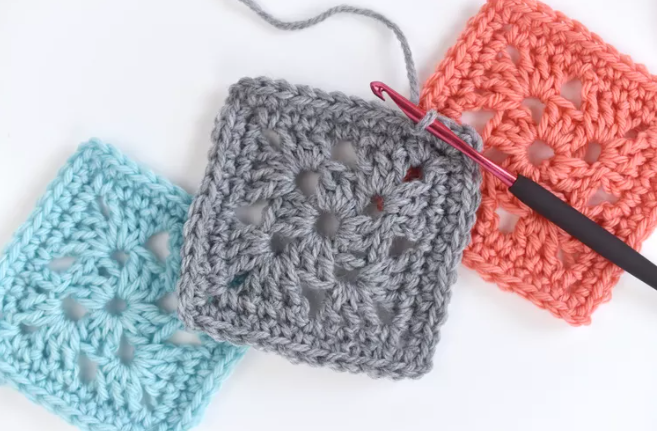
What are the Best Ways to Join Granny Squares Together?
Once you’ve done all your granny squares, joining them together to form your finished object is the next step.
There are numerous ways to join granny squares, but here are a few options that are easy and fast.
Single Crochet Join Method
This is probably the easiest joining method out there, and it uses single crochet. To execute this method, you need to put two squares wrong or back sides together. Next, insert your hook at the back loop of the first square and then do the same on the other square. Pull up a loop then do a single crochet. Repeat the steps til you have all squares stitched together.
Repeat Crafter Me has a tutorial if you need more instruction.
Flat Double Crochet Join Method
This method is somewhat similar to the single crochet join method, however, it uses double crochet instead. Compared to the previous join method, this technique has a flatter finish. Bella Coco has a great tutorial for this method.
Zip Join Method or Slip Stitch Join Method
Another join method that most crocheters use because of the nearly invisible finish. See A Crocheted Simplicity’s blog post tutorial to learn how to make this very easy join technique.
Invisible Seam Join Method (Sewing)
If you want a seamless join method, then you should try this invisible seam join method. This requires sewing, so if you are comfortable working with a tapestry needle in stitching together squares, you should go for this. Check out Wilmade for the tutorial.
Zig Zag Slip Join Method
This is a good technique for joining granny squares. Aside from its joining purpose, this method will also add texture to your project. Try and use this technique from Sunflower Cottage Crochet.
How Do I Block Granny Squares?
Blocking is a process of setting your crochet or knit project with water. Crochet blocking is important when you want to make your work have a more professional look. It’s important for granny squares if you want all of your squares to be the same size.
To block your granny squares you can either spray block, wet block, or steam block them. Spray blocking is spraying the squares with lukewarm water once they have been directly pinned on the blocking mat or blocking board.
Wet blocking, on the other hand, is a technique where the granny squares are submerged in water until they’re completely soaked with water. Press out as much water as you can, pin to the desired size and let dry.
The last blocking technique is steam blocking. First, pin the squares in place. Hold your steamer or steam iron a few inches above the squares then allow it to steam over the fibers, making sure not to completely drench the fibers. Then let them air dry.
How Do I Join a New Color When Making a Granny Square?
A monochromatic look is a good way to go when you're new to crochet. However, getting some dash of colors into your work shows a bit of charm and character.
Joining multiple colors into your granny square is easy. Start crocheting your first color yarn, then once you're ready to change colors, make a slip stitch over the starting chain from the previous row.
Tie a slip knot onto your hook with your second color. Insert the hook into the chain space where your first color ended. Pull up a loop then make a chain. Then continue the pattern from there.
What’s the Best Way To Keep Granny Square Edges Straight?
Keeping granny squares square is one of the problems crocheters encounter when it comes to making these shapes.
The easiest thing to do if your squares aren’t perfectly square is to block them as described above.
If you want to eliminate some of the irregularities in your squares, there are a few things you can try:
- Remove the chain 1 space or tighten up your chain stitches.
- When changing colors, start the next color on a different corner instead of working in rounds.
- Always turn the work whenever you start a new round instead of working in the same direction throughout.
How Do I Choose Colors For Granny Square Projects?
Choosing color combinations for your granny square project can be sometimes overwhelming. But that is not something that you need to stress about. Here are some tips and tricks to make your project cohesive.
First, limit your number of colors. If you are planning to create a multi-colored project, then choosing at least three to five colors to work with is a good range. This will keep the design manageable and not too all over the place.
Another tip is to choose one background color. White or black is a pleasing background color to use but of course, you can choose whatever color you want. In this way, it will make your project look put together.
Choosing a theme can also make a big difference. For example, if you want to make a Christmas-themed pillow cover, then you can use red, green, white, and gold. Trust me, it will make your life easier when you have a theme in mind.
But the good news is granny squares are kind of magical in that no matter how many or what colors you choose they always seem to look good. So don’t worry too much about your color choices. You can always rip out a square or change colors as you go if you end up not liking a particular color combination.
Crochet Granny Squares for Beginners
Don’t know where to start your granny square journey? Then these granny square patterns are perfect for you. We’ve listed a bunch of beginner-friendly granny square designs that should be great for you to practice and use for future projects like granny square crochet tote bags, sweaters, and blankets.
Classic Granny Square Pattern
Designer: Purl Soho
Yarn weight: any yarn weight
Suggested yarn: Lion Brand Heartland
It’s always great to go with a classic granny! This one is designed to be used with any yarn and hook combination you like so you can make them big, small, tight, and loose, from a single color yarn or many colors.
Simple Crochet Granny Square Beginner-Friendly Pattern
Designer: Melanie Ham
Yarn weight: (4) Medium
Suggested yarn: Lion Brand 24/7 Cotton
Learn how to make a very simple yet adorable granny square with this uncomplicated step-by-step written pattern. You’ll surely have a granny square or several in no time.

Basic Crochet Granny Square Pattern
Designer: Cosy Rosie UK
Yarn weight: (3) DK
Suggested yarn: Premier Yarns Anti-Pilling Everyday DK
Here’s a free pattern with a step-by-step photo tutorial that shows how simple to make this colorful granny square. The only stitch you need to know is double crochet.
Easy Granny Square Pattern
Designer: Amy Solovay
Yarn weight: Any, shown in (3) DK and (4) Worsted
Suggested yarn: Lion Brand Feels Like Heaven Yarn
Make a traditional granny square with a little bit of a twist. The single crochet stitches create a solid finished edge to the square. Perfect for coasters or blankets.
Solid Granny Square Pattern
Designer: Cherry Heart Crochet
Yarn weight: (4) Worsted
Suggested yarn: Knit Picks Comfy
A very pretty combination of five colors makes these solid granny squares that you can mix to make colorful blankets, cushions, sweaters, and many more. Made with just double crochets you’ll be able to stitch them all together and make an adorable finished project.
Perfect Solid Granny Square
Designer: Sigoni Macaroni
Yarn weight: (4) Worsted
Suggested yarn: I Love This Cotton
Learn how to make the edges of your granny square straight with this very easy step-by-step tutorial. With the right number of stitches and consistent tension, you’ll be able to make the perfect square you’re looking for.

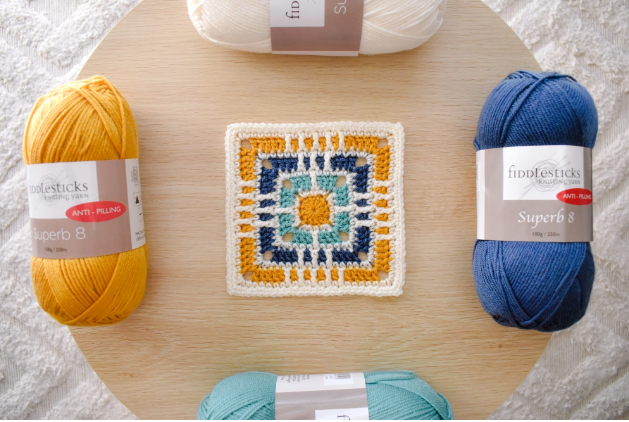
Grandview Granny Square Crochet Pattern
Designer: Stitching Together
Yarn weight:(4) Medium
Suggested yarn: Premier Yarns Anti-Pilling Everyday
Create this stunning crochet granny square for your next afghan or cushion cover. This pattern has four rounds and uses puff stitch and double crochet v-stitch to make a remarkable design.
Boho Granny Square Pattern
Designer: Bohemian Cat
Yarn weight: (2) Sport
Suggested yarn: Ewe Ewe So Sporty Merino Yarn
Check out this stunning yet simple and cozy boho-inspired free granny square pattern. Regardless of the kind of yarn you use – cotton, acrylic, wool, or other – you’ll have equally beautiful squares for any clothing or home decor.
Farmhouse Granny Square Pattern
Designer: Lindsay Oncken, via Ravelry
Yarn weight: (5) Bulky
Suggested yarn: Premier Basix Chunky
This is an extremely easy-to-follow guide for making your own uniquely textured, crocheted granny square. The puff stitch used in this pattern makes a wonderful addition to the design.
C2C Granny Square Pattern
Designer: Bella Coco
Yarn weight: (3) DK
Suggested yarn: Lion Brand 24/7 Cotton DK
Gather your yarns and learn how to crochet the C2C (corner to corner) square using the traditional granny square pattern. This addicting project makes you want to make more and more squares. This pattern also has an available video tutorial for those visual learners.
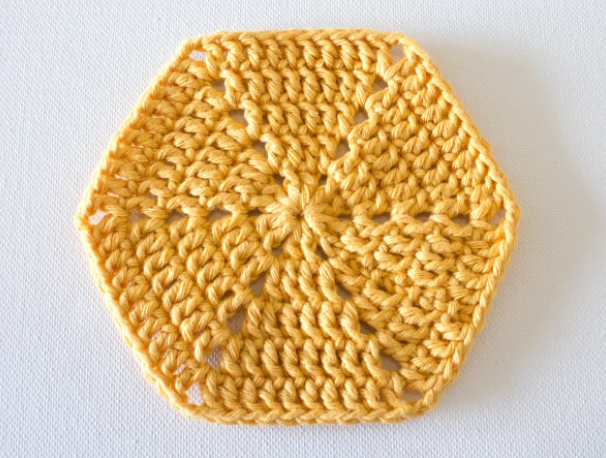
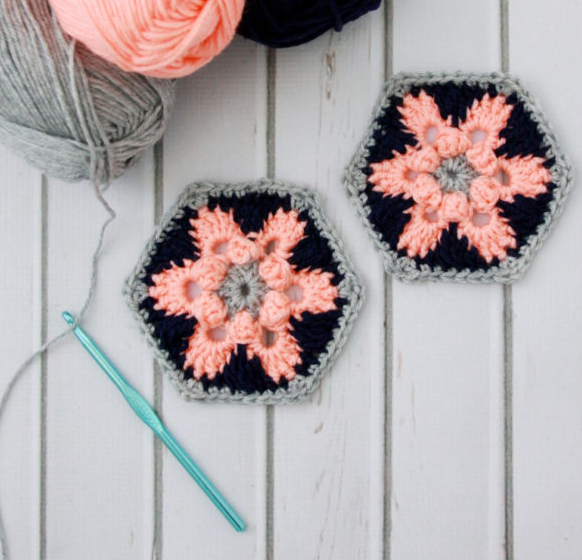
Granny Hexagon Pattern
Designer: Wink, vis Tuts+
Yarn weight: (4) Medium
Suggested yarn: Scheepjes Stone Washed XL
Use this uniquely shaped granny square as a coaster, or combine multiple hexagons into an afghan. The sky is the limit to this granny pattern. This pattern used stitches including double crochet, slip stitch, and chain.
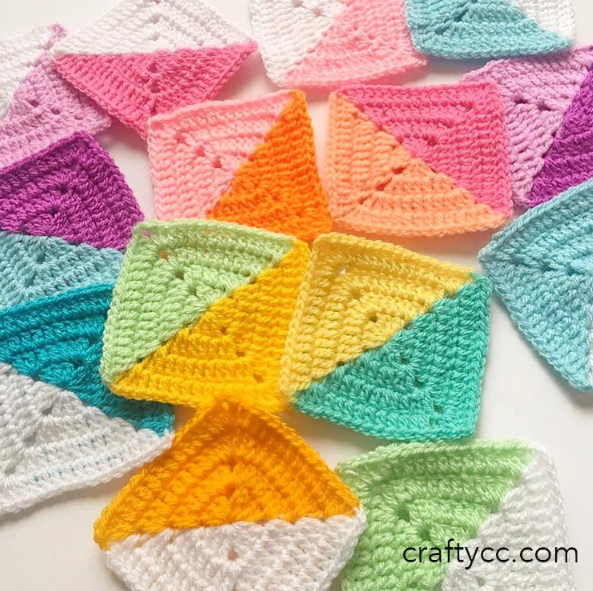
Two-Color Granny Square Pattern
Designer: Crafty CC
Yarn weight: (3) DK
Suggested yarn: Hayfield Bonus DK
Bicolored granny squares are just what we need this coming holiday season. Get colorful and creative by combining your favorite colors in one square. Expand your crochet knowledge at the same time with this pattern using the “tapestry crochet” method.
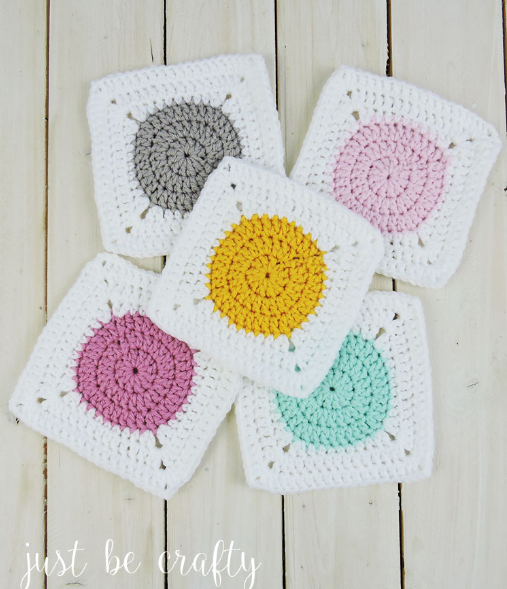
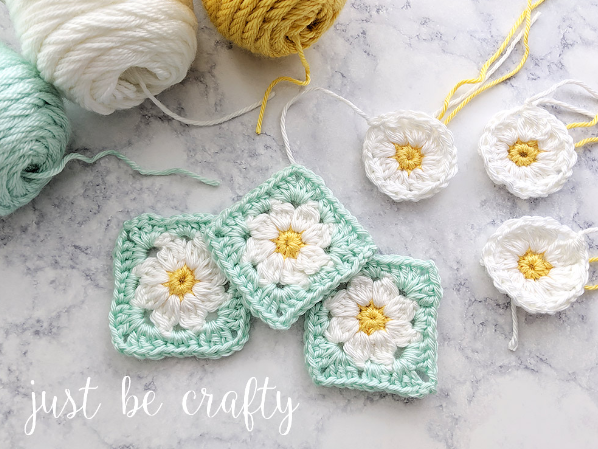
Circle to Granny Square Crochet Pattern
Designer: Just Be Crafty
Yarn weight: (4) Worsted
Suggested yarn: Red Heart with Love
A fresh take on a traditional granny square that results in a more cute modern style. This unique solid granny pattern begins with a circle and gradually turns into a square. These squares will be beyond perfect and stitched together for a baby blanket.
Floral Granny Square Patterns
Granny squares are just plain squares, and it is so fun to play with different variations on the theme. One of them is floral style granny square patterns.
Let’s check out some of the most colorful and beautifully designed floral grannies.
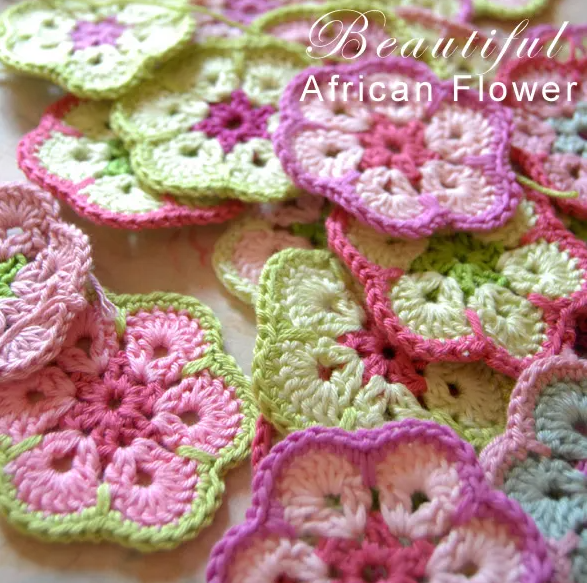
African Flower Granny Crochet Pattern
Designer: Craft Passion
Yarn weight: (2) Sport
Suggested Yarn: Ewe Ewe So Sporty Merino
This aesthetic crochet flower beginner-level granny takes less than fifteen minutes to complete. The name is said to have come from the idea that the pattern originated in South Africa. Make single flowers to decorate other projects, or connect multiple African flower squares to create a bigger project like a baby blanket.
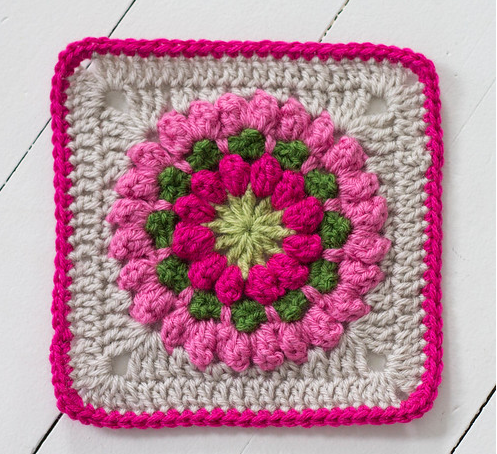
Crocheted Sunburst Granny Square Pattern
Designer: Creative Jewish Mom
Yarn weight: (5) Bulky
Suggested yarn: Lion Brand Hue + Me
Make your loved ones a bit warmer with this gorgeous sunburst granny square. A chunky yarn that's cozy and plush is perfect for this project.
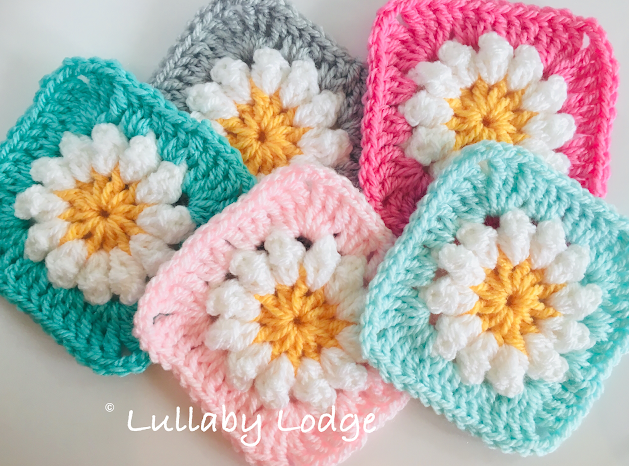
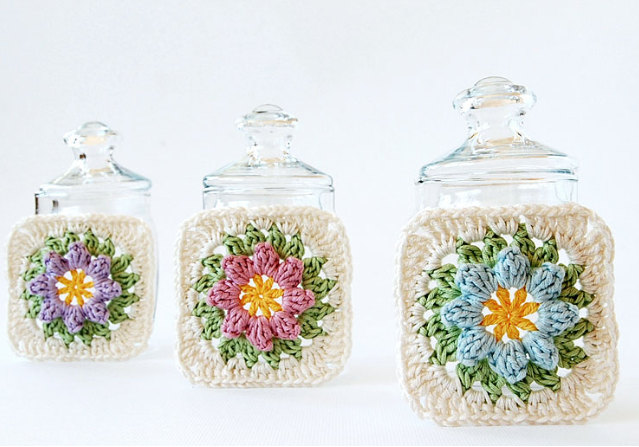
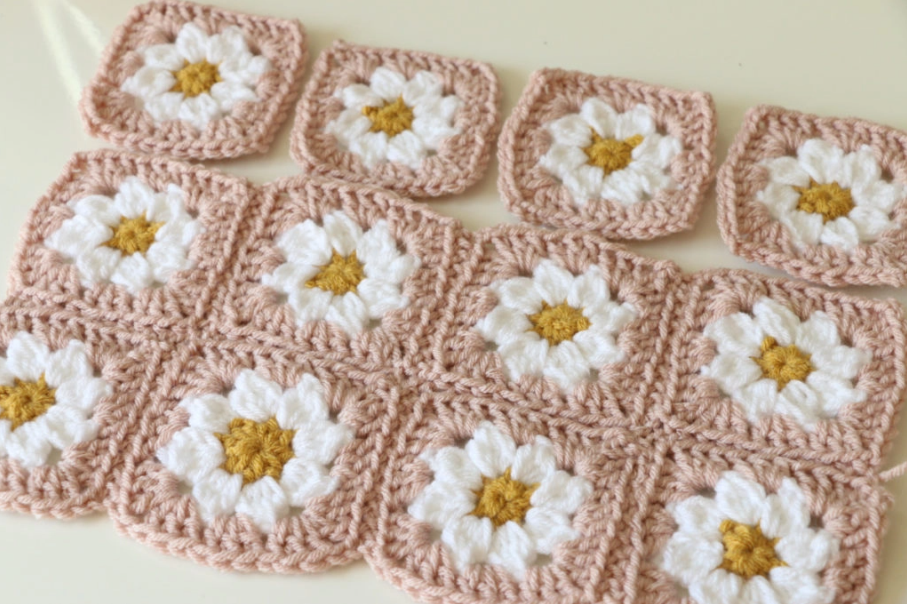
Ditsy Daisy Granny Square Crochet Pattern
Designer: Lullaby Lodge
Yarn weight: (4) Worsted
Suggested yarn: Hayfield Bonus with Wool Aran
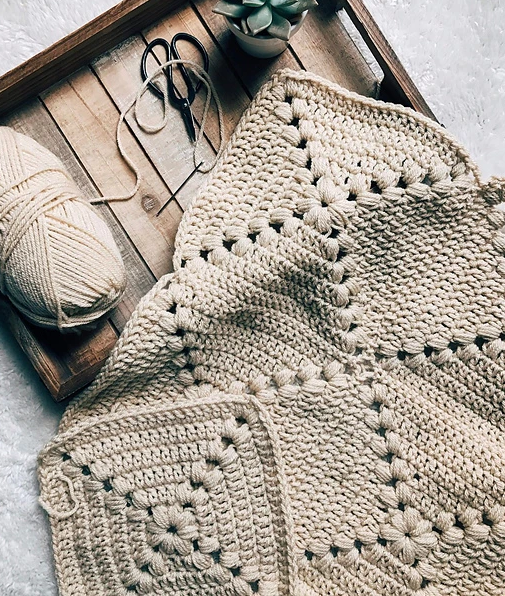
Follow along with this free crochet tutorial to make a charming textured granny that looks like a daisy. Using the popcorn stitch definitely gives that great feel to any project. There are so many projects you can use these squares.
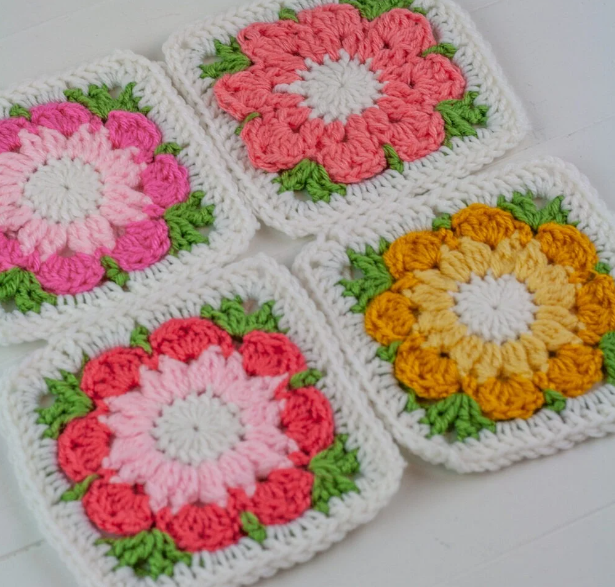
Sunburst Granny Square Pattern
Designer: Crochet 365 Knit Too
Yarn weight: (4) Worsted
Suggested yarn: Caron Simply Soft
An all-time favorite granny square. This easy and cute sunflower design in the center makes it timeless.
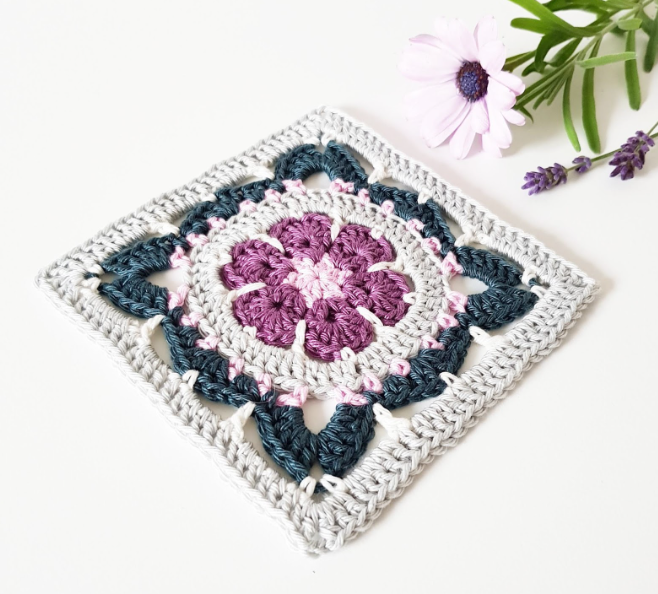
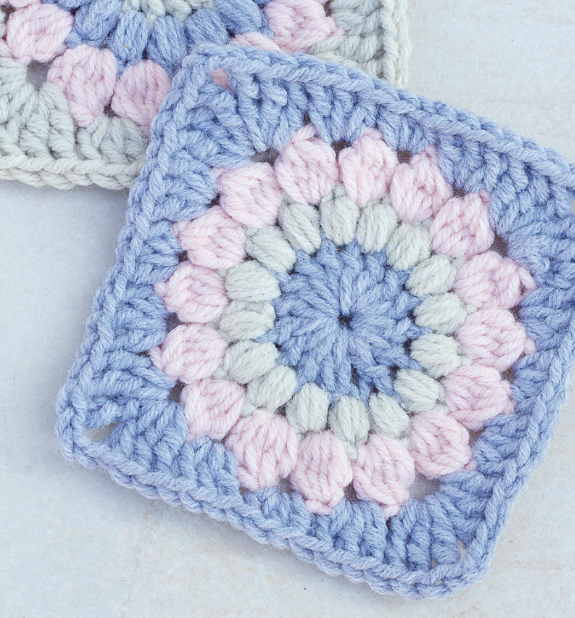
Springtime Magic Granny Square Pattern
Designer: Hverdagsmagi
Yarn weight: (2) Fine
Suggested yarn: Scheepjes Catona
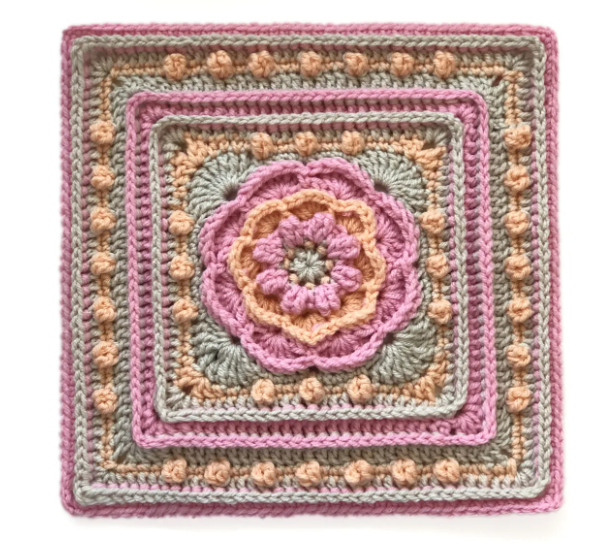
Here’s an exciting and detailed granny square without being so difficult. The designer based this square on a mandala pattern with a floral motif at the center.
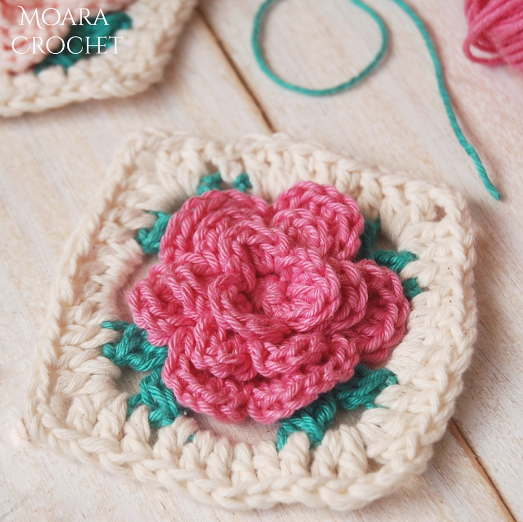
Crochet Rose Granny Square
Designer: Moara Crochet
Yarn weight: (3) DK
Suggested yarn: Circulo Amigurumi Yarn
Here’s a perfect mix of crochet and flowers. This 3D-designed flower in the center was made to stand out with a simple square border.
Winding Road Granny Square Pattern
Designer: Winding Road Crochet
Yarn weight: (4) Worsted
Suggested yarn: Red Heart Super Saver
This granny square is simply beautiful with the flower design. This would blend well with other granny designs you have. Aside from the written pattern, you can also learn how to make these by watching the video tutorial.
Dainty Daisy Granny Square Motif
Designer: Just Be Crafty
Yarn weight: (4) Worsted
Suggested yarn: Caron Simply Soft
Turn your favorite flower into crocheted art. This advanced beginner pattern is a spring-perfect granny square motif that’s inspired by a vintage crochet blanket. You only need to use the basic stitches like single crochet, half-double crochet, and double crochet.
Primavera Flowers Granny Square Pattern
Designer: Dada's Place
Yarn weight: (2) Fine
Suggested yarn: Universal Yarn Fibra Natura Cotton True Sport
Here’s another cool flower granny square pattern. They’re so pretty in pastels for a spring baby blanket. Check out the blog post for a full tutorial with step-by-step photos.
Star Lily Crochet Hexagon Pattern
Designer: Flamingo Toes
Yarn weight: (4) Worsted
Suggested yarn: Knit Picks Brava
Here’s another hexagon granny for you. The color choice on the sample is really striking and makes the flower pop, but you can use whatever colors you like for your project.
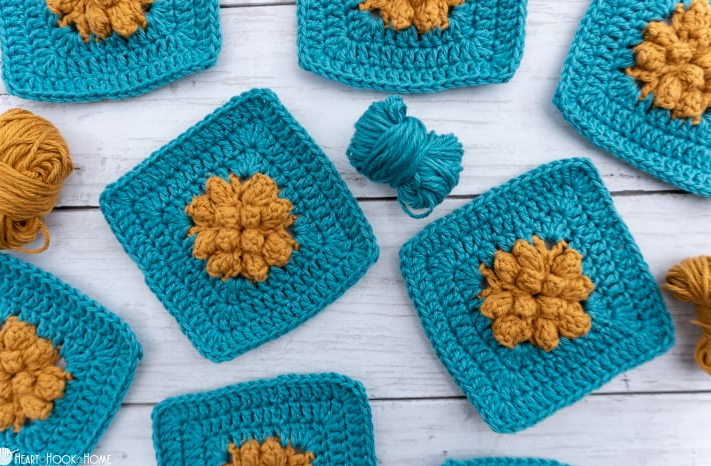
Connie’s Garden Pattern and Tutorial
Designer: Signed with an Owl
Yarn weight: (4) Medium
Suggested yarn: Vanna’s Choice
Master how to make popcorn stitches and picot stitches with these very clear instructions for this fun circle-in-a-square design.

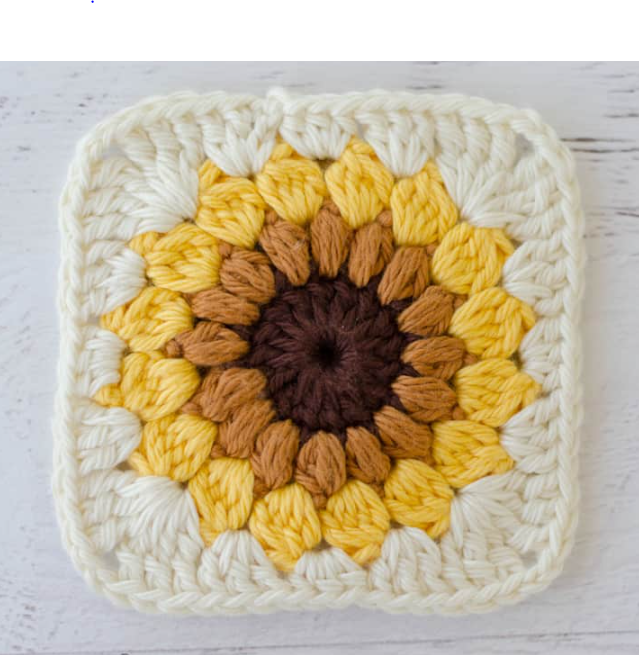
Sunflower Granny Square Pattern
Designer: Lullaby Lodge
Yarn weight: (4) Medium
Suggested yarn: Lion Brand Basic Stitch
Is another sunflower granny square pattern what you are looking for? Then, here you go! This wonderful sunflower pattern includes great written instructions and close-up photos for those new to crochet.
Crochet Granny Squares for Intermediate and Advanced Crocheters
Looking for more advanced granny square patterns that will put your skills to the test? Here you go! Enjoy these pretty intricate patterns.
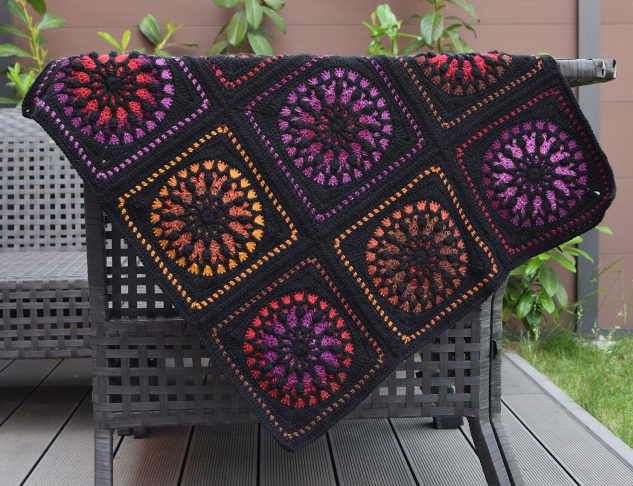
Reinventing the Granny Square 2 Pattern
Designer: Crafty CC
Yarn weight: (3) DK
Suggested yarn: Knit Picks Brava Worsted Lite
Play with colors with this geo rainbow granny square design. This pattern uses the intarsia crochet method that allows you to crochet with two or more colors in a row and throughout the pattern.
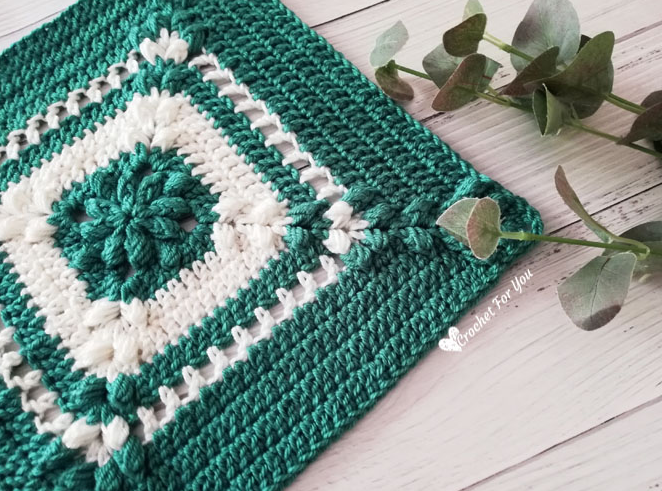
Emerald Asscher Afghan Square Pattern
Designer: Crochet for You
Yarn weight: (4) Worsted
Suggested yarn: Red Heart Soft
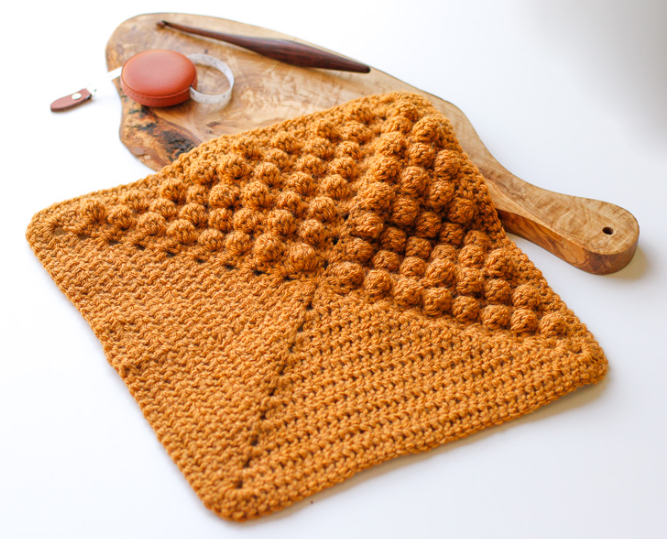
Crochet along with this Emerald Afghan Square pattern with two options to change the size of the project. This pattern looks absolutely beautiful with the textured bobble drops.
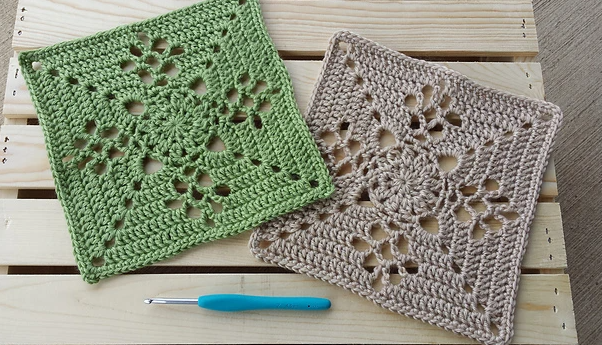
Victorian Lattice Square Pattern
Designer: Destany Wymore, via Ravelry
Yarn weight: (4) Worsted
Suggested yarn: Caron Simply Soft
Here's a fun lacy square pattern that is easy to follow and with a diagram that you can reference. The design looks like a piece of lattice or a wrought-iron fence. So cool!
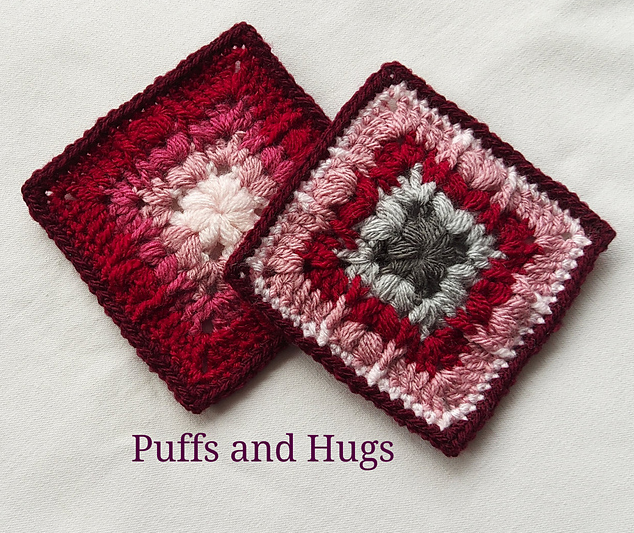
Puffs and Hugs Granny Square Pattern
Designer: K.A.M.E. Crochet
Yarn weight: (3) DK
Suggested yarn: Premier Yarns Premier Anti-Pilling Everyday DK
This colorful, textured block is so fun to make! With the size of 5×5 inches, this can be used to make big, granny square afghans or bold baby blankets.
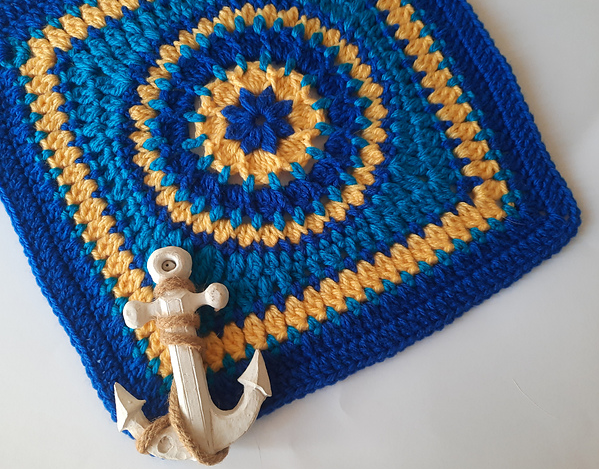
Westminster Afghan Square
Designer: Tash Jad, via Ravelry
Yarn weight: (3) DK
Suggested yarn: Scheepjes Merino Soft
This elegant design looks totally different depending on the colors you choose. Use blues and yellow for a nautical feel, or pick rainbow colors, a holiday theme, or just whatever colors you like!
Spinosa Square Pattern
Designer: The Loopy Stitch
Yarn weight: (3) DK
Suggested yarn: Premier Yarns Premier Anti-Pilling Everyday DK
Elongated stitches make this block really stand out. It’s fun in four colors but you could use as few as two if you’d rather. Just make sure there’s a lot of contrast between them so the long stitches really pop.
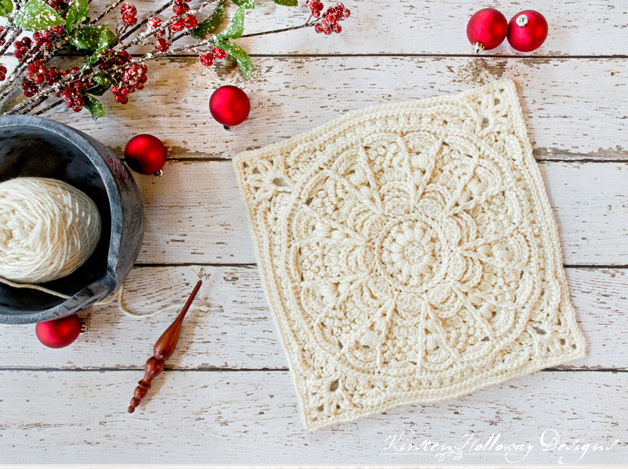
Winter Opulence Granny Square Free Crochet Pattern
Designer: Kirsten Holloway Designs
Yarn weight: (4) Worsted
Suggested yarn: Red Heart Soft
This holiday-themed granny pattern creates a thick and sturdy block that will make a good warm addition to your afghan. It’s gorgeous in white but you could also add colors or work in red or green instead.
Stained Glass Lantern Crochet Square Pattern
Designer: LillaBjorn’s Crochet
Yarn weight: (3) DK
Suggested yarn: Lion Brand Mandala
Another unique and challenging pattern? Of course! Here's another great stash buster, or you can make it with two yarns using a multicolored yarn for the patterning with a different color for the background. Either way, this stained glass look is striking and makes a great blanket.
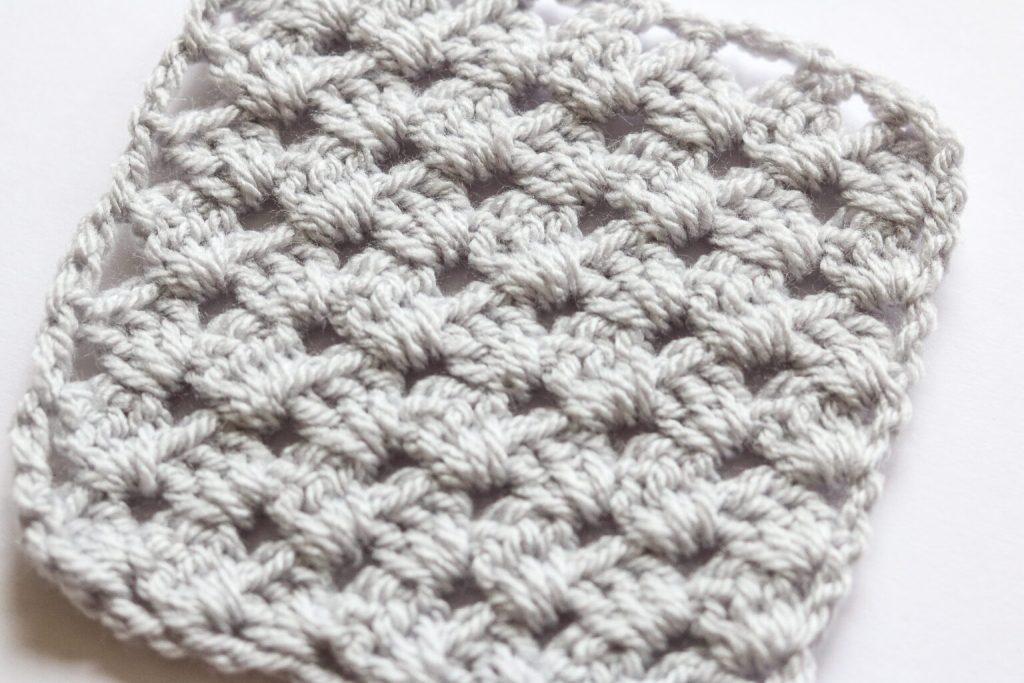
Textured Ripple Granny Square Pattern
Designer: Indigopobble
Yarn weight: (3) DK
Suggested yarn: Berroco Vintage DK
Bring your square game to the next level with a textured crochet stitch. Check out this blog post tutorial to learn how to crochet the alpine stitch.
Two-Color Linen Stitch Pattern
Designer: Look at What I Made
Yarn weight: (4) Worsted
Suggested yarn: Scheepjes Stonewashed XL
Looking for a solid and dense stitch to work for your potholder or coasters? Then this is the one for you. The pattern is specifically made for linen stitch squares using only 2 colors.
Spin Me Right Round Crochet Square Pattern
Designer: MobiusGirl Design
Yarn weight: (3) DK
Suggested yarn: Lion Brand Baby Soft
Here’s a fun way to try overlay crochet to make a really interesting block. This granny square just reminds us of a spinning record because of the movement illusion the center creates.
Quilt Block Bobble Square Pattern
Designer: Salty Pearl Crochet
Yarn weight: (4) Worsted
Suggested yarn: Lion Brand Vanna’s Choice
Here’s a great way to incorporate a bobble stitch into a square without the need to change colors. This stitch just gives so much fun texture to any project.
Beloved Square Crochet Pattern
Designer: Pink Mambo
Yarn weight: (4) Worsted
Suggested yarn: Red Heart With Love
Here’s another versatile square with loads of textured elements. With the dimensions of 12×12 inches, this is perfect for afghans. You just need a few of these squares then you’ll have a lapghan in no time.
Iris Stitch In a Square Modern Granny Square Pattern
Designer: made by Gootie
Yarn weight: (4) Worsted
Suggested yarn: Lion Brand Coboo
Try this modern granny square that has a delicate, almost flower-like look. Working from the middle out, this pattern uses Iris Stitch, which is a different stitch than the classic granny stitch.
Step-By-Step Crochet Granny Square Video Tutorials
Having a hard time following written patterns? You’re in luck. Here are a few granny square video tutorials for you to make your crocheting experience more fun and easy.
Absolute Beginners Guide to How to Crochet a Granny Square
Designer: Bella Coco
Yarn weight: (3) DK
Suggested yarn: Plymouth Yarn Cleo
Make your first-ever granny square by following this absolute beginner video. This classic granny square video tutorial definitely will make your life easier with clear instructions. (Uses UK terms.)
How to Crochet a Solid Granny Square
Designer: Sirin’s Crochet
Yarn weight: (3) DK
Suggested yarn: Premier Yarns Premier Bloom DK
Watch how easy it is to make a solid granny square. This modern granny square with open corners video tutorial will guide you on how to use simple stitches to create lovely seamless squares.

How to Crochet a Sunburst Granny Square
Designer: Simply Daisy
Yarn weight: (4) Medium
Suggested yarn: Red Heart Super Saver
Watch this video to learn how to make a starburst granny square. This square is one of the many favorites of most crocheters because it's not the typical granny and there are so many different color combinations that you can do to make your square look stunning.
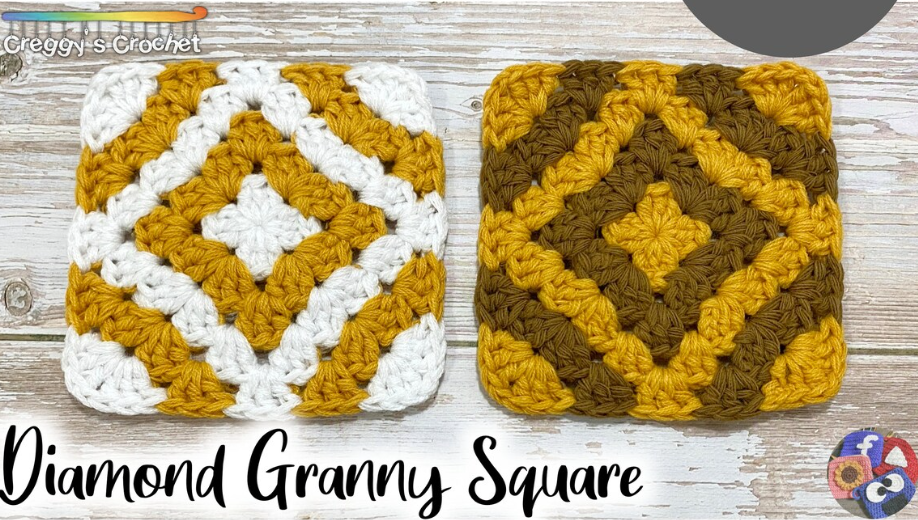
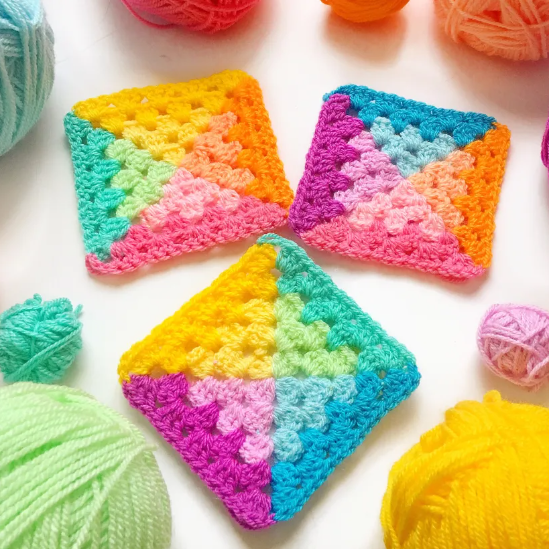
Crochet a Diamond Granny Square Pattern and Tutorial
Designer: Creggy’s Crochet
Yarn weight: (3) DK
Suggested yarn: Premier Yarns Premier Anti-Pilling Everyday DK
Get your granny square game up a notch with this Diamond granny tutorial. Learn how to make this easy and fun granny. Stitching together all the squares will make a beautiful afghan.
Daisy Granny Square Crochet Tutorial
Designer: Melanie Ham
Yarn weight: (4) Worsted
Suggested yarn: Red Heart With Love
Learn how to make this daisy crochet granny square block. Plus a bonus tutorial on how to join your granny squares. It’s super cute and stretchy.
Are You a Beginner Crochet Who Would Like Some Extra Help to Learn How to Crochet?
You’re in the right place. Advance your knowledge and learn the basics of crochet with our Fundamentals of Crochet masterclass. This class has all the basics and much more that will surely help you learn how to effectively crochet. Be ready and master your crochet skills and in no time you’ll be able to make your granny square afghan blanket.
Happy crocheting!
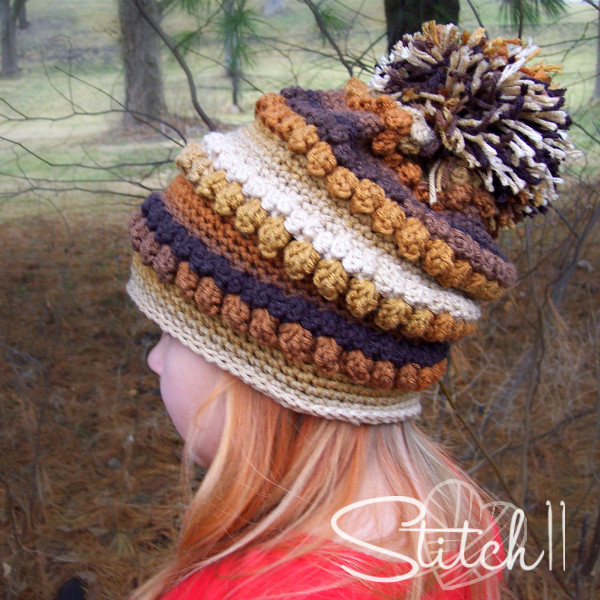
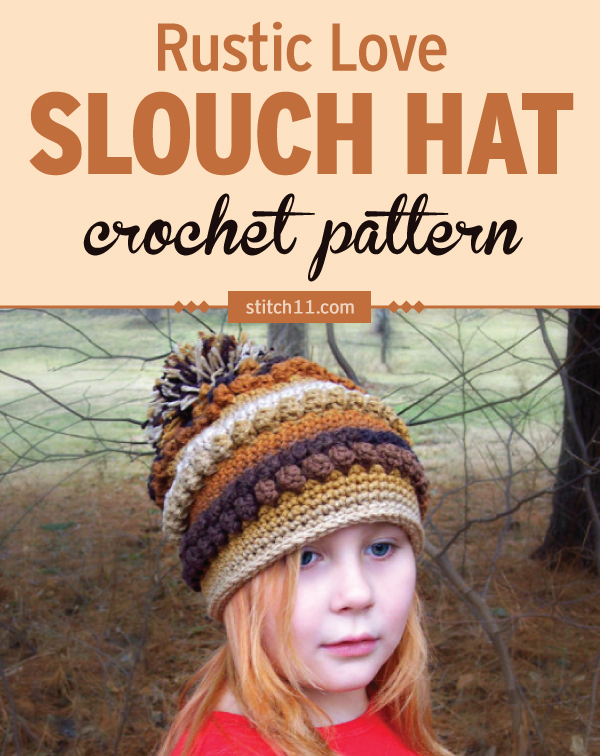
Looking for more great crochet patterns: 50+ Crochet Square Patterns, 30 Must-Try Unique Crochet Stitches for All Crocheters, 50 Free and Easy Crochet Dishcloth Patterns

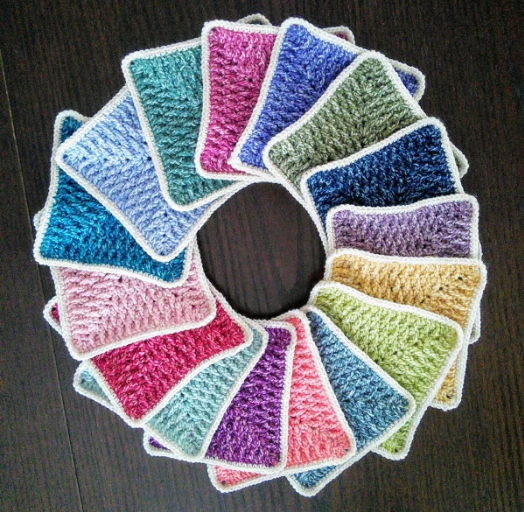
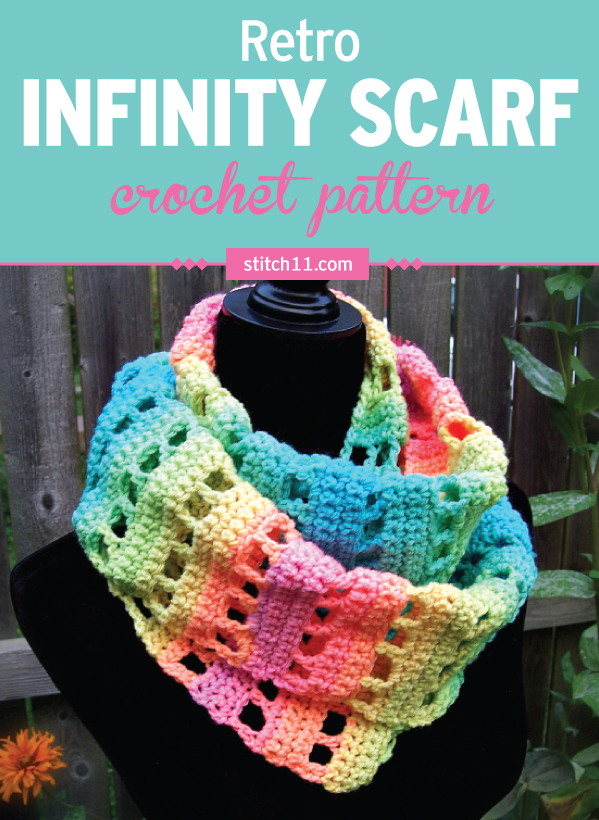 I designed this fun and colorful infinity scarf with the basic crochet stitches: chain, single crochet and double crochet; so even the beginner crocheter can hook this one up! You could easily change this infinity scarf into a cowl, by using only one skein. You could also change this into a normal scarf by using a total of two skeins. The stitch pattern is so simple that after the first set of repeats, you can get lost on your Netflix binge and mindlessly crochet this entire free pattern!
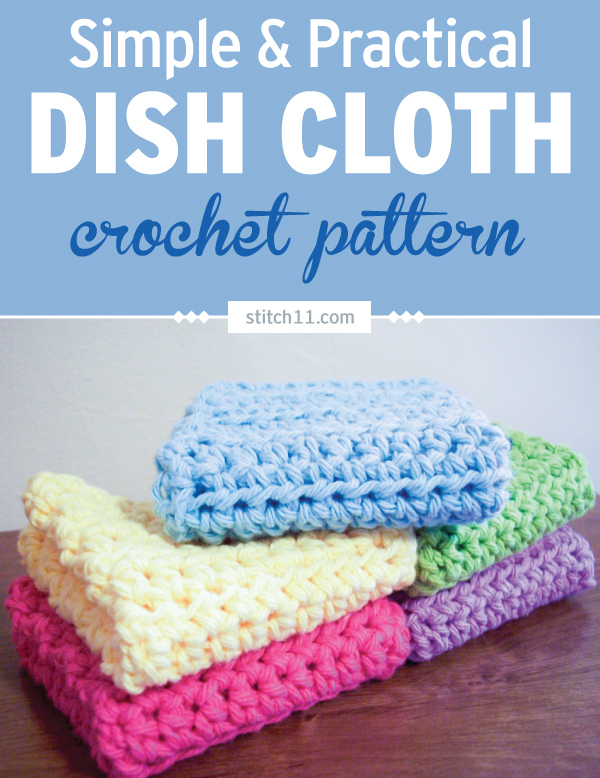
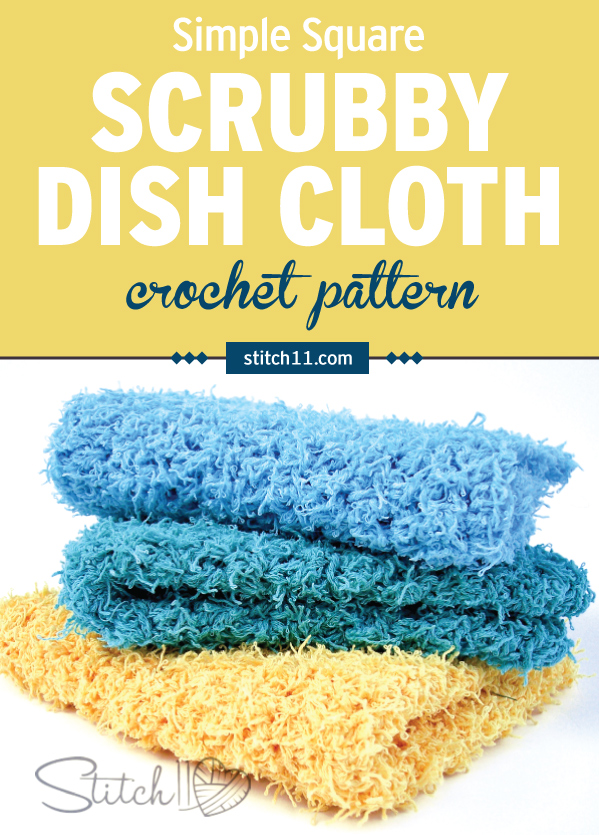 Throw away every last kitchen sponge and never waste a single penny on ineffective kitchen cleaning clothes.
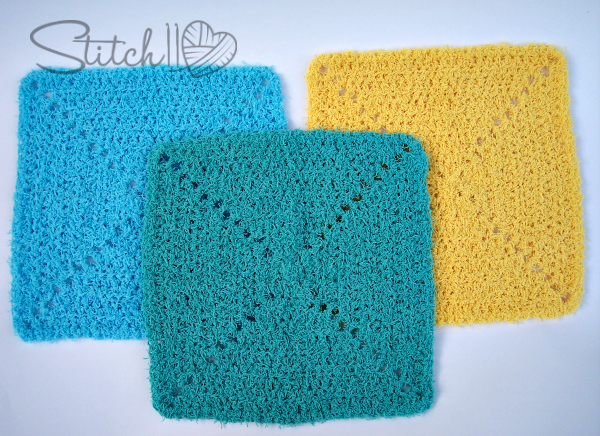


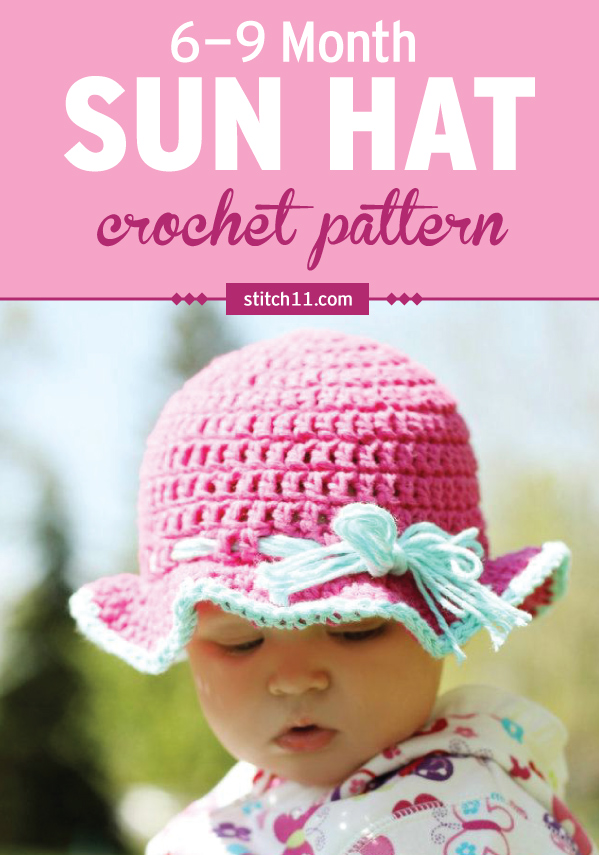 Our babies are so precious and have very sensitive skin. Help protect your baby from the elements with this adorable sun hat crochet pattern.
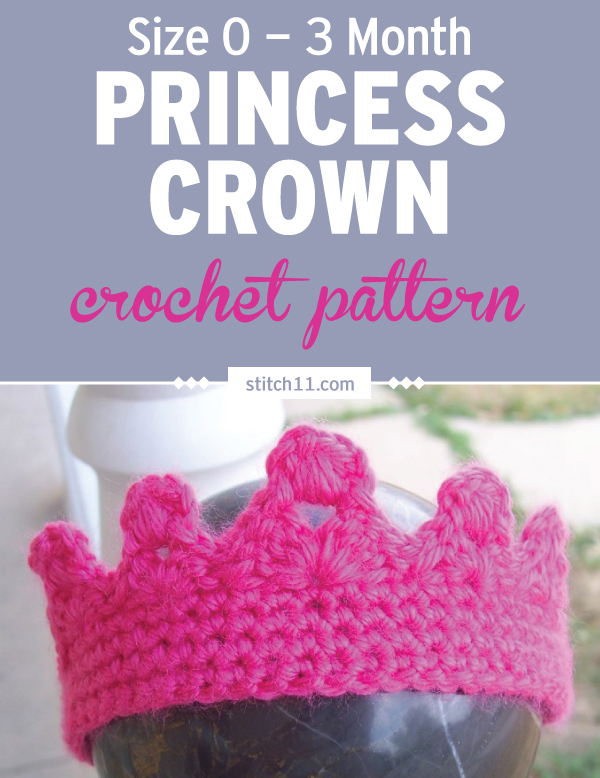
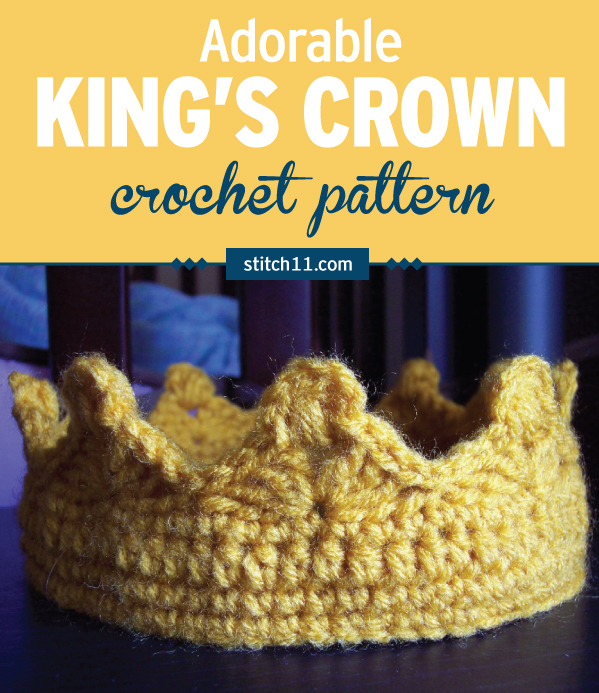 This King's Crown crochet pattern is for all of our little Kings who like to be in charge of the castle.