• Home
  • Free Patterns
    • Toys
    • Costumes
    • Bags
    • Flowers
    • Hats
    • Pattern Reviews
    • Household
    • Newborn
    • Scarves
    • Sports
  • Disclosure
  • Contact
  • Yummy Food
  • Round Ups

Stitch11

A Yarntastic Life!

  • Girls
  • Boys
  • Hats
  • Newborn
  • Flowers
  • Household
  • Costumes
  • Toys
  • Pattern Reviews
  • Grannys
You are here: Home / Archives for Inspired

How to Crochet a Hawaiian Lei

May 7, 2014 By stitch11 4 Comments

How To Crochet a Hawaiian Lei - by Stitch11
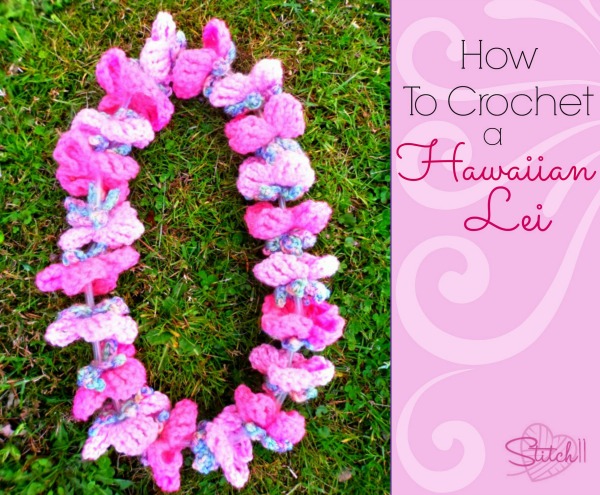
I have been in what many people call a “Crochet Rut”. It seems like every time I have felt this way…. I am actually just waiting for the right inspiration to boost me back into the hook of things. After weeks.. maybe even months of waiting for that right idea to pop into my head, I remembered one of the things I wrote on my invisible “to crochet” list- a crochet Hawaiian Lei!
The reason this was one of the first things on my list is because I have made them before, just out of fabric cut outs of flowers and fake flowers I found at yard sales. I even made a giant one that my MIL still uses as a decoration around her Hawaiian themed bathroom.
I loved the fabric ones, but the fabric flowers were so thin, it didn't give me the look I had pictured.
When learning how to crochet, flowers were the second thing I taught myself how to do (ear flap hats being the first). So, naturally I thought of the Hawaiian Lei instantly.
I now know why I was in the rut… I needed to back up about 2 years on that invisible list I keep! 😉

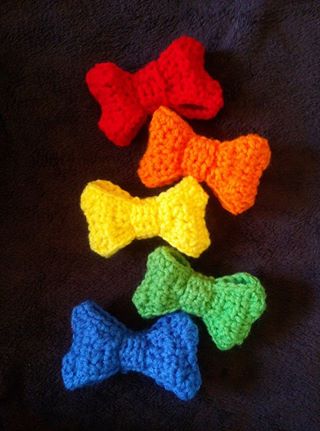
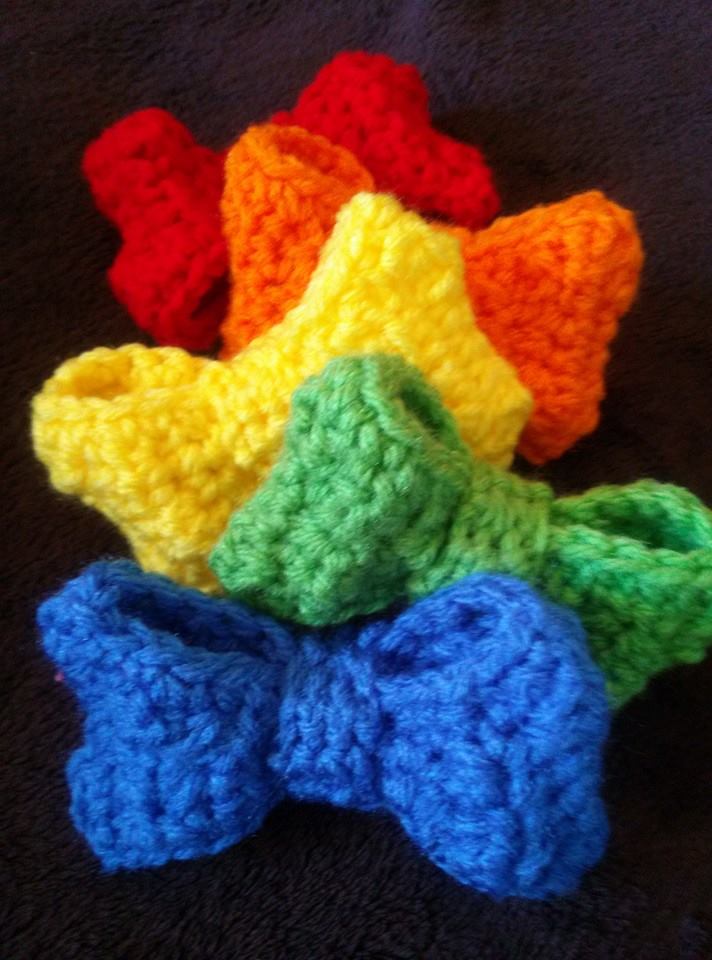
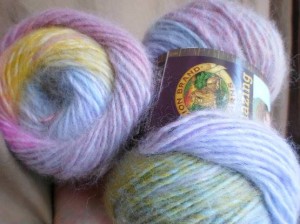
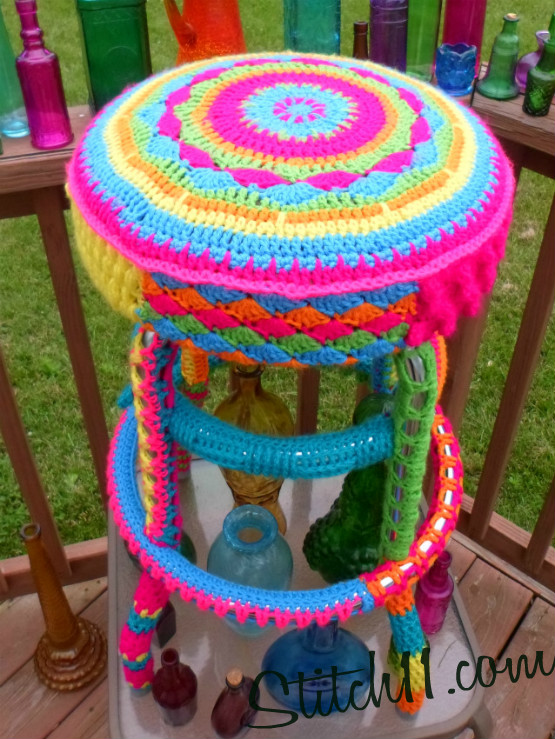
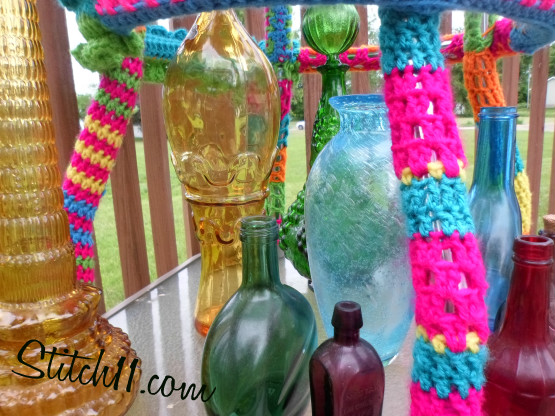
This Hawaiian Lei has many possibilities. Have fun with your yarn choices. Dig through your stash and get creative!

[Read more…]

Filed Under: Costumes, Flowers, Free Patterns, Girls, Inspired

Add Some Crochet Love With Embellishments

April 21, 2014 By stitch11 1 Comment

Free Crochet Embellishments

I wanted to bring a post together of all my l favorite Stitch11 embellishment crochet patterns. These free crochet patterns spark the creativity in me each and every time I look them over.

With the Sweetheart Love Flower, I would love to figure out a good way to put them together to make large crochet projects. I am very proud of this design!
The Water Lily would be great for frog, water, mermaid, nature, and many other themes.. Once I crocheted them… the ideas starting coming through quickly.
My Daisy– The name says it all. I love my daisy 🙂 It is the quickest ‘go to' flower pattern I have.
Dahlia‘s may actually be my favorite flower. I love the color varieties and the size of the blooms. I like to have many of them growing around my house so I can always have plenty to to cut for inside my home or to hand out to all my nieces.
Boutique Bow was inspired by Minnie Mouse… but many other cartoon characters wear identical bows to this one! I had been wanting to create the perfect bow for a long time… but was waiting for the details to work themselves out in my head…. I was so thrilled when I realized how easy they actually would be to crochet.

Filed Under: Flowers, Free Patterns, Inspired, Round Ups

8 Free Crochet Easter Basket Fillers

March 25, 2014 By stitch11 Leave a Comment

8 Free Crochet Easter Basket Fillers

Add a personal touch {made with love} to each of the Easter baskets you are giving this Spring. Also, check out the free Easter basket crochet patterns linked in TheYarnBox!

Royal Crown
Minnie Mouse Bow
Huggy Bunny
Airplane
Baby Duck
Snake Puppet
Puppy Puppet
Mini Bunny

For more Easter ideas check out these round ups!

The 10 Cutest Easter Crochet Patterns – shared by Moogly
(lots and lots) Crochet Patterns For Easter – shared by The Yarn Box
The Cutest Free Crochet Patterns For Easter – shared by Homeketeers
Free Crochet Pattern Link Blast: Easter (Traditional) –
Shared by Kim Guzman
Free Crochet Pattern Link Blast: Easter (Non-Traditional) – Shared by Kim Guzman
Free Pattern Friday Round Up – Bunny Amigurumi – Shared by Oombawka Design
12 Free Easter Egg Crochet Patterns – Shared by KeepingBusy

Filed Under: Free Patterns, Inspired, Round Ups

Boutique Bow

March 13, 2014 By stitch11 41 Comments

Make your little girl's dream come true with her very own Minnie Mouse bow! Perfect for playtime, dress ups, or any day she wants to be like Minnie. Best part? This easy pattern would take you less than a day to finish! Give it a whirl with our free pattern, or get the ad-free printable PDF pattern here.

This bow crochet pattern is designed after Minnie Mouse's popular bow. This bow pattern measures 5.5 inches wide using bulky weight yarn, but you can also use worsted weight for a slightly smaller version. #crochet #crochetlove #crochetlife #crochetaddict #crochetpattern #crochetinspiration #ilovecrochet #crochetgifts #crochet365 #addictedtocrochet #yarnaddict #yarnlove

Are you a Disney fan too? For the longest time, I have been wanting to make a bow that looks like a Minnie Mouse bow. Finally today, I broke out my graph paper and drew her bow the best I could. Then I tried to draw it as a flat piece and realized it would be a lot simpler to put together than I imagined! This free crochet bow pattern measures 5.5 inches wide.

Boutique Bow Crochet Pattern

Skill Level: Confident Beginner 

Materials: 

Yarn: Bulky weight yarn 
Small amount 

Hook: 
US size K/10½ (6.5mm) crochet hook 

Notions: 
Tapestry needle 

Size: One size 

Gauge: Gauge is not critical 

Pattern uses US crochet terms. 

ABBREVIATIONSDESCRIPTION
chChain
dcDouble crochet
dc2togDouble crochet 2 together
hdcHalf double crochet
hdc2togHalf double crochet next 2 stitches together
scSingle crochet
sl stSlip stitch
st(s)Stitch(es)

Pattern Notes: 
You can also make these bows using worsted/medium weight yarn and a US size H/8 (5mm) crochet hook. 
Chain 1 at beginning of rows does not count as a stitch. 

Get the ad-free printable PDF pattern here

Pattern:

Row 1: Ch 4. Starting in the 2nd ch from the hook, sc in each ch, turn. (3 sc) 

Row 2: Ch 1, hdc into first st, sc into next st, hdc into the last st, turn. (3 sts) 

Row 3: Ch 1, 2 hdc into first st, sc into next st, 2 hdc into last st, turn. (5 sts) 

Row 4: Ch 1, dc into first st, hdc into next stitch, sc into next st, hdc into next st, dc into last st, turn.

Row 5: Ch 1, 2 dc into first st, sc into each of next 3 sts, 2 dc into last st, turn. (7 sts)

Rows 6-7: Ch 1, dc into each of next 2 sts, sc into each of next 3 sts, dc into each of next 2 sts, turn.

Row 8: Ch 1, dc2tog, sc into each of next 3 sts, dc2tog, turn. (5 sts) 

Row 9: Repeat Row 4. 

Row 10: Ch 1, hdc2tog, sc into next st, hdc2tog, turn. (3) 

Row 11: Repeat Row 2. 

Rows 12-21: Repeat Rows 2-11. 

Row 22: Ch 1, sc in each st, do not turn. 

Edging: Ch 1, sc evenly around entire piece, join to first st with a sl st. 

Fasten off leaving long tail. Weave in your starting end. Take other end and use to sew to other end of the bow. You can also go ahead and secure the middle of the bow with this end… but it isn’t required. Weave in your end. 

Middle Band 

Row 1: Ch 4. Starting in the 2nd ch from the hook, sc in each ch, turn. (3 sc) 

Row 2-8: Ch 1, sc in each st, turn. 

Fasten off leaving long tail. 

Get the ad-free printable PDF pattern here

Finishing 

Wrap the band around the middle of the bow. This will be a snug fit. Using yarn tail and needle, attach both ends of the band together. Weave in your ends.

What do you think? Is this crochet bow pattern Minnie approved?

You can also make these bows using worsted/medium-weight yarn and a 5MM/H crochet hook like Aledria Lay Brown did! Thanks so much for sharing your photo Aledria! 

The Perfect Crochet Bow
The perfect free bow crochet pattern

Filed Under: Free Patterns, Girls, Inspired, Newborn Tagged With: bow, bow crochet pattern, bow pattern, brochet pattern, crochet

Drawstring Backpack to Care-A-Lot

March 4, 2014 By stitch11 8 Comments

Free Drawsting Backpack Crochet Pattern

I am so excited- my daughter loves Care Bears as much as I did when I was her age…. and even loves watching the same movie over and over that I used to torture my older sisters with!

This pattern was inspired by my daughters imagination. About a month ago, she started playing with invisible Care Bears. Every time we would leave the house, she would make sure that my husband and I put all the (pretend) Care Bears in our pockets. If we told her there wasn't room in our pockets, she would put on her invisible backpack and ask us to help her put the bears in it.

It only took a few days of this to realize we needed to find her some real Care Bears. We searched many stores before I realized the only way I would be able to find them would be to order them online.   You can buy them at Amazon if you are searching for them too. 🙂

Ever since the bears arrived at my house, my daughter has been playing with them all day-every day….”You wanna play Care-A-Lot” is the every 5 minute question. But, she still needed a backpack 🙂 So here it is, a free crochet pattern for the Drawstring Backpack to Care-A-Lot. I hope someone you know will get as much enjoyment out of this as my daughter.

[Read more…]

Filed Under: Bags, Free Patterns, Girls, Inspired, Toys

Crochet Molly – Bubble Guppies

February 23, 2014 By stitch11 2 Comments

Crochet Molly - Bubble GuppiesNot long ago, I crocheted the Bubble Guppy puppy. A couple days after making that post I went on the hunt for the correct colors of ombre yarn to make one of the girl guppies.  The only place I was able to find the right colors was at Walmart. I used Red Heart Super Saver in color LOT:8010.

Once again, I didn't write out the pattern… but here are a couple patterns that may help if you want to make her 🙂

Molly Mermaid Crochet Pattern by Forever Stitchin by Forever Stitchin (Paid Pattern)

FREE Mermaid Amigurumi Crochet Pattern by Breezybot (Free Pattern)

Filed Under: Inspired

Bubble Guppy Puppy

February 12, 2014 By stitch11 4 Comments

Crochet Bubble Guppies Dog

A few month back, one of my friends asked me if I could make some bubble guppy characters. I decided to start the dog first because I already had the correct yarns….. and it looked the easiest.
I was planning on writing a pattern- but when I started doing magic tricks with my hook… I had no clue how to explain what I was doing!
So, after a quick search on the web I found this pattern by gensquared for $5 that you can purchase through her etsy store.

Filed Under: Inspired

Why You Should Over Price!

December 17, 2013 By stitch11 17 Comments

Why You Should Over Price

The subject of pricing is very common in crochet forums and groups. “How much should I charge?” is the daily question, but the answers vary – from giving advice on the techniques of pricing, to searching etsy so you can follow the lead of someone else.

[Read more…]

Filed Under: Inspired

Pavement Infinity Scarf – Christmas Gifts

November 17, 2013 By stitch11 6 Comments

Pavement Infinity Scarf - Free Pattern

I was browsing the beautiful free patterns on Fiber Flux. The Pavement Infinity Scarf caught my eye. The pattern is simple, well written, and easy to follow even while you are half asleep! The perfect pattern for the Christmas gift crunch time!

I didn't have enough bulky yarn so I used some Sensations Rainbow Boucle that I bought a few months ago at JoAnnes. I used the N- 9 mm crochet hook. I did adjust the width of the infinity scarf to a starting chain of 23. I also plan on making another one with the same starting chain amount as Fiber Flux used.

Be sure to stop in and visit Fiber Flux on her Blog, Facebook, Pinterest, and Ravelry!

Infinity ScarvesHere are 4 more I have made since posting this. I am working on a neon ILTY pink one now too 🙂


Filed Under: Free Patterns, Girls, Inspired, Pattern Reviews, Scarfs

BobOmb! -with link to free pattern

November 14, 2013 By stitch11 3 Comments

BobOmb

A few days ago I discovered a free pattern for this little guy at The Yarn Box. It was almost like the computer started singing in opera while the screen was glowing brighter and brighter. My step son LOVES to play Mario Bro's! I plan on making him another item with the same theme… just haven't decided exactly what yet.

This free BobOmb pattern is designed and shared by WolfDreamer. Click HERE to view!
The pattern is perfect and VERY easy to follow! It worked up really quick too.

The only thing I did different was crocheting the eyes instead of using felt. To do that I made a magic circle and crocheted {SC, HDC, DC, HDC, SC, HDC, DC, HDC} all into the magic circle. Join to first SC and pull tight.

How would I rate this pattern? 5 gold stars!! I have no complaints at all! I could sit and adore this little BobOmb all day. 🙂

Filed Under: Boys, Free Patterns, Inspired, Pattern Reviews, Toys

Artfully Simple Pattern Review

September 29, 2013 By stitch11 2 Comments

Artfully Simple Crochet Review

Last year I met the fellow blogger/designer/artist Moogly. It didn't take long before I noticed how popular some of her patterns are and how wonderful her fans and followers are. Over the course of a few months I was seeing these beautiful scarves all over the internet. Each one was made by the same pattern but each had their own beautiful, unique, and artistic look. So I decided to give it a go with some special yarn I have been holding onto… just waiting for a pattern to scream out at me.

1157657_599045256801061_698239218_nUsing 2 balls of Lion Brands Amazing Yarn “Pink Sands” ( that you can actually get a really good deal on right now through Craftsy)  and a button I went on the hunt for and found at JoAnns Fabric… this scarf turned out beautiful!!! The button shopping was so much fun. I had never discovered how fun it really was until now. I think I might enjoy it just as much as yarn shopping :O

Moogly' s free Artfully Simple Pattern is the perfect pattern for any crocheter, even if your a first time hooker. The pattern is so fun, quick, and simple that it really doesn't require much thinking at all. We all need a break from those patterns that you have to read 20 times to understand the next step… and this was the perfect pattern for that! This scarf is also the ideal project for that yarn you have been hoarding.. you know, the yarn you buy because it is beautiful but do not want to use it and risk ruining the beauty. Yes, this scarf works with the yarn in a way that it only compliments the yarn and shows off its artistic fiber yummyness.  This pattern receives 5 gold stars from me! I highly recommend it to anyone looking for a break, learning crochet, and for you who has been smelling and petting any beautiful artsy yarn on a daily bases.


Filed Under: Free Patterns, Inspired, Pattern Reviews, Scarfs

What have I been hooking?

September 4, 2013 By stitch11 2 Comments

Free Patterns, projects, yarn organization

This last weekend was very busy for me! Not only with crochet, but I was also able to visit with a lot of family.  I want to share all the crochet pieces I have made during this time, and of course, link the free patterns too!

First of all, I came across some old fabric dye in an ancient craft box of mine… and I knew instantly that my two white balls of peaches and creme were about to become colorific 😀 I made 3 new Granny Slouches using my own free Adult pattern. One of them I actually got to use the yarn I hand dyed.  I also made two Octopus's using a free pattern I found on Squidoo. These little guys were a ton of fun and super quick to make. The only change I made were the eyes and also making a circle for the bottom so I could stuff them.

[Read more…]

Filed Under: Inspired

God’s Timing

August 25, 2013 By stitch11 19 Comments

God's Timing

I believe God has perfect timing for everything.

I wanted to share my story of how God had put a child and crochet in my life at the perfect time.
I am always amazed at how things add up and line up in my life… things you never understand until years later.

Growing up, I had many people try to teach me how to crochet. The farthest I had ever reached with my hook was making a sloppy chain. In my early 20's I became a Homemaker (cleaned for the elderly) I had one client who insisted I learn how to crochet instead of dusting behind her mountains of storage containers. (which I now know what she was hoarding ;))
I remember this beautiful old woman being so frustrated with me. It was almost like she could see the crochet light in my eyes and she was determined to help me reach my potential…. but I just couldn't hold the yarn or hook correct… let alone actually crochet! I gave up. The idea of crocheting was such a tiny little thought in my brain. The thought of me actually picking up a hook and learning was obsolete.

During this time, I was also trying to have a baby. Month after month, year after year, I would get my hopes up. Wasting money on pregnancy tests were a monthy activity. After 8 years I gave up. For years I had cried out to God. I didn't understand why I wasn't *good enough* *woman enough* I came to the idea that God didn't design me to have children. I believed this until Mothers Day 2010.

My world changed rapidly after that day.

I was blessed with a healthy daughter on 1-11-11. I then knew there was a reason it took me so many years to have her. In fact… there are many reasons. One year after having Ella, I picked up a crochet hook and a cheap skein of yarn and everything clicked in my brain. It was almost like this part of my brain was suddenly able to process a foreign language and all while my hands were able to hold a hook and yarn with ease. I was suddenly a natural.

I believe there is a reason it took me so long to have a child. I also believe there is a reason it took even longer to spark up the crochet wiring in my brain. God has a plan. And it is up to us to have faith and trust in him. Sometimes it is so hard to be patient… understanding…. but when he reveals the Big Picture, it will all make sense. We will know he had the best intentions for each of us the entire time…. and we wouldn't want it any other way.

I can now look back at my life and know things would be so different if the timing would have been sooner. The world I know right now would not exist in my reality. Who knows what kind of mother I would have been if it had not taken 8 years to conceive.  The crochet community probably would have never been discovered by me. There would be no Stitch11. Most likely I would not be a stay at home mom…. I would be either waiting tables or in some dirty factory. My point is, God has a plan. Sometimes what feels like punishment to us is actually a blessing that we are not meant to understand just yet.  So have faith and remember to praise him through the storms…. it is those very storms that will help your gardens grow.

Filed Under: Inspired

Painful Crochet

August 2, 2013 By stitch11 5 Comments

Crochet Mickey Mouse

No pain – No gain?

I have been crocheting for about a year and a half. When first learning to crochet I would get hand cramps and minor blisters but would power through them. My hands were getting stronger with every knot and the skin on my thumb was building strength also. Every so often the pain would come back but would fade away as I would continue with my crochet item.

Then I discovered Amigurumi!

The first few amigurumi pieces I made were a few cats and a toy airplane. When crocheting the cats I discovered a new level of crochet pain but the projects were small enough that I could still get through the aches and blisters.

My most recent project that consisted of tight single crochet through out the entire project were the Lalaloopsy dolls and the free pattern. After each one I told myself I would take a break from using tight stitches until my hands had time to heal but the outcome of the dolls were so rewarding that I could not help but to keep making them! After the third one I made a promise to myself that I would make something with looser stitches. But that promise was broken quickly when my sister-in-law requested a Mickey Mouse doll for my nephew who is having a Mickey Mouse party to celebrate his first birthday.  I thought about finding an alternative project but then I visualized him smiling from ear to ear while chewing on Mickey's nose. How could I miss out on this opportunity?!

Sometimes writing it out just isn't going to happen…

With every project I do, I do my best to write out the pattern step by step to share with all of you. Sharing my patterns are just as rewarding as gifting the crochet item to people I love.  I truly cannot put into words how rewarding it feels to share my God given gifts with the world. BUT this darn Mickey Mouse had me ready to chop off my hands! All I could think about was getting the doll done so I can take a couple day break from crochet and have the doll ready in time for his party. So I am very sorry to say, half way through Mickey Mouse I stopped writing the pattern out. 🙁 And of course, now that I am done… I wish I would have just written it out 0.O

There is always a bright side.

I am one of those people who look at the bright side of EVERYTHING. I cannot help it. I can come up with something positive from almost any situation… to the point that I kinda creep myself out. Not that this is one of those times 😉  Anyhow, I now have all the mickey mouse colors and I am hoping to have the chance soon to sit down and make a smaller version of Mickey…. and Goofy because that is what my daughter is begging me to make! Also, now that I have made this GIANT Mickey Mouse.. I have a better idea of what I am getting into and how to get the shapes correct and simple. But, before I can attempt any more items with tight stitches.. I have a few other things on my list that will be easier on my hands… so my hands can come back to them stronger than ever!

Filed Under: Inspired

Lalaloopsy Inspired Doll

July 10, 2013 By stitch11 49 Comments

Lalaloopsy inspired doll crochet pattern. Easy to love and adorably cute! Make a very special doll for your child or as a gift that is sure to be cherished. #crochet #crochetlove #crochetlife #crochetaddict #crochetpattern #crochetdoll #ilovecrochet #crochetgifts #crochet365 #addictedtocrochet #yarnaddict #yarnlove
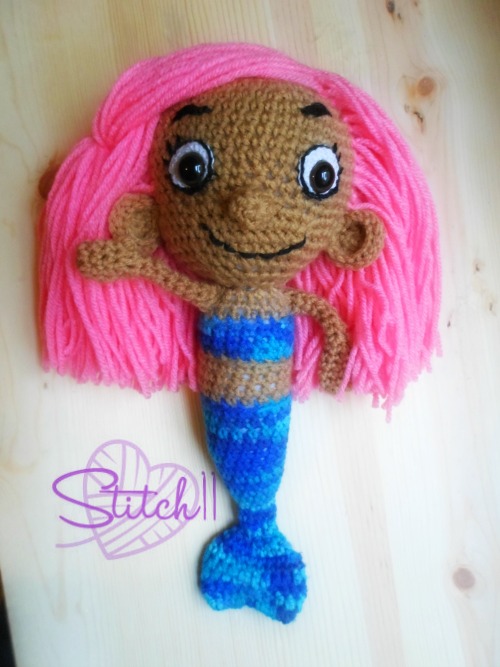
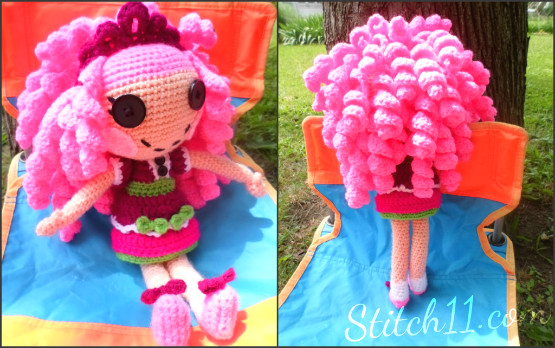
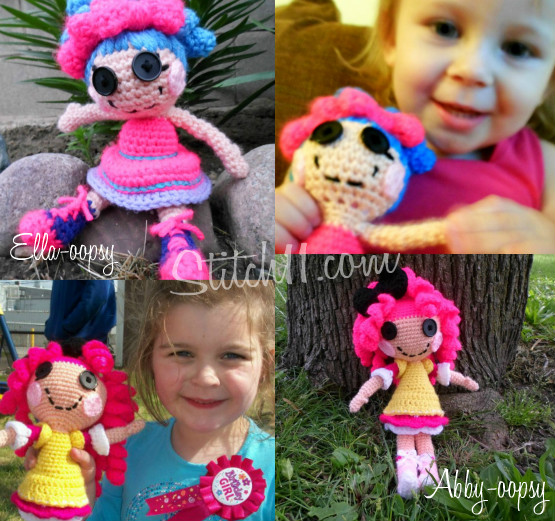
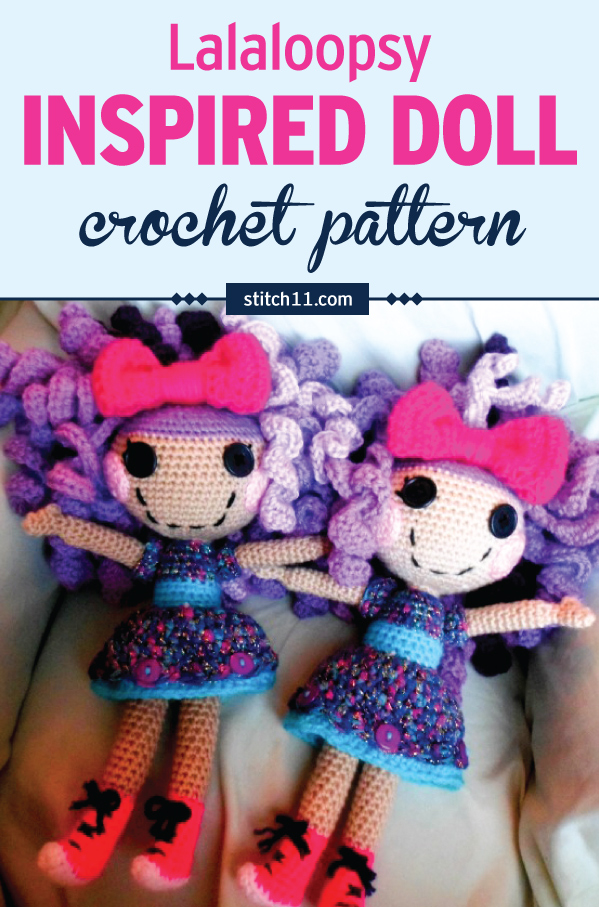
Here she is! For the last few months, I have had so many requests for me to write this free Lalaloopsy crochet pattern.  I tried to keep her simple and I did my best at explaining everything as well as I know how. This is not an “Easy” pattern…. mostly because it takes a little extra patience. This crochet pattern is loads of fun! I encourage you to be creative with your yarns. I used all medium weight yarns but mixed up the textures and brands of yarns and I LOVE it!!!  Now go look through your scraps and find all those small amounts of beautiful yarn that you have been waiting to use! And I will warn you, the hair takes twice as much yarn and twice as much time as it appears.

This Doll measures 12 inches in length.

Lalaloopsy Crochet Supplies

Medium Weight Yarn. Lots of colors! You can custom choose your color for what lalaloopsy you are going for.
2 one inch buttons
3.5 mm crochet hook for entire lalaloopsy doll. 5 mm hook for lalaloopsy hair and bow
Yarn needle
Scissors
Stuffing

Crochet Stitches used

SC – Single Crochet
HDC – Half Double Crochet
DC – Double Crochet
SC DEC – Single Crochet Decrease
Slip Stitch
CH- Chain
SC into front (or) back loop only

Note – When “joining” to your first stitch, you will use the slip stitch. On the next round it will say to crochet into the same stitch, you will be crocheting into the SC you joined to (not the slip stitch).

Free Crochet Lalaloopsy Crochet Pattern

Using 3.5 mm crochet hook

Crochet Lala Legs and Shoes (make two)

With your color choice for the sole of the shoes. (I used I Love This Yarn – Neon Purple)

Round 1: CH 8. SC in 2nd CH from hook. SC in next 2 CH. HDC in next 4 CH. HDC in same CH 3 more times. Turn and work into other side of CH. HDC into next 3 CH. SC into next 2 CH. SC 3 times into starting CH. Join to first SC (18 stitches)
I went ahead and wove my ends in now. 

Change to your choice of color for the shoes (I used Red Heart with Love – Lilac) *Joining to back loop only*

Round 2: In back loops only. CH 1, SC into same stitch and into next 4 stitches. 4 SC DEC.  SC into next 5 stitches.  Join to first SC. (14 SC)
Round 3: CH 1, SC into same stitch and next 2 stitches. 4 SC DEC. SC into next 3 stitches.  Join to first SC. (10 stitches)
Round 4-10:  CH 1, SC into same stitch and each stitch around. Join to first SC. (10 SC)
Finish off.. I went ahead and wove my end in and stuffed the boots with scrap yarns.

Change to skin color yarn (I used I Love This Yarn – Light Peach) *Joining to back loop only and into the starting stitch of round 10 *

Round 11: In back loops only. CH 1, SC into same stitch and each stitch around. Do not join (10 SC)
Work in continuous rounds now.
Round 12-28:  SC into same stitch and each stitch around. (10 SC)
Slip stitch into next stitch. Finish off.

Change to color of the undies/panties
Round 29-30: CH 1. SC into same stitch and each stitch around. Join to first SC. (10 SC)
Finish off the first leg but do not finish off the yarn with the second leg. Set the legs together and slip stitch into the stitch that lines up from the top of the other leg.
Round 31: CH 1, SC into same stitch. SC around the legs in one large circle. (20 SC)
Round 32-35: CH 1, SC into same stitch and each stitch around. Join to first SC. (20 SC)

Crochet Lalaloopsy Belt and Skirt

With color of your choice for the belt band. Join yarn to the back of the doll.. in the back loop only.

Round 36: In back loops only. CH 1, SC into same loops and around. Join to first SC. (20 SC)
Round 37-38: CH 1, SC into same stitch and each stitch around. Join to first SC. (20 SC)
Finish off (I wove in my ends)

Using color of your choice for the top layer of skirt. Attach to the back of the doll into the front loop from round 35.

Round 39: In front loops. Crocheting from the top of the loops so the pretty side of the stitches will lay down as the outside of the skirt. CH 1, HDC into same stitch and each stitch around. Join to first HDC. (20 HDC)
Round 40: CH 1, HDC into same stitch. 2 HDC into next stitch. **HDC into next stitch. 2 HDC into next stitch. Repeat from ** around. Join to first HDC. (30 HDC)
Round 41:CH 1, HDC into same stitch and into the next stitch. 2 HDC into next stitch. **HDC into next 2 stitches. 2 HDC into next stitch. Repeat from ** around. Join to first HDC. (40 HDC)
Round 42-43: CH 1, HDC into same stitch and each stitch around. Join to first HDC. (40 HDC)
Round 44: In front loop only. CH 1, SC in same stitch. Skip one stitch. 3 DC into next stitch.  Skip one stitch. **SC into next stitch. Skip one stitch. 3 DC into next stitch. Skip one stich** repeat from ** around. Join to first SC.

Change colors to your choice for the bottom layer of the dress. Attach to the back of the doll and  into the back loops from round 43. 

Round 45:  In the back loops only. CH 3, DC into each stitch around. Join to top of CH 3. (40 DC)
Round 46: CH 1, HDC into same stitch and each stitch around. Join to first HDC. (40 HDC)
Finish off and weave in your ends.

Add some bows and shoe strings!

I added bows to every other shell at the bottom of  the dress. When tying them on, I tied them through the center DC of the shell and I tied them through both the top and bottom layer of the skirt. (this helps the top layer from flipping up. The way I made my bows was very simple. I cut a piece of yarn and pulled in through from the top to the inside.. and then back out… and then tied it into a nice bow. If you are worried about your bows not wanting to stay tied, you can add a very small amount of hot glue under the knot and it will hold like a champ!
Now for the laces I used a yarn needle. I started at the bottom and pulled a piece of yarn half way through.. zig zagged both ends up the shoe and then tied them. Again, you can use a small amount of hot glue if you do not feel it it secure enough.

Lala Body

With color of your choice (I used the same color as the top layer of the skirt) Attach yarn to the back side of the doll. Into the back loop of the top of the belt. 

Round 47: In back loops only-  CH 1, SC into same stitch and each stitch around. Join to first SC. (20 SC)
Round 48-50:  CH 1, SC into same stitch and each stitch around. Join to first SC. (20 SC)
Round 51: CH 1, SC DEC around. Join to first SC DEC. (10 stitches)
Finish off and weave in your end. Go ahead and stuff the body of the doll.

Crochet Lalaloopsy Neck and Head (part 1)

Attach skin color yarn into the back loop.

Round 52: In back loops only. CH 1, SC into same stitch and each stitch around. Join to first SC. (10 SC)
Round 53: CH 1, SC into same stitch and each stitch around. Join to first SC. (10 SC)
Round 54: In front loops only- CH 1, 2 SC into same stitch and each stitch around. Do NOT join. (20 SC)
Start working in continuous rounds.
Round 55: 2 SC into same stitch. SC into next stitch ** 2 SC into next stitch. SC into next stitch. Repeat from ** around.  (30 SC)
Round 56: SC into each stitch around. (30 SC)
Round 57: 2 SC into same stitch. SC into next 2 stitches ** 2 SC into next stitch. SC into next 2 stitches. Repeat from ** around.  (40 SC)
Round 58: SC into each stitch around. (40 SC)
Round 59: 2 SC into same stitch. SC into next 3 stitches ** 2 SC into next stitch. SC into next 3 stitches. Repeat from ** around.  (50 SC)
Round 60: 2 SC into same stitch. SC into next 4 stitches ** 2 SC into next stitch. SC into next 4 stitches. Repeat from ** around.  (60 SC)
Round 61-70: SC into each stitch around. (60 SC)

Slip stitch into next stitch and finish off. Attach color of yarn you will be using for the hair. (I used Caron Simply Soft

Round 71: SC into each stitch around (60 SC) DO NOT FINISH OFF

This is where I put the crochet at a pause and made her face.

Lalaloopsy face

The first step to making the face is to add the eyes. But before you can sew the 1 inch buttons on, you will need to use some black yarn and your yarn needle to make the lashes. I cannot tell you exactly how to do this other than to make two lashes. I start the lashes where the button will cover and then work out at an upper angle.
-Sew on your buttons.
-With yarn needle stitch a smile. You can use my doll as a guide or you can google images a picture of a lalaloopsy doll.

Now for the cheeks. 
With light pink yarn. (make two)

Magic circle, CH 1, 9 HDC inside ring. pull ring tight and join to first HDC. CH 1, 2 SC into each HDC. Leave a long tale and use that tail to attach them to the face,

Crochet Lalaloopsy Head (part 2)

Pick the yarn pack up where you left off on the hair.

Round 72: SC into each stitch around (60 SC)
Round 73: **SC into next 2 stitches. SC DEC. Repeat from ** around. (45 stitches)
Round 74: **SC into next stitch. SC DEC . Repeat from ** around. (30 stitches)
Round 75: SC into each stitch around. (30 stitches)
Round 76: SC DEC around. (15 stitches)
Stuff the head now while you still have a small hole.
Round 77: SC DEC 7 times. SC into last stitch. ( 8 stitches)
Round 78: SC DEC around. (4 stitches)
Finish off leaving long tail to close hole.

Lalaloopsy Arms and Sleeves

Starting with skin color yarn.

Round 1: Magic circle, CH 1, SC 5 into magic ring, pull ring tight. Join to first SC. (5 SC)
Round 2-3: CH 1, SC into same stitch and each stitch around. Join to first SC. (5 SC)
Round 4: CH 1, HDC into same stitch. CH 1, Slip stitch into same stitch, SC into next 4 stitches. Join to first SC (skipping over the HDC thumb)
Round 5: CH 1, SC into each stitch around. (4 SC)
Round 6:  CH 1, 2 SC into each stitch around. Join to first SC (8 SC)
Working in continuous rounds now.
Round 7-19: SC into each stitch around. (8 SC)

Change colors to your choice for the sleeves. Attach the yarn in the front loop. You with be crocheting into the loops upside down so that the pretty side of the stitches will be on the outside of the sleeves.

Round 20: In front loops only.  CH 3, DC into same stitch and  DC into the next stitch. **2 DC into next stitch. DC into next stitch. Repeat from ** around.  Join to top of CH 3. (12 DC)
Round 21: CH 1, SC into same stitch and each stitch around, (12 SC)
Finish off. Weave in ends and attach the arms with a yarn needle. (I lightly stuffed the arms with yarn ends) This may be a little tight… be patient and it will all come together. I pinched the arm flat and sewed it on my the back loops that were left.

 Lalaloopsy Curls

Using 5 MM crochet hook

Leaving tail, CH 15, 3 DC into second CH from hook and down the rest of the chains.  *For a double curl do not finish off — CH 15, 3 DC into second CH from hook and in remaining chains. Cut yarn leaving tail – Make as many as it takes to get the fullness of hair you are going for.
To attach the hair. Inset hook around SC stitch of the scalp, pull one yarn tail through, tie both tails into a knot, the using yarn needle, weave in ends into the hair curl.
**When making my lalaloopsy with rainbow mohair I had to put 4 DC into each CH to get a good curl)

Crochet Hair Bow

With your choice of yarn color.

Step 1:  CH 33, DC into 4th CH from hook and each CH across. (31 DC)
Step 2-4: CH 3, Turn, DC into each stitch across. (31 DC)
Join both ends with a slip stitch. Fold the bow so that the seam is in in the middle. CH 60. Finish off leaving long end.. Wrap your chain around the center of the bow. Weave your ends in to secure the CH. And then using the same end, attach it to the top of the lalaloopsy head.

Lala Collection using Stitch11 crochet pattern

Filed Under: Free Patterns, Girls, Inspired, Toys Tagged With: crochet pattern, doll, doll crochat pattern, lalaloopsy, lalaloopsy crochet doll, lalaloopsy doll

Lalaloopsy Crochet Doll

June 30, 2013 By stitch11 12 Comments

Crochet Lalaloopsy Doll

Whats hot in the crochet world right now? Toys!! It's too hot for scarves, sweaters, and fun hats right now but its never too hot for a custom handmade crochet lovey! Children of all ages are helping us Yartist bring crochet up in today's market.  Lalaloopsy is one of the hottest current trends! Everyone loves the fun bright colors and beautiful curly hair. The button eyes can be a little creepy but the lashes  make up for it.

For this Lalaloopsy doll I used a free crochet pattern that I had found in The Yarn Box. I have already made 2 Lalaloopsy dolls at an earlier date– and when I posted pictures of them on my personal Facebook I had so many people asking for prices that I actually panicked a little.

When crocheting this doll I was going for the look of “Jewel Sparkles” from the Lalaloopsy movie that my daughter cannot seem to get enough of. I was hoping for a doll about 12 inches tall and quoted the buyer $50 for my time and work… I didn't expect the doll to end up about 1.5 feet tall or to take as long making her as I did– or I would have probably told her $75-$100 dollars. I did my best to follow the pattern but I had to change a lot to get the look I was going for. I didn't find it very hard to change but the pattern did seem flawed… or it may have just been my lack of reading comprehension skillz. Anyhow, the doll turned out beautiful! I could just stare at her for hours!!! I do recommend the free pattern from The Yarn Box and I think anyone with the basic crochet experience could have a lot of fun with it.

Filed Under: Free Patterns, Inspired

Yarn Bombing!

June 1, 2013 By stitch11 5 Comments

Yarn Bombing

I finally had my go at yarn bombing!

About 7 years ago, I attended some type of work family day with my mom. Lucky me won a door prize! It was an awesome bar stool with the word “Autocar” written across the seat. Yeah, the stool was really nice…. but it was so *ugly! The Autocar stool has sat in my closet ever since. A couple weeks ago I asked my mom if she would like to have it. She quickly replied that she would love to have it. Then it dawned on me…. So I sent my mom a Facebook message saying that she can have it after I am finished yarn bombing it!

How do you yarn bomb?

I have been wanting to yarn bomb ever since I first discovered hooking January of 2012. With so many beautiful masterpieces on Facebook and Pinterest… I was scared to even try!  But let me tell you, its not as hard as it looks! The greatest thing for me was the fact that I could have fun with it and not worry about messing up! I was able to practice and learn new stitches to give my yarn bomb some texture. But the greatest thing I discovered while making this yarn bomb was that you do not have to actually crochet ON the item you are bombing. You take a few simple measurements and make the pieces separate and then sew them together on the item you are yarn bombing! If you can make a circle or square,  you can yarn bomb too!

Yarn Bomb

Have you ever Yarn Bombed? What will be your next masterpiece?

Filed Under: Inspired

Crochet Lalaloopsy Dolls

May 17, 2013 By stitch11 6 Comments

Recently my niece Abby was having a birthday. I knew I wanted to make her something that would make her eyes light up. I asked my sister Miranda, from Work At Home Adventures, what I should make.  Since she has a little girl that is also 6, I knew she would have a clever idea. She quickly sent me a link from The Yarn Box for a free Lalaloopsy crochet pattern.
The Lalaloopsy pattern was simple enough for me to understand but I must admit, the pattern is flawed and at some points, it really lacked detail. Which is really fine with me since I like to do my own thing anyways. I think a crochet beginner would be able to figure the pattern out but experience will really come in handy with this one.
Shortly after I started making Abby's doll, my daughter Ella stressed to me how much she wanted one too… a baby one. I was going to write a free pattern for it to share with you but there were some flaws that I would really want to get fixed before posting. Don't worry though! You can find the free pattern for the original on Ravelry.

Crochet Lalaloopsy

Filed Under: Free Patterns, Inspired

Infant Overalls – Size 3 Months

April 28, 2013 By stitch11 12 Comments

Free 3 Month Crochet Overall patternAbout a year ago, a friend of mine took some amazing photos for me of the Chloe Hat and for my About Me. I promised her I would make her baby (who was still in her belly) a crochet item. I have started making things for her so many times in the past but never really loved anything enough to give her as a big “Thank You!” Last week I came across a pattern by Busting Stitches for a newborn suspenders and bow tie photo prop. That is the moment I decided I wanted to make clothing and a bow tie. I honestly wasn't wanting to write a pattern but after searching and searching for a free boy clothing pattern…. I had no choice but create something of my own.
Wyatt (pictured above) is 13 lbs and is 4 months old. Since this is my first time really making clothing, I am not exactly sure if this outfit would be 0-3, 3-6, or 0-6 months in size- so “3 months” is what I will call it 😉  I did actually use measurements and 3-6 month clothing as a guide, but Wyatt is in 0-3 month clothing so “3 months” really seems safe.

This pattern is a very simple crochet pattern and ideal for even the crochet beginner. If you are not up for the “Foundation Chain” you can use the regular technique of chaining and shouldn't have any issues.

[Read more…]

Filed Under: Boys, Free Patterns, Inspired

Adult Yoda hat

April 9, 2013 By stitch11 10 Comments

Do you have a Star Wars fan in your house? This Yoda hat crochet pattern is designed for an adult male with a 24-inch head circumference. When laying this beanie flat, it measures 11 inches across and is just over 8.5 inches tall. This pattern is a custom fit for a family member. #crochet #crochetlove #crochetlife #crochetaddict #crochetpattern #ilovecrochet #crochetgifts #crochet365 #addictedtocrochet #yarnaddict #yarnlove
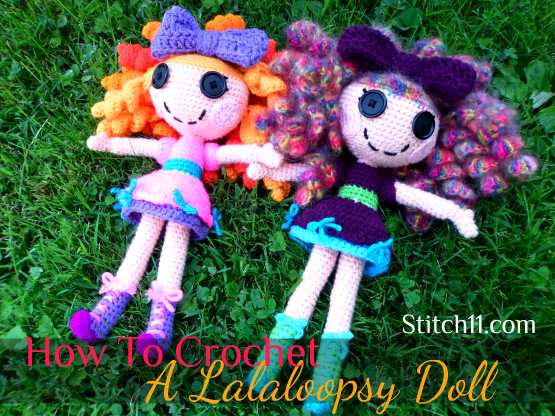
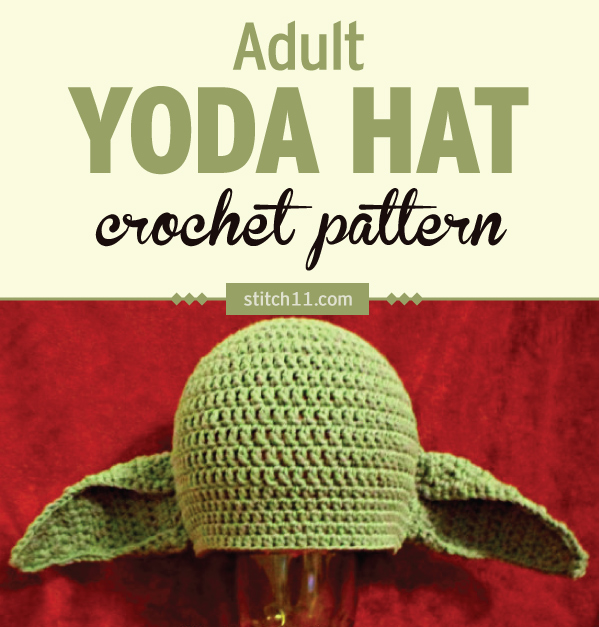
This Yoda beanie is designed for an adult male with a 24-inch head circumference. When laying this beanie flat, it measures 11 inches across and is just over 8.5 inches tall. If you need a different size you can add rounds or you can use your favorite beanie pattern and just use the Yoda ears from this pattern.  I also have a free 3-6 month size Yoda hat crochet pattern available.  This pattern is a custom fit for a family member. If you are not sure of what size you need, I would suggest checking out the size chart at the bottom of the post that I discovered on Crochet In Color.

Supplies:
Baby Bee – Hushabye Solid – Baby Sage yarn (4 Medium)
5mm (H/8) hook
Yarn Needle

Abbreviations:
CH – Chain
SC – Single Crochet
HDC – Half Double Crochet
DC – Double Crochet
HDC 3 Together

Adult Large Yoda Hat

CH 3 Does not count as DC

Round 1: Magic Ring, CH 3, DC 10, pull ring tight, join to top CH of CH 3
Round 2: CH 3, 2 DC each DC around. Join to top CH of CH 3. (20 DC)
Round 3: CH 3. *2 DC in next DC, DC in next DC, repeat from * around. Join to top CH of CH 3. (30 DC)
Round 4: CH 3. *2 DC in next DC, DC in next 2 DC, repeat from * around. Join to top CH of CH 3. (40 DC)
Round 5: CH 3. *2 DC in next DC, DC in next 3 DC, repeat from * around. Join to top CH of CH 3. (50 DC)
Round 6: CH 3. *2 DC in next DC, DC in next 4 DC, repeat from * around. Join to top CH of CH 3. (60 DC)
Round 7: CH 3. *2 DC in next DC, DC in next 5 DC, repeat from * around. Join to top CH of CH 3. (70 DC)
Round 8-15: CH 3, DC in each DC around. Join to top CH of CH 3.
Round 16-19: CH 2, HDC into each stitch around. Join to top of CH 2.

Finish Off

Crochet Yoda Ears

Using  5 mm hook.

Using TWO strands of yarn.

Row 1. CH 15, Skip 1 CH, HDC in next 14 CH. (14 HDC)
Row 2: Turn, CH 1, HDC across. (14 HDC)
Row 3: Turn, CH 1, HDC 2 Together, HDC into next 10 HDC. HDC 2 Together. (12 Stitches)
Row 4: Turn, CH 1, HDC across. (12 HDC)
Row 5: Turn, CH 1,  HDC 2 Together, HDC into next 8 HDC, HDC 2 Together. (10 Stitches)
Row 6: Turn, CH 1, HDC across. (10 HDC)
Row 7: Turn, CH 1, HDC 2 Together, HDC into next HDC.  HDC 2 Together, HDC 2 Together, HDC into next stitch. HDC 2 Together. (6 Stitches)
Row 8-9: Turn, CH 1, HDC across. (6 HDC)
Row 10: Turn, CH 1, HDC 2 Together, HDC into next 2 stitches. HDC 2 together.(4 stitches)
Row 11: Turn, CH 1, HDC  into each stitch. (4)
Row 12: Turn, CH 1, HDC 2 together 2 times. (2 stitches)
Row 13: Turn, CH 1, HDC 2 together, CH 1
SC around the edge of the ear. With 3 SC into each corner.
Repeat for 2 ears and weave in your ends with yarn needle

When attaching the ears, I folded the of the top of the ear down around 4-5 stitches and the bottom of the ear up about 2 stitches.

Size Chart

Newborn
Head Circumference 13″ – 14 ”
Hat Circumference = 11.5″ – 13″
Hat height = 5.5 to 6″

3 to 6 months
Head Circumference: 14″ – 17 ”
Hat height= 6.5 – 7″

6 to 12 months
Head Circumference: 16″ – 19 ”
Hat height = 7.5″

Toddler -12 months – 3 years
Hat height = 8″
Head Circumference: 18″ to 20 ”

Child – 3 – 10 years
Hat height =8.5″
Head Circumference: 19″ – 20 1/2″

Teens
Hat height 9-10″
Head Circumference: 20 1/2″ – 22″

Adult Woman
Head Circumference: 21.5″ – 22.5″

Adult Man
Head Circumference: 23″ – 24″

Filed Under: Costumes, Free Patterns, Hats, Inspired Tagged With: adult yoda hat, crochet yoda hat, yoda, yoda hat, yoda hat crochet pattern

  • « Previous Page
  • 1
  • 2
  • 3
  • 4
  • Next Page »
  • Email
  • Facebook
  • Pinterest
  • RSS

Stitch11 is a Red Heart Blogger!

unnamed

.

Grab My Button

Archives

Privacy Policy

Copyright © 2026 Stitch11.com · All Rights Reserved · Log in