• Home
  • Free Patterns
    • Toys
    • Costumes
    • Bags
    • Flowers
    • Hats
    • Pattern Reviews
    • Household
    • Newborn
    • Scarves
    • Sports
  • Disclosure
  • Contact
  • Yummy Food
  • Round Ups

Stitch11

A Yarntastic Life!

  • Girls
  • Boys
  • Hats
  • Newborn
  • Flowers
  • Household
  • Costumes
  • Toys
  • Pattern Reviews
  • Grannys
You are here: Home / Archives for stitch11

God’s Timing

August 25, 2013 By stitch11 19 Comments

God's Timing

I believe God has perfect timing for everything.

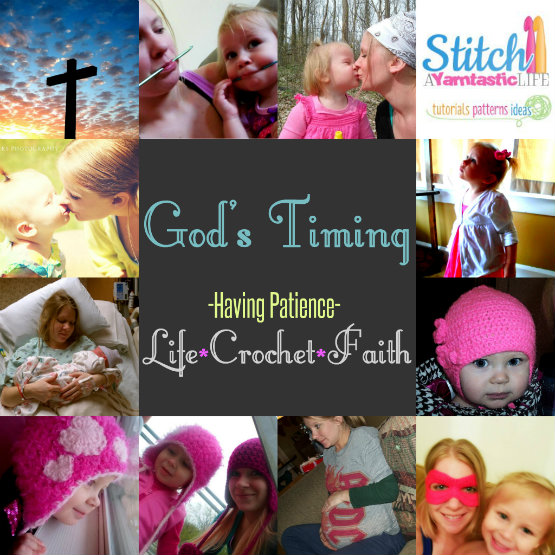
I wanted to share my story of how God had put a child and crochet in my life at the perfect time.
I am always amazed at how things add up and line up in my life… things you never understand until years later.

Growing up, I had many people try to teach me how to crochet. The farthest I had ever reached with my hook was making a sloppy chain. In my early 20's I became a Homemaker (cleaned for the elderly) I had one client who insisted I learn how to crochet instead of dusting behind her mountains of storage containers. (which I now know what she was hoarding ;))
I remember this beautiful old woman being so frustrated with me. It was almost like she could see the crochet light in my eyes and she was determined to help me reach my potential…. but I just couldn't hold the yarn or hook correct… let alone actually crochet! I gave up. The idea of crocheting was such a tiny little thought in my brain. The thought of me actually picking up a hook and learning was obsolete.

During this time, I was also trying to have a baby. Month after month, year after year, I would get my hopes up. Wasting money on pregnancy tests were a monthy activity. After 8 years I gave up. For years I had cried out to God. I didn't understand why I wasn't *good enough* *woman enough* I came to the idea that God didn't design me to have children. I believed this until Mothers Day 2010.

My world changed rapidly after that day.

I was blessed with a healthy daughter on 1-11-11. I then knew there was a reason it took me so many years to have her. In fact… there are many reasons. One year after having Ella, I picked up a crochet hook and a cheap skein of yarn and everything clicked in my brain. It was almost like this part of my brain was suddenly able to process a foreign language and all while my hands were able to hold a hook and yarn with ease. I was suddenly a natural.

I believe there is a reason it took me so long to have a child. I also believe there is a reason it took even longer to spark up the crochet wiring in my brain. God has a plan. And it is up to us to have faith and trust in him. Sometimes it is so hard to be patient… understanding…. but when he reveals the Big Picture, it will all make sense. We will know he had the best intentions for each of us the entire time…. and we wouldn't want it any other way.

I can now look back at my life and know things would be so different if the timing would have been sooner. The world I know right now would not exist in my reality. Who knows what kind of mother I would have been if it had not taken 8 years to conceive.  The crochet community probably would have never been discovered by me. There would be no Stitch11. Most likely I would not be a stay at home mom…. I would be either waiting tables or in some dirty factory. My point is, God has a plan. Sometimes what feels like punishment to us is actually a blessing that we are not meant to understand just yet.  So have faith and remember to praise him through the storms…. it is those very storms that will help your gardens grow.
Filed Under: Inspired

Ninja Turtle Mask

August 22, 2013 By stitch11 67 Comments

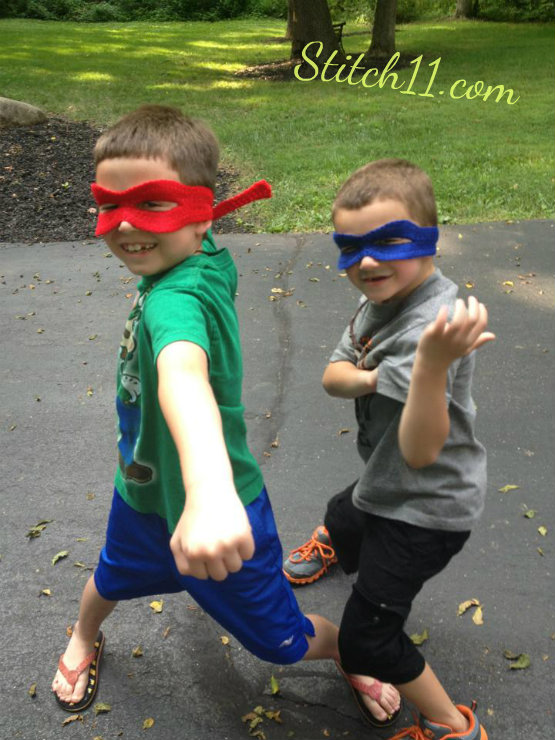
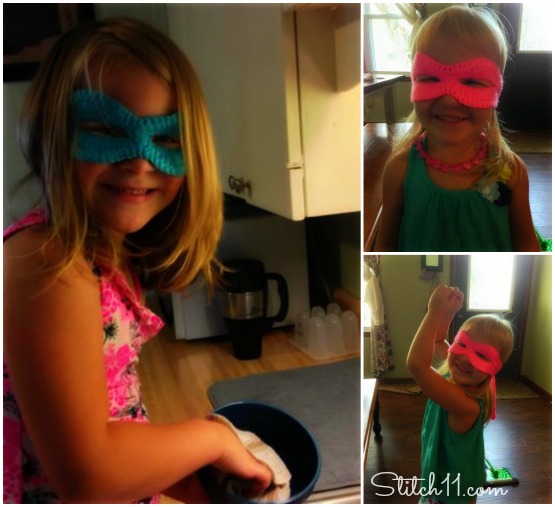
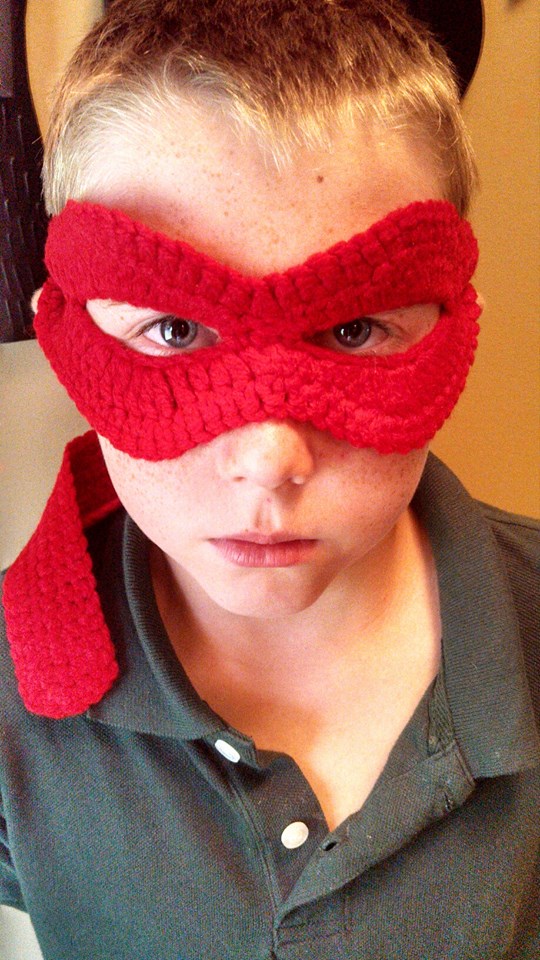
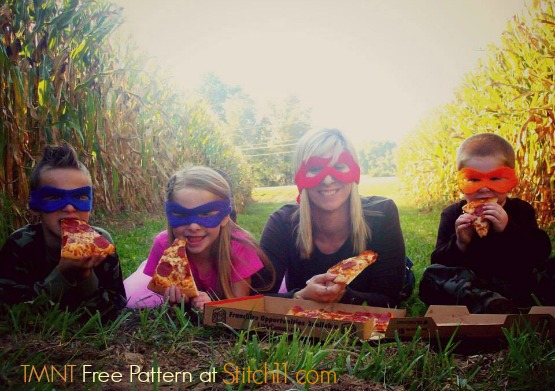
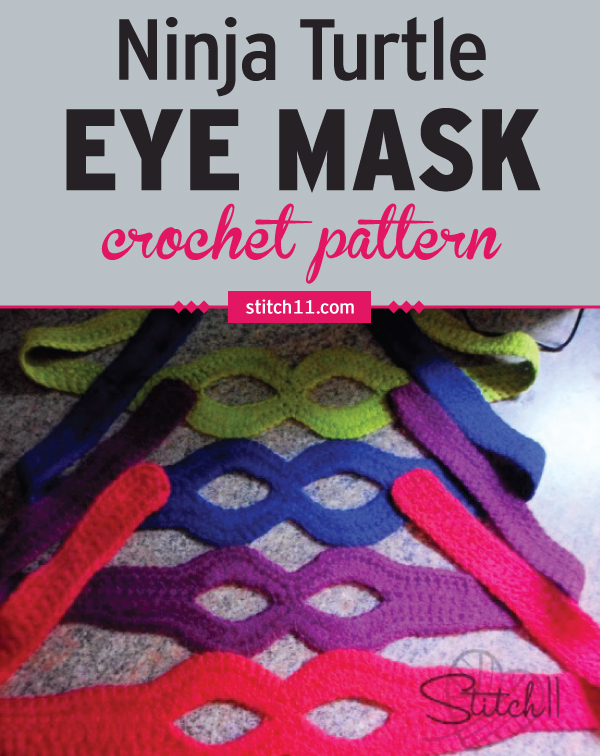
The Ninja Turtle Mask is in the theme of the popular Teenage Mutant Ninja Turtles. Crochet a number of these in every color for each of your ninjas. #crochet #crochetlove #crochetlife #crochetaddict #crochetpattern #crochetinspiration #ilovecrochet #crochetgifts #crochet365 #addictedtocrochet #yarnloveDuring this last week, I have tried and tested countless crochet masks. My goal was to make 4 ninja masks in the theme of the TMNT. 9 masks later I finally got it! I love the technique of making this mask and am very proud to say I came up with it. Now that I have made so many (using this pattern I have written out for you) I already have many more ideas for masks that I plan to test out in the upcoming weeks. So find a ninja or superhero near you and create them a mask of their own!Crochet Ninja Mask
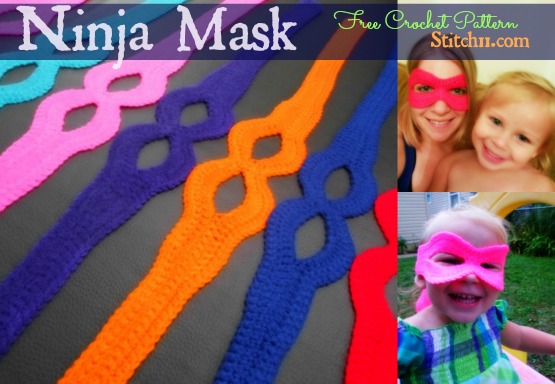
Ninja Turtle Mask

Supplies

Medium weight yarn (Red Heart Super Saver or I Love This Yarn)
Using H hook
Yarn Needle (for weaving in your ends)
Iron and wet cloth (for killing yarn)
A Super Hero 😉

Stitches
CH- Chain
HDC- Half Double Crochet
DC- Double Crochet
HDC 3 Together
Slip Stitch

Get Started!

Row 1: CH 116, turn, skip 1 CH. SC in next 40 CH, HDC in next CH, DC in next 9 CH, 2 DC in next 2 CH. 3 DC in next CH. 2 DC in next CH. HDC in next CH. 2 HDC in next CH. HDC 3 together. 2 HDC in next CH. HDC in next CH. 2 DC in next CH. 3 DC in next CH. 2 DC in next 2 CH. DC in next 9 CH. HDC in next CH. SC in next 40 CH. slip stitch into the same chain. CH 1, turn.

Row 2: (working on the other side of the CH)  SC in same CH and next 47 CH. CH 8. Skip 8 stitches. SC in next 3 CH. CH 8, skip 8 stitches. SC in next 48 CH. CH 1, turn.

Row 3: SC in the same stitch and next 37, HDC in next stitch, DC in next 9 stitches, DC into next CH. 2 DC in next 2 CH. 3 DC in next CH. 2 DC in next CH. HDC in next CH. 2 HDC in next CH. HDC in next CH. HDC 3 together. HDC in next CH. 2 HDC in next CH. HDC in next CH. 2 DC in next CH. 3 DC in next CH. 2 DC in next 2 CH. DC in last CH. DC in next 9 stitches. HDC in next stitch. SC in next 38 stitches.

Row 4: CH 1, SC around the entire piece. Join to first SC.

Now you need to weave in your ends. Lay the piece on a flat surface and kill the acrylic yarn! To do this you will need to lay a wet washcloth or towel over the piece and iron it. For a “How to kill acrylic yarn”check out Moogly's tutorial! *tip* killing and letting it air dry will help the fit

.
Free Ninja Mask Crochet Pattern

Girl Ninja Masks

TMNT crochet mask

TMNT - Free Crochet Pattern

Filed Under: Boys, Costumes, Free Patterns, Toys Tagged With: crochet, crochet pattern, mask, mask crochet tutorial, ninja mask

Owl Cuddle Lovey

August 17, 2013 By stitch11 17 Comments

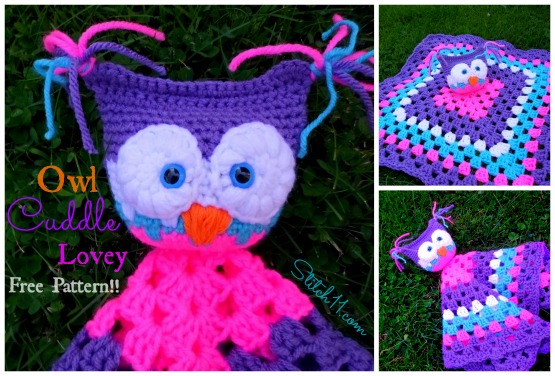
free owl cuddle lovey crochet pattern

I designed this free crochet pattern for an Owl Cuddle Lovey to be ideal for children of all ages. It is perfect for cuddles and comfort. Get creative with your colors, yarn, texture, and pattern. No lovey should ever be the same!

[Read more…]

Filed Under: Free Patterns, Girls, Newborn, Toys

Crochet Tree Frog

August 13, 2013 By stitch11 12 Comments

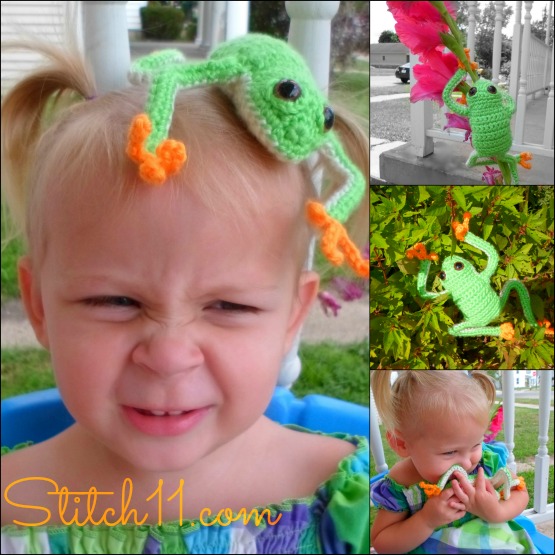
Crochet Tree Frog

My daughter has been begging me to make her so many things… and this frog is one of them. When she lists off everything she wants to add to my list, I will have her sit with me while we look at photos. If she see's something she wants, I can only hope the pattern is free or that I can come up with it myself. With this adorable tree frog I was lucky enough to catch a free pattern! Roman Sock has many free crochet patterns that are very cool like the frog pictured above. It was a lot of work but gets done quickly…. if that makes sense. I felt like an expert crocheter after finishing this one 🙂 Thanks Roman Sock!!

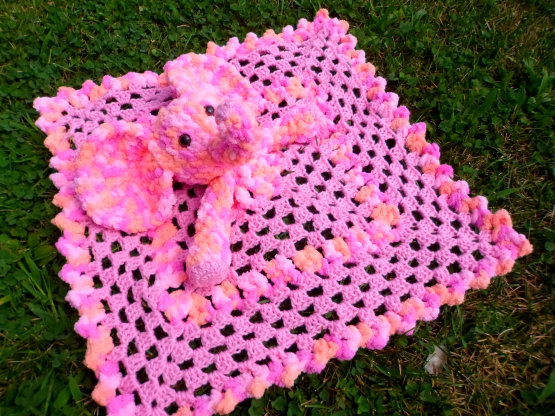
And pictured below is the Elephant Lovey… I will be working up a few more soon and writing the pattern. But before I can get to that, I know a little boy who is having a rough time right now… and I am betting some Ninja Turtles will bring some sunshine to  his life.

Elephant Lovey

Filed Under: Free Patterns, Pattern Reviews

Toddler Granny Slouch Hat

August 9, 2013 By stitch11 2 Comments

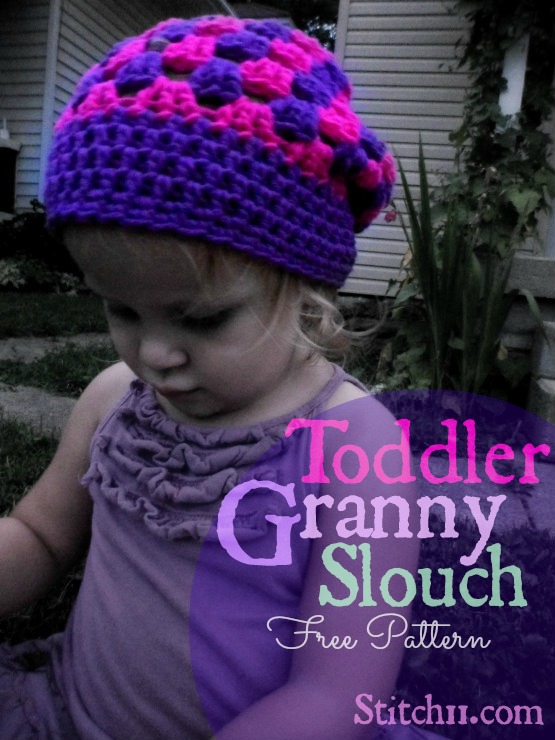
Free toddler Slouch Crochet Pattern
While writing the Adult Granny Slouch Hat, my daughter was already telling me she wanted a pink and purple one next. Little did she know, I was already planning hers out in those very colors <3 This slouch hat pattern is written for toddlers, 1-3 years of age. Now available – Child Size Granny Slouch Hat

[Read more…]

Filed Under: Free Patterns, Girls, Grannys, Hats

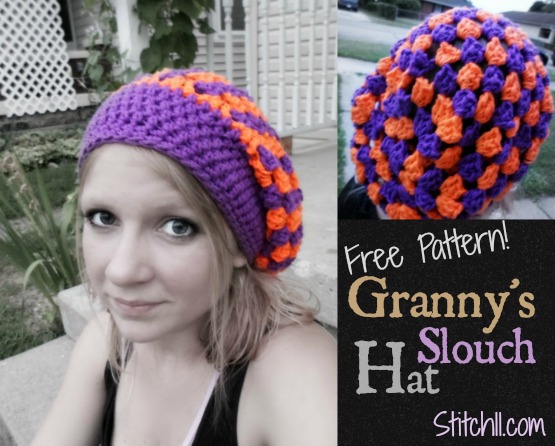
Granny’s Slouch Hat

August 8, 2013 By stitch11 41 Comments

Free Slouch Hat Crochet Pattern
Yesterday my husband took me to JoAnn Fabrics to get a few sets of safety eyes. I purposely kept my eyes on the “Isle 10” sign so I could avoid looking at the yarn before getting what I had came for. Before I could even grab the little bag of eyes off the display hook, Chad was already telling me how many great yarn deals were going on a few isles down. In the lovely little piece of yarn heaven I noticed a box of huge Medium Weight Bernat Cotton marked down to 5 dollars each. The price wasn't as appealing as the 97 cent specialty yarns but the beautiful colors and amount of yardage was too good to pass up!
It did not take me long after getting this yummy yarn in my hand that I was visualizing this very hat! Super quick, super fun, and I think its a pretty easy one too!  So grab your K hook and get hookin'! Now Available –Toddler Granny Slouch– Child Size Granny Slouch

[Read more…]

Filed Under: Free Patterns, Hats

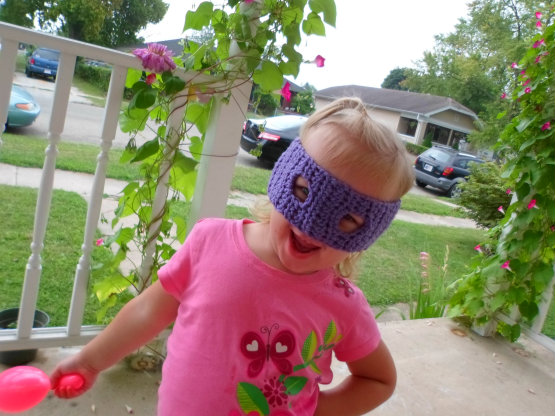
Ear Warmer/Ninja Mask

August 7, 2013 By stitch11 2 Comments

Ear Warmer/Ninja Mask


This Morning my daughter, Ella, woke up in a slightly sad mood. She told me she missed her aunt, uncle, and cousins. When I told her her cousins both started school today, she looked as if her heart was broken. So I decided to make her something that I was hoping would give her a smile. I did a quick search at The Yarn Box (with her watching over my shoulder) When we came across this Super Hero Mask/Ear Warmer she gasped for air and ran to get her miracas… which she calls her “ninja sticks”.
The free pattern is written by The Worsted Crochet Blog… Ever and was extremely easy to follow and worked up fast. I did make mine 4 rows shorter…. other than that, I followed the pattern to a T.
Ella loves her “Ninja Mask”! I may still add a pink bow so she can use it this fall when it starts to get cooler out. 🙂

Filed Under: Boys, Free Patterns, Girls, Pattern Reviews

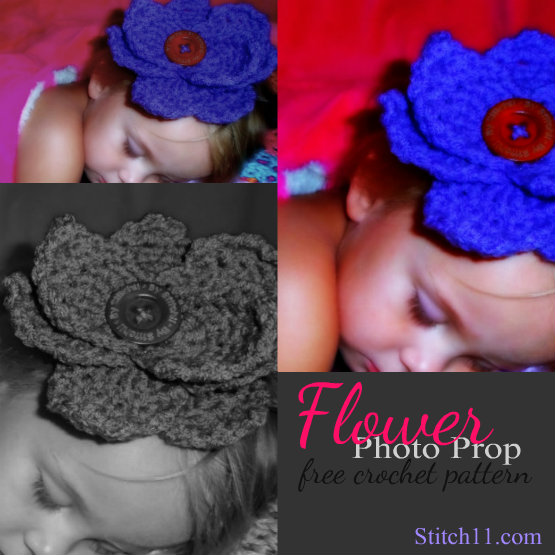
Flower Photo Prop

August 5, 2013 By stitch11 7 Comments

Free Flower Photo Prop Crochet Pattern

This large photo prop crochet flower is inspired by the pineapple stitch. I wanted to create a free pattern to embellish beautiful little girls during a photo shoot. While awake or asleep, this crochet flower is perfect for all little angels.

[Read more…]

Filed Under: Flowers, Free Patterns, Girls

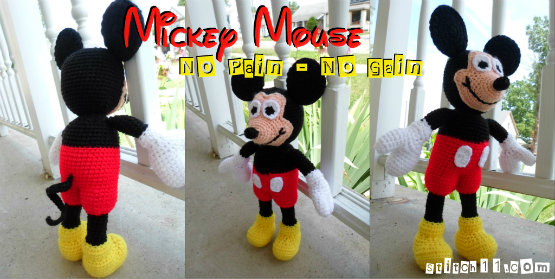
Painful Crochet

August 2, 2013 By stitch11 5 Comments

Crochet Mickey Mouse

No pain – No gain?

I have been crocheting for about a year and a half. When first learning to crochet I would get hand cramps and minor blisters but would power through them. My hands were getting stronger with every knot and the skin on my thumb was building strength also. Every so often the pain would come back but would fade away as I would continue with my crochet item.

Then I discovered Amigurumi!

The first few amigurumi pieces I made were a few cats and a toy airplane. When crocheting the cats I discovered a new level of crochet pain but the projects were small enough that I could still get through the aches and blisters.

My most recent project that consisted of tight single crochet through out the entire project were the Lalaloopsy dolls and the free pattern. After each one I told myself I would take a break from using tight stitches until my hands had time to heal but the outcome of the dolls were so rewarding that I could not help but to keep making them! After the third one I made a promise to myself that I would make something with looser stitches. But that promise was broken quickly when my sister-in-law requested a Mickey Mouse doll for my nephew who is having a Mickey Mouse party to celebrate his first birthday.  I thought about finding an alternative project but then I visualized him smiling from ear to ear while chewing on Mickey's nose. How could I miss out on this opportunity?!

Sometimes writing it out just isn't going to happen…

With every project I do, I do my best to write out the pattern step by step to share with all of you. Sharing my patterns are just as rewarding as gifting the crochet item to people I love.  I truly cannot put into words how rewarding it feels to share my God given gifts with the world. BUT this darn Mickey Mouse had me ready to chop off my hands! All I could think about was getting the doll done so I can take a couple day break from crochet and have the doll ready in time for his party. So I am very sorry to say, half way through Mickey Mouse I stopped writing the pattern out. 🙁 And of course, now that I am done… I wish I would have just written it out 0.O

There is always a bright side.

I am one of those people who look at the bright side of EVERYTHING. I cannot help it. I can come up with something positive from almost any situation… to the point that I kinda creep myself out. Not that this is one of those times 😉  Anyhow, I now have all the mickey mouse colors and I am hoping to have the chance soon to sit down and make a smaller version of Mickey…. and Goofy because that is what my daughter is begging me to make! Also, now that I have made this GIANT Mickey Mouse.. I have a better idea of what I am getting into and how to get the shapes correct and simple. But, before I can attempt any more items with tight stitches.. I have a few other things on my list that will be easier on my hands… so my hands can come back to them stronger than ever!

Filed Under: Inspired

Lalaloopsy Inspired Doll

July 10, 2013 By stitch11 49 Comments

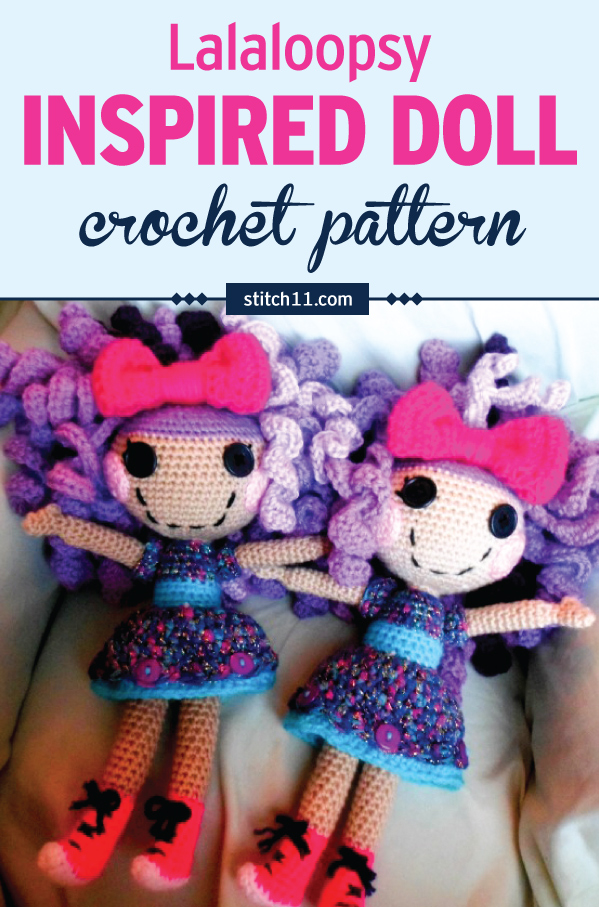
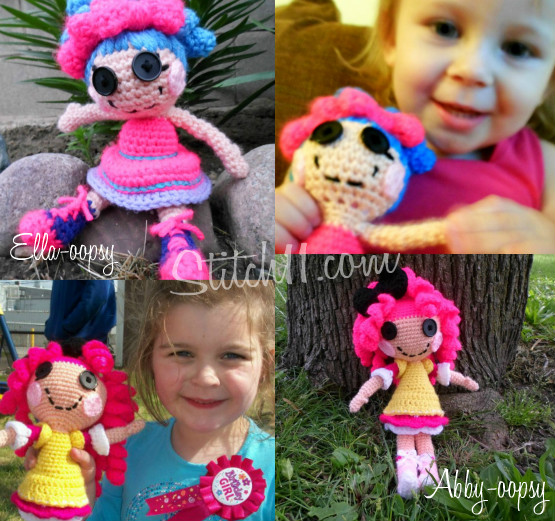
Lalaloopsy inspired doll crochet pattern. Easy to love and adorably cute! Make a very special doll for your child or as a gift that is sure to be cherished. #crochet #crochetlove #crochetlife #crochetaddict #crochetpattern #crochetdoll #ilovecrochet #crochetgifts #crochet365 #addictedtocrochet #yarnaddict #yarnloveHere she is! For the last few months, I have had so many requests for me to write this free Lalaloopsy crochet pattern.  I tried to keep her simple and I did my best at explaining everything as well as I know how. This is not an “Easy” pattern…. mostly because it takes a little extra patience. This crochet pattern is loads of fun! I encourage you to be creative with your yarns. I used all medium weight yarns but mixed up the textures and brands of yarns and I LOVE it!!!  Now go look through your scraps and find all those small amounts of beautiful yarn that you have been waiting to use! And I will warn you, the hair takes twice as much yarn and twice as much time as it appears.
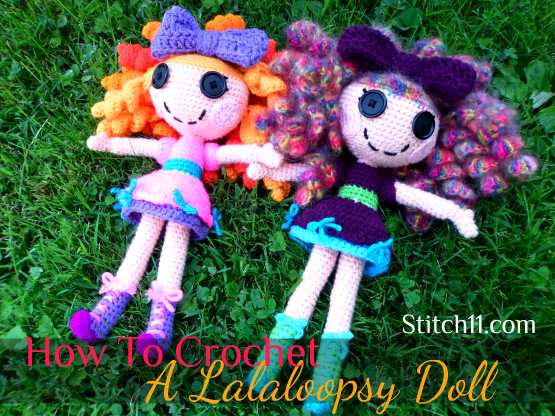
This Doll measures 12 inches in length.

Lalaloopsy Crochet Supplies

Medium Weight Yarn. Lots of colors! You can custom choose your color for what lalaloopsy you are going for.
2 one inch buttons
3.5 mm crochet hook for entire lalaloopsy doll. 5 mm hook for lalaloopsy hair and bow
Yarn needle
Scissors
Stuffing

Crochet Stitches used

SC – Single Crochet
HDC – Half Double Crochet
DC – Double Crochet
SC DEC – Single Crochet Decrease
Slip Stitch
CH- Chain
SC into front (or) back loop only

Note – When “joining” to your first stitch, you will use the slip stitch. On the next round it will say to crochet into the same stitch, you will be crocheting into the SC you joined to (not the slip stitch).

Free Crochet Lalaloopsy Crochet Pattern

Using 3.5 mm crochet hook

Crochet Lala Legs and Shoes (make two)

With your color choice for the sole of the shoes. (I used I Love This Yarn – Neon Purple)

Round 1: CH 8. SC in 2nd CH from hook. SC in next 2 CH. HDC in next 4 CH. HDC in same CH 3 more times. Turn and work into other side of CH. HDC into next 3 CH. SC into next 2 CH. SC 3 times into starting CH. Join to first SC (18 stitches)
I went ahead and wove my ends in now. 

Change to your choice of color for the shoes (I used Red Heart with Love – Lilac) *Joining to back loop only*

Round 2: In back loops only. CH 1, SC into same stitch and into next 4 stitches. 4 SC DEC.  SC into next 5 stitches.  Join to first SC. (14 SC)
Round 3: CH 1, SC into same stitch and next 2 stitches. 4 SC DEC. SC into next 3 stitches.  Join to first SC. (10 stitches)
Round 4-10:  CH 1, SC into same stitch and each stitch around. Join to first SC. (10 SC)
Finish off.. I went ahead and wove my end in and stuffed the boots with scrap yarns.

Change to skin color yarn (I used I Love This Yarn – Light Peach) *Joining to back loop only and into the starting stitch of round 10 *

Round 11: In back loops only. CH 1, SC into same stitch and each stitch around. Do not join (10 SC)
Work in continuous rounds now.
Round 12-28:  SC into same stitch and each stitch around. (10 SC)
Slip stitch into next stitch. Finish off.

Change to color of the undies/panties
Round 29-30: CH 1. SC into same stitch and each stitch around. Join to first SC. (10 SC)
Finish off the first leg but do not finish off the yarn with the second leg. Set the legs together and slip stitch into the stitch that lines up from the top of the other leg.
Round 31: CH 1, SC into same stitch. SC around the legs in one large circle. (20 SC)
Round 32-35: CH 1, SC into same stitch and each stitch around. Join to first SC. (20 SC)

Crochet Lalaloopsy Belt and Skirt

With color of your choice for the belt band. Join yarn to the back of the doll.. in the back loop only.

Round 36: In back loops only. CH 1, SC into same loops and around. Join to first SC. (20 SC)
Round 37-38: CH 1, SC into same stitch and each stitch around. Join to first SC. (20 SC)
Finish off (I wove in my ends)

Using color of your choice for the top layer of skirt. Attach to the back of the doll into the front loop from round 35.

Round 39: In front loops. Crocheting from the top of the loops so the pretty side of the stitches will lay down as the outside of the skirt. CH 1, HDC into same stitch and each stitch around. Join to first HDC. (20 HDC)
Round 40: CH 1, HDC into same stitch. 2 HDC into next stitch. **HDC into next stitch. 2 HDC into next stitch. Repeat from ** around. Join to first HDC. (30 HDC)
Round 41:CH 1, HDC into same stitch and into the next stitch. 2 HDC into next stitch. **HDC into next 2 stitches. 2 HDC into next stitch. Repeat from ** around. Join to first HDC. (40 HDC)
Round 42-43: CH 1, HDC into same stitch and each stitch around. Join to first HDC. (40 HDC)
Round 44: In front loop only. CH 1, SC in same stitch. Skip one stitch. 3 DC into next stitch.  Skip one stitch. **SC into next stitch. Skip one stitch. 3 DC into next stitch. Skip one stich** repeat from ** around. Join to first SC.

Change colors to your choice for the bottom layer of the dress. Attach to the back of the doll and  into the back loops from round 43. 

Round 45:  In the back loops only. CH 3, DC into each stitch around. Join to top of CH 3. (40 DC)
Round 46: CH 1, HDC into same stitch and each stitch around. Join to first HDC. (40 HDC)
Finish off and weave in your ends.

Add some bows and shoe strings!

I added bows to every other shell at the bottom of  the dress. When tying them on, I tied them through the center DC of the shell and I tied them through both the top and bottom layer of the skirt. (this helps the top layer from flipping up. The way I made my bows was very simple. I cut a piece of yarn and pulled in through from the top to the inside.. and then back out… and then tied it into a nice bow. If you are worried about your bows not wanting to stay tied, you can add a very small amount of hot glue under the knot and it will hold like a champ!
Now for the laces I used a yarn needle. I started at the bottom and pulled a piece of yarn half way through.. zig zagged both ends up the shoe and then tied them. Again, you can use a small amount of hot glue if you do not feel it it secure enough.

Lala Body

With color of your choice (I used the same color as the top layer of the skirt) Attach yarn to the back side of the doll. Into the back loop of the top of the belt. 

Round 47: In back loops only-  CH 1, SC into same stitch and each stitch around. Join to first SC. (20 SC)
Round 48-50:  CH 1, SC into same stitch and each stitch around. Join to first SC. (20 SC)
Round 51: CH 1, SC DEC around. Join to first SC DEC. (10 stitches)
Finish off and weave in your end. Go ahead and stuff the body of the doll.

Crochet Lalaloopsy Neck and Head (part 1)

Attach skin color yarn into the back loop.

Round 52: In back loops only. CH 1, SC into same stitch and each stitch around. Join to first SC. (10 SC)
Round 53: CH 1, SC into same stitch and each stitch around. Join to first SC. (10 SC)
Round 54: In front loops only- CH 1, 2 SC into same stitch and each stitch around. Do NOT join. (20 SC)
Start working in continuous rounds.
Round 55: 2 SC into same stitch. SC into next stitch ** 2 SC into next stitch. SC into next stitch. Repeat from ** around.  (30 SC)
Round 56: SC into each stitch around. (30 SC)
Round 57: 2 SC into same stitch. SC into next 2 stitches ** 2 SC into next stitch. SC into next 2 stitches. Repeat from ** around.  (40 SC)
Round 58: SC into each stitch around. (40 SC)
Round 59: 2 SC into same stitch. SC into next 3 stitches ** 2 SC into next stitch. SC into next 3 stitches. Repeat from ** around.  (50 SC)
Round 60: 2 SC into same stitch. SC into next 4 stitches ** 2 SC into next stitch. SC into next 4 stitches. Repeat from ** around.  (60 SC)
Round 61-70: SC into each stitch around. (60 SC)

Slip stitch into next stitch and finish off. Attach color of yarn you will be using for the hair. (I used Caron Simply Soft

Round 71: SC into each stitch around (60 SC) DO NOT FINISH OFF

This is where I put the crochet at a pause and made her face.

Lalaloopsy face

The first step to making the face is to add the eyes. But before you can sew the 1 inch buttons on, you will need to use some black yarn and your yarn needle to make the lashes. I cannot tell you exactly how to do this other than to make two lashes. I start the lashes where the button will cover and then work out at an upper angle.
-Sew on your buttons.
-With yarn needle stitch a smile. You can use my doll as a guide or you can google images a picture of a lalaloopsy doll.

Now for the cheeks. 
With light pink yarn. (make two)

Magic circle, CH 1, 9 HDC inside ring. pull ring tight and join to first HDC. CH 1, 2 SC into each HDC. Leave a long tale and use that tail to attach them to the face,

Crochet Lalaloopsy Head (part 2)

Pick the yarn pack up where you left off on the hair.

Round 72: SC into each stitch around (60 SC)
Round 73: **SC into next 2 stitches. SC DEC. Repeat from ** around. (45 stitches)
Round 74: **SC into next stitch. SC DEC . Repeat from ** around. (30 stitches)
Round 75: SC into each stitch around. (30 stitches)
Round 76: SC DEC around. (15 stitches)
Stuff the head now while you still have a small hole.
Round 77: SC DEC 7 times. SC into last stitch. ( 8 stitches)
Round 78: SC DEC around. (4 stitches)
Finish off leaving long tail to close hole.

Lalaloopsy Arms and Sleeves

Starting with skin color yarn.

Round 1: Magic circle, CH 1, SC 5 into magic ring, pull ring tight. Join to first SC. (5 SC)
Round 2-3: CH 1, SC into same stitch and each stitch around. Join to first SC. (5 SC)
Round 4: CH 1, HDC into same stitch. CH 1, Slip stitch into same stitch, SC into next 4 stitches. Join to first SC (skipping over the HDC thumb)
Round 5: CH 1, SC into each stitch around. (4 SC)
Round 6:  CH 1, 2 SC into each stitch around. Join to first SC (8 SC)
Working in continuous rounds now.
Round 7-19: SC into each stitch around. (8 SC)

Change colors to your choice for the sleeves. Attach the yarn in the front loop. You with be crocheting into the loops upside down so that the pretty side of the stitches will be on the outside of the sleeves.

Round 20: In front loops only.  CH 3, DC into same stitch and  DC into the next stitch. **2 DC into next stitch. DC into next stitch. Repeat from ** around.  Join to top of CH 3. (12 DC)
Round 21: CH 1, SC into same stitch and each stitch around, (12 SC)
Finish off. Weave in ends and attach the arms with a yarn needle. (I lightly stuffed the arms with yarn ends) This may be a little tight… be patient and it will all come together. I pinched the arm flat and sewed it on my the back loops that were left.

 Lalaloopsy Curls

Using 5 MM crochet hook

Leaving tail, CH 15, 3 DC into second CH from hook and down the rest of the chains.  *For a double curl do not finish off — CH 15, 3 DC into second CH from hook and in remaining chains. Cut yarn leaving tail – Make as many as it takes to get the fullness of hair you are going for.
To attach the hair. Inset hook around SC stitch of the scalp, pull one yarn tail through, tie both tails into a knot, the using yarn needle, weave in ends into the hair curl.
**When making my lalaloopsy with rainbow mohair I had to put 4 DC into each CH to get a good curl)

Crochet Hair Bow

With your choice of yarn color.

Step 1:  CH 33, DC into 4th CH from hook and each CH across. (31 DC)
Step 2-4: CH 3, Turn, DC into each stitch across. (31 DC)
Join both ends with a slip stitch. Fold the bow so that the seam is in in the middle. CH 60. Finish off leaving long end.. Wrap your chain around the center of the bow. Weave your ends in to secure the CH. And then using the same end, attach it to the top of the lalaloopsy head.

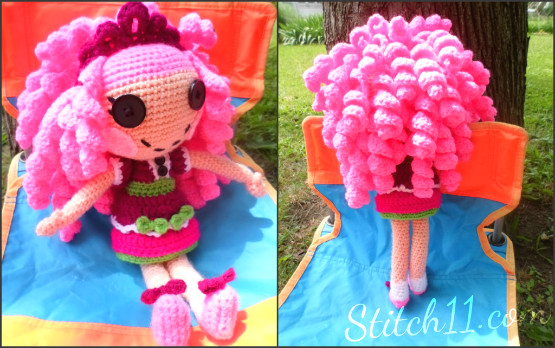
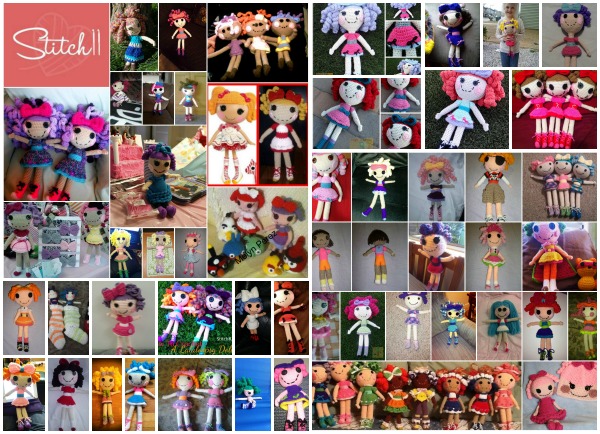
Lala Collection using Stitch11 crochet pattern

Filed Under: Free Patterns, Girls, Inspired, Toys Tagged With: crochet pattern, doll, doll crochat pattern, lalaloopsy, lalaloopsy crochet doll, lalaloopsy doll

Free Crochet Stitch11 Purse Pattern

July 3, 2013 By stitch11 4 Comments

Free Crochet Purse Pattern


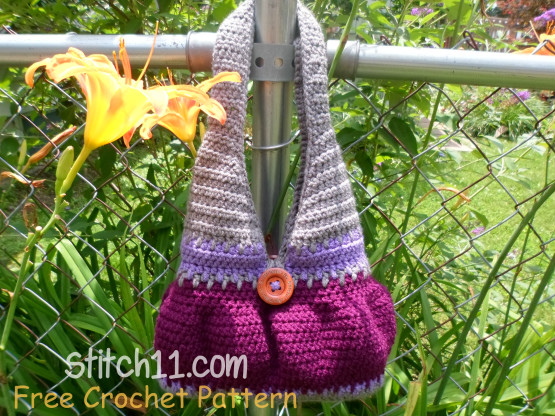
I created this beautiful Stitch11 purple purse using my free pattern from an earlier post “Stitch11 Crochet Purse.”  I used Red Heart with Love yarn and the only changes I made were adding an extra four rows to the strap, and using a Foundation Chain for the button strap instead of the basic Chain. I love my purse and I use it daily!! Sharing the love <3

Filed Under: Bags, Free Patterns

Lalaloopsy Crochet Doll

June 30, 2013 By stitch11 12 Comments

Crochet Lalaloopsy Doll

Whats hot in the crochet world right now? Toys!! It's too hot for scarves, sweaters, and fun hats right now but its never too hot for a custom handmade crochet lovey! Children of all ages are helping us Yartist bring crochet up in today's market.  Lalaloopsy is one of the hottest current trends! Everyone loves the fun bright colors and beautiful curly hair. The button eyes can be a little creepy but the lashes  make up for it.

For this Lalaloopsy doll I used a free crochet pattern that I had found in The Yarn Box. I have already made 2 Lalaloopsy dolls at an earlier date– and when I posted pictures of them on my personal Facebook I had so many people asking for prices that I actually panicked a little.

When crocheting this doll I was going for the look of “Jewel Sparkles” from the Lalaloopsy movie that my daughter cannot seem to get enough of. I was hoping for a doll about 12 inches tall and quoted the buyer $50 for my time and work… I didn't expect the doll to end up about 1.5 feet tall or to take as long making her as I did– or I would have probably told her $75-$100 dollars. I did my best to follow the pattern but I had to change a lot to get the look I was going for. I didn't find it very hard to change but the pattern did seem flawed… or it may have just been my lack of reading comprehension skillz. Anyhow, the doll turned out beautiful! I could just stare at her for hours!!! I do recommend the free pattern from The Yarn Box and I think anyone with the basic crochet experience could have a lot of fun with it.

Filed Under: Free Patterns, Inspired

11 Free Animal Hat Crochet Patterns

June 20, 2013 By stitch11 5 Comments

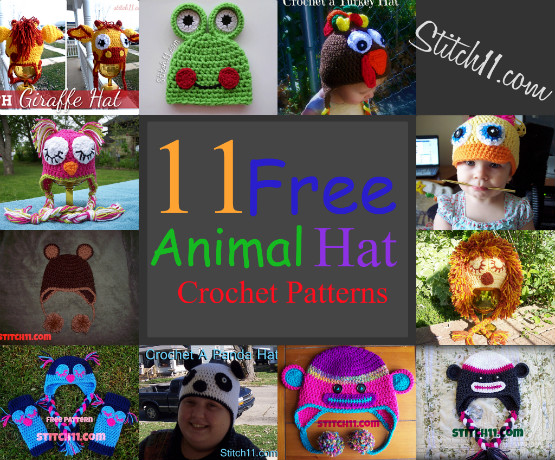
11 free animal hat crochet patterns

Animal hats are so popular with my customers! With every order I have accepted I have also written out the pattern step by step to share with all the Stitch11 fans. These 11 patterns are from the last year… excited to see what the next year will bring!

Sleeping Owl
Neon Monkey
0-3 Month Bear Hat
6 Month Owl Hat, Leg Warmers, and Diaper Cover Set
Monkey Hats
Adult Panda
Gobble Gobble
The Mighty Jungle Lion Hat
Duck Hat
Giraffe Hat
Frog Hat

Filed Under: Free Patterns, Round Ups

7 Free Crochet Patterns For The Home

June 19, 2013 By stitch11 1 Comment

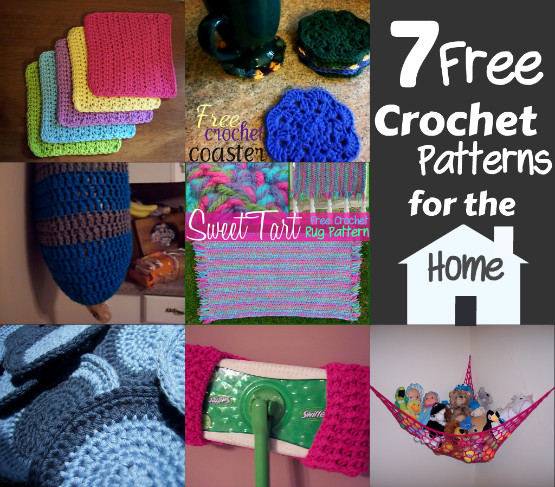
Seven Free Crochet Patterns For The Home

Here is a list of free crochet patterns all designed for the home and designed by me during this last year. Everything on this list is still being used daily either by my sister, mom, daughter, or used by me. 🙂

Simple and Practical Dish Cloth
Free Crochet Shell Coaster
Plastic Bag Dispenser 
Sweet Tart Rug
Simply Perfect Coasters
Swiffer Sweeper Cover
Crochet Hammock for Stuffed Toys

Filed Under: Free Patterns, Round Ups

Craft Fair Crochet Patterns

June 13, 2013 By stitch11 4 Comments

Free Craft Fair Crochet Patterns

Are you planning a craft fair? Here are 6 free crochet patterns that are perfect for craft fairs and are quick and fun!

Bracelets For Everyone!
Toy Airplane
Princess Crown
Princess Hat
Penzy – Highlighter and Pen book holder
Stitch11 Crochet Purse

Filed Under: Free Patterns, Round Ups

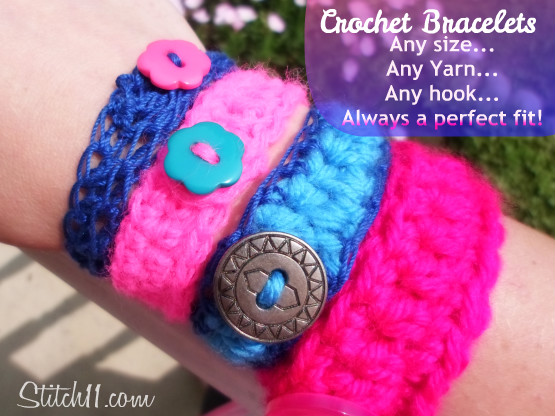
Crochet Bracelet for Everyone

June 7, 2013 By stitch11 5 Comments

Crochet Bracelets

Since my wrists and hands are smaller than most, I am sharing a technique that anyone can follow no matter what size the wrist. You can use any yarn, thread,hemp, jute, or even string. You can choose whatever hook size you wish. The size of the button will vary on what yarn and hook you use. This pattern contains the stitches HDC (half double crochet), SC (Single Crochet), and CH (Chain). You will need a yarn needle for weaving in your ends and sewing on the button.

Step 1: Make a chain the length to fit around your wrist. It will need to fit around snug with no stretch what so ever.

Step 2: Skip one CH, and HDC across.

Step 3: CH 4, Slip stitch into the bottom of same stitch.

Step 4: CH 1, SC across. SC 2 times into the side…(the 1 CH you skipped before starting the HDC row.)

Step 5: SC across the other side

Step 6: SC 4 times into CH space. Join to first SC.

Step 7: Weave in your ends and sew on your button!

Filed Under: Free Patterns, Girls

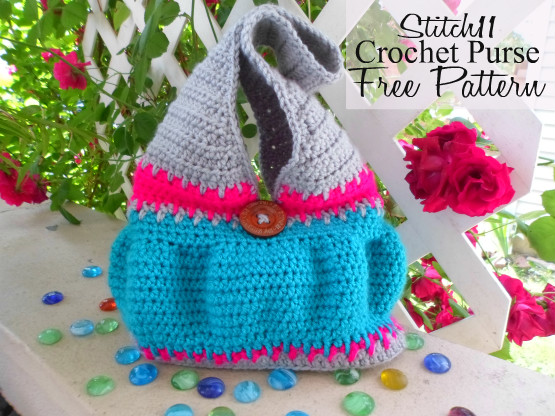
Stitch11 Crochet Purse

June 3, 2013 By stitch11 18 Comments

Stitch11 Crochet Purse - Free Pattern

For the last year I have attempted to make myself a purse multiple times… I have not been happy with any crochet purse until now!! I love this little bag so much. It's perfect for me! The strap is shorter because I have had problems while carrying my toddler through parking lots and my purse strap falling from my shoulder to my elbow causing the purse to drag by my ankles. o.O not ok! I also made the bag part of the purse a little smaller BUT I can still fit my wallet, keys, glasses, pack of wipes, and a few diapers into it! Its perfect for the someone like me who only carries what I need and doesn't like to carry a tote around when you already have a 35 lb toddler on your hip. Happy Hookin!

[Read more…]

Filed Under: Bags, Free Patterns

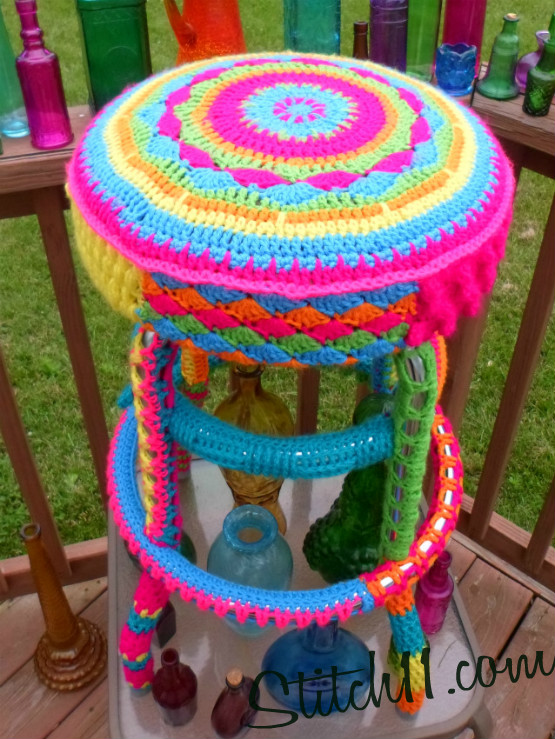
Yarn Bombing!

June 1, 2013 By stitch11 5 Comments

Yarn Bombing

I finally had my go at yarn bombing!

About 7 years ago, I attended some type of work family day with my mom. Lucky me won a door prize! It was an awesome bar stool with the word “Autocar” written across the seat. Yeah, the stool was really nice…. but it was so *ugly! The Autocar stool has sat in my closet ever since. A couple weeks ago I asked my mom if she would like to have it. She quickly replied that she would love to have it. Then it dawned on me…. So I sent my mom a Facebook message saying that she can have it after I am finished yarn bombing it!

How do you yarn bomb?

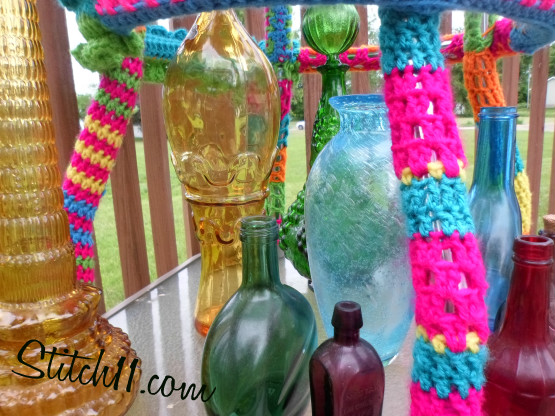
I have been wanting to yarn bomb ever since I first discovered hooking January of 2012. With so many beautiful masterpieces on Facebook and Pinterest… I was scared to even try!  But let me tell you, its not as hard as it looks! The greatest thing for me was the fact that I could have fun with it and not worry about messing up! I was able to practice and learn new stitches to give my yarn bomb some texture. But the greatest thing I discovered while making this yarn bomb was that you do not have to actually crochet ON the item you are bombing. You take a few simple measurements and make the pieces separate and then sew them together on the item you are yarn bombing! If you can make a circle or square,  you can yarn bomb too!

Yarn Bomb

Have you ever Yarn Bombed? What will be your next masterpiece?

Filed Under: Inspired

Crochet Lalaloopsy Dolls

May 17, 2013 By stitch11 6 Comments

Recently my niece Abby was having a birthday. I knew I wanted to make her something that would make her eyes light up. I asked my sister Miranda, from Work At Home Adventures, what I should make.  Since she has a little girl that is also 6, I knew she would have a clever idea. She quickly sent me a link from The Yarn Box for a free Lalaloopsy crochet pattern.
The Lalaloopsy pattern was simple enough for me to understand but I must admit, the pattern is flawed and at some points, it really lacked detail. Which is really fine with me since I like to do my own thing anyways. I think a crochet beginner would be able to figure the pattern out but experience will really come in handy with this one.
Shortly after I started making Abby's doll, my daughter Ella stressed to me how much she wanted one too… a baby one. I was going to write a free pattern for it to share with you but there were some flaws that I would really want to get fixed before posting. Don't worry though! You can find the free pattern for the original on Ravelry.

Crochet Lalaloopsy

Filed Under: Free Patterns, Inspired

Secure Pom Pom Tutorial

May 16, 2013 By stitch11 9 Comments

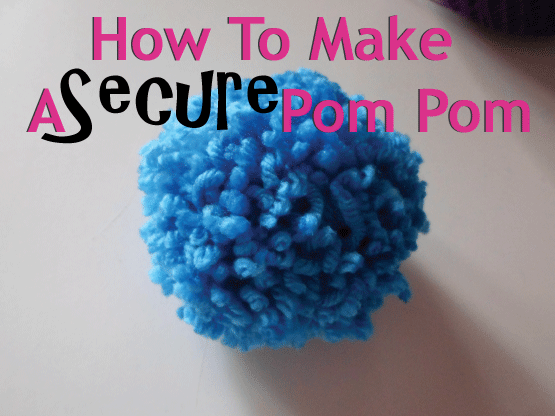
Have you ever watched a pom pom fall apart before your eyes? Have you ever made a toddler a hat with pom poms? If the answer is yes, you need to know how to make a secure pom pom!! Follow this step by step tutorial and say goodbye to those annoying pom pom bombs. #crochet #crochetlove #crochetlife #crochetaddict #crochetpattern #crochetinspiration #ilovecrochet #crochetgifts #crochet365 #addictedtocrochet #yarnaddict #yarnlove

Have you ever watched a pom pom fall apart before your eyes? Have you ever made a toddler a hat with pom poms? If the answer is yes, you need to know how to make a secure pom pom!!

Follow this step by step tutorial and say goodbye to those annoying pom pom bombs.

Pom Pom Tutorial

Filed Under: Free Patterns Tagged With: crochet tutorial, pom pom, pompom tutorial, tutorial

  • « Previous Page
  • 1
  • …
  • 15
  • 16
  • 17
  • 18
  • 19
  • …
  • 25
  • Next Page »
  • Email
  • Facebook
  • Pinterest
  • RSS

Stitch11 is a Red Heart Blogger!

unnamed

.

Grab My Button

Archives

Privacy Policy

Copyright © 2026 Stitch11.com · All Rights Reserved · Log in