• Home
  • Free Patterns
    • Toys
    • Costumes
    • Bags
    • Flowers
    • Hats
    • Pattern Reviews
    • Household
    • Newborn
    • Scarves
    • Sports
  • Disclosure
  • Contact
  • Yummy Food
  • Round Ups

Stitch11

A Yarntastic Life!

  • Girls
  • Boys
  • Hats
  • Newborn
  • Flowers
  • Household
  • Costumes
  • Toys
  • Pattern Reviews
  • Grannys
You are here: Home / Archives for stitch11

It’s So EASY Towel Topper – Free Crochet Pattern

May 15, 2015 By stitch11 3 Comments

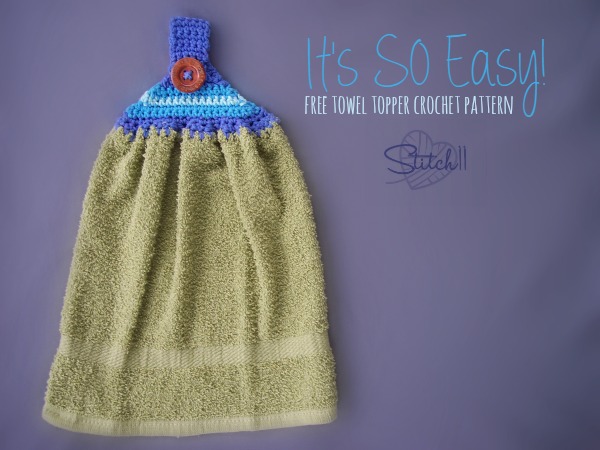
It's SO Easy - Free Towel Topper Crochet Pattern - Stitch11

I wanted to crochet while sitting outside… away from my computer. So I grabbed a half of a hand towel, my sharpened 4 MM crochet hook and a few shades of blue Peaches and Creme cotton yarn.
While sitting there brain storming and wondering if I should freehand this one or just go ahead and write the pattern, I decided to do both. I wanted to freehand something so simple… with easy step by step instructions that anyone could follow it.. no matter what yarn or hook they used… or how long they have been hooking.

Note- To Sharpen an aluminum crochet hook, you just need to use a knife sharpener.

Stitches Used 
CH – Chain
SC – Single Crochet
SC DEC – Single Crochet Decrease

Supplies (The supplies I used are listed in the top paragraph of this post)
Yarn
Hook
1 inch button
1/2 a hand towel

Step 1 – SC across the cut side of the towel with an even number of stitches.  This time, I folded the cut end back while crocheting… it did make it slightly cleaner than not folding. 
Step 2. CH 1. Turn. SC DEC across.
Step 3. CH 1. Turn. SC DEC once at the start of the row and once at the end of the row. While SC in each stitch between.

Repeat Step 3 until you only have 5 stitches. 

Step 4: CH 1, Turn. SC into each stitch across.

Repeat step 4 twelve times. 

Step 5. CH 1. Turn. SC into first stitch. CH 3. SC into last stitch.
Step 6. CH 1. Turn. SC into first stitch. 4 SC into CH 3 space. SC into last stitch. Finish off and attach a button where Step 4 started.

Tada!
Filed Under: Free Patterns, Household

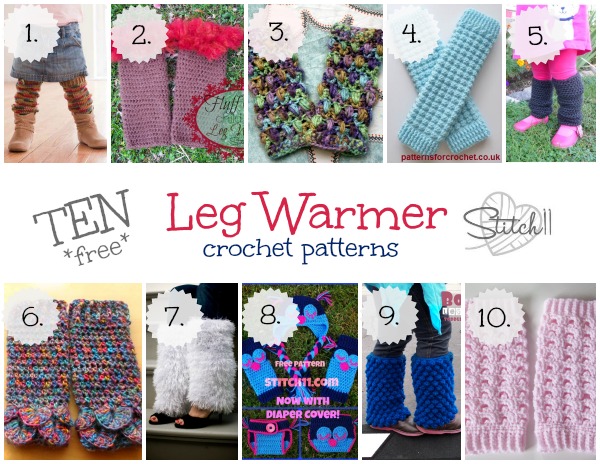
10 Free Leg Warmer Crochet Patterns

May 13, 2015 By stitch11 Leave a Comment

10 free leg warmer crochet patterns

Here in Indiana, our weather has been CRAZY! One day it's around 90 degrees outside and the next is in the 50's. When the weather is changing so rapidly, we like to have legwarmers on hand for my daughter. Not only are the great for keeping her warm, but they look adorable too! We use leg warmers all year round. On summer nights while watching fireworks, the stars, or while camping. In the winter over leggings, with costumes, and with her favorite dresses. There is always a reason!

Leg Warmers are also great gifts for babies who are learning to crawl, photo props, and craft fairs!

Below you will see each leg warmer linked through the title of the pattern. Get your hooks ready!

1. Little Crochet Leg Warmers (You will see the download button below the description of the book)
2. Fluff Cuff Leg Warmers by Stitch11
3. Cute Puff Stitch Leg Warmers by Busting Stitches
4.  Ladies Leg Warmers by PatternsForCrochet
5. Toddler Leg Warmers by Stitch11
6. 6-12 Month Leg Warmers by Stitch11
7. Snowy Lane Leg Warmers from Lion Brand
8. Owl Leg Warmers by Stitch11
9. Bobble Leg Warmers by Stitch11
10. Picot Baby Leg Warmers by Crochet N' Crafts

Filed Under: Free Patterns, Girls, Round Ups

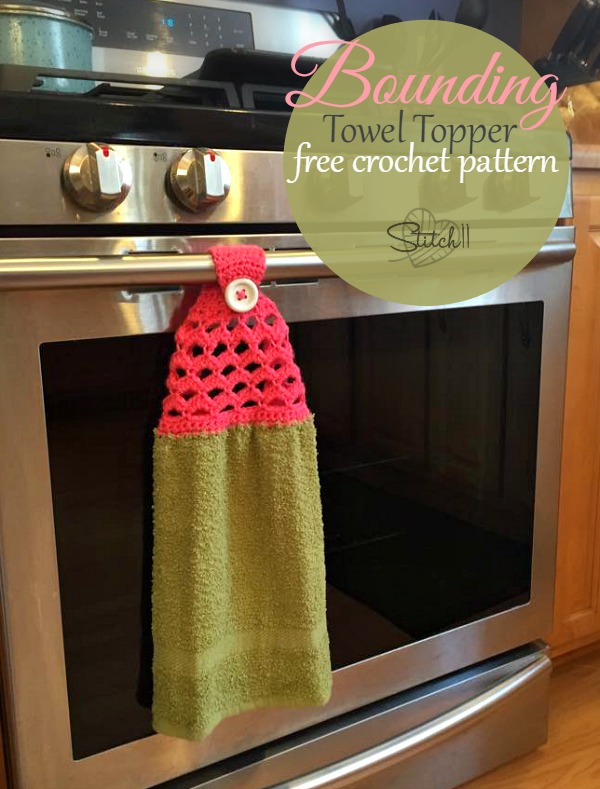
Bounding Towel Topper – Free Crochet Pattern

May 8, 2015 By stitch11 31 Comments

Bounding Towel Topper - Free Crochet Pattern
While searching for Towel Topper crochet patterns, I realized there really isn't that much of a variety to choose from. In order to complete my latest crochet order, I knew I would have to write at least one pattern for a towel topper if not more..
I wanted to make this pattern easy for any hook size, yarn, or tension. I had problems following other patterns because on a towel they could fit 60 SC into their first row, I was only getting 40! So with this pattern, whether you can fit 24, 40, or even 60.. add one more SC to your towel and it will still work out just fine!
There is more information about adjusting your starting SC row in the notes. This gives you the ability to make the towel  custom to how many stitches you can get into your first row. You also have the freedom to change your hook size and even yarn weight.

Supplies
1 hand towel cut in half – You will only need 1/2 of a towel for each topper you make.
5 MM crochet hook
Worsted Medium Weight yarn
Yarn needle for weaving in ends.
One 1 inch Button

Stitches
SC – Single Crochet
CH – Chain
Slip Stitch
HDC – Half Double Crochet

-Note- I sharpened an aluminum 5 mm crochet hook with a knife file. Then, after row 1, switched to an un-sharpened 5 mm.
-Note- To change your starting SC number, hook size, and yarn weight- you will be making your starting SC count by 4's plus 1.

Let's Get Started!
Row 1: 41 SC across the cut end of the towel.
Row 2-3: CH 1. Turn. SC into same stitch and each of the remaining 40 stitches.
Row 4: CH 1. Turn. SC into same stitch. **CH 3. Skip 3 stitches. SC into next stitch. Repeat from ** across.
Row 5: Turn. Slip Stitch into same stitch. **5 HDC into CH space. Slip stitch into next SC. Repeat from ** across.
Row 6: CH 1. Turn. Slip stitch into next 3 HDC. CH 1. SC into same stitch. **CH 3. SC into 3rd HDC of next HDC set.  Repeat from ** across.
Row 7: Turn. Slip Stitch into same stitch. **5 HDC into CH space. Slip stitch into next SC. Repeat from ** across.
Repeat rows 6 and 7 until you only have SEVEN 5 HDC sets left. With starting with 41 SC, this is 2 repeats of rows 6 and 7.

Row 11: CH 1. Turn. Slip stitch into next 3 HDC. CH 1. SC into same stitch. **CH 2. SC into 3rd HDC of next HDC set. Repeat from ** across.
Row 12: Turn. Slip stitch into same stitch. **3 HDC into CH space. Slip stitch into next SC. Repeat from ** across.
Row 13: CH 1. Turn. In this row you will be skipping your slip stitches. **HDC DEC, HDC into next stitch. Repeat from ** across. (You should have 12 stitches)
Row 14: CH 1. Turn. HDC into same stitch and each stitch across.
Row 15: CH 1. Turn. **HDC DEC, HDC into next stitch. Repeat from ** across. (You should have 8 stitches)
Row 16-23: CH 1. Turn. HDC into same stitch and each stitch across.
Row 24: CH 1. Turn. HDC DEC. CH 3. Skip 4 stitches. HDC DEC.
Row 25: CH 1. Turn. SC into first stitch. 5 HDC into CH space. SC into last stitch.
Finish off and weave in your ends. Attach a button to the center of row 14.

Filed Under: Free Patterns, Household

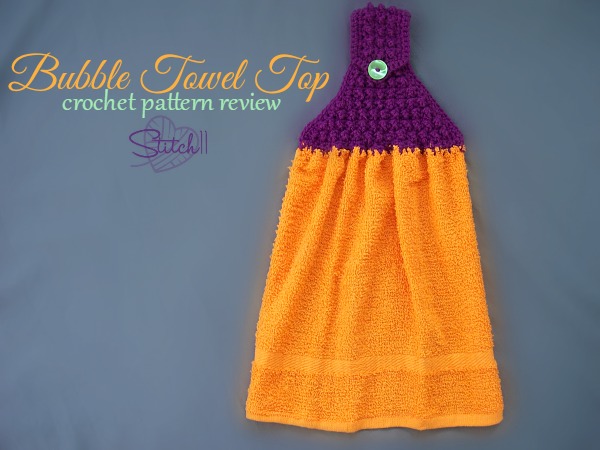
Bubble Towel Top – Crochet Pattern Review

May 7, 2015 By stitch11 1 Comment

Bubble Towel Top - Crochet Pattern Review

I love the shape and decreases in the Bubble Towel Top designed by Kate Wagstaff! It makes the towel drape perfectly. We all love free patterns, but this one is well worth the $1.95 it costs.
If you have done your own searching for towel toppers.. there really isn't a lot of high quality and well written designs to choose from. But, Kate Wagstaff actually has two towel topper designs! You can check out her other one >HERE<
Thanks Kate for the well written pattern and beautiful design!

Filed Under: Household, Pattern Reviews

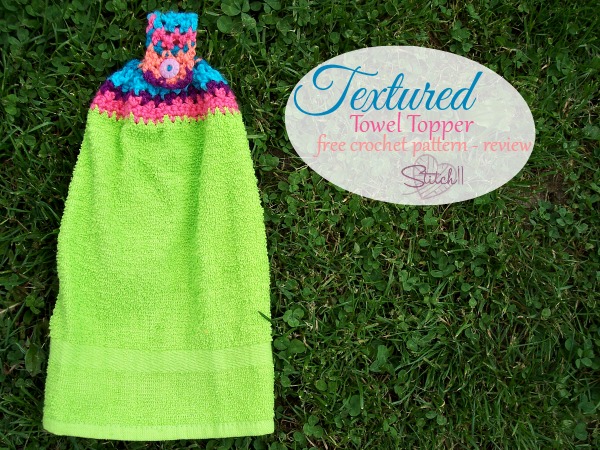
Textured Towel Topper – Free Crochet Pattern – Stitch11 Review

May 6, 2015 By stitch11 Leave a Comment

Textured Towel Topper - Free Crochet Pattern Review

The customer who I am making the towel toppers for, requested for some to have a scrap yarn look. I thought this free crochet pattern for the Textured Towel Topper ( >LINK HERE<)  would be perfect!

I loved the pattern! The size is ideal to me. The pattern is really quick, even with changing so many colors like I did.

I did have to make a couple personal notes on the pattern. They are listed below.
– I ignored the number 8 in row 2. Not sure what it is there for.. I think it's a typo. I did leave a comment to let the designer know.
– I was also confused and getting one less loop for Row 7. But once I got further into the pattern, I realized the first loop I should crochet into isn't what I consider the “next stitch” but more of the “same stitch”.
I tend to over think things and assume something is wrong with the pattern. Then later I realize I  just wasn't thinking clearly- or still stuck on the last Towel Topper I made. 

Filed Under: Free Patterns, Household, Pattern Reviews

Pineapple Towel Topper – Free Crochet Pattern – Review by Stitch11

May 5, 2015 By stitch11 2 Comments

Pineapple Towel Topper - Free Crochet Pattern - Stitch11 Review

Ever since crocheting my Scrap Yarn Towel.. I have wanted to make towel toppers on regular towels! Luckily, I excepted a few crochet orders and the towel toppers got bumped up the list!

There will be a series of towel toppers on Stitch11. You are going to LOVE these! At least I know I will love making them! The first on the list is this beautiful Pineapple Towel Topper. You can get the free pattern through Ravelry >HERE<.

I have no complaints on the pattern. It was a very fun experience for me and worked up fairly quick. The one thing I will do different if I make another one, is I would use a little bit thinner yarn for more of a delicate look.

-Note- After publishing I realized I skipped some of the repeat rounds where it hangs onto something… shows how easy it is for me to get carried away! Still works great and looks beautiful though. >.<

Filed Under: Free Patterns, Household, Pattern Reviews

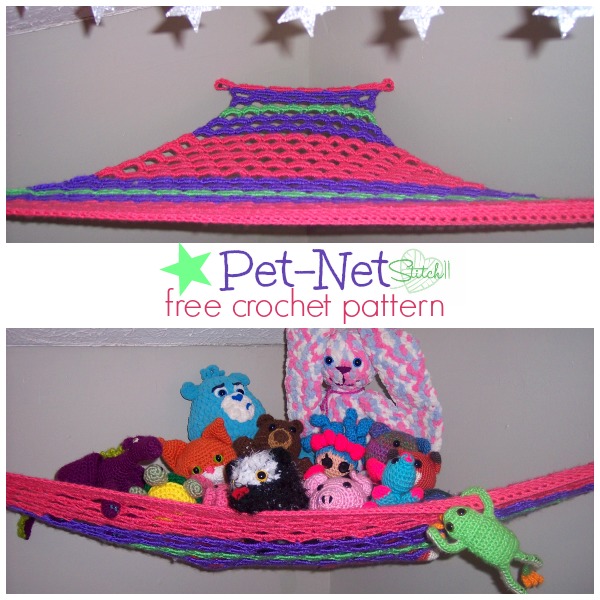
Stitch11 Pet Net – Crochet Net for Stuffed Toys

May 3, 2015 By stitch11 7 Comments

Pet Net - Free Stitch11 Crochet Pattern

I have been trying to come up with a better idea for the Stuffed Animal Hammock since making the first design for one. (You can see that free crochet pattern HERE). To be honest, I still am not 100% happy but it is better than the first. I contemplated on even sharing this pattern. But, I decided to go ahead and share it with everyone while I keep brainstorming on the next better idea. 🙂
Be sure to read all the notes (at the beginning and end of the pattern) before starting your Pet-Net!

STOP! This pattern has been updated and perfected – View BEST version HERE!

Supplies
Medium Weight Yarn (Worsted)
5 mm Crochet Hook
Yarn needle for weaving in your ends

Stitches
FSC -Foundation Single Crochet 
CH – Chain 
SC – Single Crochet 
HDC – Half Double Crochet 

-Note- If you want to adjust the size, make your starting FSC in counts of 5 +1.
-Note- If you cannot do the FSC, you can make a CH of 122, turn, skip one CH, SC into next 121 CH. You may want to use a size larger hook just for your CH.
-Note- You can change colors before any odd numbered row (the rows with chains) to make whatever color pattern your heart desires.
-Note- If/when you change colors, attach the yarn into the center HDC instead of slip stitching to it.

Row 1: FSC 121.
Row 2: CH 4, turn. SC into each of the 121 FSC across. CH 4. Slip Stitch into the side FSC from row 1. (121 SC)
Row 3: CH 1, turn. 6 SC into CH space. SC into each of the 121 SC across. 6 SC into CH space. Slip stitch into FSC from row 1. CH 1. (133 SC)
Row 4: Turn. Slip Stitch into first 7 SC. CH 1. SC into same stitch and next 120 stitches. (121 SC)
Row 5: Ch 1, turn. SC into same stitch. ** CH 4. Skip 4 stitches. SC into next SC. Repeat from ** 23 more times.  (25 SC)
Row 6: Turn.** 5 HDC into CH space. Slip Stitch into next SC. Repeat from ** 23 more times. (120 HDC)
Row 7: CH 1, turn. Slip stitch into next 3 HDC. CH 1. SC into same stitch. CH 4, Skip next 4 HDC (and the slip stitch). SC into next HDC. (This is the center HDC of 5 HDC). ** CH 4. SC into next center HDC of 5 HDC. Repeat from ** 21 more times. (24 SC)
Row 8: Turn.** 5 HDC into CH space. Slip Stitch into next SC. Repeat from ** 22 more times. (115 HDC)

Repeat rows 7 and 8 -17 times.  Decreasing one 5 HDC set each time.  Your last row will have 30 HDC (6 sets of 5 HDC)

Last 2 rows with loops for hanging
–CH 1, turn. Slip stitch into next 3 SC. CH 4. SC into same stitch. CH 4, Skip next 4 SC (and the slip stitch). SC into next SC. (This is the center HDC of 5 HDC). ** CH 4. SC into next center HDC of 5 HDC. Repeat from **  3 more times. CH 4. Slip stitch into the same stitch. (6 SC)
– CH 1, turn. 6 SC into CH loop. Slip stitch into SC. **5 HDC into CH space. Slip stitch into next SC. Repeat from ** 4 more times.  6 SC into CH loop. Slip stitch into same loop.
–Finish off and weave in your ends.

-Note- When hanging mine, I used drywall screws. You should use whatever you feel is best for your walls. I am not an expert on hanging things. >.< Make sure you hang the net tight. Once you have stuffed animals in it, it will stretch.
After hanging mine up, I measured it 4 feet wide, and 2 feet deep from the corner.

-Note- If the sides are not strong enough to keep your animals from falling, You can attach the center set of HDC on both sides to the wall as well. This will eliminate the issue. **Edited** <- I now know that when you buy them from the store, they actually attach them on the sides as well.

Filed Under: Free Patterns, Household, Toys

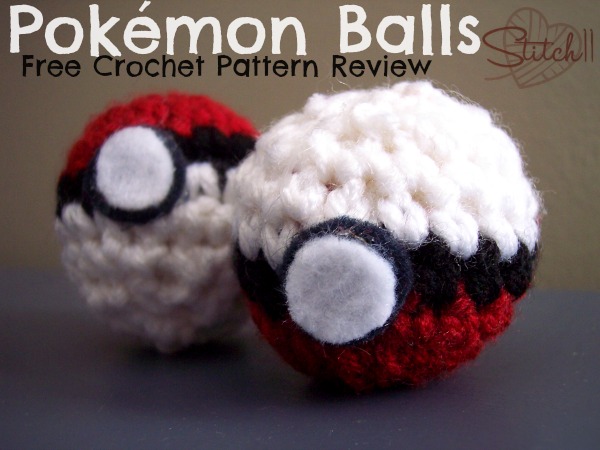
Pokémon Ball – Free Crochet Pattern – Review

April 30, 2015 By stitch11 Leave a Comment

Pokemon Balls - Free Crochet Pattern - Review

My stepson, Brennan and my daughter, Ella have WILD imaginations. They defeat giant trolls in the back yard, adventure through wild jungles in the living room and slay dragons on the staircase.
I remember being young and having such a strong imagination. When using it, it feels like the world around you really changes… and your sibling who becomes a witch can actually terrify you- when she finds you hiding behind the waterfall (chair).
It didn't take long for Ella to want to watch all of her brothers favorite tv shows- including Pokemon. They have been begging me to make some Pokemon items for months now.. and these balls are just the beginning. Not only do they want these, but also the characters. I am also contemplating on making the larger version of poke'balls for them.

Oh yeah – the review! These little Poke'balls are designed by Denton Foreman. Get the FREE pattern >>>HERE<<<

The pattern was very easy to follow and very quick too. It took me about 5 minutes to complete each ball. Instead of sewing the felt button on, I used my hot glue gun. I am always for simple and quick… and this pattern gave that to me. Thank you so much Denton Foreman for the easy pattern!

If you are looking for the larger (and still free) version – Click >>>HERE<<<


Filed Under: Boys, Free Patterns, Pattern Reviews, Toys

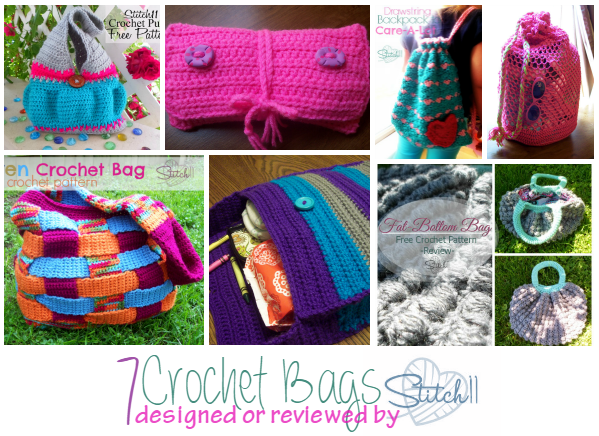
Seven Crochet Bag Patterns – Designed or Reviewed by Stitch11

April 28, 2015 By stitch11 Leave a Comment

Seven Crochet Bags - Designed or Reviewed by Stitch11

I love crocheting bags. It's so rewarding to crochet something that can be used daily! Not only do they get used daily, but they sell quickly. Making them great for craft fairs no matter what season you are selling for.

Here is a list of seven crochet bags I have designed or reviewed. I am listing them based on the photo- going from left to right and top to bottom.

Stitch11 Crochet Purse 
On The Go Make-up Bag
Backpack to Care-A-Lot
Beach Bag for Momma 
Woven Crochet Bag 
A Mothers Purse 
Fat Bottom Bag

What is your favorite bag pattern? Leave a link to it in the comment section!

Filed Under: Bags, Free Patterns, Girls, Round Ups

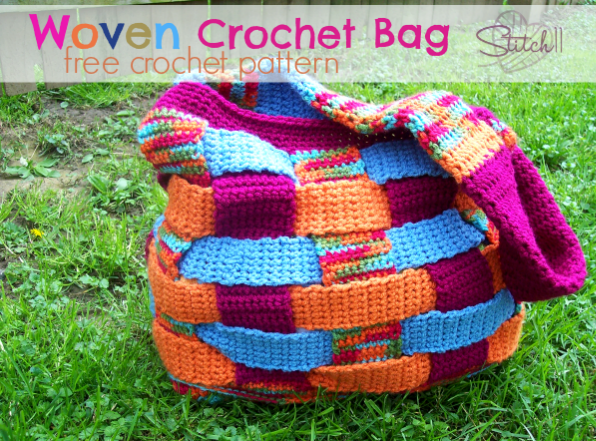
Woven – Crochet Bag – Free Crochet Pattern

April 22, 2015 By stitch11 8 Comments

Woven Crochet Bag - Free Crochet Pattern

I originally was designing this as a beach bag. But once I finished, I realized it would need lined to really be usable. I wanted that to be the first thing I tell you- so you can check out these following links and see if lining a crochet bag is for you!
If you love the idea, continue to the pattern, 🙂

Double Lining – By KatiDCreations 

Crochet Bag Liner – By Dearest Debi 

How To Line a Crocheted Bag – By Pattern Paradise 

-Note- I will be adding a liner and still using this as a beach bag. But first, I have a few other things I need to crochet. I will share updated photos asap! 

This bag measures 16 inches wide and 16 inches tall. Not including the strap.

Supplies
Red Heart with Love – 1.5 skeins of “fruit punch” variegated, 1/2 skein of grayish blue, 1/2 skein of orange and 1 skein of maroon. *These are Black Friday Skeins from Walmart. They are each originally 180 yards.*
K – 6.5 mm crochet hook
Yarn needle

Stitches
Magic Circle
CH – Chain
SC – Single Crochet
HDC – Half Double Crochet
DC – Double Crochet

Lets get started!
I started with “Fruit Punch” variegated yarn.
Round 1: Magic Circle. 2 SC, 1 HDC, 1 DC, 1 HDC, 2 SC, 1 HDC, 1 DC, 1 HDC <– all into magic circle. Join to first stitch. (10 stitches)
Round 2: CH 1, turn. SC and HDC into the HDC. 2 DC into the DC. HDC and SC into the HDC. 2 SC into each of the next 2 SC. SC and HDC into next HDC. 2 DC into the DC. HDC and SC into the next HDC. 2 SC into each of the next 2 SC. Join to first stitch. (20 stitches)
Round 3: CH 1, turn. SC into same stitch as you joined. SC in next 5 SC.  HDC and DC into next stitch. 2 DC into each of the next 2 stitches. DC and HDC into next stitch.
SC in next 6 stitches. HDC and DC into next stitch. 2 DC into next 2 stitches. DC and HDC into next stitch. Join to first SC. (28 stitches)
Round 4: CH 1, turn. SC into same stitch and next stitch. HDC into next stitch. 2 DC into each of the next 4 stitches. HDC into next stitch.
SC into next 8 stitches. HDC into next stitch. 2 DC into each of the next 4 stitches. HDC into next stitch.SC into next 6 stitches. Join to first stitch.  (36 stitches)
Round 5: CH 1, turn. SC into same stitch and next 7 stitches. CH 3, skip 1 stitch. HDC into next stitch. DC into next stitch. CH 4. Skip 2 stitches. DC into next stitch. HDC into next stitch. CH 3. Skip 1 stitch.
SC into next 10 stitches. CH 3. Skip 1 stitch. HDC into next stitch. DC into next stitch. CH 4. Skip 2 stitches. DC into next stitch. HDC into next stitch. CH 3, skip 1 stitch. SC in next 2 stitches. Join to first stitch (28 stitches. Not including chains. )
Round 6: CH 1, turn. SC into same stitch and next 2 stitches. 2 HDC and 2 DC into CH space. DC into next stitch. 2 DC into next stitch.{ 2 DC, CH 3, 2 DC all in CH space}. 2 DC into next stitch.  DC into next stitch.  2 DC and 2 HDC into CH space.
SC in next 10 stitches.  2 HDC and 2 DC into CH space. DC into next stitch. 2 DC into next stitch. {2 DC, CH 3, 2 DC all in CH space}. 2 DC into next stitch.  DC into next stitch.  2 DC and 2 HDC into CH space. SC in next 7 stitches. Join to first stitch.  (56 stitches. Not including chains.)
Round 7: CH 1, turn. SC into same stitch and next 5 stitches. CH 4, skip 3 stitches. SC into next 2 stitches. 2 HDC into next stitch. CH 4, skip 3 stitches. DC into next 2 stitches. 3 DC into CH space. DC in next 2 stitches. CH 4, skip 3 stitches. 2 HDC into next stitch. SC into next 2 stitches. CH 4, skip 3 stitches.
SC into next 6 stitches. CH 4, skip 3 stitches. SC into next 2 stitches. 2 HDC into next stitch. CH 4, skip 3 stitches. DC into next 2 stitches. 3 DC into CH space. DC in next 2 stitches. CH 4, skip 3 stitches. 2 HDC into next stitch. SC into next 2 stitches. CH 4, skip 3 stitches. Join to first stitch.  (41 stitches. Not including chains)

We will stop turning after each round now.

Round 8: CH 1. SC into same stitch and next 5 stitches.  5 SC into CH space. SC into each of the next 2 stitches. 2 HDC into each of the next 2 stitches. 5 DC into CH space. DC into each of the next 7 stitches. 5 DC into CH space. 2 HDC into each of the next 2 stitches. SC into each of the next 2 stitches. 5 SC into CH space.
SC into next 6 stitches.  5 SC into CH space. SC into each of the next 2 stitches. 2 HDC into each of the next 2 stitches. 5 DC into CH space. DC into each of the next 7 stitches. 5 DC into CH space. 2 HDC into each of the next 2 stitches. SC into each of the next 2 stitches. 5 SC into CH space. Join to first stitch.  (90 stitches)
Round 9: CH 1. SC into same stitch and next 16 stitches. 2 HDC into next stitch. 2 DC into next stitch. 1 DC into next stitch. 2 DC into next stitch. DC into each of the next 9 stitches. 2 DC into next stitch. 1 DC into next stitch. 2 DC into next stitch. 2 HDC into next stitch.
SC in next 28 stitches.  2 HDC into next stitch. 2 DC into next stitch. 1 DC into next stitch. 2 DC into next stitch. DC into each of the next 9 stitches. 2 DC into next stitch. 1 DC into next stitch. 2 DC into next stitch. 2 HDC into next stitch.  SC in next 11 stitches. (102 stitches)
Round 10: CH 1. SC into same stitch and next 19 stitches. 2 HDC into next stitch. DC into next stitch. 2 DC into next stitch. DC into each of the next 11 stitches. 2 DC into next stitch. DC into next stitch. 2 HDC into next stitch.
SC into next 34 stitches. 2 HDC into next stitch. DC into next stitch. 2 DC into next stitch. DC into each of the next 11 stitches. 2 DC into next stitch. DC into next stitch. 2 HDC into next stitch. SC into each of the next 14 stitches. Join to first stitch. (110 stitches)
Round 11: CH 1. SC into same stitch and next stitch. CH 3, skip 2 stitches. SC in next 18 stitches. 2 HDC into next stitch.  2 DC into each of the next 2 stitches. DC into next 3 stitches. CH 5, skip 4 stitches. DC into next 3 stitches. 2 DC into each of the next 2 stitches. 2 HDC into next stitch. SC into next 18 stitches.
CH 3, skip 2 stitches. SC in next 18 stitches. 2 HDC into next stitch.  2 DC into each of the next 2 stitches. DC into next 3 stitches. CH 5, skip 4 stitches. DC into next 3 stitches. 2 DC into each of the next 2 stitches. 2 HDC into next stitch. SC into next 17 stitches. Join to first stitch. (114 stitches)
Round 12: CH 1. SC into same stitch and next stitch. 4 SC into CH space. 1 SC into each of the next 27 stitches. 6 SC into CH space. SC into each of the next 27 stitches.
4 SC into CH space. 1 SC into each of the next 27 stitches. 6 SC into CH space. SC into each of the next 26 stitches. Join to first stitch. (129 stitches)
Round 13: Slip stitch into each front loop around. Join to first slip stitch.
Round 14: Slip stitch into the back loop from round 12. CH 1. SC into each back loop around. Add one increase so you have 130 stitches. Join to first SC.
Round 15-17: CH 1. SC into each stitch around. Join to first SC. (130 SC)

Vertical strips
Ch 1. SC into same stitch and next 8 stitches. (9 SC) Turn, repeat for a total of 36 rows. Finish off.

Skip 4 stitches. Join yarn to next stitch and repeat the vertical strips all the way around. Each strip is 9 SC wide and 36 rows tall with 4 stitches left unworked between them.  You will have 10 vertical strips.
I rotated with two colors on the vertical strips. I used the variegated “fruit punch”  and  a maroon.

Do not finish off your last vertical strip. 

Joining the top of the strips to form your bag

Round 1: CH 1, turn. SC into each of the 9 SC of the strip, then continuing straight to the next strip. You will SC into each SC around. Join to first SC. (90 SC)
Round 2-6: CH 1. SC into same stitch and each stitch around. Join to first SC.  (90 SC)
Finish off. 

Weave in all your ends.

Time to get the weaving strips worked up!  
I rotated my weaving strips with orange and blue Redheart with Love.
Make a total of 6 strips.

Row 1: CH 7, skip 1 CH, and SC into the next 6 CH. (6 SC)
Row 2: CH 1, turn. SC into each stitch across. (6 SC)

For weaving strip # 1 you will repeat row 2 until you have a total of 130 rows.  Leaving long yarn end, finish off.
Weaving strip #2 will have 120 rows.
Weaving strip #3 will have 110 rows
Weaving strip # 4 will have 100 rows.
Weaving strip # 5 will have 95 rows.
Weaving strip # 6 will have 90 rows.

Weave in your strips starting with the longest to the shortest- and weaving them from the bottom of the bag up. Using yarn end from strip and yarn needle, join both ends of each strip together as you finish weaving them.

Crocheting your Bag Strap

With any of your colors, CH 24. Slip stitch to first CH. 
Round 1-60: CH 1. HDC into each stitch around. Join to first HDC.

Once you are finished, attach the strap to both sides of the top of the bag. Before doing this, lay your bag flat to know exactly which parts are the sides. 

Now, make your bag lining using your favorite technique. I linked three tutorials for lining at the top of this post.


Filed Under: Bags, Free Patterns, Uncategorized

16 FREE Stitch11 Crochet Patterns for Babies!

April 18, 2015 By stitch11 Leave a Comment

16 FREE Stitch11 Crochet Patterns for Babies

I have spent the last week on a new pattern. Just when I realized I was almost finished, I looked at the weather to see we have rain in our forecast for the entire coming week! I really want to get an outdoor photo. So, I decided to put the new pattern release on hold and put together a few Stitch11 round ups!

Here is a list of 16 free crochet patterns that I designed for sweet lil' babies! They are listed from the photo, working left to right and top to bottom.

Curtain Huggy Bear 
0-3 Month Frog Hat 
Owl Cuddle Lovey 
Puff Bonnet 
Newborn Sleepy Owl Hat 
Weight Set (photo prop) 
The Chloe – Newsboy Beanie 
Princess Hat 
Robot  
Turtle Photo Prop 
Witch/Wizard Hat 
Overalls 
Sock Monkey Hat 
Welcome Home Beanie 
Flower Photo Prop Cocoon 
Princess Crown 

Filed Under: Boys, Free Patterns, Girls, Newborn, Round Ups

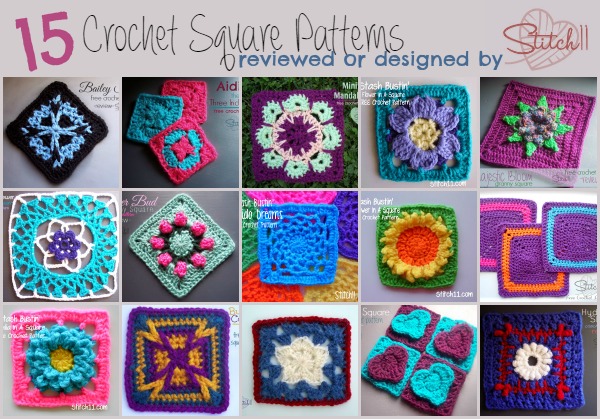
15 Crochet Square Patterns – Reviewed or Designed by Stitch11

April 13, 2015 By stitch11 Leave a Comment

15 Crochet Square Patterns - Reviewed or Designed by Stitch11

Although I know I am not done making squares, I wanted to go ahead and put them together into one post while I work on a few other items.

Below, each pattern or review of a pattern is linked through the title. They are listed based on the photo above, in rows, left to right.

Happy hookin'!

The Bailey Square 

The Aiding Square 

Mini Mandala 

Flower in a Square 

Majestic Bloom  

Lacy Flower Square 

Flower Bud Crochet Square 

Dream Catcher Square 

Sunflower in a Square 

Perfectly Square 

Dahlia in a Square 

Bursting Corners 

Star in a Square 

Three Inch Square 

Hydrangea  Shrub Square 

Filed Under: Round Ups

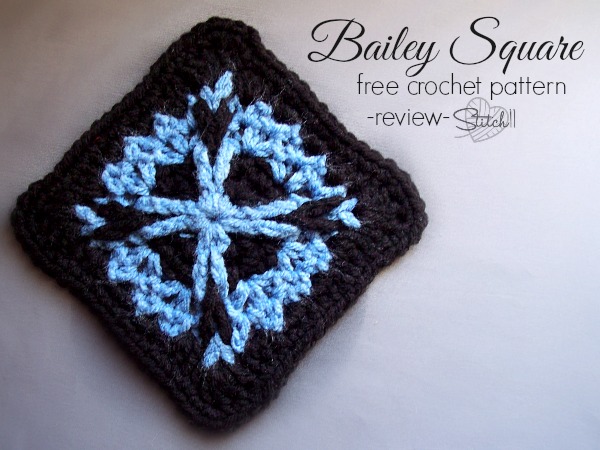
Bailey Square – Free Crochet Pattern – Review

April 12, 2015 By stitch11 1 Comment

Bailey Square - Free crochet pattern - review

This square is a perfect example as to why I love following crochet patterns. I learned a new technique! I would have thought this look was created with front post stitches… boy was I wrong! So easy, so fun, so pretty!

The Bailey Square (<-link) by Kim Guzman is great for everyone. Simple color changes can make this square for either boy or girl.. or gender neutral!

Thanks Kim for helping me learn new techniques and for this beautiful free crochet square pattern!

Filed Under: Free Patterns, Grannys, Pattern Reviews

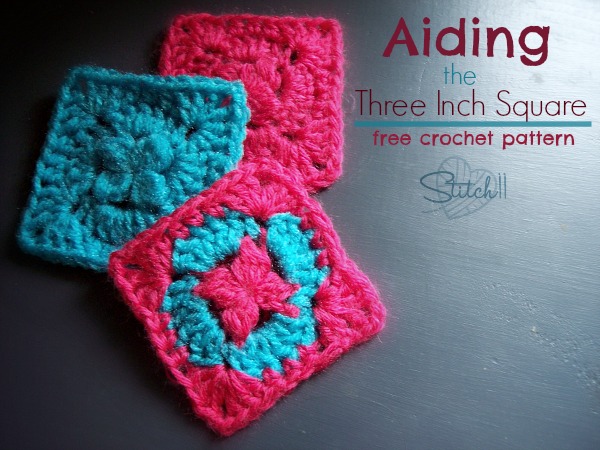
Aiding – The Three Inch Granny Square – Free Crochet Pattern

April 8, 2015 By stitch11 2 Comments

aiding - the three inch square - free crochet pattern

While trying to piece some of my crochet squares together.. I found myself wanting a piece that was 9 inches wide and 3 inches tall. So I decided to make 3 more three inch squares.

I didn't have a chance to look for a pattern. My daughter was begging me to lay with her while she fell asleep. I quickly freehanded these up and memorized the pattern well enough to share with everyone!
These little squares will make a great addition to piece together a blanket with 6 and 12 inch squares.

If the weather is on my side, I will go add them to the tree today. 🙂 Enjoy my latest free crochet pattern!

Supplies
Med-worsted weight yarn
5 mm crochet hook.
Yarn needle

Stitches
Magic Circle
4 DC CL – Four Double Crochet Cluster
CH – Chain
DC – Double Crochet
SC – Single Crochet
HDC – Half Double Crochet 

Tip: To make your starting 4 DC CL, you will CH 2 as your first partial DC and then continue with the next 3 partial DC's before pulling through all 5 loops.

Let's get started! 
Round 1: Magic Circle. Make your starting 4 DC CL into the magic circle. CH 3. **4 DC CL into magic circle. CH 3. Repeat from ** 2 more times. Join to first Cluster.   Pull magic circle tight.
Round 2: CH 1. **SC into top of cluster. 5 DC into CH space. Repeat from ** 3 more times. Join to first SC.
Round 3: CH 3. DC into same SC. CH 2. 3 DC into same SC. Skip one DC. HDC into each of the next 3 DC. Skip 1 DC. **3 DC into SC. CH 2. 3 more DC into same SC. Skip one DC. HDC into each of the next 3 DC. Skip 1 DC. Repeat from ** 2 more times. DC into starting stitch. Join to top CH of CH 3.
Weave in your ends. 

Filed Under: Free Patterns, Grannys

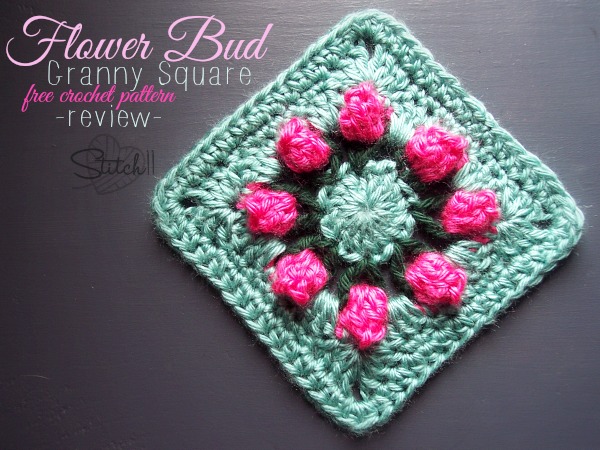
Flower Bud Granny Square – Free Crochet Pattern – Review

April 7, 2015 By stitch11 1 Comment

Flower Bud Granny Square - Free Crochet Pattern - Review

Most of us in the crochet community has noticed the beautiful flower bud crochet patterns by Dearest Debi over the last year or so. I have been waiting for an excuse to work one up since her first Flower Bud Stitch tutorial. What better excuse (for me) than decorating a tree!

I am a nature lover! Always have been and always will be. There is something about the outdoors that feels healing to the soul.
A few years ago, I put 6 granny squares on a tree, deep in the woods at one of my favorite hiking areas. Since then I have seen people posting photos of my mini yarn bomb with amazement of what they discovered while hiking or bird watching. 😀 Fills my heart with so much joy to know people get excited when they stumble across it.  So, this Spring, every time I hike that direction, I bring some yarn love to add to it. I can't help but to hope and wonder how long it will take before another hooker decides to add to it. 😀

This lovely Flower Bud Granny Square pattern (<- link) is going to make a beautiful addition to my yarn bomb! The pattern was VERY easy for me to follow and it worked up extremely quick. These squares would make an adorable baby blanket! And, not only is this pattern beautiful and easy… but it is also free!

Filed Under: Flowers, Free Patterns, Grannys, Pattern Reviews

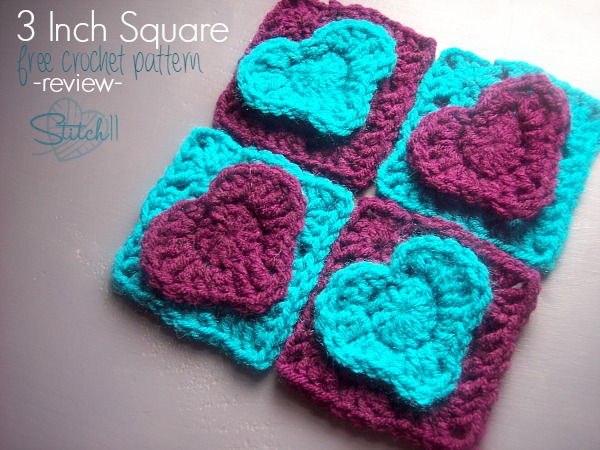
3 Inch Square – Free Crochet Pattern – Review

April 3, 2015 By stitch11 Leave a Comment

3 inch crochet square - free crochet pattern - review

I was searching for some three inch square crochet granny patterns when I discovered the Colorado Strong Granny Square Crochet Pattern (<-pattern linked) designed by Posh Pooch Designs.

With her pattern, you can actually make this square much larger but I decided to stop after round 4 because it measured exactly 3 inches like I needed.

Why did I need 3 inch squares? Because I will be joining them to other squares that were 3 inches short of fitting around a tree!

Keep following the granny square series to see the results!

Filed Under: Free Patterns, Grannys, Pattern Reviews

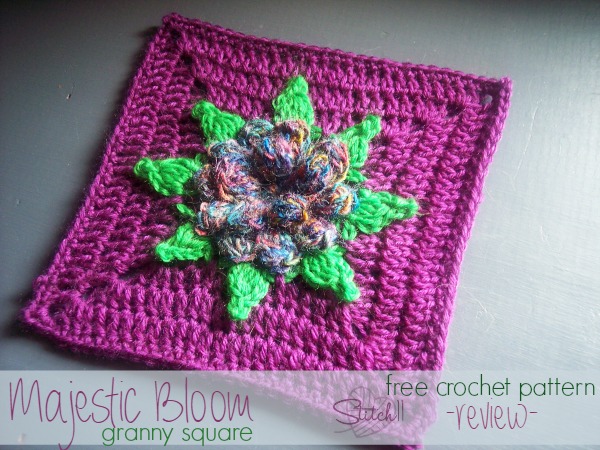
Majestic Bloom – Free Crochet Pattern – Review

April 2, 2015 By stitch11 1 Comment

Majestic Square - Free Crochet Pattern -- Review
I love it when I find an excuse to my DK weight yarn! Although she mentions that you can use any weight, the fact that she used DK made me run to my DK drawer with excitement. It's the little things in life… right? 😉

The Majestic Bloom Granny Square (<-link) was really easy for me to follow. It works up so clean and beautiful! I love love love the way she does the leaves!

Thank you My Hobby Is Crochet for sharing your wonderful art with us!

Filed Under: Flowers, Free Patterns, Grannys, Pattern Reviews

Hydrangea Shrub – Crochet Pattern Review

March 31, 2015 By stitch11 Leave a Comment

Hydrangea Shrub - Crochet Pattern Review

I am thrilled to share the link for the Hydrangea Shrub Crochet Square!

And, I am so excited to finally have the chance to learn the Bullion stitch! To be honest, I never thought I would be able to pull it off!  But this square has the perfect amount for someone like me who fears pulling through too many loops at once. Ha! If you haven't worked with the Bullion stitch before, this is your excuse to learn it!

Thank you so much for sharing your design Underground Crafter!

Filed Under: Grannys, Pattern Reviews

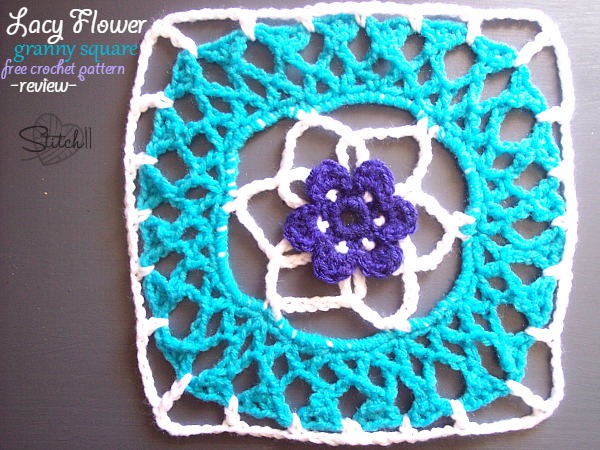
Lacy Flower Granny Square – Free Crochet Pattern Review

March 30, 2015 By stitch11 2 Comments

Lacy Flower Granny Square - Free Crochet pattern - Review

The Lacy Flower Crochet Granny Square (<–pattern linked) is the first of the series that is to come. This square is going to look beautiful wrapped around a tree!

As soon as I started hookin' the square up, ideas started popping into my head like a spreading wild fire. You can make beach bags, market bags, ponchos, beach wraps, lacy shirts to wear over your tanks, and even curtains! Have more ideas? Share them in the comment section below! I want to hear them!

Thanks for the endless ideas and for the free crochet pattern KatidCreations.

Filed Under: Flowers, Free Patterns, Grannys, Pattern Reviews

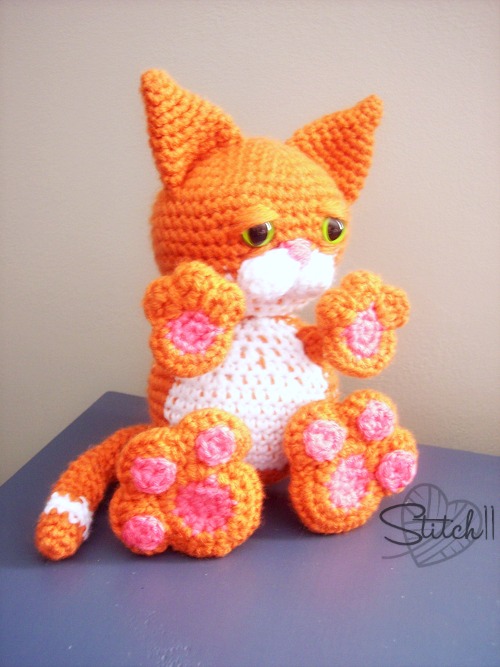
Cute Cat – Why I Follow Crochet Patterns

March 29, 2015 By stitch11 15 Comments

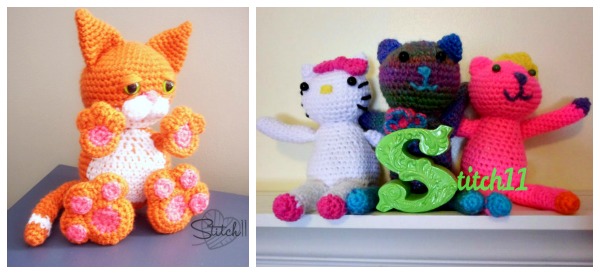
Cute Cat - Why I follow crochet patterns.


I often see/hear people say “I do not follow patterns.” I know there are many reasons a person will say this.. but I want to share with everyone why I choose to follow patterns.

Sometimes I feel like I can make anything that I put my mind to… and at this moment, I still feel this way. Not that I think I can design or freehand anything I put my mind to, or that I can find a pattern for anything I wish. I just know that between the patterns and techniques that are out there for me to discover, I can learn how to make anything that I need/want to. And really, so can you.

For this cat, I knew I wanted to make something better than my first experience with crocheting kittens. After all, it has been a few years since I made them, why wouldn't I be able to make something better?

After searching online with my daughter by my side, we were inspired by many patterns, photos and even a video! Here are the links that helped me create this adorable crochet cat pattern!

First of all, the kitten who started the idea…

This video has captured the hearts of everyone in my home. We have watched a few different ones.. but this one was the first. So cute!!!

Next, we attempted to find the perfect and most adorable cat pattern to use/base the creation off of. I knew I could design one, or wing it; but I think following other peoples patterns only increases my own skill. I learn new techniques that I would have never thought up on my own!

IMG_8356_rt_w


This blog
post captured my child's imagination and inspired the colors of the cat. But when I went to follow the pattern… I couldn't get it translated well enough without having to wing it anyways.

moko
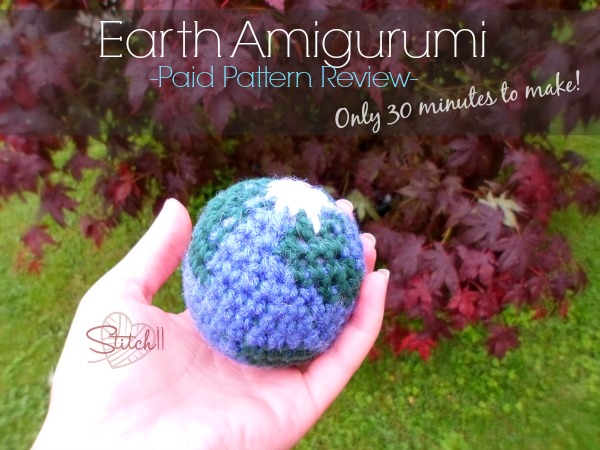
Earth-Amigurumi

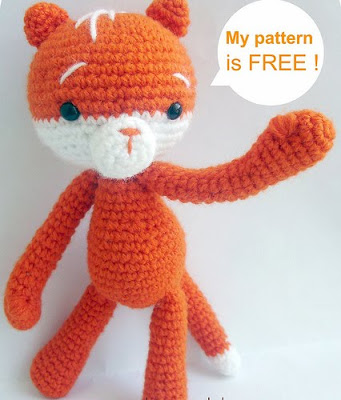
Next up, we found another pattern that my daughter said was her favorite- Moko The Cat.

So, using this, I crocheted the head. But instead of making the bottom half a different color, I changed colors using the techniques I learned from the little Earth I crocheted last year.

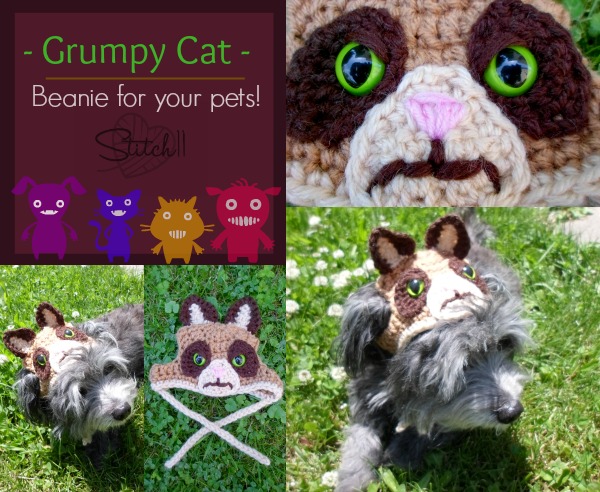
Grumpy-Cat-Beanie-For-Your-Pets
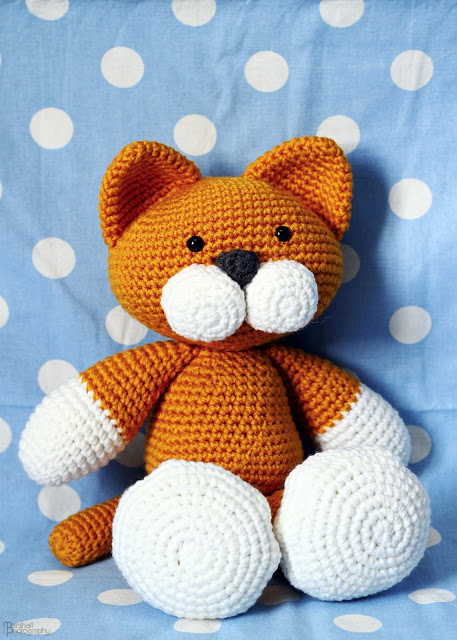
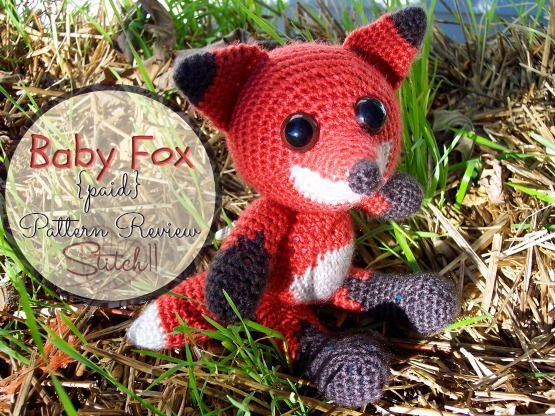
Baby-Fox-Pattern-Review

With the eyes, I knew I loved the look of the Grumpy Cat Hat I made last year. So I used techniques from that experience for this item.

For the ears, I knew I wanted the clean look- like the ones from the Baby Fox pattern!

Ella Bunny - pattern review

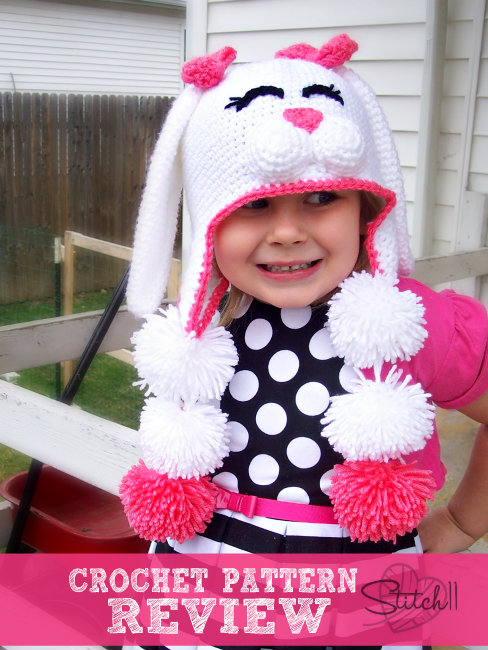
For the puffy cheeks above the mouth, I used the technique that I fell in love with last week while following the Sweet Bunny Hat!

PuppyDogLovey

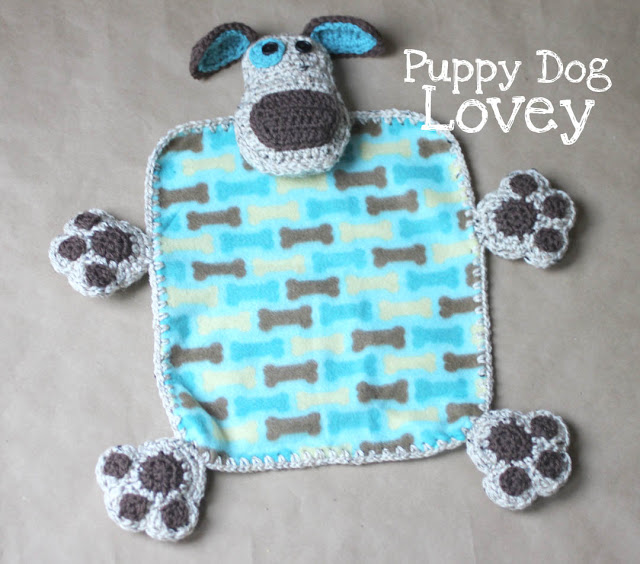
For the paws, I googled “Crochet Amigurumi Paws” and found this fantastic and creative pattern by Repeat Crafter Me! It was perfect for the feet. And using what I learned from this pattern, I was able to make a smaller version for the front paws too.

For the body, I free handed something similar to the pattern I used for the head.
For the tail, I just started with 8 SC in a magic ring, and kept it at 8 SC the entire length. I will be honest though, there were a few cat patterns out there with amazing tails that I contemplated on using.

Why I follow Crochet Patterns

This cat is the outcome from putting the minds of many artists together into one piece. This is exactly why I love to follow patterns. I take what I learn from each one, whether it be their ideas, techniques, or actual patterns- and mix it all up with my own creativity. It is like the fire that sparks my own passion for art. Without everyone else sharing their work, patterns, and tutorials. It would have taken me longer than 2 years to go from the original cats I made…. to this latest. And wow, what a difference!!!

If you'd like more inspiration for crochet cat patterns, take a peek at some of my other blog pages here: 50+ Purr-fect Crochet Cat Patterns

Filed Under: Free Patterns, Inspired, Pattern Reviews, Toys

  • « Previous Page
  • 1
  • …
  • 7
  • 8
  • 9
  • 10
  • 11
  • …
  • 25
  • Next Page »
  • Email
  • Facebook
  • Pinterest
  • RSS

Stitch11 is a Red Heart Blogger!

unnamed

.

Grab My Button

Archives

Privacy Policy

Copyright © 2026 Stitch11.com · All Rights Reserved · Log in