• Home
  • Free Patterns
    • Toys
    • Costumes
    • Bags
    • Flowers
    • Hats
    • Pattern Reviews
    • Household
    • Newborn
    • Scarves
    • Sports
  • Disclosure
  • Contact
  • Yummy Food
  • Round Ups

Stitch11

A Yarntastic Life!

  • Girls
  • Boys
  • Hats
  • Newborn
  • Flowers
  • Household
  • Costumes
  • Toys
  • Pattern Reviews
  • Grannys
You are here: Home / Archives for stitch11

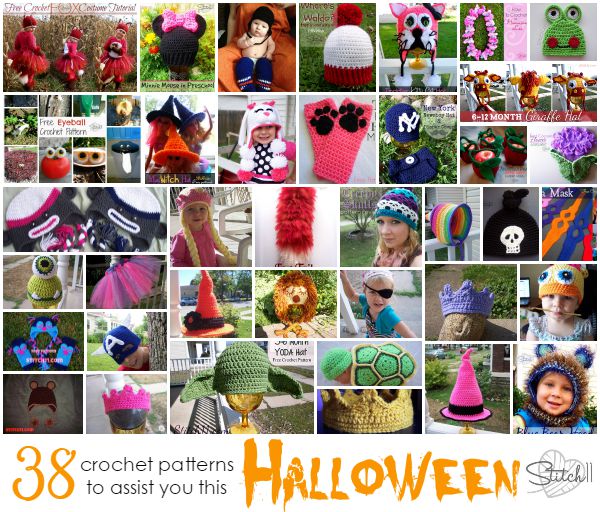
38 Crochet Patterns to Assist You This Halloween

September 10, 2015 By stitch11 1 Comment

Stitch11 Halloween Crochet Patterns and Reviews


Here's a list of 38 crochet patterns that can assist you this Halloween. Each one is either written by me, Stitch11, or reviewed by me. Happy Halloween!

Fox Costume
Minnie Mouse Hat – Toddler Size and Child-Adult Size
Hockey Helmet
Where's Waldo
Cat Hat
Hawaiian Lei
0-3 Month Frog Hat
Eyeballs
Mini Witch Hat
Bunny Hat
Cat Paw Fingerless Gloves
Newborn Baseball Set
Apple Cozies
Newborn Knot Skull Hat
Ninja Mask
Giraffe Hat – 6-12 Month Size and Adult Size
Flower Cocoon
Sock Monkey Hats – 0-3 Months, 6 Month, Toddler, and Child Size
Princess Hat with Braids – Newborn and Toddler SizeĀ 
Fluffy Animal Tail
Skull Beanie
Hood
Baby Cyclops Hat
Tutu
Newborn Witch Hat
Lion Hat
Pirate Eye Patch
Princess Crown – 12 Months, Toddler and Child
0-3 Month Princess Crown
Duck Hat
Owl Set
Captain America Hat
0-3 Months Bear Hat
Yoda Hat – Baby and Adult Size
Newborn Turtle Costume
Kings Crown
Toddler Witch Hat
Bear Hood
Filed Under: Costumes, Free Patterns, Pattern Reviews, Round Ups

Optical Illusion Baby Blanket

August 25, 2015 By stitch11 5 Comments

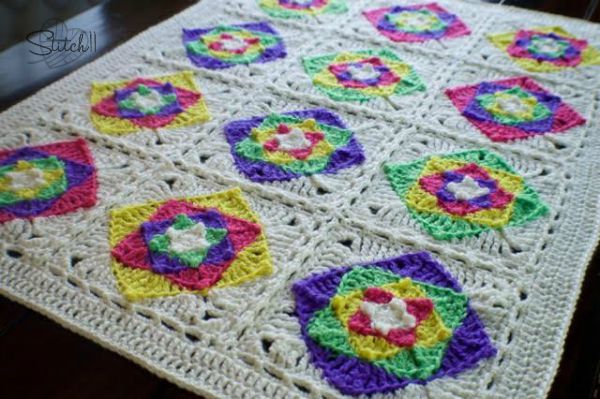
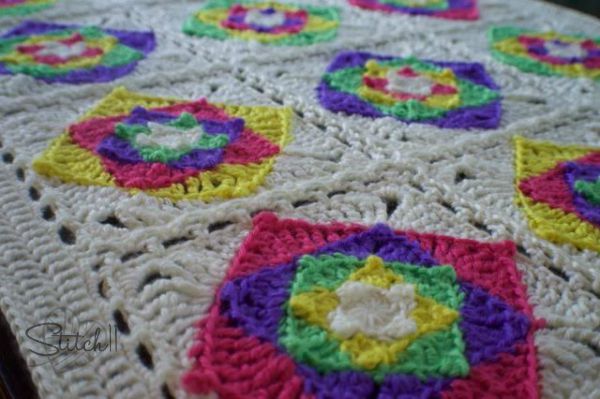
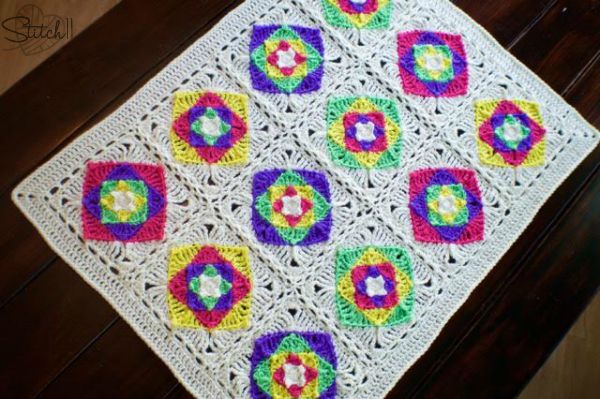
This isn't your average granny square blanket! Get to work on this small masterpiece and make in any color you like! Scroll down for the complete free pattern or get the ad-free, printable PDF here.

optical illusion baby blanket- free crochet pattern on Stitch11

Get the Ad-free Printable PDF Pattern Here

The Optical Illusion Baby Blanket is designed for my new baby cousin Gracie. But, with a change of colors, you can customize this free blanket crochet pattern for any baby or even change up the size!

What I love about this pattern is you can take individual squares and seam them together to make a full blanket. I can also teach you how to take rectangles and hexagons and crochet almost any pattern. My video course Crocheting Anything with Rectangles and Crocheting Anything with Hexagons will help you master the skills you need to use basic shapes to stitch together larger patterns! You are going to love these courses and how easy they are! Check them out now and learn free for 2 days.

NOTE- You can choose to use the joining method and “join as you go” to minimize your yarn ends for weaving in. I didn't do this.. because I wasn't sure how I was going to join until after I finished the squares. But using and learning the Scallop Join, made me realize I could have saved time and yarn by just doing it before finishing off the yarn after the last round of each square.

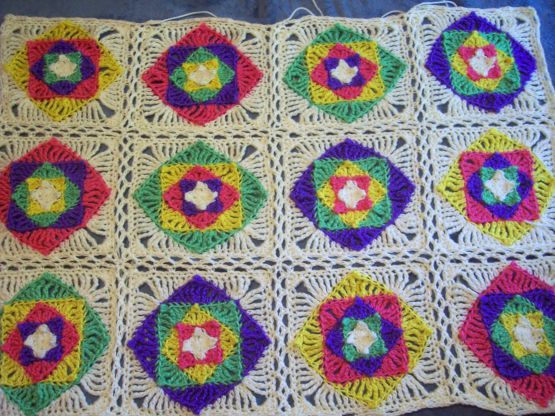
To crochet the Optical Illusion Baby Blanket, you will need to crochet you desired amount of THIS SQUARE PATTERN. I made 12.

Optical Illusion Square

The first edging before joining your squares.
Join yarn to corner TR. CH 1, SC into same stitch. CH 3. SC into same stitch.{ *CH 3, skip 2 stitches, SC into next stitch. Repeat from * 5 more times. SC into TR. CH 3. SC into same stitch.} Repeat from { to } 2 more times.   **CH 3, skip 2 stitches, SC into next stitch. Repeat from ** 5 more times. Join to first SC.
After finishing your first edging, You will use this —-> SCALLOP JOIN by Gourmet Crochet. You will continue with the same edging you used with the first square, besides on the sides you are joining.. that is where you need the Scallop Join.


NOTE- After the first row of joining. When joining in corners, I slip stitched into the same slip stitch as previous corners.
Below is a progress photo from after I joined my squares.

Stitch11

Border
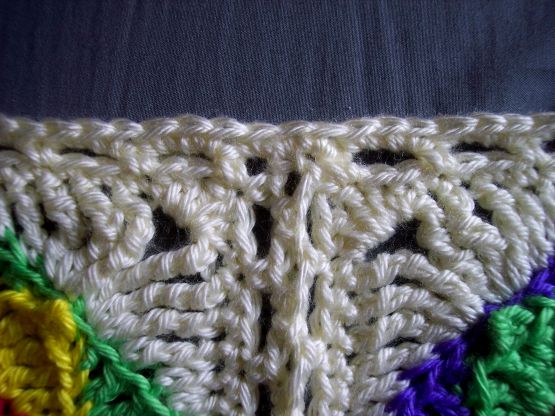
Round 1: Starting in any CH 3 space, CH 1. 3 SC into CH 3 space. You will be putting 3 SC into every CH 3 space (while skipping every SC). In the corner CH 2 spaces, you will {SC, CH 2, SC} all into the corner CH 2 space. When you reach each area of joins, you will work 1 SC into each of the 3 spaces. (The Ch space, the side of the SC that joins the CH space and the next CH space.) I have a photo below to help.
Once you get back to your starting stitch, join to the first SC.

Optical Illusion - first round of border - Stitch11

Get the Ad-free Printable PDF Pattern Here


Round 2: CH 3 (counts as first DC). DC into each SC around. On the corner CH 2 spaces, you will {2 DC, CH 2, 2 DC} all into the CH space. Once you get back to the starting CH 3. join to the top CH.
Round 3: CH 3 (counts as first DC). DC into each DC around. On the corner CH 2 spaces, you will {2 DC, CH 2, 2 DC} all into the CH space. Once you get back to the starting CH 3.
Round 4: CH 1. SC into each stitch around. On the corners you will be crocheting 3 SC into the CH 2 spaces. Join to first SC.
Weave in your ends. 

optical illusion baby blanket- free crochet pattern on Stitch11

Filed Under: Free Patterns, Grannys, Household, Newborn, Uncategorized

Star Bright Square

August 14, 2015 By stitch11 8 Comments

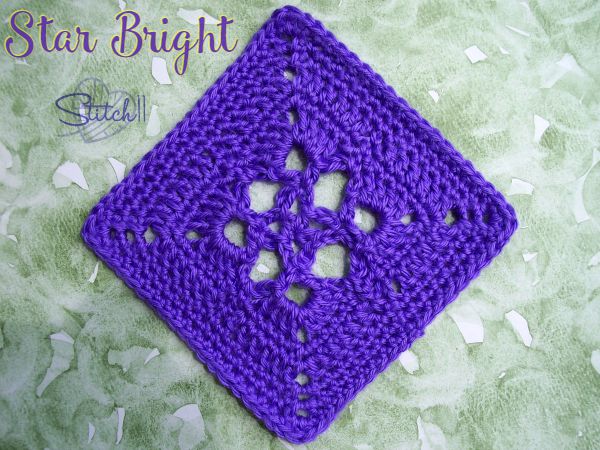
Star Bright - 6 inch crochet square

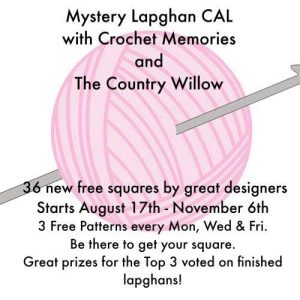
I’m excited to be joining the Mystery Lapghan CAL! I’ve teamed up with 29 other crochet designers to share 36 free crochet square patterns for a one-of-a-kind lapghan!
Each pattern will be a 6-inch square using a worsted or aran weight yarn – yarn symbol 4 and a size US-I/9 (5.5 mm) hook.

The Star Bright crochet square isn't scheduled to release for the CAL until 8/27/2015. But, you can start early to stay ahead!

NOTE – I have noticed that a lot of the people following the CAL are having issues with not all squares being the same size. Since I had used Caron Simply Soft yarn, my measurements may not be the same as some. If you find that you need to make your square smaller, you can skip round 7 (and even round 6 if needed) and go straight to the last round, where you SC into each stitch and {HDC, DC, HDC}-into the corner CH spaces.

SuppliesĀ 
Medium Weight yarn. I used Caron Simply Soft.
1/9-5.5 mm crochet hook
Yarn needle for weaving in your ends.

Stitches used
Magic Circle
CH – Chain
Slip Stitch
SC – Single Crochet
HDC – Half Double Crochet
DC – Double Crochet

Note- This square measures 6 inches.

Round 1: Magic circle. CH 1. *HDC into magic circle. CH 5. Repeat from * 3 more times. Join to first HDC. (4 HDC)
Round 2: Slip stitch into next 3 chains. CH 1. HDC into same CH. CH 5. HDC into same CH. *CH 5. HDC into 3rd CH of next loop. CH 5. HDC into same CH. Repeat from * 2 more times. CH 5. Join to first HDC. (8 HDC)
Round 3: Slip stitch into CH space. CH 3 (counts as first DC). 3 DC into same CH space. CH 2. 4 DC into same CH space. CH 2. SC into next CH space. CH 2. * 4 DC into next CH space. CH 2. 4 DC into same CH space. CH 2. SC into next CH space. CH 2. Repeat from * 2 more times. Join to top of CH 3. (36 stitches not including chains)
Round 4:Ā CH 1. SC into same stitch and next 3 stitches. SC into CH space. CH 2. SC into same CH space. SC into next 4 stitches. CH 1. SC into SC. CH 1 *SC into next 4 stitches. SC into CH space. CH 2. SC into same CH space. SC into next 4 stitches. CH 1. SC into SC. CH 1. Repeat from * 2 more times. Join to first SC. (44 stitches not including chains)
Round 5: CH 3 (counts as first DC) DC into each of the next 4 stitches. DC into CH space. CH 2. DC into same CH space. DC into each of the next 5 stitches. Ā SC into SC. *DC into next 5 stitches. DC into CH space. CH 2. DC into same CH space. DC into next 5 stitches. SC into SC. Repeat from * 2 more times. Join to top of first CH 3. (52 stitches not including chains)
Round 6: CH 1. SC into same stitch and next 5 stitches. *HDC into CH space. CH 2. HDC into same CH space. SC into next 13 stitches. Repeat from * 2 more times. HDC into CH space. CH 2. HDC into same CH space. SC into next 7 stitches. Join to first SC. (60 stitches not including chains)
Round 7: CH 1: SC into same stitch and next 6 stitches. HDC into CH space. CH 2. HDC into same CH space. *SC into next 15 stitches. HDC into CH space. CH 2. HDC into same CH space. Repeat from * 2 more times. SC into last 8 stitches. Join to first SC. Ā (68 stitches not including chains)
Round 8: CH 1. SC into same stitch and next 7 stitches. {HDC, DC, HDC}-all into CH space. *SC into next 17 stitches.Ā {HDC, DC, HDC}-all into CH space. Repeat from * 2 more times. SC into last 9 stitches. Join to first SC. (80 stitches)
Finish off and weave in your ends.Ā 

HOW TO JOIN IN THE MYSTERY LAPGHAN CAL?
Every week, Monday, Wednesday, and Friday from August 17th through November 6th, a new square will be released.Ā  You can join the Facebook online group at “Mystery Group CAL” to keep up with each release date.

Click the photo below to visit Stitches n Scraps who will be scheduled to release her square by 8/31/2015!Ā unnamed (9)

Filed Under: Free Patterns, Grannys

Optical Illusion Square

August 13, 2015 By stitch11 1 Comment

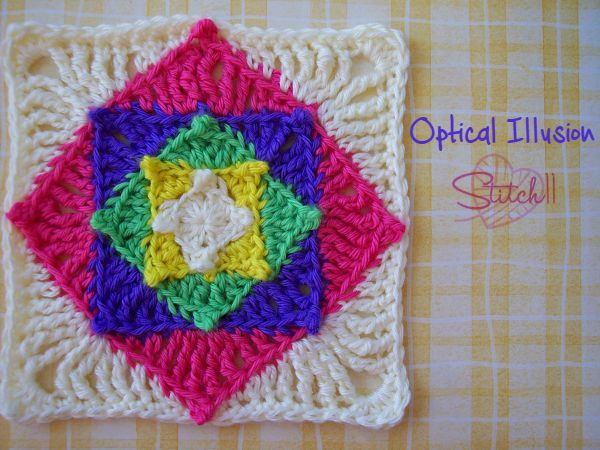
Optical Illusion Square

Looking for a baby blanket that’s a lot of fun to stitch? This optical illusion crochet baby blanket looks almost like a kaleidoscope in crochet stitches.

This is a great stash-busting project, too, because you can use different colors for each block if you like. The key is to use a neutral color yarn for the borders so that the project looks harmonious even if the blocks themselves are wild.Ā 

The blog post about this project talks about how to join the crochet squares as you go, which is a handy way to make the finishing faster, but you can also make individual blocks and sew them together at the end.

The blog post about this project talks about how to join the crochet squares as you go, which is a handy way to make the finishing faster, but you can also make individual blocks and sew them together at the end. To view the full blanket >>CLICK HERE<<

If you enjoy crocheting blankets, you might want to check out the professionally filmed video tutorial for making a Log Cabin Baby Blanket here.

Optical Illusion Square Crochet Pattern

SuppliesĀ 
Medium Weight yarn. I used Caron Simply Soft.
I/5.5 MM crochet hook
Yarn needle for weaving in your ends.

Stitches
Magic Circle
Slip Stitch
CH- Chain
SC – Single Crochet
HDC – Half Double Crochet
DC – Double Crochet
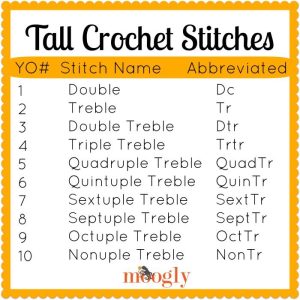
TR – Treble Crochet
DTR – Double Treble Crochet
TRTR – Treble Treble Crochet

Don't understand all these stitches? If you enjoy working with a variety of crochet stitches, I highly recommend the Ultimate Crochet Stitch Library which includes 45 professionally filmed stitch tutorials.

4fd3cdac04bce849a28df24d76b3e563

*Note* This square measures 7 inches.
*Note* On the corners you will be making a {CH 3, Slip stitch to first CH} These are picot stitches. When working the next row around, you will want the picots to be pushed towards the front of the square.
*Note* Final stitch count at the end of each row does not include picots.

Round 1: Magic Circle. CH 3 (counts as first DC).  2 DC into magic circle. CH 3. Slip stitch into first CH. 3 *3 DC into magic circle. CH 3. slip stitch into first CH. Repeat from * 2 more times. Join to top of CH 3. (12 DC)
Finish off. Join new color to the back loop of the first DC after corner picot.

YOU WILL BE WORKING IN BACK LOOPS THROUGH THE ENTIRE PATTERN

Round 2: CH 1. SC into same stitch. HDC into next stitch. DC into same stitch. CH 3. Slip stitch to first CH. DC into same stitch. HDC into same stitch. SC into next stitch.  Skip picot stitch and push it to the front. *SC into next stitch. HDC into next stitch. DC into same stitch. CH 3. Slip stitch to first CH. DC into same stitch. HDC into same stitch. SC into next stitch.  Skip picot stitch and push it to the front. Repeat from * around. Join to first SC.  (24 stitches)
Finish off. Join new color to the back loop of the first DC after picot. 

Round 3: CH 1. SC into same stitch. HDC into next stitch. DC into next stitch. TR into same stitch. CH 3. Slip stitch into first CH. TR into next stitch. DC into same stitch. HDC into next stitch. SC into next stitch. Skip picot stitch and push it forward. *SC into next stitch. HDC into next stitch. DC into next stitch. TR into same stitch. CH 3. Slip stitch into first CH. TR into next stitch. DC into same stitch. HDC into next stitch. SC into next stitch. Skip picot stitch and push it forward. Repeat from* around. Join to first SC. (32 stitches)
Finish off. Join new color to the back loop of the first TR after picot. 

Round 4: CH 1. SC into same stitch. HDC into next stitch. DC into next stitch. TR into next stitch. DTR into same stitch. CH 3. Slip stitch into first CH.  DTR into next stitch. TR into same stitch. DC into next stitch. HDC into next stitch. SC into next stitch. Skip picot stitch and push it forward. *SC into next stitch. HDC into next stitch. DC into next stitch. TR into next stitch. DTR into same stitch. CH 3. Slip stitch into first CH.  DTR into next stitch. TR into same stitch. DC into next stitch. HDC into next stitch. SC into next stitch. Skip picot stitch and push it forward.  Repeat from * around. Join to first SC. (40 stitches)
Finish off. Join new color to the back loop of the first DTR after picot. 

Round 5: CH 1. SC into same stitch.  HDC into next stitch. DC into next stitch. TR into next stitch. DTR into next stitch. TRTR into same stitch. CH 3. Slip stitch into first CH. TRTR into next stitch. DTR into same stitch. TR into next stitch. DC into next stitch. HDC into next stitch.  SC into next stitch. Skip picot stitch and push it forward. *SC into next stitch.  HDC into next stitch. DC into next stitch. TR into next stitch. DTR into next stitch. TRTR into same stitch. CH 3. Slip stitch into first CH. TRTR into next stitch. DTR into same stitch. TR into next stitch. DC into next stitch. HDC into next stitch.  SC into next stitch. Skip picot stitch and push it forward.Repeat from * around. Join to first SC. (48)
Finish off. Join new color to the back loop of the first TRTR after picot. 

Notice in the next round, you will be putting 3 stitches into both corner stitches on all 4 corners. When following the pattern a second time, I had to keep reminding myself! (I kept thinking I was a stitch short so I figured it would be worth a note just in case others do the same.) 

Round 6: CH  1. SC into same stitch. HDC into next stitch. DC into next 2 stitches. TR into next stitch. DTR into next stitch. 2 TRTR into the same stitch. CH 2. 2 TRTR into next stitch. DTR into the same stitch. TR into the next stitch. DC into next 2 stitches. HDC into next stitch. SC into next stitch. Skip picot stitch and push it forward. *SC into next stitch. HDC into next stitch. DC into next 2 stitches. TR into next stitch. DTR into next stitch. 2 TRTR into the same stitch. CH 2. 2 TRTR into next stitch. DTR into the same stitch. TR into the next stitch. DC into next 2 stitches. HDC into next stitch. SC into next stitch. Skip picot stitch and push it forward. Repeat from * around. join to first SC.  (64)

DO NOT FINISH OFF. YOU WILL BE WORKING IN BOTH LOOPS FOR EDGING ROUND.

Round 7: CH 1. SC into same stitch and next 7 stitches. { HDC, DC,TR, DC, HDC} all intoĀ CH space. *SC into next 16 stitches. {HDC, DC,TR, DC, HDC} all intoĀ CH space. Repeat from * two more times. SC into last 8 stitches. Join to first SC. (84)

If you enjoyed this post, check out some of my other popular posts.

  • Bright Stripe Blanket Crochet Pattern
  • Colour Block Boho Bag Crochet Pattern
  • Sweetheart Cowl Crochet Pattern

Filed Under: Free Patterns, Grannys

Moogly Reviewed by Stitch11 – Learning the Tunisian – Free Infinity Scarf Crochet Pattern – Review

August 4, 2015 By stitch11 1 Comment

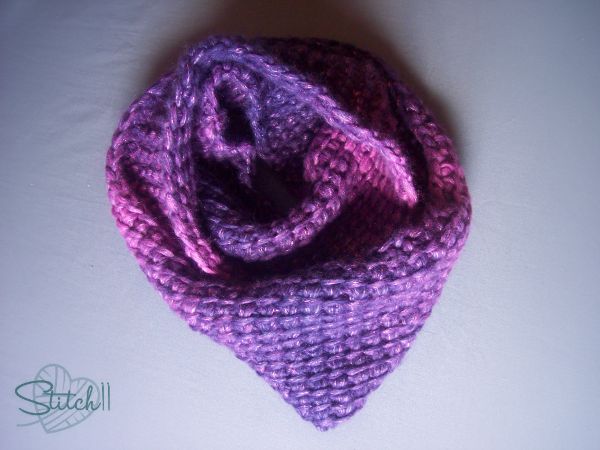
Moogly reviewed by Stitch11 - Free Infinity Scarf Crochet Pattern - review

First of all, you can get your copy of the free Infinity Scarf pattern HERE.

View the Moogly video tutorial that helped me figure out the Tunisian stitch HERE.

There comes a point in almost every season, when I know I am ready to learn a new stitch. When the desire of learning something new hit's me, one of the first places I check out is www.mooglyblog.com.Ā She never fails me!

When I first laid eyes on her Tunisian Infinity Scarf crochet pattern.. I knew it would be my next project. I had never used the stitch for anything… and I was finally ready!
Just by reading through her simple pattern, I had a really good idea of how to pull the stitch off. To be safe, I watched her video which just gave me all the confidence I needed.

After completing just a few rows, I was able to close my laptop and crochet while watching Netflix. I love taking a mental break from time to time… and after learning the stitch, my hook flowed quickly and with ease. I didn't have a Tunisian hook, so I just used a regular hook. It worked fine, but I'm sure the hooks Moogly has linked with the pattern would make it even better!

I usedĀ Red Hearts Boutique Infinity yarn. It's colors are soft, deep, and bright all at once. The sparkles in the yarn are gorgeous! It has just the right thickness and fluff that I prefer when using Bulky weight yarn. You can purchase Ā your own Red Heart Boutique Infinity Yarn through my affiliate link here. –>Ā Red Heart Yarn, Infinity EnchantedĀ 

Free infinity scarf crochet pattern - review

Filed Under: Free Patterns, Pattern Reviews, Scarfs

Mother Daughter – Child/Teen-Adult Ear Warmer Crochet Pattern

July 31, 2015 By stitch11 Leave a Comment

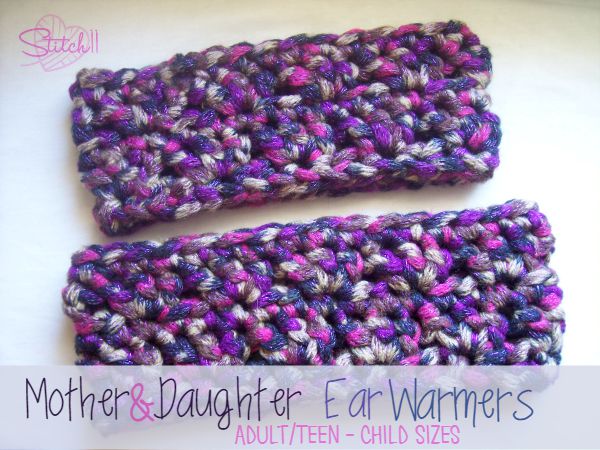
Mother and Daughter Ear Warmers - AdultTeen - Child sizes - Free Crochet Pattern

Supplies
One skein of Red Heart Boutique Twilight – Super Bulky 6 – 59 yds (one skein is enough to make two headbands with yarn to spare)
P/16 11.5 mm crochet hook
Yarn needle

Makes sizes Child/Teen-Adult

Stitches UsedĀ 
FSC – Foundation Single CrochetĀ 
CH – Chain
SC – Single CrochetĀ 
DC – Double CrochetĀ 

Round 1: FSC 30/33. Join to first FSC.
Round 2: CH 3 (counts as first DC) 2 more DC into same stitch. Skip 2 stitches. **3 DC into next stitch. skip 2 stitches. Repeat from ** around. Join to top of CH 3.
Round 3: CH 1. SC into same stitch and each stitch around. Join to first SC.
Round 4: CH 3 (counts as first DC) 2 more DC into same stitch. Skip 2 stitches. **3 DC into next stitch. skip 2 stitches. Repeat from ** around. Join to top of CH 3.
Round 5: CH 1. SC into same stitch and each stitch around. Join to first SC.
Finish off and weave in your ends. You will have to secure your starting end to your last FSC of your first round.

Filed Under: Free Patterns, Girls

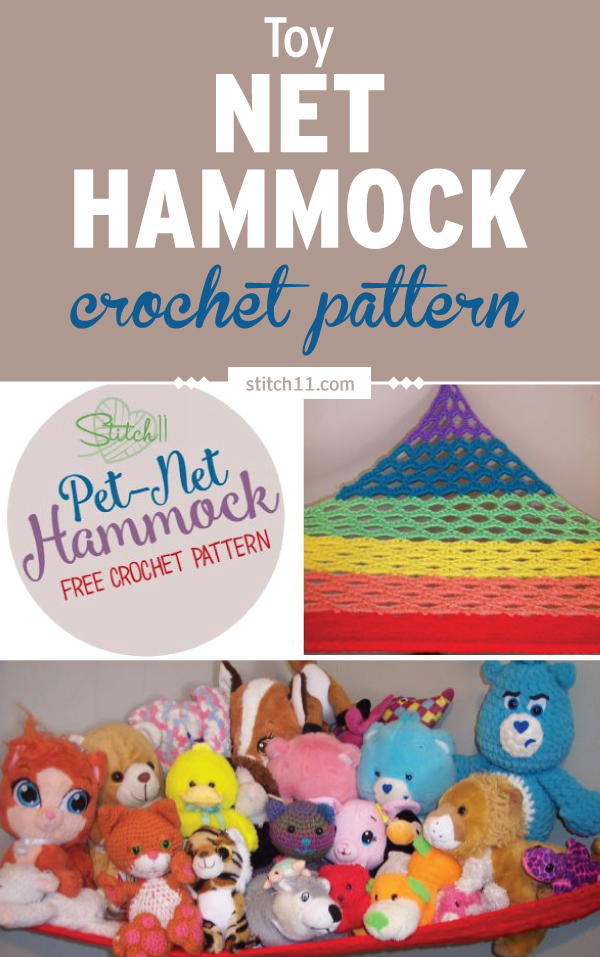
The Perfect Rainbow Pet Net Hammock

July 30, 2015 By stitch11 24 Comments

This pretty pattern isn't only lovely to look at. It also has a lot of other purposes, including keeping those messy toys off the floor. It's also one of the best ways to make use of those yarns you want to get rid off! See it come to life with the free pattern below or get the ad-free printable PDF pattern here.

This Toy Net Hammock crochet pattern is a cute hammock where you can place all the sweet stuffies. Instead of the stuffed toys hogging the space on your child's bed, shelves, or floor - you can rest them all on this pretty rainbow hammock! #crochet #crochetlove #crochetlife #crochetaddict #crochetpattern #crochetinspiration #ilovecrochet #crochetgifts #crochet365 #addictedtocrochet #yarnaddict #yarnlove

A few days ago, my daughter came to me and asked me to “please get rid of my creepy dolls.” She was quick to explain that she didn't need creepy dolls because she has so many stuffed animal babies.  Within twenty minutes she comes back to inform me…. she needs *another* crocheted toy net hammock.

I was quick to jump at this request because I desperately needed to update my previous crochet hammock. So really, this is *Take Three* of attempting the perfect hammock. I feel as if I finally did it! One that I am truly proud of designingĀ and sharing with all of you…. for FREE! šŸ™‚

The Perfect Rainbow Pet Net Hammock Crochet Pattern has now arrived.

Before we get to the pattern, if you enjoy crocheting things for the little people in your life, check out these incredibly cute stuffies in the Crochet Anything with Hexagons class.

[Read more…]

Filed Under: Boys, Free Patterns, Girls, Toys Tagged With: crochet pattern, hammock, pattern, toy hammock, toy hammock crochet pattern

Dizzy 12 Inch Square

July 24, 2015 By stitch11 3 Comments

Dizzy - 12 inch crochet square - free crochet pattern by Stitch11

Are you looking for a fun crochet project that’s full of color? This Dizzy 12-inch crochet square is a great option for you!

Grab all your leftover bits of medium-weight yarn because you can use all of them on this project! I used 9 colors in my square but you can use as many or as few as you like for yours.Ā I know 9 colors might seem intimidating but let me share with you my Crochet (& Knit) Essential Skills course where I go over a tons of the techniques that you need to master this pattern and (and really any other crochet project you might be working on). I show you how to make a granny square, how to change colors, how to weaving in the ends and so much more in my 72 video collection! Check out all the skill videos here.

Make a bunch of these to use up all your scraps in the most colorful crochet blanket ever, or make a wall hanging, a bag, or anything else you would like. The main thing is to have fun!

Before we get to the post, if you love crocheting squares, you will love learning how to Crochet Anything With Hexagons. I mean really it is so fun. Believe it or not there are so many things that you can crochet with just hexagons you would be surprised! We show you how to crochet hexagon animals in this course and how to apply to all the other types of projects you love! Check out the class here!

Dizzy 12 Inch Square

[Read more…]

Filed Under: Free Patterns, Grannys

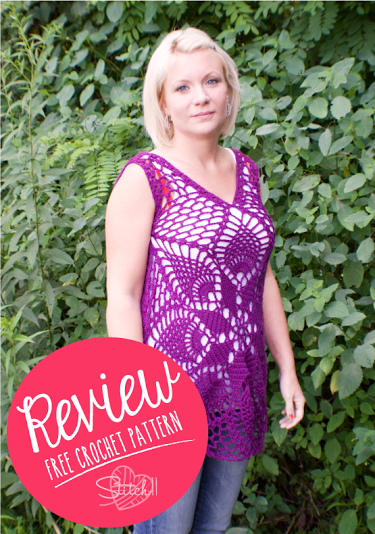
Summer Tank – Free Crochet Pattern – Review

July 22, 2015 By stitch11 5 Comments

Summer Tank - Free Crochet Pattern - Review

Walking through shopping centers can be so inspiring for us who know how to crochet. It is really hard to let myself spend money on pricey machine crocheted items when I know I can make it myself.

That being said, I have spent the last year searching for the perfect pattern to open my crochet world to adult clothing. When I spotted >>THIS<< free crochet pattern by EmmHouse I knew it was “The One”!

I was so thrilled to see how easily the shirt is made. It reminds me of making two big doilies and adding straps, then piecing it together. Very simple, and even the crochet beginner could figure it out with determination.

I did have to make adjustments on the shoulder parts so my numbers added up. You do not have to trust mine, but if you find your numbers don't add up you are more than welcome to come back to my notes when you reach that point.

-note- The round parts of the pattern worked up perfectly and needed no changes at all.

-note- I used aĀ 3.25 hook for starting CH circle and aĀ 4 mm hook for rest.

-note- I used Cascade DK Cherub that is always on sale at Craftsy!

-note- Ā When you reach the crochet sleeves, I did not CH 5 after or before the shells on shoulder pieces…. besides on row 24. On row 26, CH 5 after shell. but not before the finishing shell.Ā Follow rows 28- 30 exactly as directed.Ā On second sleeve, on row 26 you will CH five before finishing shell but not after starting shell.

This was the perfect top! After posting a photo, I had people lining up begging for me to acceptĀ crochet orders!

Filed Under: Free Patterns, Girls, Pattern Reviews

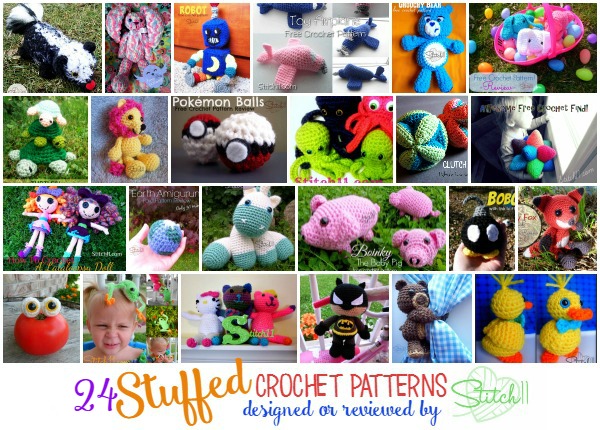
Stuffed – Crochet Patterns Reviewed or Designed by Stitch11

June 28, 2015 By stitch11 2 Comments

Stuffed Crochet Patterns Designed or Reviewed by Stitch11


I wanted to round up all the items I have made to stuff. I didn't realize until now, but I missed one! The Baby Bunny deserves a shout out too! The rest are listed below. Working from left to right from the photo above.

Skunk
Huggy BunnyĀ 
RobotĀ 
AirplaneĀ 
Grumpy BearĀ 
Bunnies
TurtleĀ 
LionĀ 
Pokemon BallsĀ 
OctopusĀ 
Clutch BallĀ 
Awesome Crochet FindĀ 
LalaloopsyĀ 
EarthĀ 
Unicorn
PigĀ 
BobombĀ 
FoxĀ 
EyeballsĀ 
FrogĀ 
KittensĀ 
BatmanĀ 
Curtain Hugging BearĀ 
Baby DuckĀ 

And I don't want to forget the amazing cat I made! Although I didn't write a pattern, I did link all the patterns that I used to put it together.

Filed Under: Free Patterns, Round Ups, Toys

Rainbows for Love -Free Crochet Patterns and Other Rainbow Tutorials

June 27, 2015 By stitch11 Leave a Comment

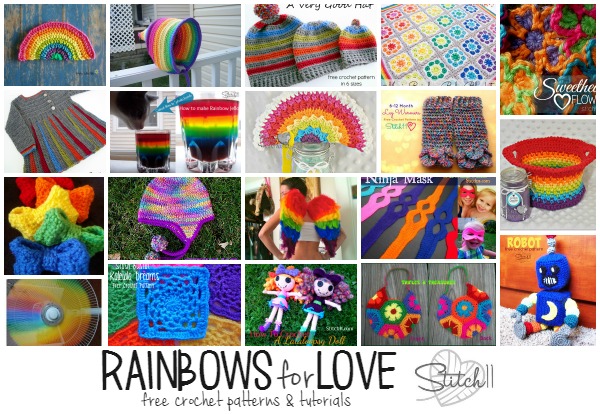
Rainbows for Love - Free crochet patterns and tutorials


Let's take a moment to sit back, take a deep breath…. and smile. The right to LOVE is sweeping across the states! Let's keep sharing the love! The more we love, the less room there is for hate. <3 <3

Here are 19 rainbow tutorials. Most of these tutorials are crochet, but some are cooking and some are crafty. Share the love!


Hood For Tots
– Design by Stitch11

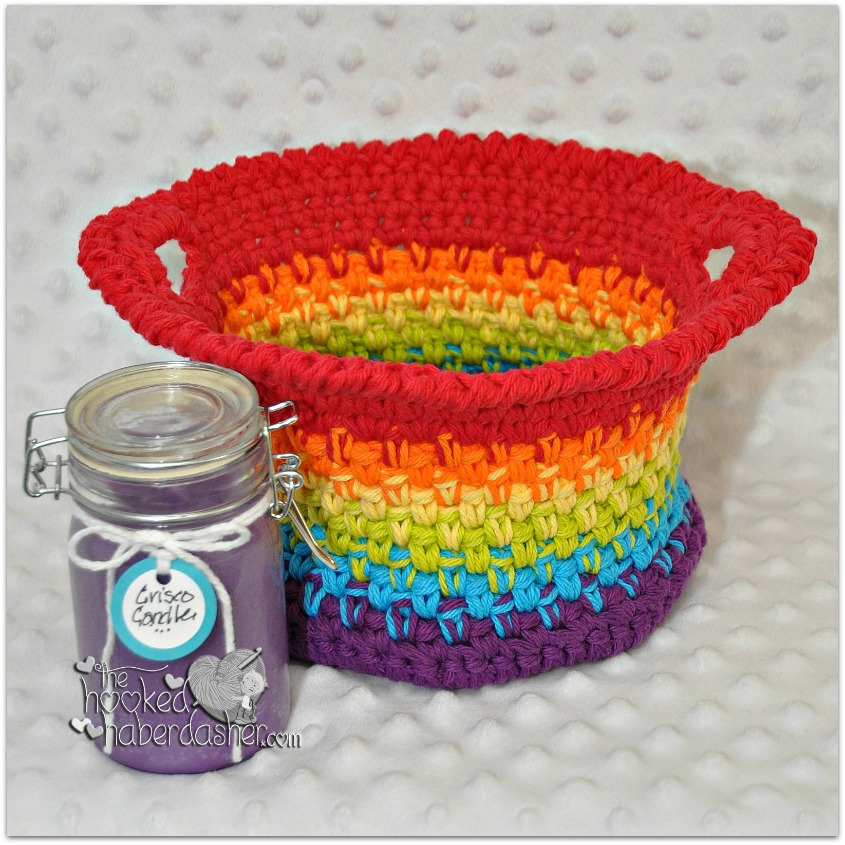
SPSD3-Simply-Pampered-Basket-The-Hooked-Haberdasher
SimplyĀ Pampered DIY Crisco Candle Recipe and Basket Crochet Pattern
– Design by The Hooked Haberdasher

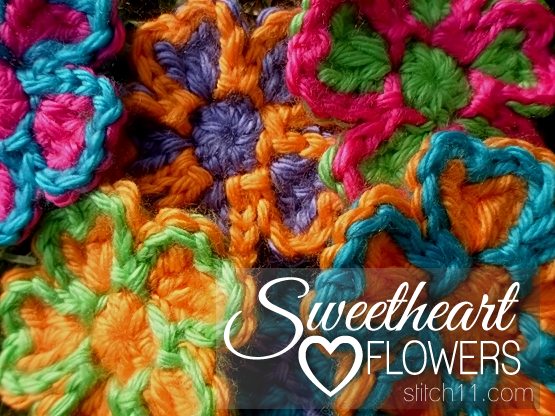
sweetheart-love-flowers
Sweetheart Love Flower
– Design by Stitch11

Simply-Pampered-Spa-Day-2-The-Hooked-Haberdasher
Simply PamperedĀ Lacy Round Washcloth and Bath Salts
– Design by The Hooked Haberdasher

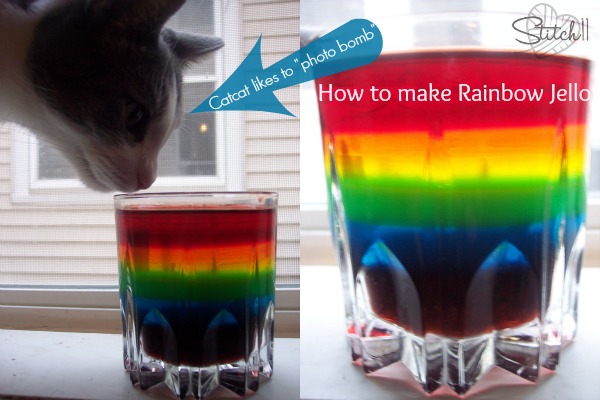
How-to-make-Rainbow-Jello
Rainbow Jello
– Design by Stitch11

9880993
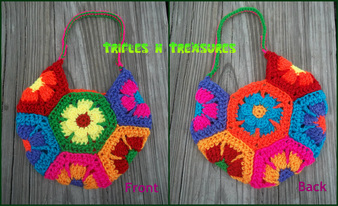
Flower Child Bag
– Design by Trifles N Treasures

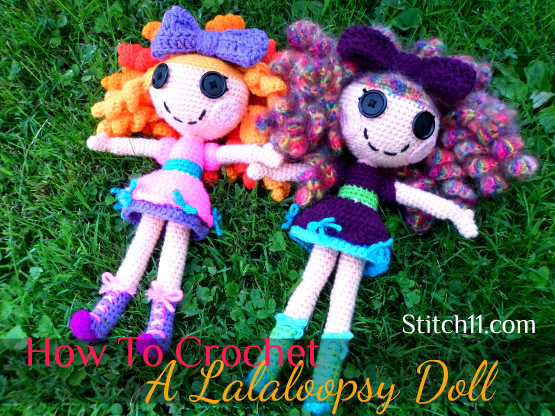
Crochet-Lalaloopsy
Lalaloopsy Doll
– Design by Stitch11

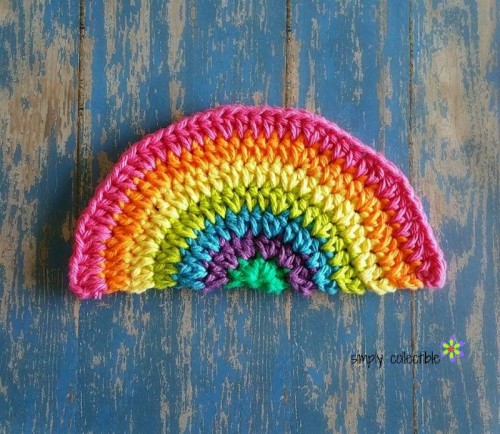
Rainbow-Daze-Washcloth-e1429812502111
Rainbow Daze Washcloth
– Design by Simply Collectible Crochet

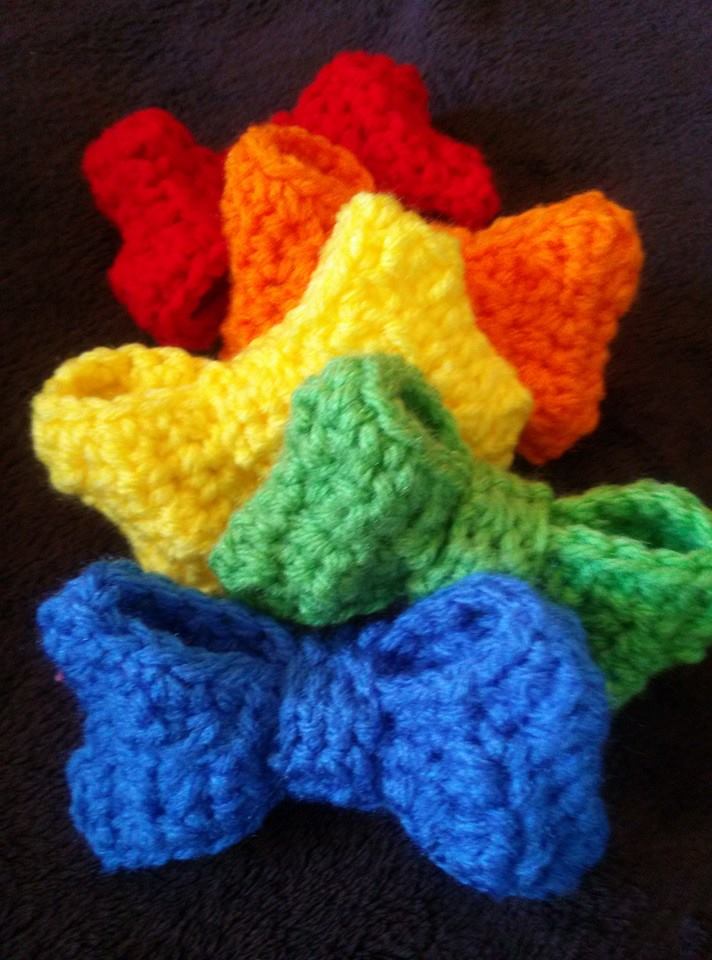
1150153_10152113236157713_299595242_n
Boutique Bow
– Design by Stitch11

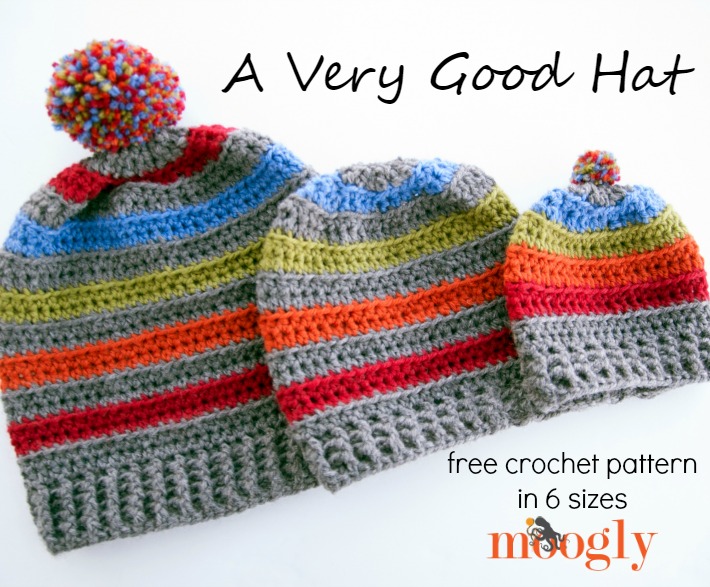
A-Very-Good-Hat-FB
Good Hat
– Design by Moogly

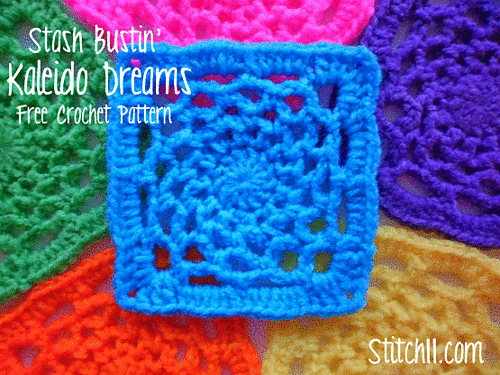
Kaleido-Dreams_medium
Kaleido Dreams Square
– Design by Stitch11

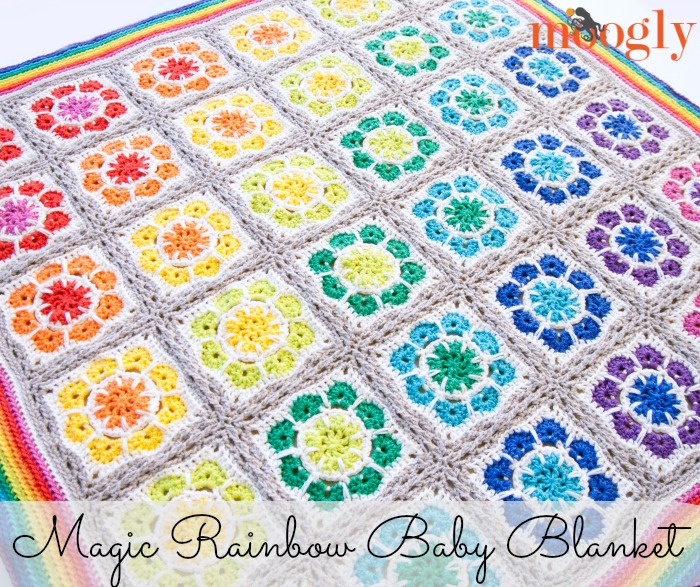
magic-rainbow-baby-fb-1
Magic Rainbow Baby Blanket
– Design by Moogly

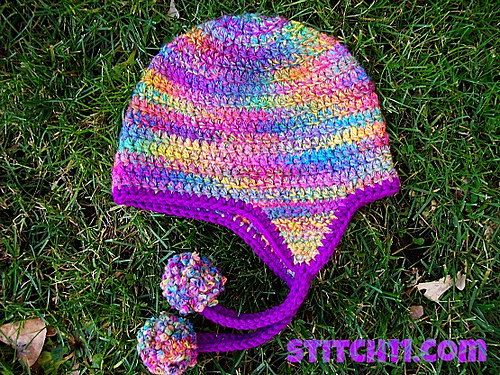
024_medium
Curly Q Hat
– Design by Stitch11

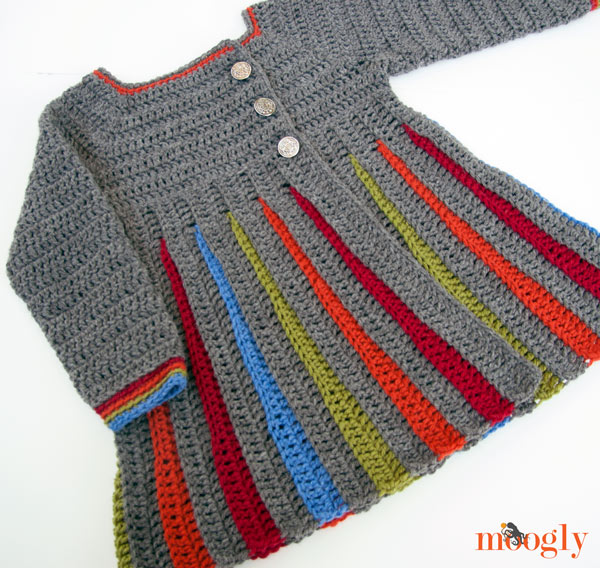
Eloise-Girls-Folded1
Eloise Sweater
– Design by Moogly

000_1077_medium
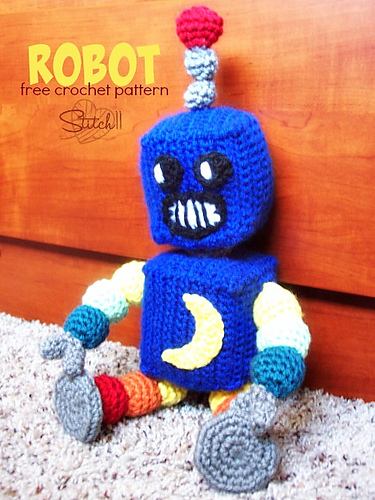
Baby Robot
– Design by Stitch11

bfeff8b658dfc62497bb6249d902d503
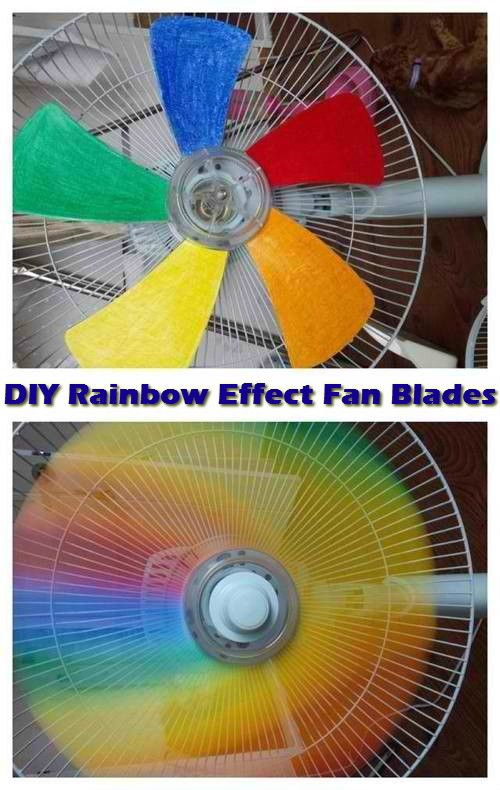
Rainbow Fan
– Tutorial by DIY Home Tips and Tricks

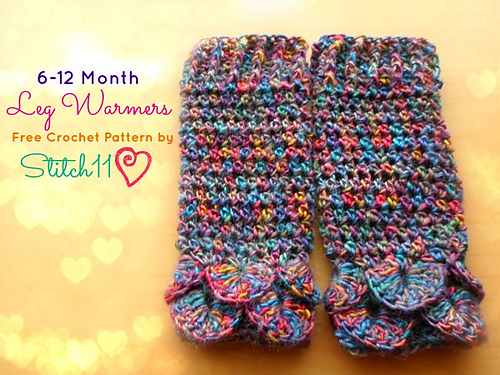
6-12_month_leg_warmers_medium
6-12 Month Leg Warmers
– Design by Stitch11

4da853e32097d038ee536a60f82c65dc
Rainbow Wings
– Tutorial by Katie Kupcake

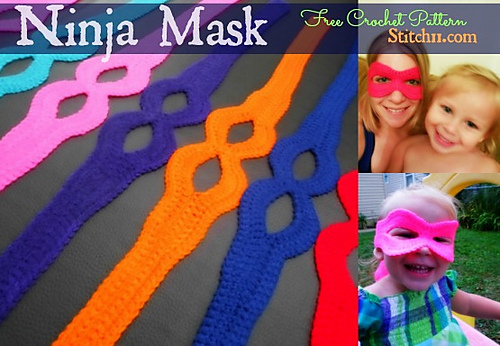
Crochet_Ninja_Mask_medium
Ninja Mask
– Design by Stitch11


Filed Under: Boys, Costumes, Crafts, Free Patterns, Girls, Inspired, Round Ups

Crochet Hemp Bracelet – Free Crochet Pattern

June 24, 2015 By stitch11 Leave a Comment

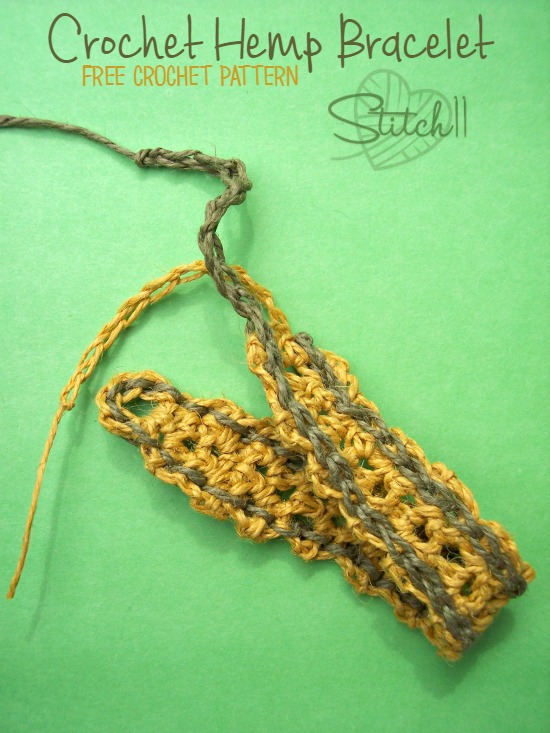
Crochet Hemp Bracelet - free crochet pattern

This bracelet is designed for a 6 inch wrist. I made mineĀ 6.5-7 inches around for comfort. ThisĀ bracelet is designed so you can easily make them smaller or larger. You may not need to adjust the pattern though.. this bracelet fit's my small wrist, my husbands huge wrist, and my 4 year olds ankle.

Supplies
2 colors of hemp cord. 10 yrds each.
4.25 MM crochet Hook
Yarn needle

Stitches
CH – Chain
SC- Single Crochet
Slip Stitch

Step 1: CH 5. Slip stitch into first CH.
Step 2: CH 1. 3 SC into loop you just made. Do not join.
Step 3: CH 1. SC into each of the 3 SC.
Repeat step 3 to desired length. I repeated step 3 twenty six times.
Step 4: CH 10. Finish off.
Change colors
Step 5: CH 9. Slip stitch into the starting SC of your last step 3 repeat. Slip stitch up the side of the bracelet… through the center of each SC. Slip stitch into each CH (of the loop you made from step 1). Slip stitch back up the other side of the bracelet. Finish off when you reach the last repeat row of step 3.
Weave in your ends and finish off.

You use the CH ends to tie through the loop end. Making this bracelet custom fit to many wrists.

Filed Under: Boys, Free Patterns, Girls

Baby Clutch Ball – Review

June 11, 2015 By stitch11 1 Comment

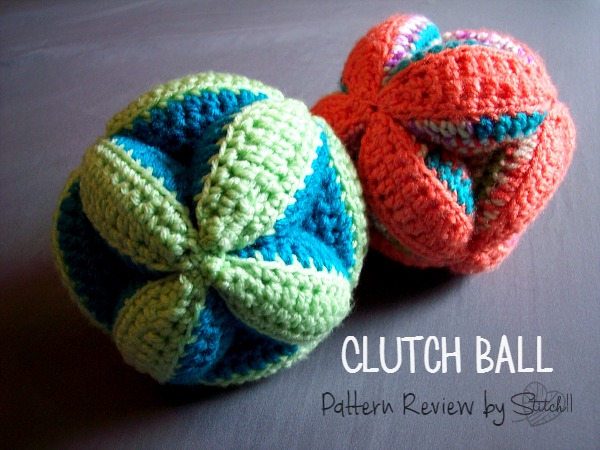
Clutch Ball - Pattern review by Stitch11


The Baby Clutch Ball by Petals To Picots is so much fun!

It reminded me of the Awesome Crochet Find from my beginner crochet days! It's one of those crochet patterns that is so exciting to watch come together!

I am so proud of these and I am so excited to be gifting them to my cousins at their baby showers.

The pattern was so easy to follow and easy to memorize too! Make sure to fetch your own copy of the pattern >here<!

Filed Under: Pattern Reviews

Child-Teen/Small Adult Size Mouse Hat with a Bow

June 7, 2015 By stitch11 3 Comments

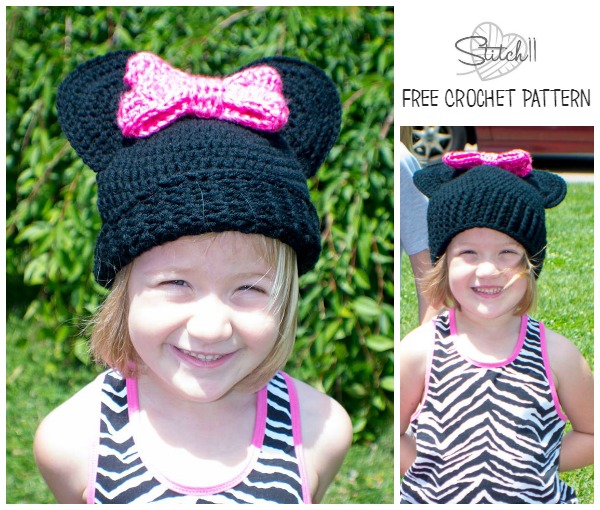
Minnie Mouse Hat - Free Crochet Pattern - Preschool and child-teensmall adult sizes

For the next couple months, I will be working on birthday gifts and baby shower gifts. I will do my best to either write up what I make or review and link the patterns I decide on. This is going to be a fun summer in my little crochet world so make sure you follow Stitch11 on Facebook!

My niece is turning 6! Last week while she was at my house, she told me that she “REALLY REALLY loves Minnie Mouse”! I asked her if that means she needed a Minnie Mouse hat and of course she says “YES!!!”

This hat fits most heads 5 years and up! Although it won't fit all adults, it fits me great. If you are wanting to make it for a larger head just add an extra increase round. If you want it for someone younger than 5, check out my Preschool Minnie Mouse Hat pattern! It's free as well.

Supplies
I/9 – 5.5 mm crochet hook
black med-worsted weight yarn (I used I Love This Yarn)
Yarn needle
You will also need…
#5 Pink Bulky Weight Yarn and a 6.5 mm crochet hook for the bow. For THIS bow, I actually used two strands of Caron Simply Soft held together.

Stitches Used
Magic CircleĀ 
CH- Chain
SC- Single Crochet
HDC- Half Double Crochet
FPDC – Front Post Double CrochetĀ 
FPSC – Front Post Single Crochet

You will also be using these stitches when making the bow
DC- Double Crochet
HDC-2-TOG
DC-2-TOG


You will be working in continuous rounds.

Round 1: Magic Circle. 10 HDC in magic circle. Ā (10)
Round 2: 2 HDC into each of the next 10 stitches. (20)
Round 3: **2 HDC into the next stitch. HDC into the next stitch. Repeat from ** 9 more times. (30)
Round 4:Ā **2 HDC into the next stitch. HDC into the next 2 stitches. Repeat from ** 9 more times. (40)
Round 5:Ā **2 HDC into the next stitch. HDC into the next 3 stitches. Repeat from ** 9 more times. (50)
Round 6: Ā 1 HDC into each of the next 50 stitches. (50)
Round 7:Ā **2 HDC into the next stitch. HDC into the next 4 stitches. Repeat from ** 9 more times. (60)
Rounds 8-13: 1 HDC into each of the next 60Ā stitches. (60)
Round 14: 1 HDC into each of the next 56 stitches. SC into the next stitch. Slip stitch into the next stitch. (60)
Rounds 15-20: CH 1, HDC into same stitch. FPDC over next stitch. ** HDC into next stitch. FPDC over next stitch. Repeat from ** around. Join to first HDC. (60)
Round 21: CH 1, FPSC into each stitch around. Join to first FPSC. (60)

Finish off and weave in your ends.

Ears

Round 1: Magic Circle. CH 1. 6 HDC into magic circle. Do NOT join. Pull ring tight.(6)
Round 2: CH 1, turn. 2 HDC into each stitch across. (12)
Round 3: CH 1, turn. 2 HDC into the first stitch. 1 HDC into the next stitch. **2 HDC Ā into the next stitch. 1 HDC into the next stitch. Repeat from ** across. (18)
Round 4:Ā CH 1, turn.Ā SCĀ into next 4 stitches. 2 SC into the next stitch. HDC into next 3 stitches. 2 HDC into each of the next two stitches. HDC into next 3 stitches. 2Ā SCĀ into the next stitch. SCĀ into next 4 stitches. (22)
Round 5:Ā CH 1, turn. SCĀ into next 6 stitches. 2 SCĀ into the next stitch. HDC into next 3 stitches. 2 HDC into each of the next two stitches. HDC into next 3 stitches. 2 SCĀ into the next stitch. SCĀ into next 6 stitches. (26)
Round 6:Ā CH 1, turn.Ā SCĀ into next 8 stitches.Ā HDC into next stitch. 2 HDC into the next stitch. HDC into each of the next 6 stitches. 2 HDC into the next stitch. HDC into the next stitch.Ā SCĀ into next 8 stitches. (26)

Finish off and repeat for a total of 4 ears.

Layer 2 ears together and join from one side to the otherĀ with the Single Crochet stich. No need to join the bottom, you will do that when attaching it. This will make it a thicker and stronger ear. Attach the ear to the hat and repeat for other ear. I attached my ears acrossĀ rounds 2-9.

Now all you need to do is make your Minnie MouseĀ BowĀ and attach it in front of your ears. For the bow in the picture, I used two strands of pink Caron Simply Soft held Ā together.
When I attached my bow, I used black yarn and not only attached the bottom center to the hat, but I also attached it to the ears a little bit.

Filed Under: Costumes, Free Patterns, Girls, Hats

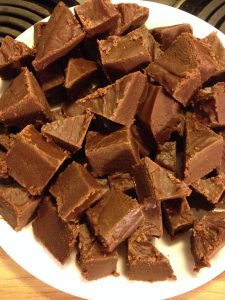
Peanut Butter- Chocolate Fudge – Easy!

June 3, 2015 By stitch11 4 Comments

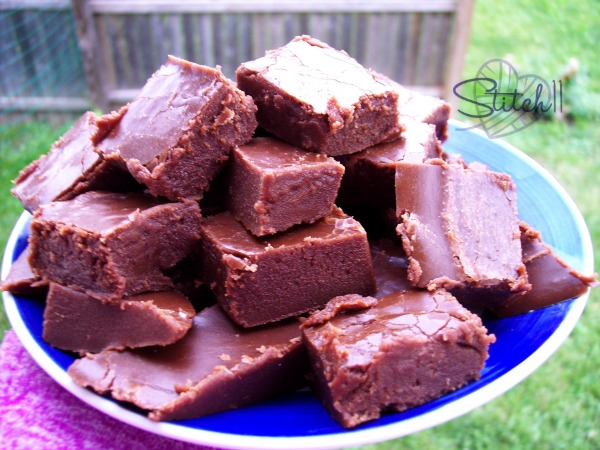
Easy Chocolate and Peanut Butter Fudge!


This is my own personal recipe for my favorite kind of fudge – Peanut Butter & Chocolate! And of course, if you know me, you know I like EASY!

If you decide to bless yourself or your family with this fudge, show me a photo of your fudge, or even someone enjoying it! You can send me photo's on my Facebook Page HERE.

I cut my fudge a little early.. because I am a chocoholic who just cannot hold back from stuffing my face. šŸ˜‰ Once a few people send me their photos, I will add them all to this post! Enjoy!!

Ingredients and Supplies
2 cups of sugar
1/2 cup of milk
1 cup of peanut butter
2 heaping tablespoons of cocoa (unsweetened)
1/2 tablespoon of butter (plus butter for greasing plate)
1 tablespoon of vanilla
1 dinner plate
large sauce pan
bowl

Step 1: Butter the plate completely.
Step 2: Ā Measure your peanut butter, vanilla, and butter out into a bowl. Set aside.
Step 3: Measure your sugar, milk, and cocoa into your sauce pan.
Step 4: On medium heat, bringĀ your saucepan to a boil. Boil for exactly 4 minutes. (I used a timer)
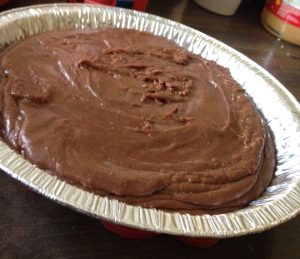
Step 5: Empty bowl contents into your pan. Stir until well blended. Pour over your plate. Do not take your time! It will thicken up to harden quickly.
Step 6: Set aside until it cools completely. You can put it in the fridge to speed up the process. Slice it up and EAT! šŸ™‚

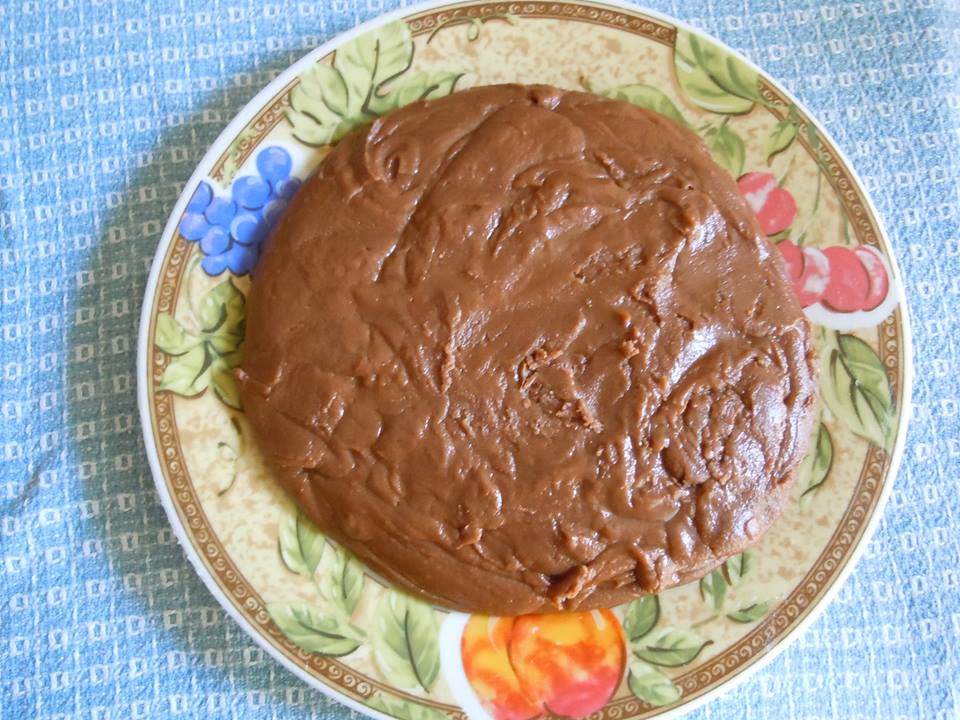
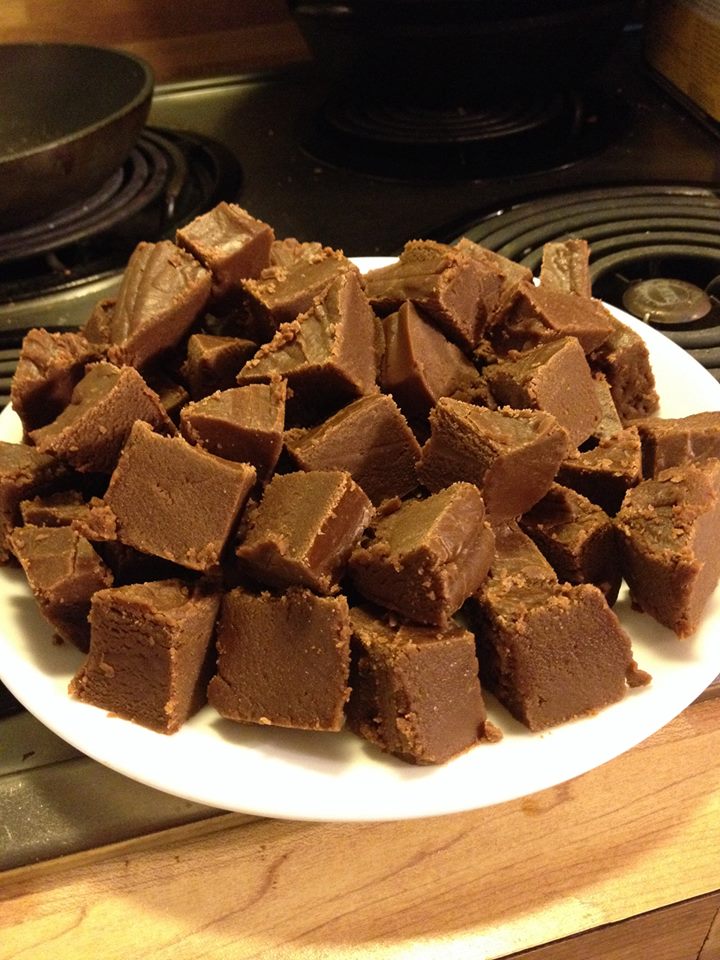
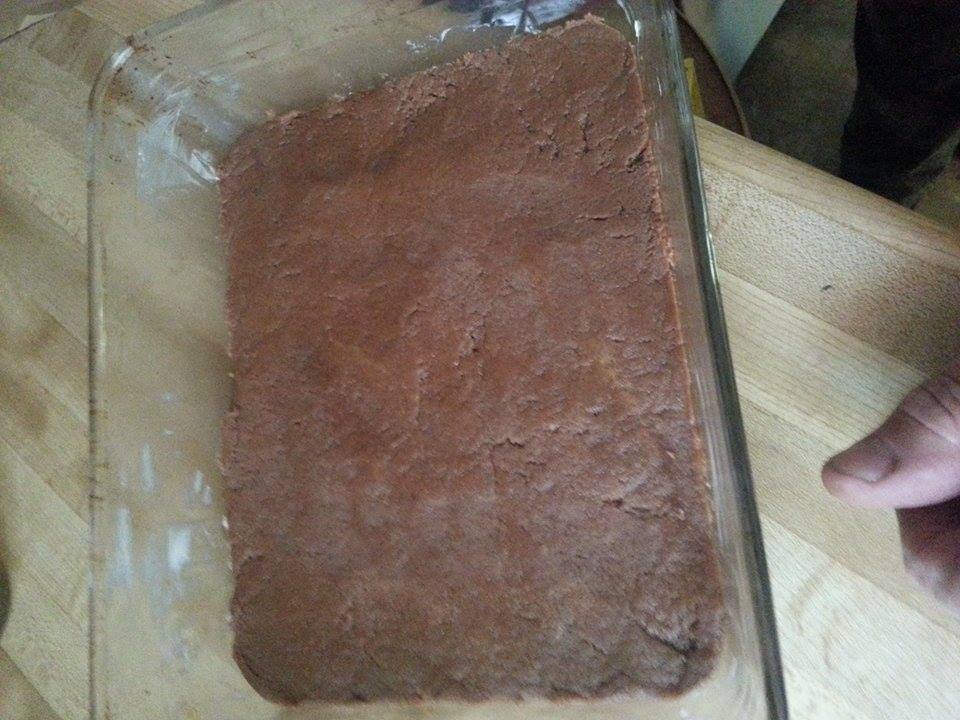
Thank youĀ Annamarie Wheeler for sharing your photo! Yummmmm!
11419904_10206127267073065_128195887_nThank youĀ Maria Call for sharing your beautiful photo's!
11424312_10204378634975088_7620755066492378416_n11392940_10204378635295096_107605929943593966_n

11391206_10204378634415074_8688290694970569465_n

Thank you Annie Blue for sharing your photo's too! <3

11354880_994856530532734_1916640816_n11414622_994828180535569_1591981352_n

Filed Under: Uncategorized, Yummy Food

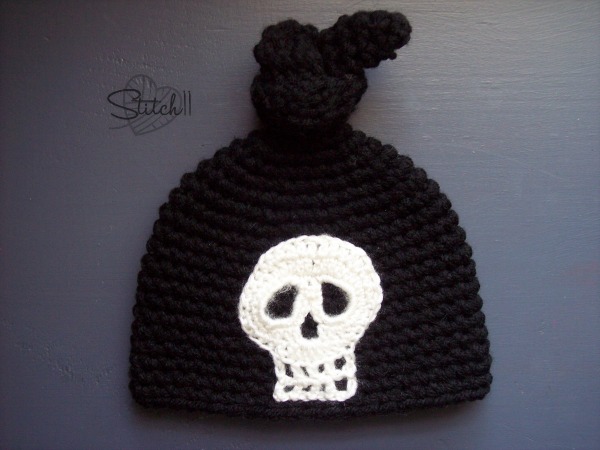
Newborn Skull Knot Hat

May 27, 2015 By stitch11 2 Comments

Newborn Skull Knot Hat

My latest order is for a dear friend who wanted to welcome her new baby home in a custom made crochet hat.
As soon as she messaged me on Facebook, I knew the Crochet Newborn Knot Hat by Repeat Crafter Me would be perfect!

I told her I could put any applique on the hat that she wished.. and she requested a skull. Which is really ideal for their family since her daughters love Monster High!

To make the skull I followed the Day Of The Dead Skull Applique by KristinsKrazyKnits. I found this free pattern through one of Moogly's wonderful round ups that you can check out HERE!

For the hat I used Red Heart With Love and for the skull I used Cascade Cherub DK weight.

Filed Under: Boys, Costumes, Free Patterns, Hats, Newborn, Pattern Reviews

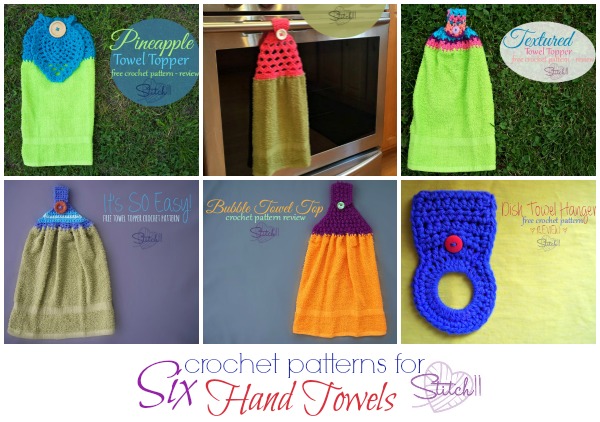
Six Crochet Patterns for Hand Towels

May 26, 2015 By stitch11 2 Comments

Six Crochet Patterns For Hand Towels


A friend of mine brought me some towels and told me I was free to use my creative side to do whatever I wish! That is one of the best things a customer can ever tell me. šŸ™‚

Here are the links to my patterns or the patterns I reviewed to complete this order.

Pineapple Towel TopperĀ 
Bounding Towel TopperĀ 
Textured Towel TopperĀ 
It's So Easy Towel TopperĀ 
Bubble Towel TopĀ 
Dish Towel HangerĀ 

Filed Under: Free Patterns, Household, Pattern Reviews, Round Ups

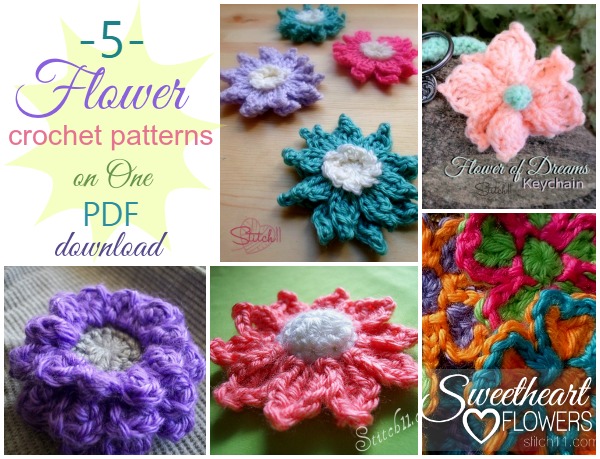
Five Flower Crochet Patterns on ONE PDF Download

May 24, 2015 By stitch11 Leave a Comment

5 flower patterns on ONE PDF download

This PDF includes 5 crochet flower patterns. The Water Lily Flower, Flower of Dreams, Autumn Flower, My Daisy, and the Sweetheart Love Flower.
All 5 of these crochet flower patterns are on ONE easy to read and ad free- Ā 5 page PDF download.
To download this PDF follow >THIS LINK < to Craftsy.

Filed Under: Uncategorized

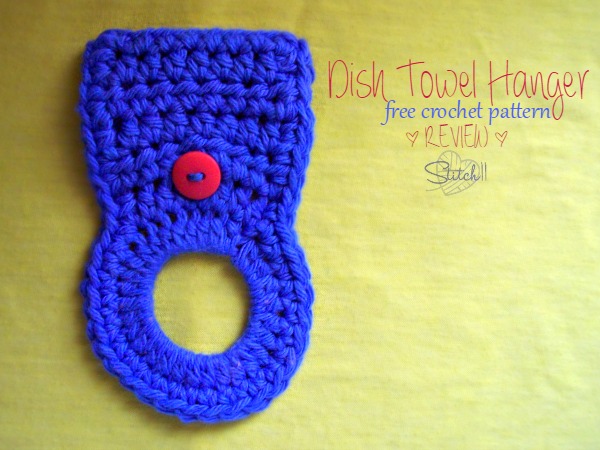
Dish Towel Hanger – Free Crochet Pattern Review

May 20, 2015 By stitch11 4 Comments

Dish Towel Holder Crochet Pattern Stitch11 Review

While looking through Towel Hanger crochet patterns, I decided on this one because not only does it look simple, but it doesn't call for a hair tie.
Hair ties are very hard to keep in my house. Between my 4 year old playing with them, me throwing them from my hair in the middle of the night, and my little thieving cats… they can never be found. We usually just use little hair rubber bands.
Anyways, that is why I chose to follow this pattern first. At least until I can get some hair ties. >.<

Overall, the pattern is very easy to follow and works up super fast. However, the piece was a little small/tight/short.. and it was hard to fit my tiny button between the HDC stitches. If I were to freehand more based from this pattern, I would make it longer and also add a button hole.
The towel holder does still do it's job.. and that is whats most important. So thank you very much TheNinjaHerself!

Get your copy of the free Dish Towel Hanger crochet pattern by TheNinjaHerself >HERE<

Filed Under: Free Patterns, Household, Pattern Reviews

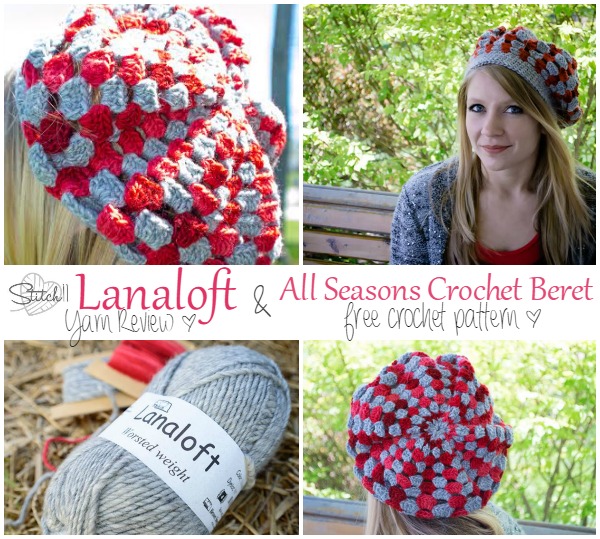
Lanaloft Yarn Review & Free Beret Crochet Pattern

May 17, 2015 By stitch11 Leave a Comment

Stitch11 Beret Free Crochet Pattern

All Free Crochet gave me a wonderful opportunity! I was given the chance to review some amazing yarn, and share a free crochet pattern using it!
Check out the Lanaloft Yarn Review HERE!
Get your copy of the free Beret crochet pattern HERE!

Filed Under: Free Patterns, Girls, Grannys, Hats, Pattern Reviews

  • « Previous Page
  • 1
  • …
  • 6
  • 7
  • 8
  • 9
  • 10
  • …
  • 25
  • Next Page »
  • Email
  • Facebook
  • Pinterest
  • RSS

Stitch11 is a Red Heart Blogger!

unnamed

.

Grab My Button

Archives

Privacy Policy

Copyright © 2026 Stitch11.com Ā· All Rights Reserved Ā· Log in