• Home
  • Free Patterns
    • Toys
    • Costumes
    • Bags
    • Flowers
    • Hats
    • Pattern Reviews
    • Household
    • Newborn
    • Scarves
    • Sports
  • Disclosure
  • Contact
  • Yummy Food
  • Round Ups

Stitch11

A Yarntastic Life!

  • Girls
  • Boys
  • Hats
  • Newborn
  • Flowers
  • Household
  • Costumes
  • Toys
  • Pattern Reviews
  • Grannys
You are here: Home / Archives for crochet pattern

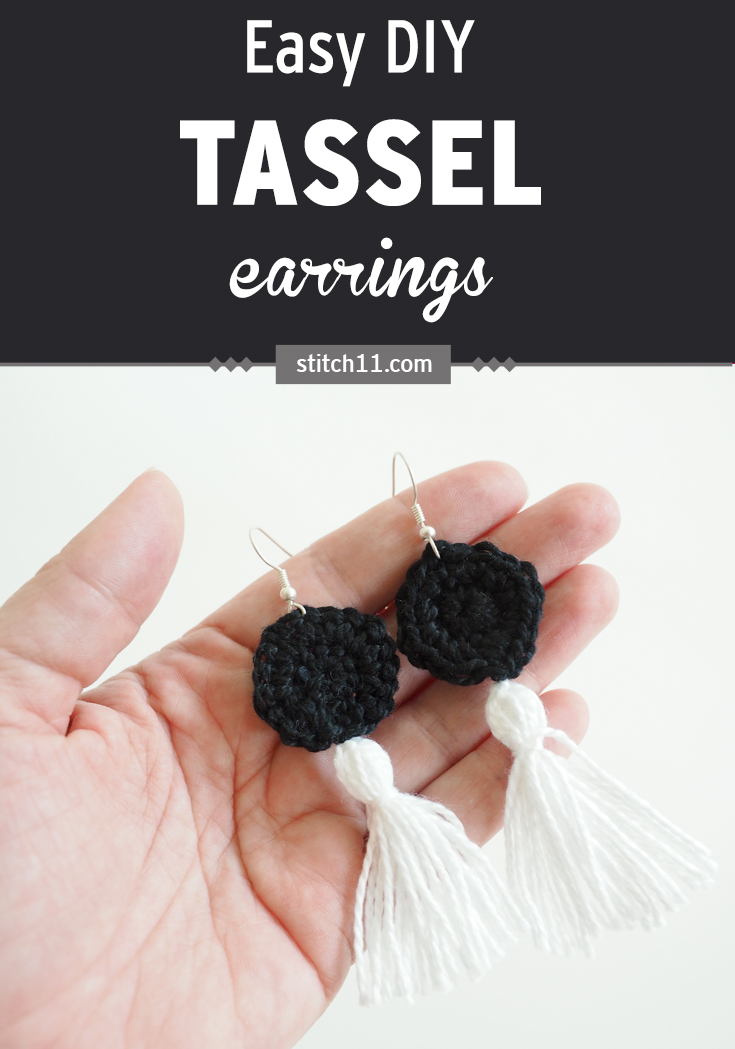
Easy DIY Tassel Earrings Crochet Pattern

August 18, 2018 By stitch11 1 Comment

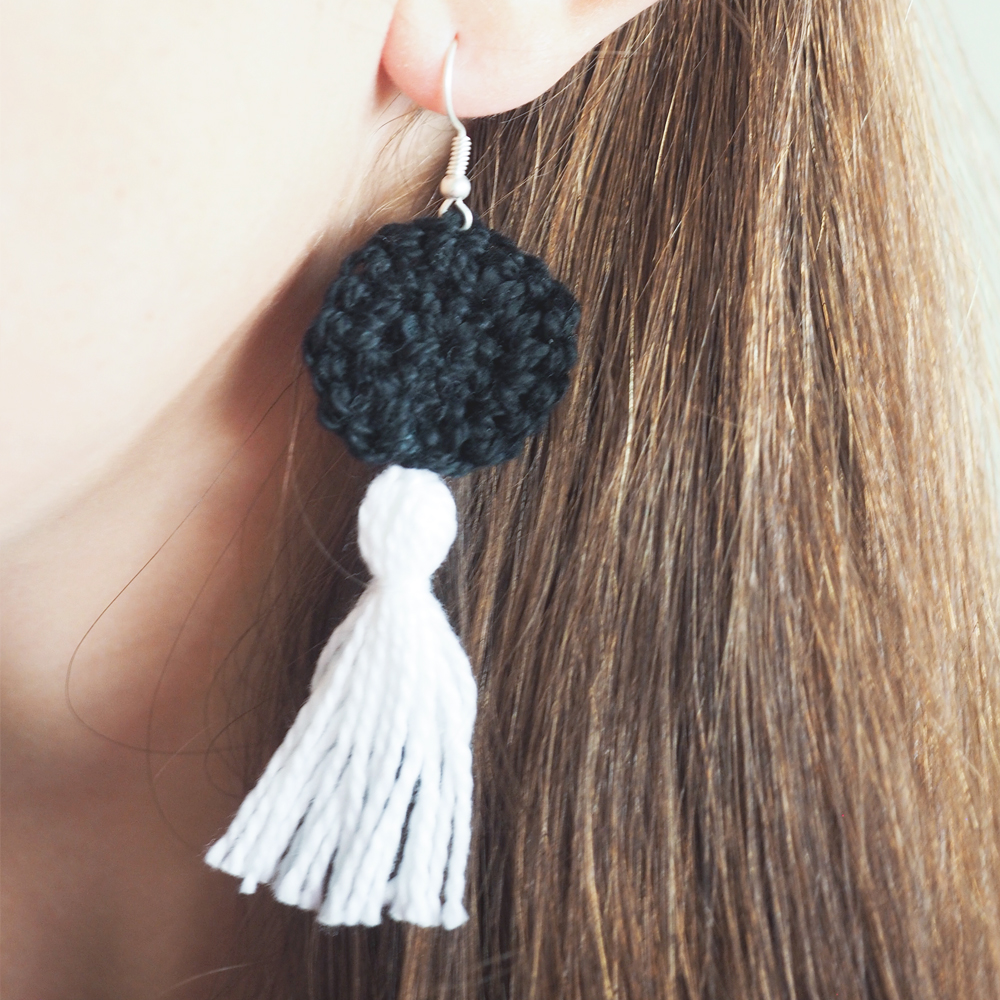
Easy DIY Tassel Earrings - the dangliest, cutest crochet tassel earrings you ever did see. #crochetpattern #crochetearrings #crochettasselearrings #crochetlove #crochetaddict #crochetaccessories

Easy DIY Tassel Earrings Crochet Pattern

If you’ve ever been interested in making your own jewelry, these Crochet Tassel Earrings are the perfect project for you. Learning how to crochet earrings can be really rewarding, and puts you in control of your own style.

Print the pattern. Get the Ad-Free PDF Here.

These crochet earrings are so unique and will really stand out.  If you’re looking to make a statement with your jewelry, you should give them a try.

And as a bonus, they're actually really easy to make. The crochet pattern starts off using the magic circle and explains how to make your own tassels. And you can customize the color to go with all your outfits.

It’s so easy and cute to crochet, you can make multiple pairs of earrings for your family and friends in no time.

This is a great project for someone who is new to crochet and is looking to learn how to crochet in the round. If you're starting out on your crochet journey, I can't recommend this great Crochet Fundamentals class enough.

So what are you waiting for? Grab your crochet hook and let’s get started. There’s no time to waste when it comes to these stylish tassel earrings.
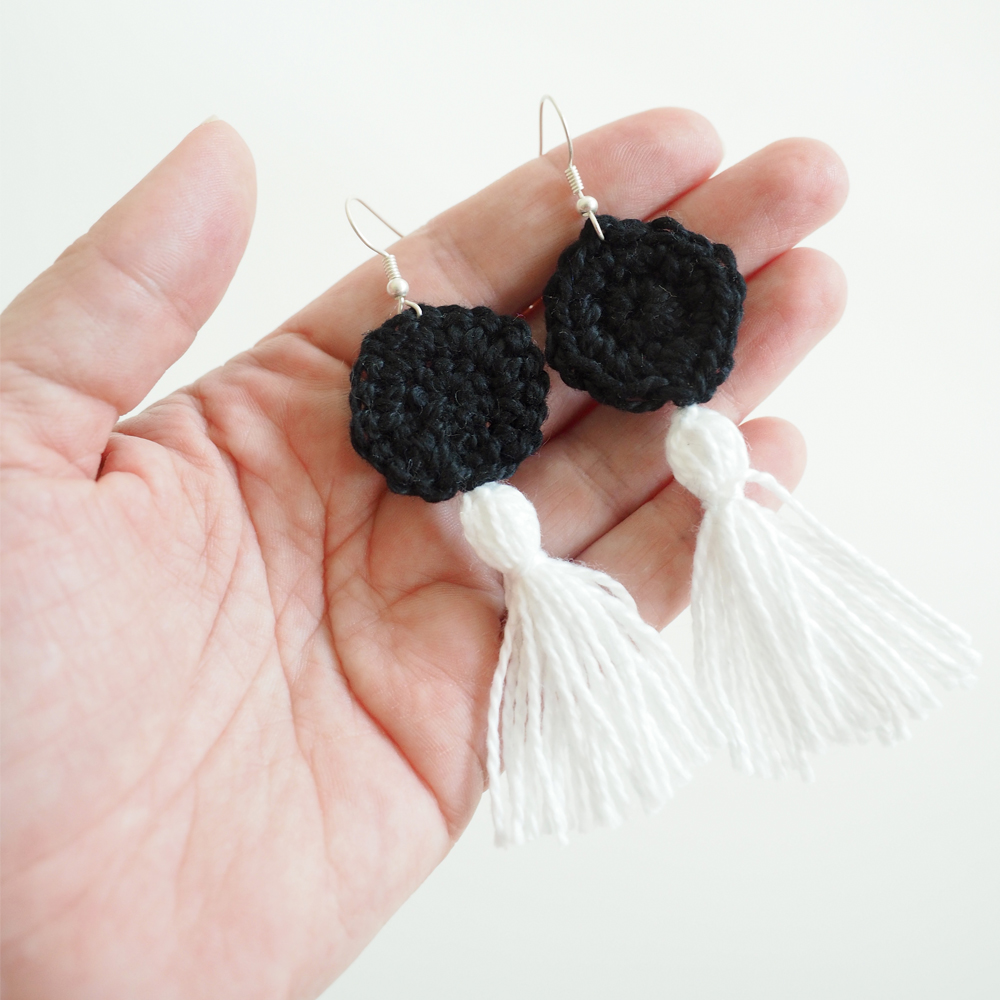
Easy DIY Tassel Earrings - the dangliest, cutest crochet tassel earrings you ever did see. #crochetpattern #crochetearrings #crochettasselearrings #crochetlove #crochetaddict #crochetaccessories

Print the pattern. Get the Ad-Free PDF Here.

Skill Level: Easy 

Materials: 

Yarn: Fine/Sport weight cotton yarn 

  • 30 yds black (A) 
  • 30 yds white (B) 

Hook: 

  • US size D/3 (3.25mm) crochet hook or size needed to match gauge 

Notions: 

  • Scissors 
  • Yarn needle 
  • 2 earring hooks 
  • Pliers 

Size: 3.5” diameter 

Gauge: 
6 sc x 4 rnds = 1” 
Use pattern as gauge swatch – circle should measure about 1” in diameter. Exact gauge is not critical. 

Pattern uses US crochet terms

ABBREVIATIONSDESCRIPTION
chChain
rndRound
scSingle crochet
st(s)Stitch(es)

The pattern:

Circle 

With A, make a magic circle. 

Rnd 1: Ch 1, 10 sc in magic circle, pull tail to close the magic circle, do not join. (10 sc)

Rnd 2: 2 sc in each st around, join with sl st to first st. (20 sc) 

Pull working loop up big (so it won’t slip out) and remove hook, but do not fasten off. 

Tassel 

Wrap color B around 4 fingers 10 times. Cut through all layers, creating a bundle with10 strands of yarn about 6-8” long. 

Cut another 8” strand of B and use it to tie the bundle tightly together at the center. With right side up on your circle, tie the string from the top of the tassel onto the working loop, then bring the tails back down to blend in with the rest of the tassel. 

Put the working loop back on your hook, sl st in next st and fasten off. 

Cut another 8” strand of B and double knot it around the top of your tassel, about ½ inch from the circle. Make sure to include all strands and tails of B in the bundle. 

Trim tassel to make ends even. 

Use pliers to open the ring on the earing hook and secure it into the top center of the circle, directly opposite the tassel. Close the ring again with the pliers. 

Repeat instructions for 2nd earring.

Killer accessories can take your style to new heights. And with these earrings in your jewelry arsenal, everyone will be asking for pointers. Luckily, you can tell them about this pattern so they can take their style into their own hands too. You might even make some new friends in the process.

If you enjoy making crochet earrings, here are a few more earring video tutorials that you may also like:

  • DIY Boho Crochet Earrings
  • Dahlia Earrings
  • Crochet Hoop Earrings

These cute earrings are such a great little project for beginners. Being a beginner can be a challenge but what if there was no more confusion. No more feeling like you wasted your time. No more being nervous about trying new patterns. If you're new to crochet and looking for some great foundational videos to help you develop your skills quickly and easily, visit the Crochet Fundamentals professionally filmed classes.

Print the pattern. Get the Ad-Free PDF Here.
Filed Under: Free Patterns Tagged With: Crochet Earrings, crochet pattern, Earrings Crochet Pattern, Tassel Earrings Crochet Pattern

Momma Beach Bag Crochet Pattern

July 27, 2018 By stitch11 3 Comments

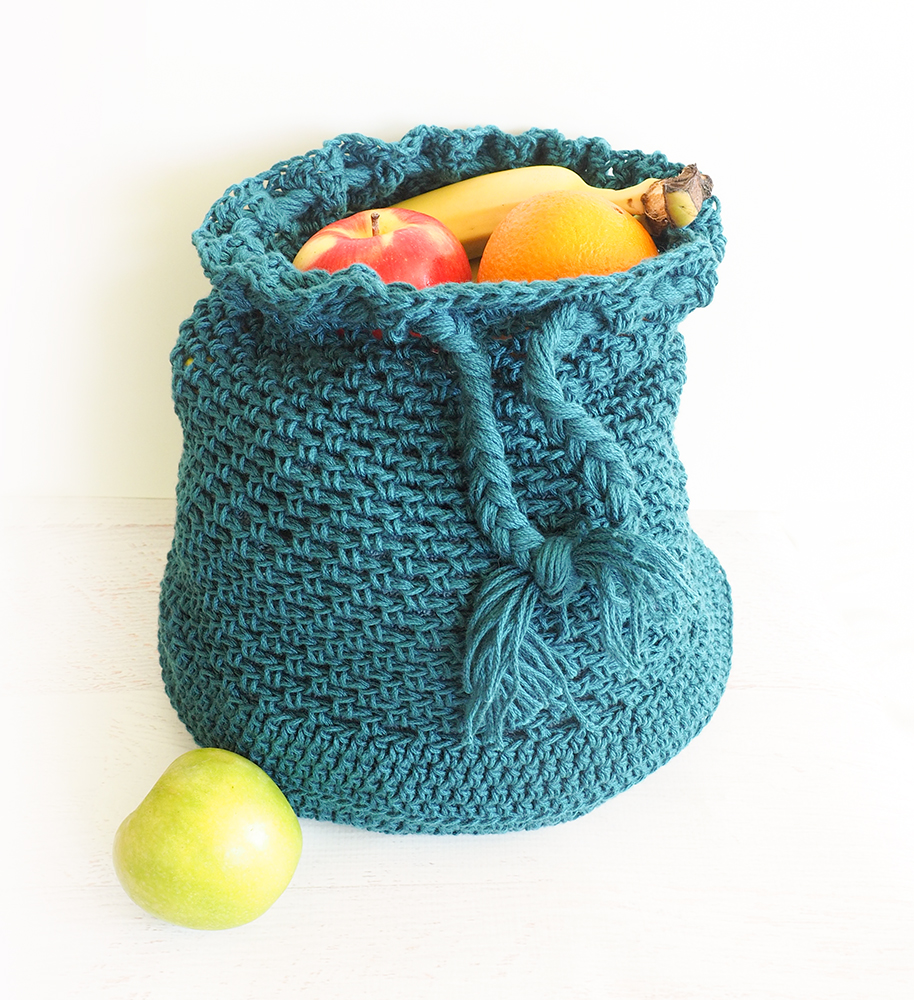
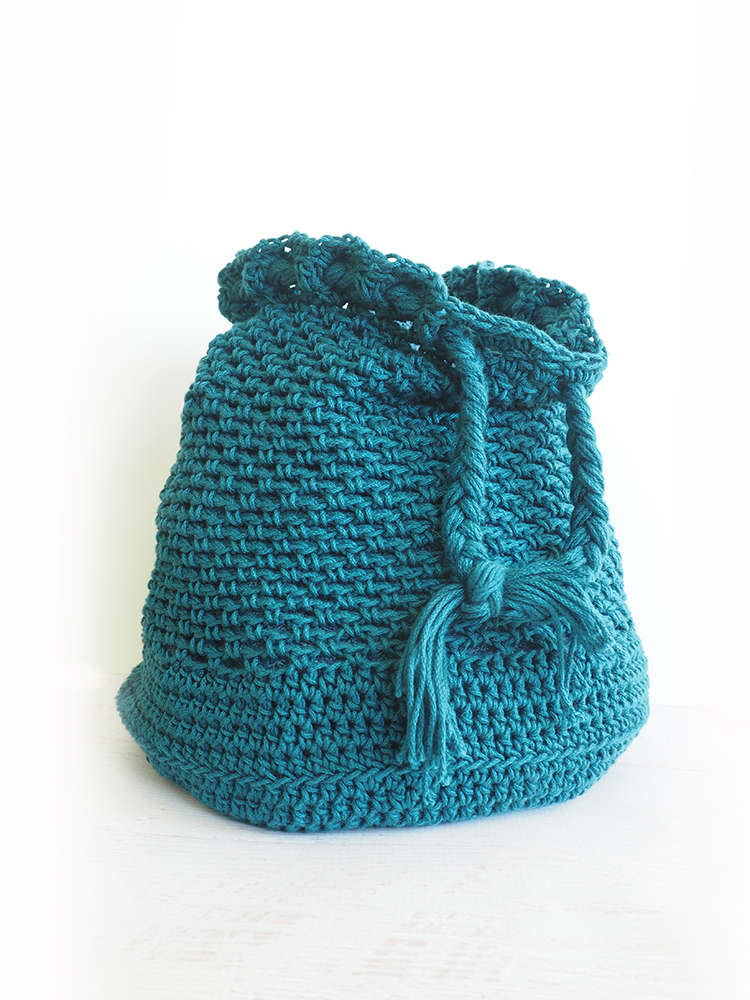
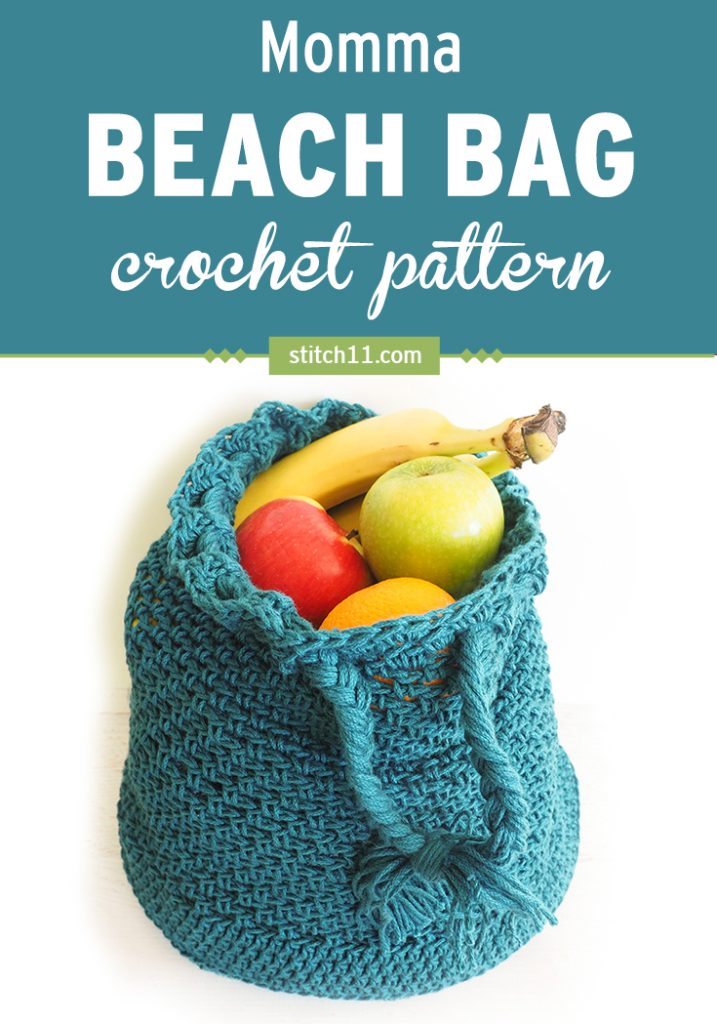
Momma Beach Bag Crochet Pattern #crochetbag #crochetbeachbag #crochetlove #crochetaddict

Momma Beach Bag Crochet Pattern

This is not your momma’s beach bag. Well, it is. But you’ll want one for yourself as well once you see how easy it is to make and how many different uses there are for it. The Momma Beach Bag Crochet Pattern is one that you can use again and again.

Ditch those ugly bags you take with you to the grocery store and use this one instead. Your apples and bananas have never looked cuter nestled in this adorable bag. We love taking it with us on errands or to the beach.

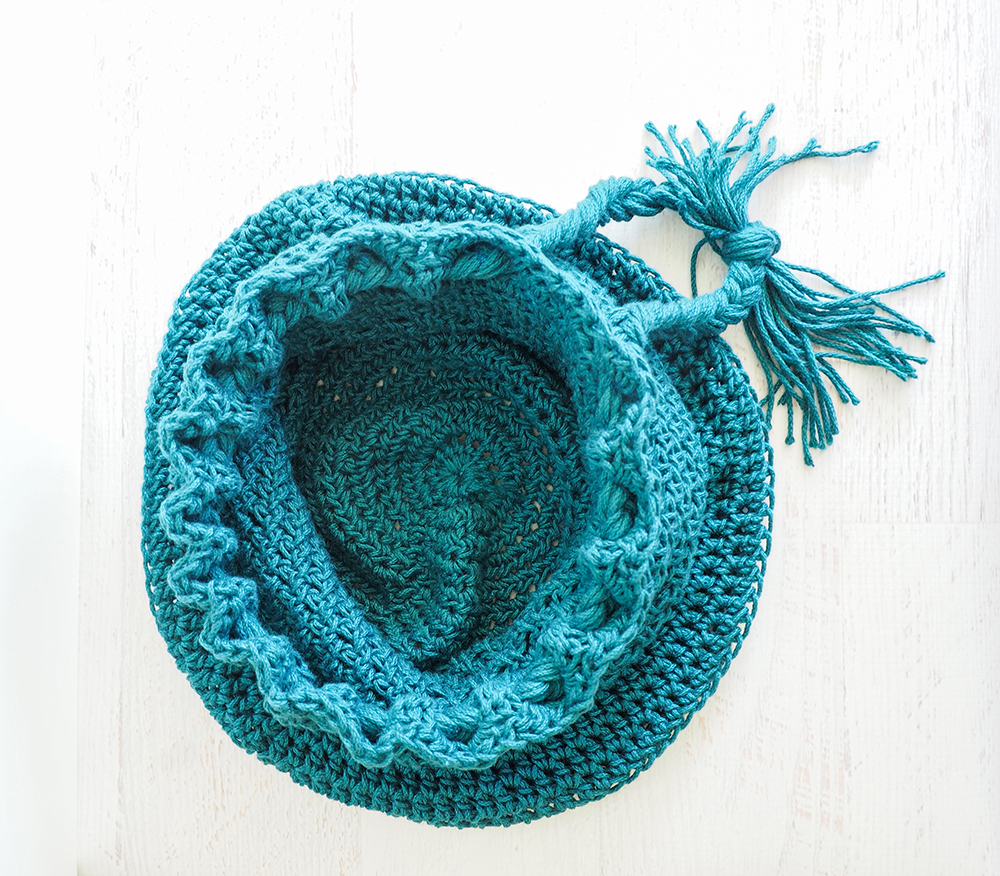
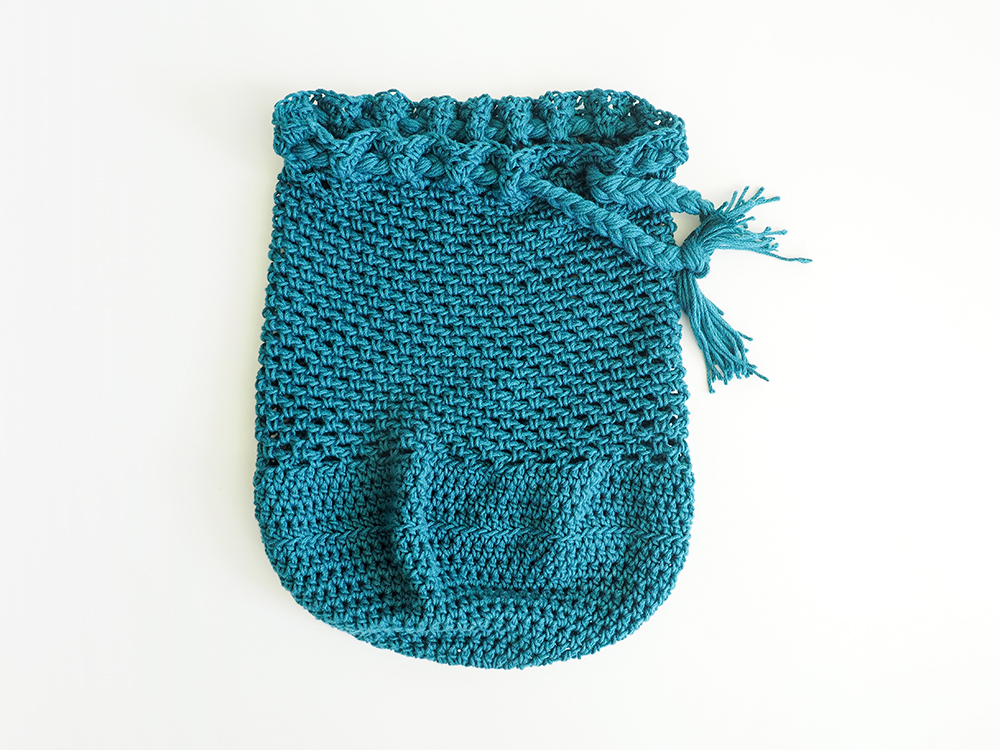
It’s stretchy so you can work with objects of any shape and size, and they’ll fit right into the bag. Tie it all together with a string of the same color as the body of the bag, or get funky with it and choose a contrasting color.

The PDF version of this pattern has answers to all the questions you could possibly have about this bag – and more than that. You’ll be able to master the stitches, use a magic ring, tie it all together, and have a great bag ready to go.

Momma Beach Bag Crochet Pattern #crochetbag #crochetbeachbag #crochetlove #crochetaddict

Skill Level: Advanced Beginner

Materials:
Yarn to use: Cascade Avalon – approx 3 skeins total (525 yrds) Base colour: 31 Dragonfly – approx 3 skeins
5mm hook
Scissors

Abbreviations:
CH – Chain
HDC – Half Double Crochet
SC – single Crochet

Momma Beach Bag Crochet Pattern #crochetbag #crochetbeachbag #crochetlove #crochetaddict

Instructions:

(CH 2 does not count as HDC)

Step 1: Magic ring

Round 1: Chain 2,  16 HDC inside of the magic ring, Connect to top of chain 2

Round 2: CH 2,  2 HDC in each HDC around, Connect to top of CH 2

Round 3: CH 2,  *2 HDC in first HDC, 1 HDC in next HDC* repeat around, Connect to top of
CH 2

Round 4: CH 2,  *2 HDC in first HDC, 1 HDC in next 2 HDC* repeat around, Connect to top of CH 2

Round 5: CH 2,  *2 HDC in first HDC, 1HDC in next 3 HDC* repeat around, Connect to top of CH 2

Round 6: CH 2,  *2 HDC in first HDC, 1 HDC in next 4 HDC* repeat around, Connect to top of CH 2

Round 7: CH 2,  *2 HDC in first HDC, 1 HDC in next 5 HDC* repeat around, Connect to top of CH 2

Round 8: CH 2,  *2 HDC in first HDC, 1 HDC in next 6 HDC* repeat around, Connect to top of CH 2

Round 9: CH 2,  *2 HDC in first HDC, 1 HDC in next 7 HDC* repeat around, Connect to top of CH 2

Round 10: CH 2,  *2 HDC in first HDC, 1 HDC in next 8 HDC* repeat around, Connect to top of CH 2

Round 11: CH 2,  *2 HDC in first HDC, 1 HDC in next 9 HDC* repeat around, Connect to top of CH 2

Round 12: CH 2,  *2 HDC in first HDC, 1 HDC in next 10 HDC* repeat around, Connect to top of CH 2

Round 13: CH 2,  *2 HDC in first HDC, 1 HDC in next 11 HDC* repeat around, Connect to top of CH 2

Round 14: CH 2,  *2 HDC in first HDC, 1 HDC in next 12 HDC* repeat around, Connect to top of CH 2

Round 15: CH 2, (For this Round only: Crochet in the back hoop of each HDC) HDC around, Connect to top of CH 2

Round 16-18: CH 2, HDC around, Connect to top of CH 2

Round 19: CH 1, SC in same stitch, *CH 2, Skip 2 stitches, SC in next stitch, repeat from * Around and Slip stitch into first SC

Momma Beach Bag Crochet Pattern #crochetbag #crochetbeachbag #crochetlove #crochetaddict

*Now working in continuous rounds* 

for Rounds 20-46: Slip stitch into first CH 2 Space,  SC in same space, *CH 2, Skip 2 stitches, SC in next CH 2 space, repeat from * Around Slip stitch into first SC of Round 46

*Working in single rounds*

Round 47-49: Slip stitch into first CH 2 space. CH 2, 2 HDC in same space. * 3 HDC in next CH 2 space, repeat from * around, Join into the top of CH 2.

Slip stitch into the space between the first two groups of 3 HDC, do 3 HDC into the center HDC of the next group of 3 HDC. *Slip stitch into the next space. 3 HDC into the next center HDC, Repeat from * around. Join to first slip stitch.

Finish off and weave in ends

Cut about 25 4 foot strands of yarn and braid together to make a drawstring. Weave through round 48 and tie together.  When making my drawstring I ran out of sport weight yarn. So I added some pretty green cotton yarn to make my braid fatter. I actually wish I would have made it a little fatter and shorter to make it easier to carry. Make the length and width that you feel most comfortable with.

Where will you wear your bag? We want to know what kind of adventures you’re going on. The Momma Beach Bag Crochet Pattern is one to be shared, and we’re asking that’s just what you do.

If you took it on some place exciting – or maybe even just to the park on a picnic – snap a pic and share it with us. Then move on to your next crocheting project, because once you’ve been bitten by the DIY bug, we know just how hard it is to stop.

Momma Beach Bag Crochet Pattern #crochetbag #crochetbeachbag #crochetlove #crochetaddict

Filed Under: Bags, Free Patterns Tagged With: Bag Crochet Pattern, Beach Bag Crochet Pattern, crochet pattern, Momma Beach Bag Crochet Pattern

Chevron Wristlet Clutch Bag Crochet Pattern

July 15, 2018 By stitch11 4 Comments

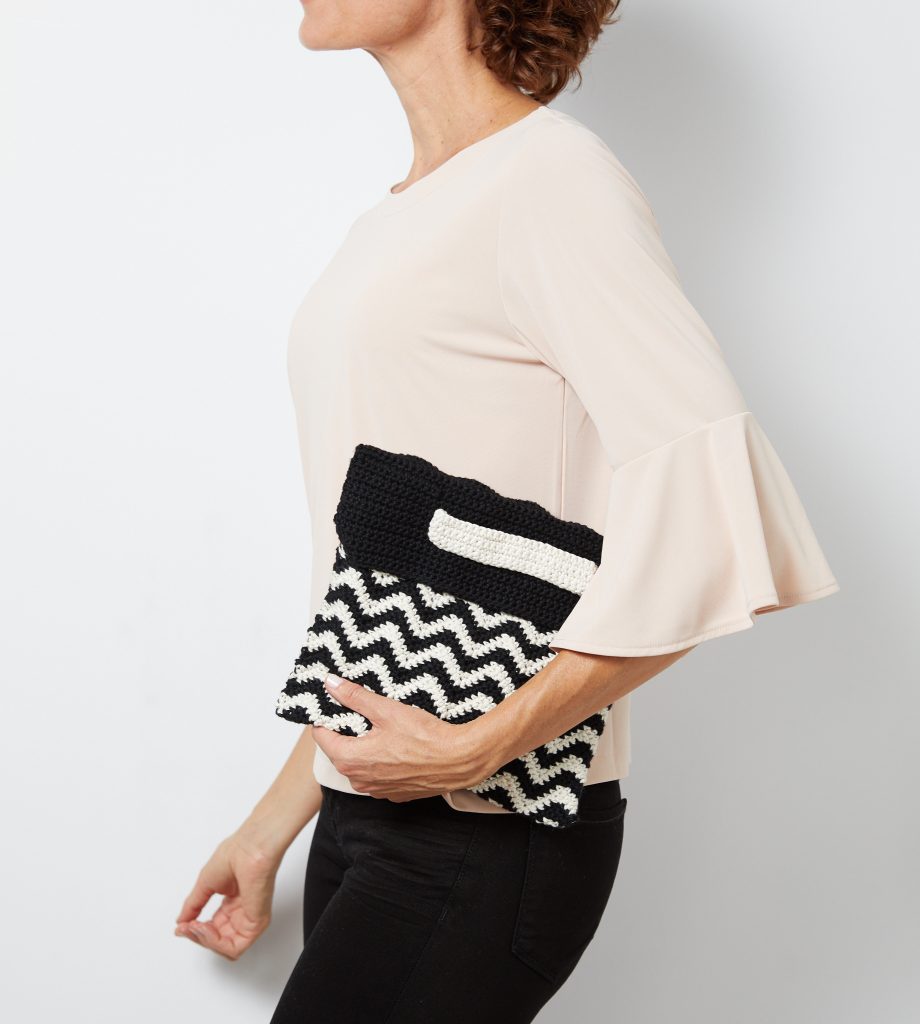
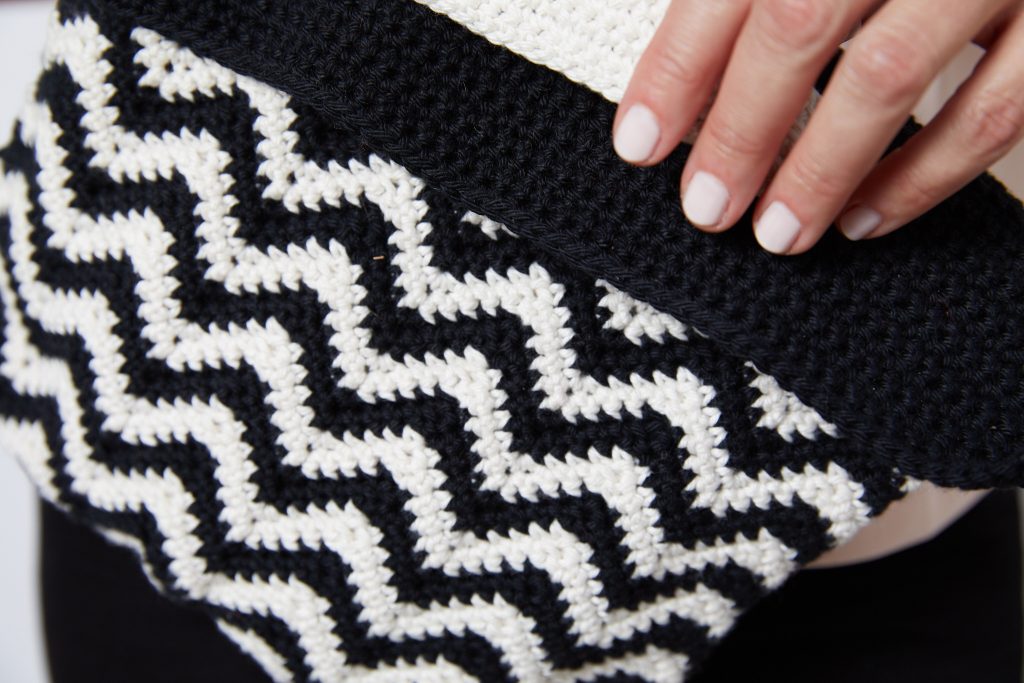
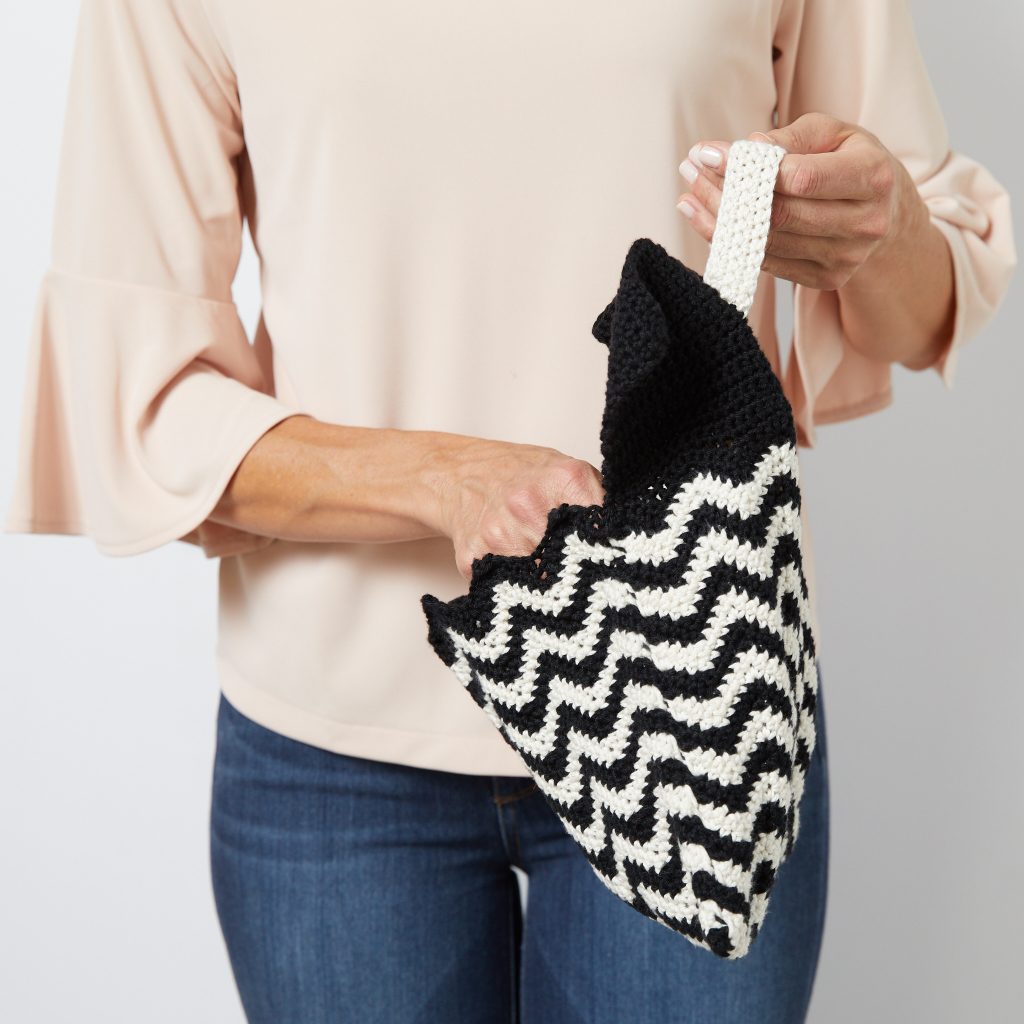
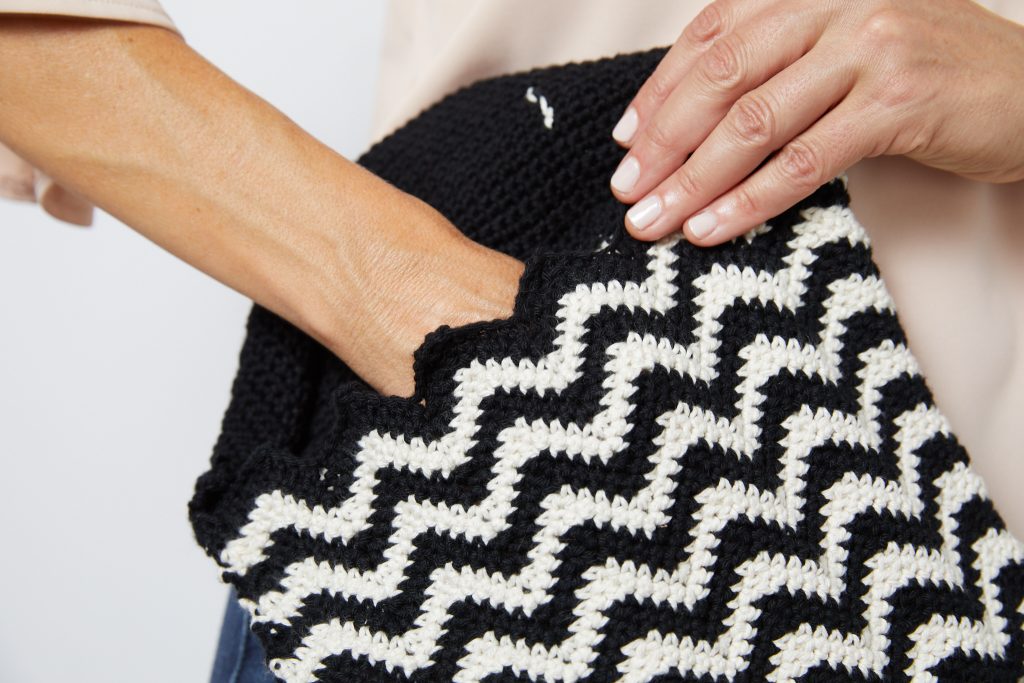
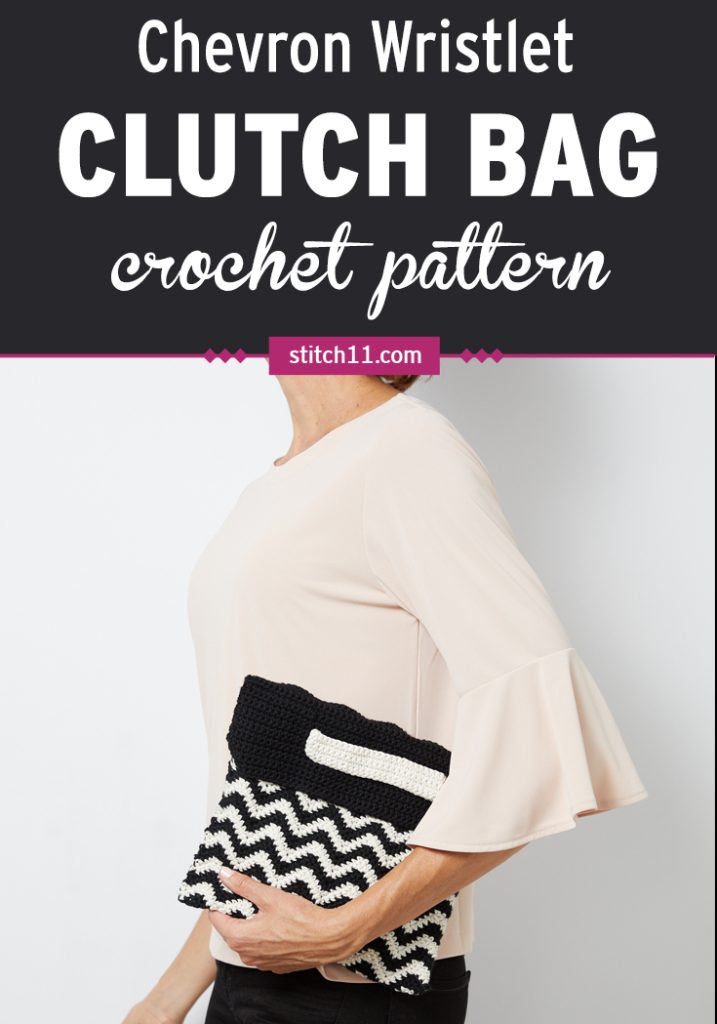
Chevron Wristlet Clutch Bag Crochet Pattern

Chevron Wristlet Clutch Bag Crochet Pattern

Chevron is the most classic pattern out there. And when you’re looking for a clutch to carry around with you wherever you go, classic takes the cake. It matches with everything and gives a cool touch to any outfit.
We chose a black and white yarn because of the timeless look. You can opt for any two colors you like. Make them complementary and subtle, or choose two primary colors that pop. Whatever way you choose to go, you really can’t go wrong. 

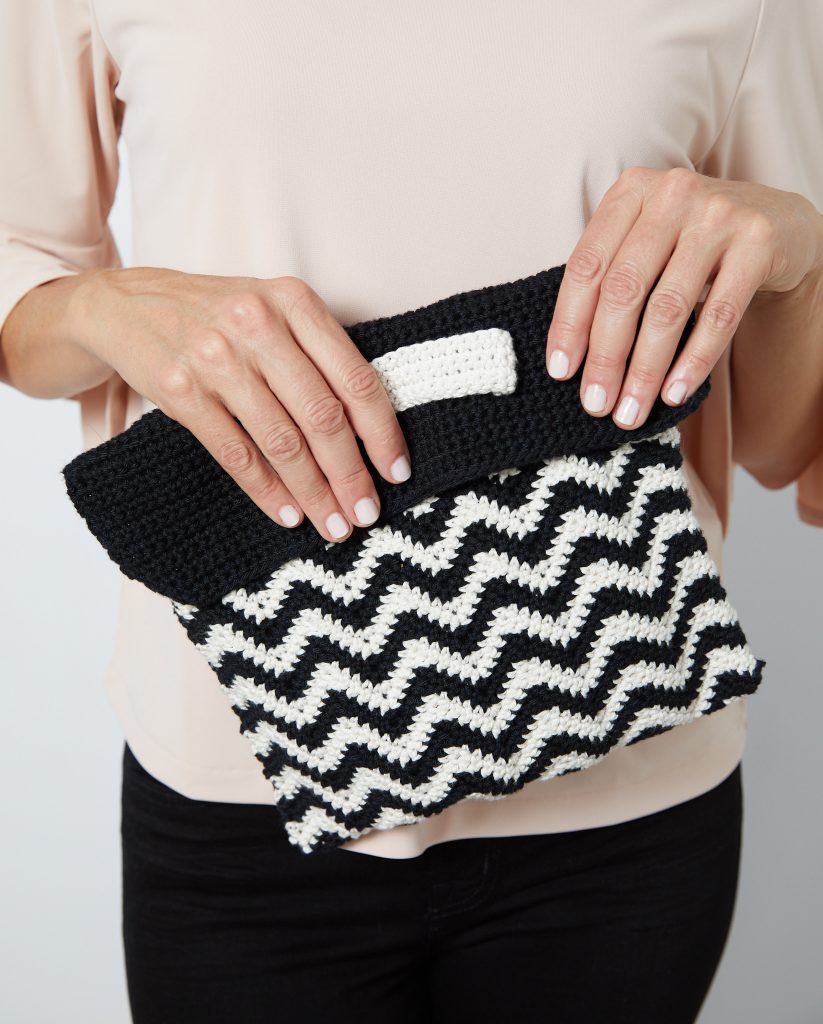
You can finish making this clutch in just a few short hours. It might seem hard to even wait that long before you’re able to use it – so, get started right away! You can choose to add a metal popper to your clutch, or just use the handle. You’ll be ready to go in no time.

Chevron Wristlet Clutch Bag Crochet Pattern

Difficulty: Advanced Beginner

Supplies:

1 skien Berroco Pima 100 DK weight cotton yarn, Magnolia

2 skiens Berroco Pima 100 DK weight cotton yarn, Black Eyed Susan

G (US) / 4 mm hook

Yarn needle

Scissors

Chevron Wristlet Clutch Bag Crochet Pattern

Abbreviations:

Sc: single crochet

St: stitch

Sk: skip

Sc3tog: single crochet 3 together, decreasing stitch

Ch 74

Row 1: sc into the 2nd ch from the hook. Make 3 more sc, then sk 3 st. *Sc into the next 4 st, then 3 sc into the next st. Sc in the next 4, sk 3 st* Sc into the next 2 st, 3 sc into the last st. Ch 1 and turn

Row 2: Sc into the first 4 st, sk 2, *sc in the next 4 st, 3 sc in the next st, sc in next 4 st, sk 2*

Row 3 & 4: Repeat row 2 in contrasting color

Rows 5-66: Continue repeating row 2 changing colors every two rows. The last two rows will be black, as will all the remaining rows.

Row 67: Sc into the first 4 st, sc3tog, *9  sc, sc3tog*

Rows 68-88: Sc across

Fold the right sides of the work so they face each other, with the chevron patterns even with each other. Leave the solid black portion above the rest, and whip stitch the chevron portion together. Turn right side out, then attach handle in the center of the flap.

Chevron Wristlet Clutch Bag Crochet Pattern

Handle

Ch 31, sc into the second ch from hook and across.

Rows 1-5: Sc across

Leave a long enough tail on each end to sew centered on flap of bag.

Chevron Wristlet Clutch Bag Crochet Pattern

Where’d your clutch come in a clutch? We want to see pictures of how your new trendy bag looked as you carried it around town.

These bags are also great to give away as gifts, so once you’re finished making yours, you can start on another. It’s cool to match with your friends.

Chevron Wristlet Clutch Bag Crochet Pattern - When you’re looking for a clutch to carry around with you wherever you go, this classic chevron wristlet takes the cake. #crochetpattern #crochetlove #crochetbag #crochetpurse

Filed Under: Free Patterns, Girls Tagged With: Bag Crochet, Bag Crochet Pattern, Chevron Wristlet Clutch Bag Crochet Pattern, Clutch Bag Crochet, crochet pattern, Wristlet Clutch Bag Crochet Pattern

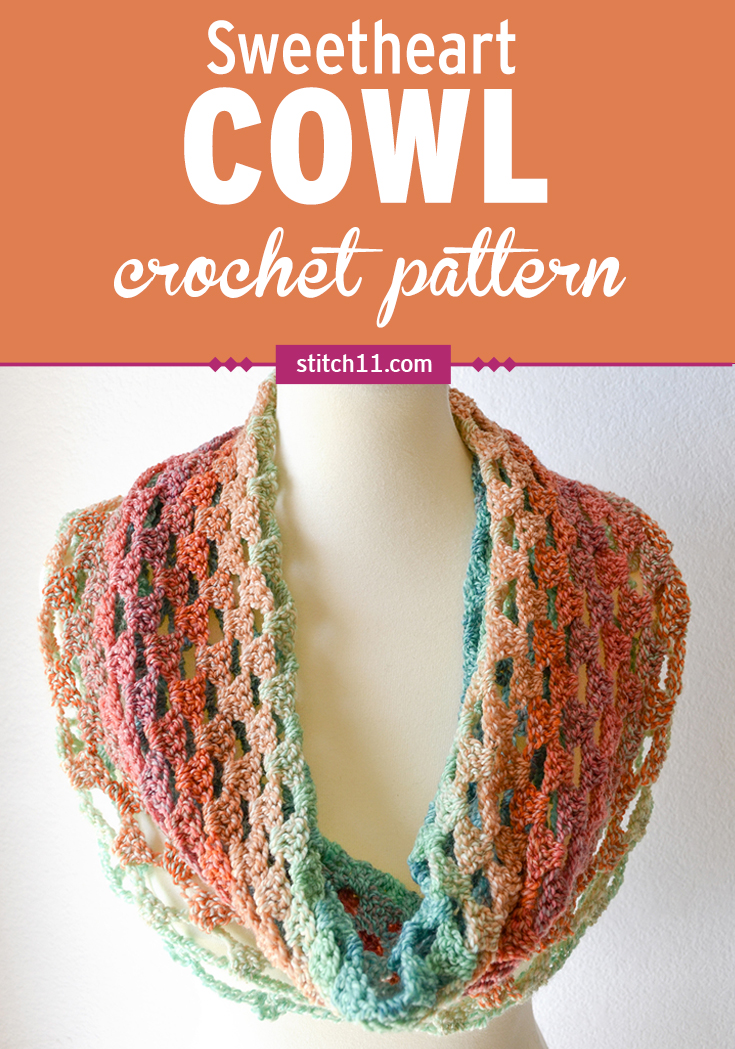
Sweetheart Cowl Crochet Pattern

April 27, 2018 By stitch11 8 Comments

To all cowl lovers out there, if this is not hanging in your closet, you're missing out! It's the perfect accessory all-year-round! Plus, you can make it with any color you like, and it will bring the same gorgeous results. If you're not convinced, give it a whirl! The pattern is right below, or you can get the ad-free printable PDF pattern here.
Sweetheart Cowl Crochet Pattern

Sweetheart Cowl Crochet Pattern

The most important accessory is a smile, but after that, it’s all up to you. This sweetheart cowl is bound to become one of your go-to accessories on colder days.

You’ll love the whimsical pattern almost as much as how easy it is to follow. This crochet pattern is worked in the round, so brush up on those crochet skills before you begin. Speaking of brushing up on your crochet skills, I highly recommend checking out the Crochet Fundamentals class that will help you to polish and perfect your skills and techniques.

With a pattern this cute and unique, you’ll want to ditch your plain old scarves every time you see them hanging in your closet. You can choose to crochet with whatever color fits the outfit you have in mind. We’re envisioning how great it would look paired with some knee-high boots and layered under a winter coat.

While this design will have you wishing for chilly days, this cowl is also light enough to wear in warmer weather. Using bright colors can add a touch of spring to your everyday outfits. You might even want to make two, so you can rotate your wardrobe accordingly.

Grab your crochet hook and get ready to dress to impress.

Sweetheart Cowl Crochet Pattern

Skill Level: Easy

Materials:

  • Yarn: 275 yds worsted weight yarn or size needed to obtain gauge
  • Hook: Size J/10/6 mm crochet hook
  • Notions:
    • Yarn needle
    • Scissors

Size: Approximately 34” circumference x 6.25” height.

Gauge: 13 dc x 16 rounds = 4 inches

The pattern uses US crochet terms.

ABBREVIATIONDESCRIPTION
chchain
dcdouble crochet
rndround
scsingle crochet
sl stslip stitch
spspace
st(s)stitch(es)

Special Stitch:

  • Picot: Ch 5, sl st into 5th ch from hook

*Looking for more great crochet stitches to try in other projects. Click here to see the Ultimate Crochet Stitch Library.

Sweetheart Cowl Crochet

Notes:

  • This pattern is worked in the round from the bottom up. Do not turn your work.
  • Rnd 1 is both the foundation ch and edging.

Get the ad-free printable PDF pattern here.
Pattern:

Rnd 1: [Picot, ch 5] 22 times, sl st to center of 1st picot to form a loop. (22 picots, 22 ch-5 sps)
Rnd 2: Ch 10 (counts as dc, ch 8), [sk next ch-5 sp, dc in next Picot, ch 8] around, join with sl st to
first dc (2nd ch of beginning ch-10). (22 dc, 22 ch-8 sps)

Rnd 3: Sl st in first ch-8 sp, (ch 1, sl st) twice in same sp, ch 2 (counts as dc), 2 dc in same sp, ch 2, [sk
next dc, 3 dc in next ch-8 sp, ch 2] around, sl st in top of first dc. (66 dc, 22 ch-2 sps)

Rnds 4-25: Sl st in each of next 2 dc, sl st in next ch-2 space, ch 2 (counts as dc), 2 dc in same sp, ch
2, [sk next dc, 3 dc in next ch-8 sp, ch 2] around, sl st in top of first dc. (66 dc, 22 ch-2 sps)

Fasten off and weave in all ends.

Sweetheart Cowl Crochet Pattern

Get the ad-free printable PDF pattern here.

Now that you’ve made your sweetheart cowl, we want to see what you’ve got. Send us a picture before you flaunt your work, out in public. Once you’ve done that, browse for your next project. Since we know you’ve got a little taste for whimsy, might we suggest one of these circle vests?

Sweetheart Cowl Crochet Pattern

Filed Under: Free Patterns, Girls Tagged With: Cowl Crochet, Cowl Crochet Pattern, Cowl Pattern, crochet pattern, Sweetheart Cowl Crochet, Sweetheart Cowl Crochet Pattern

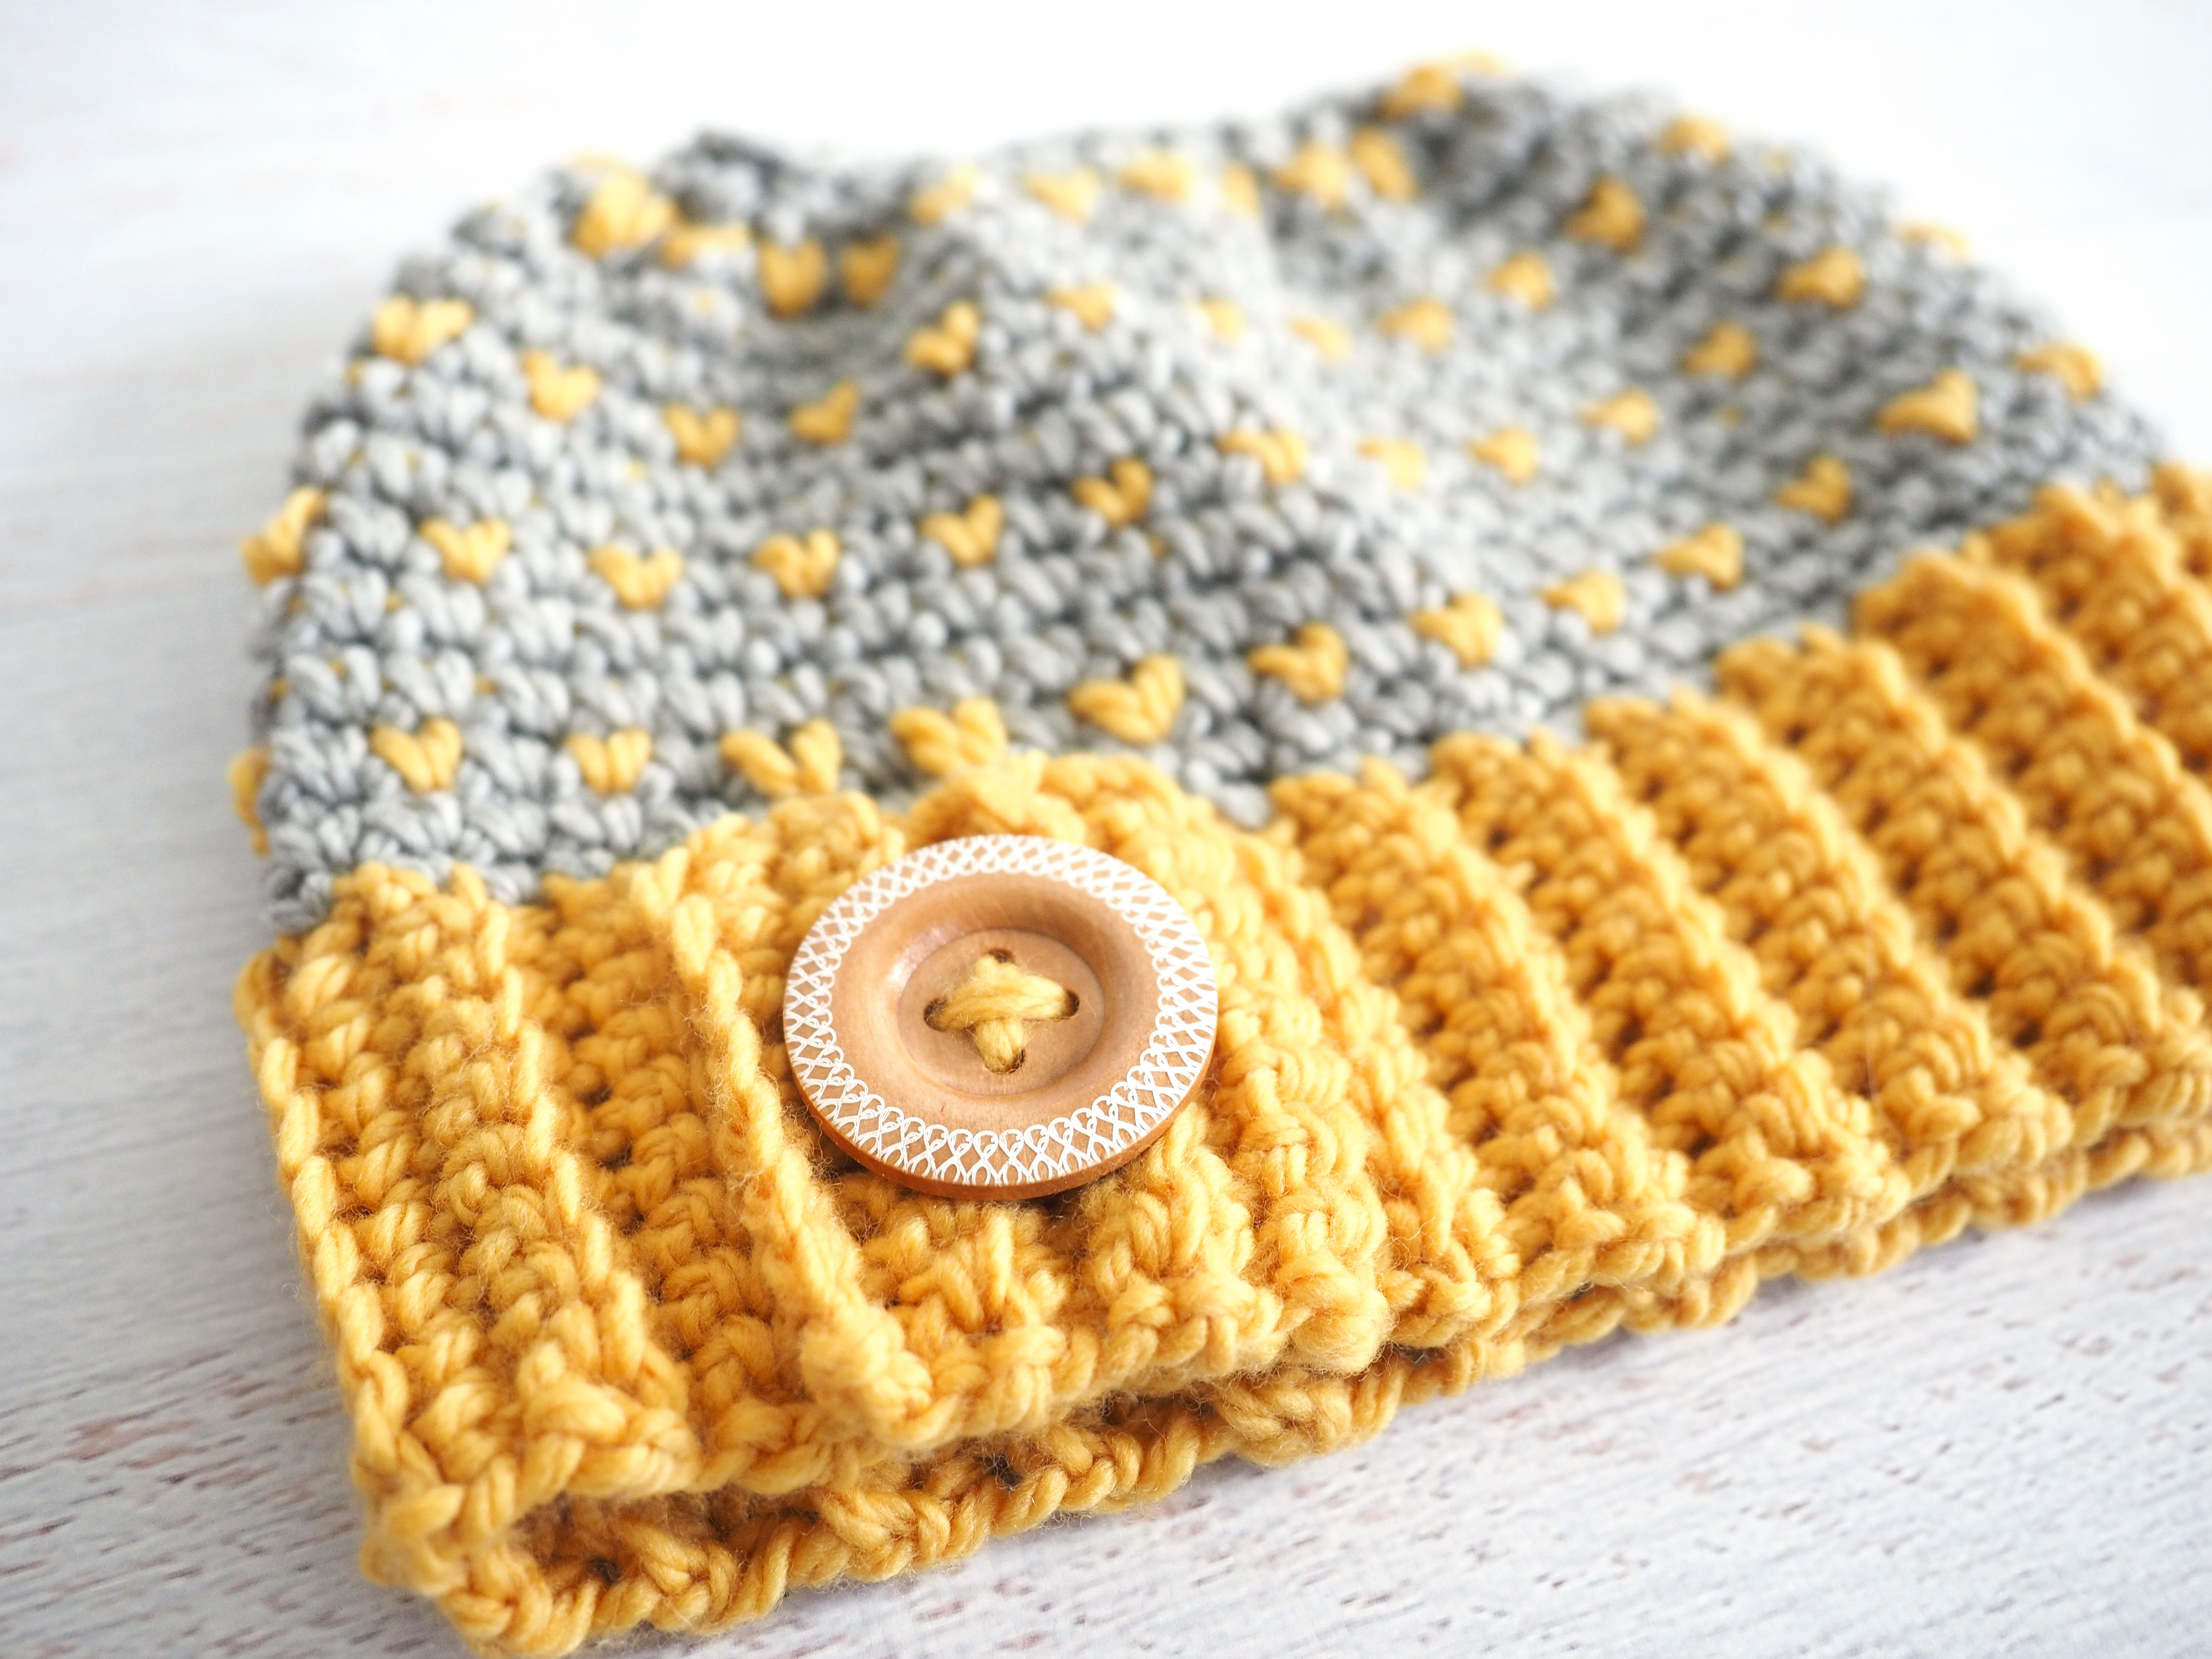
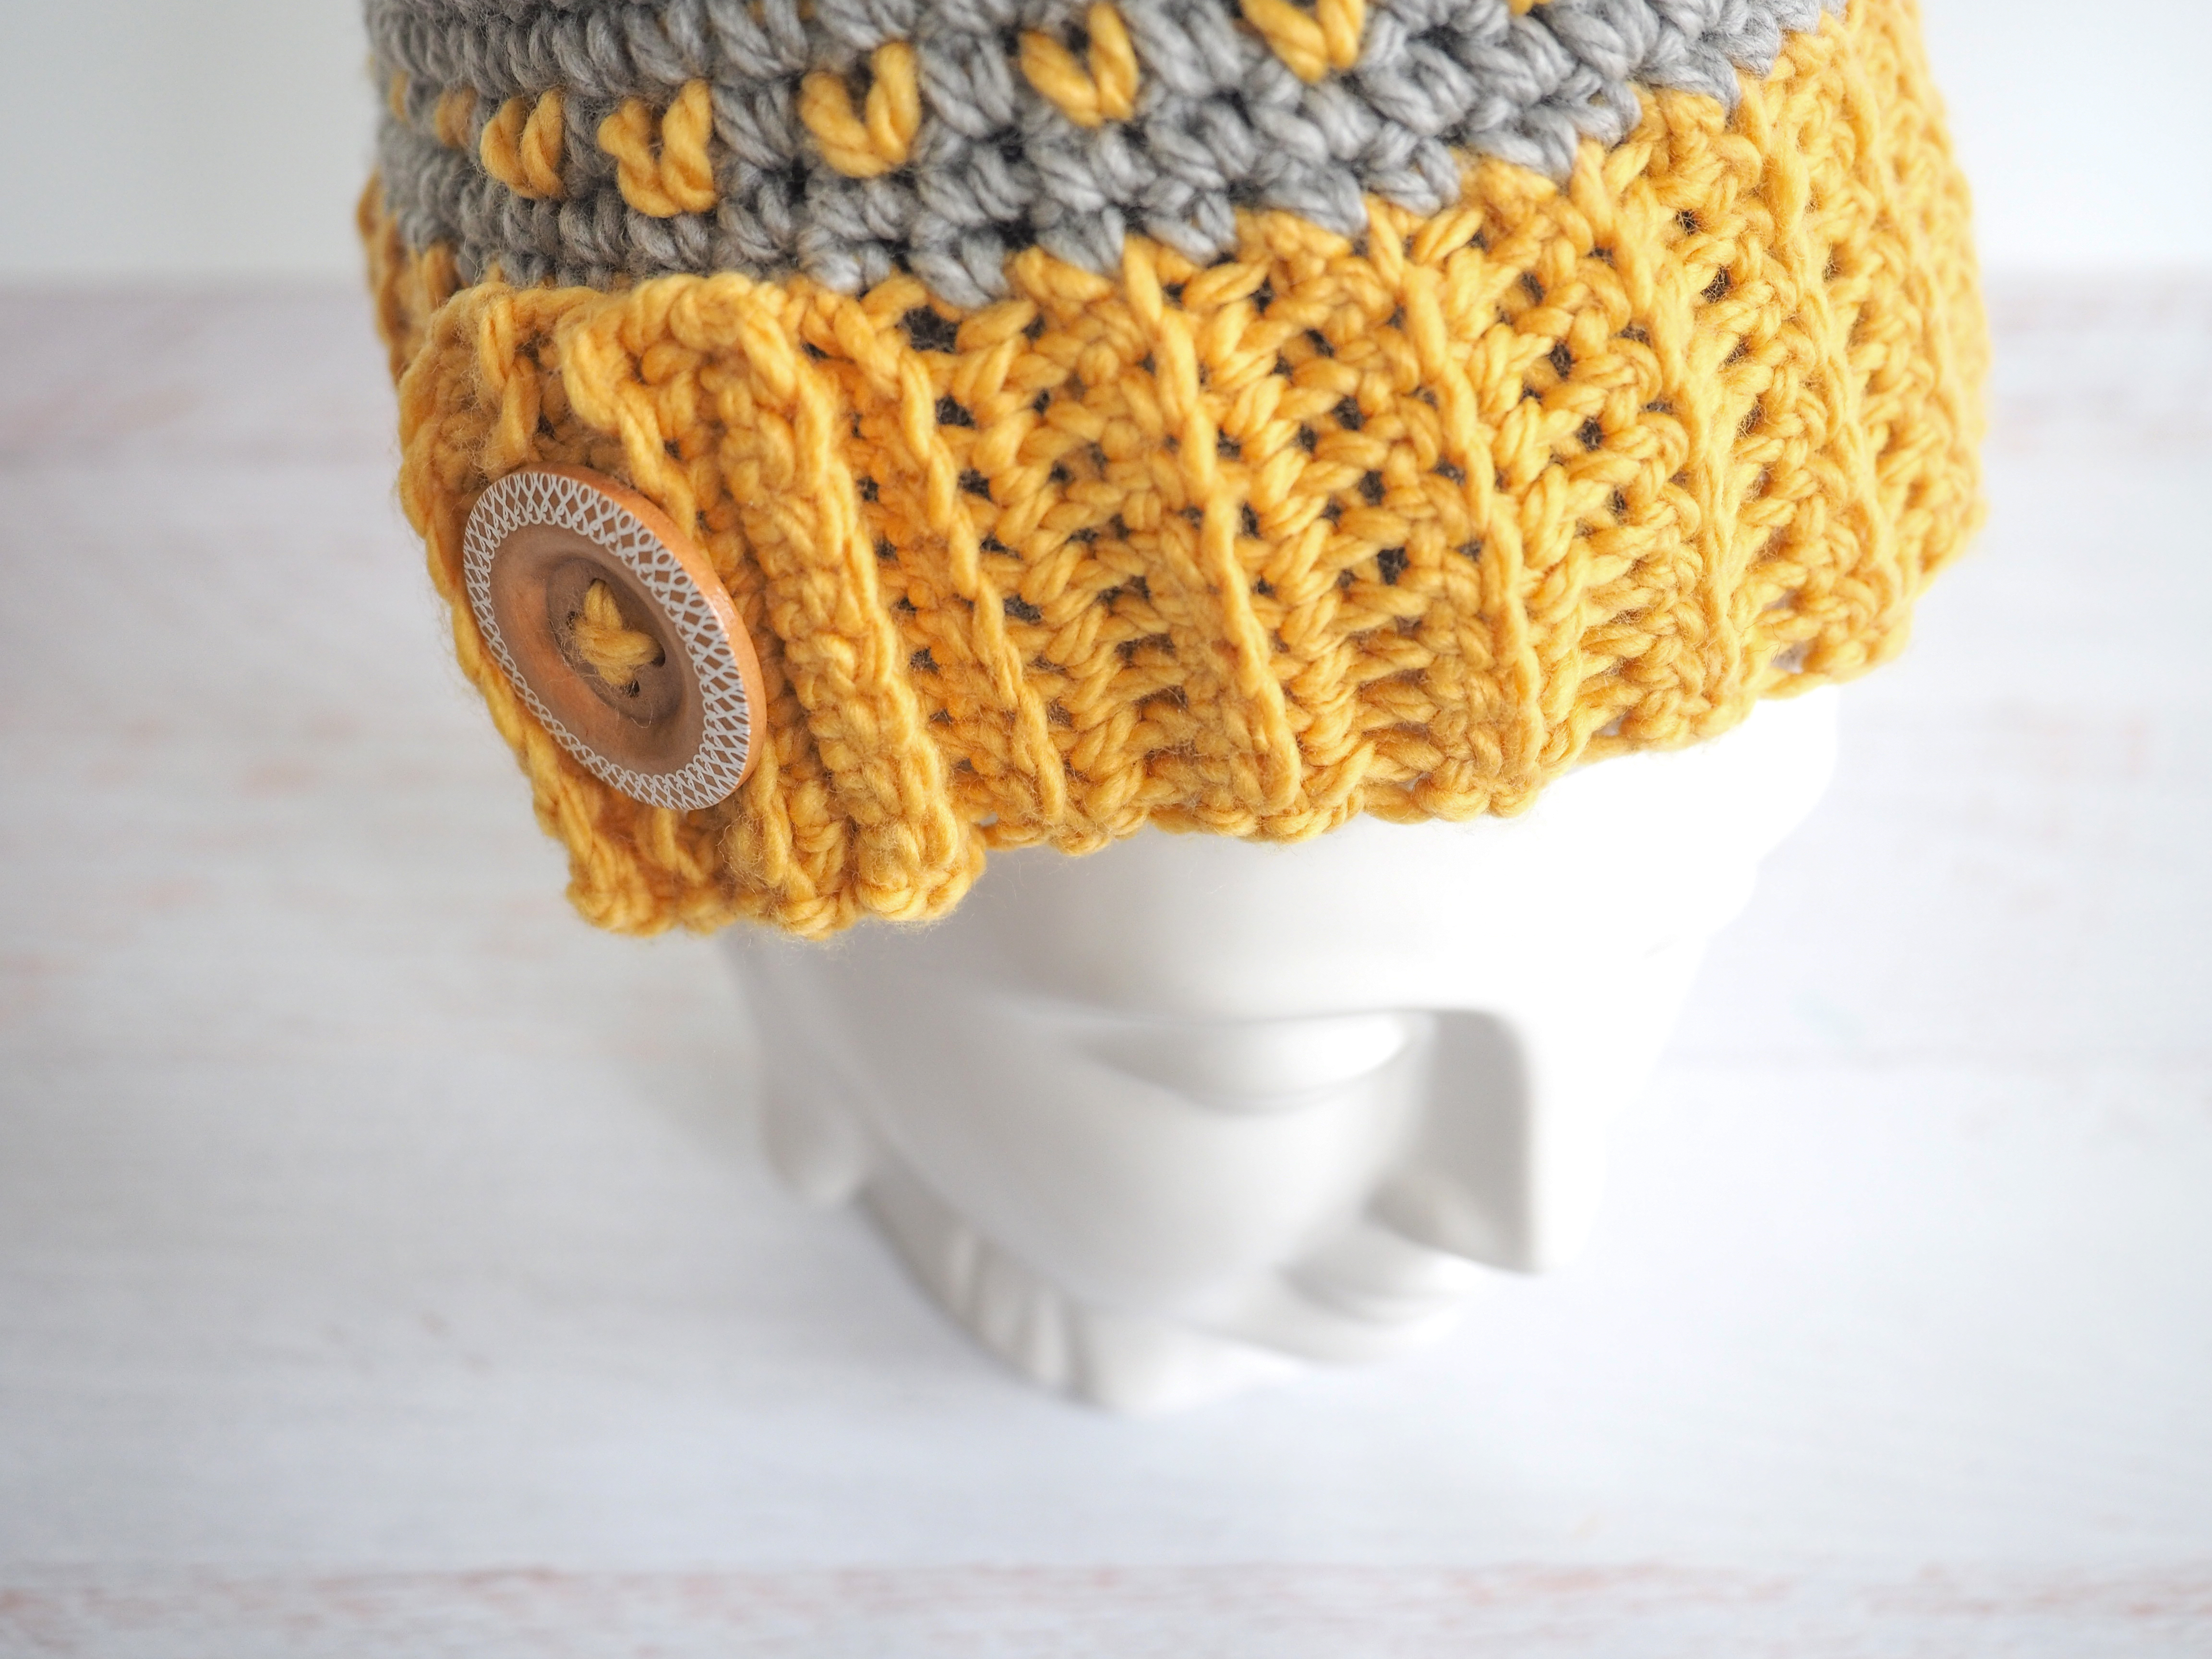
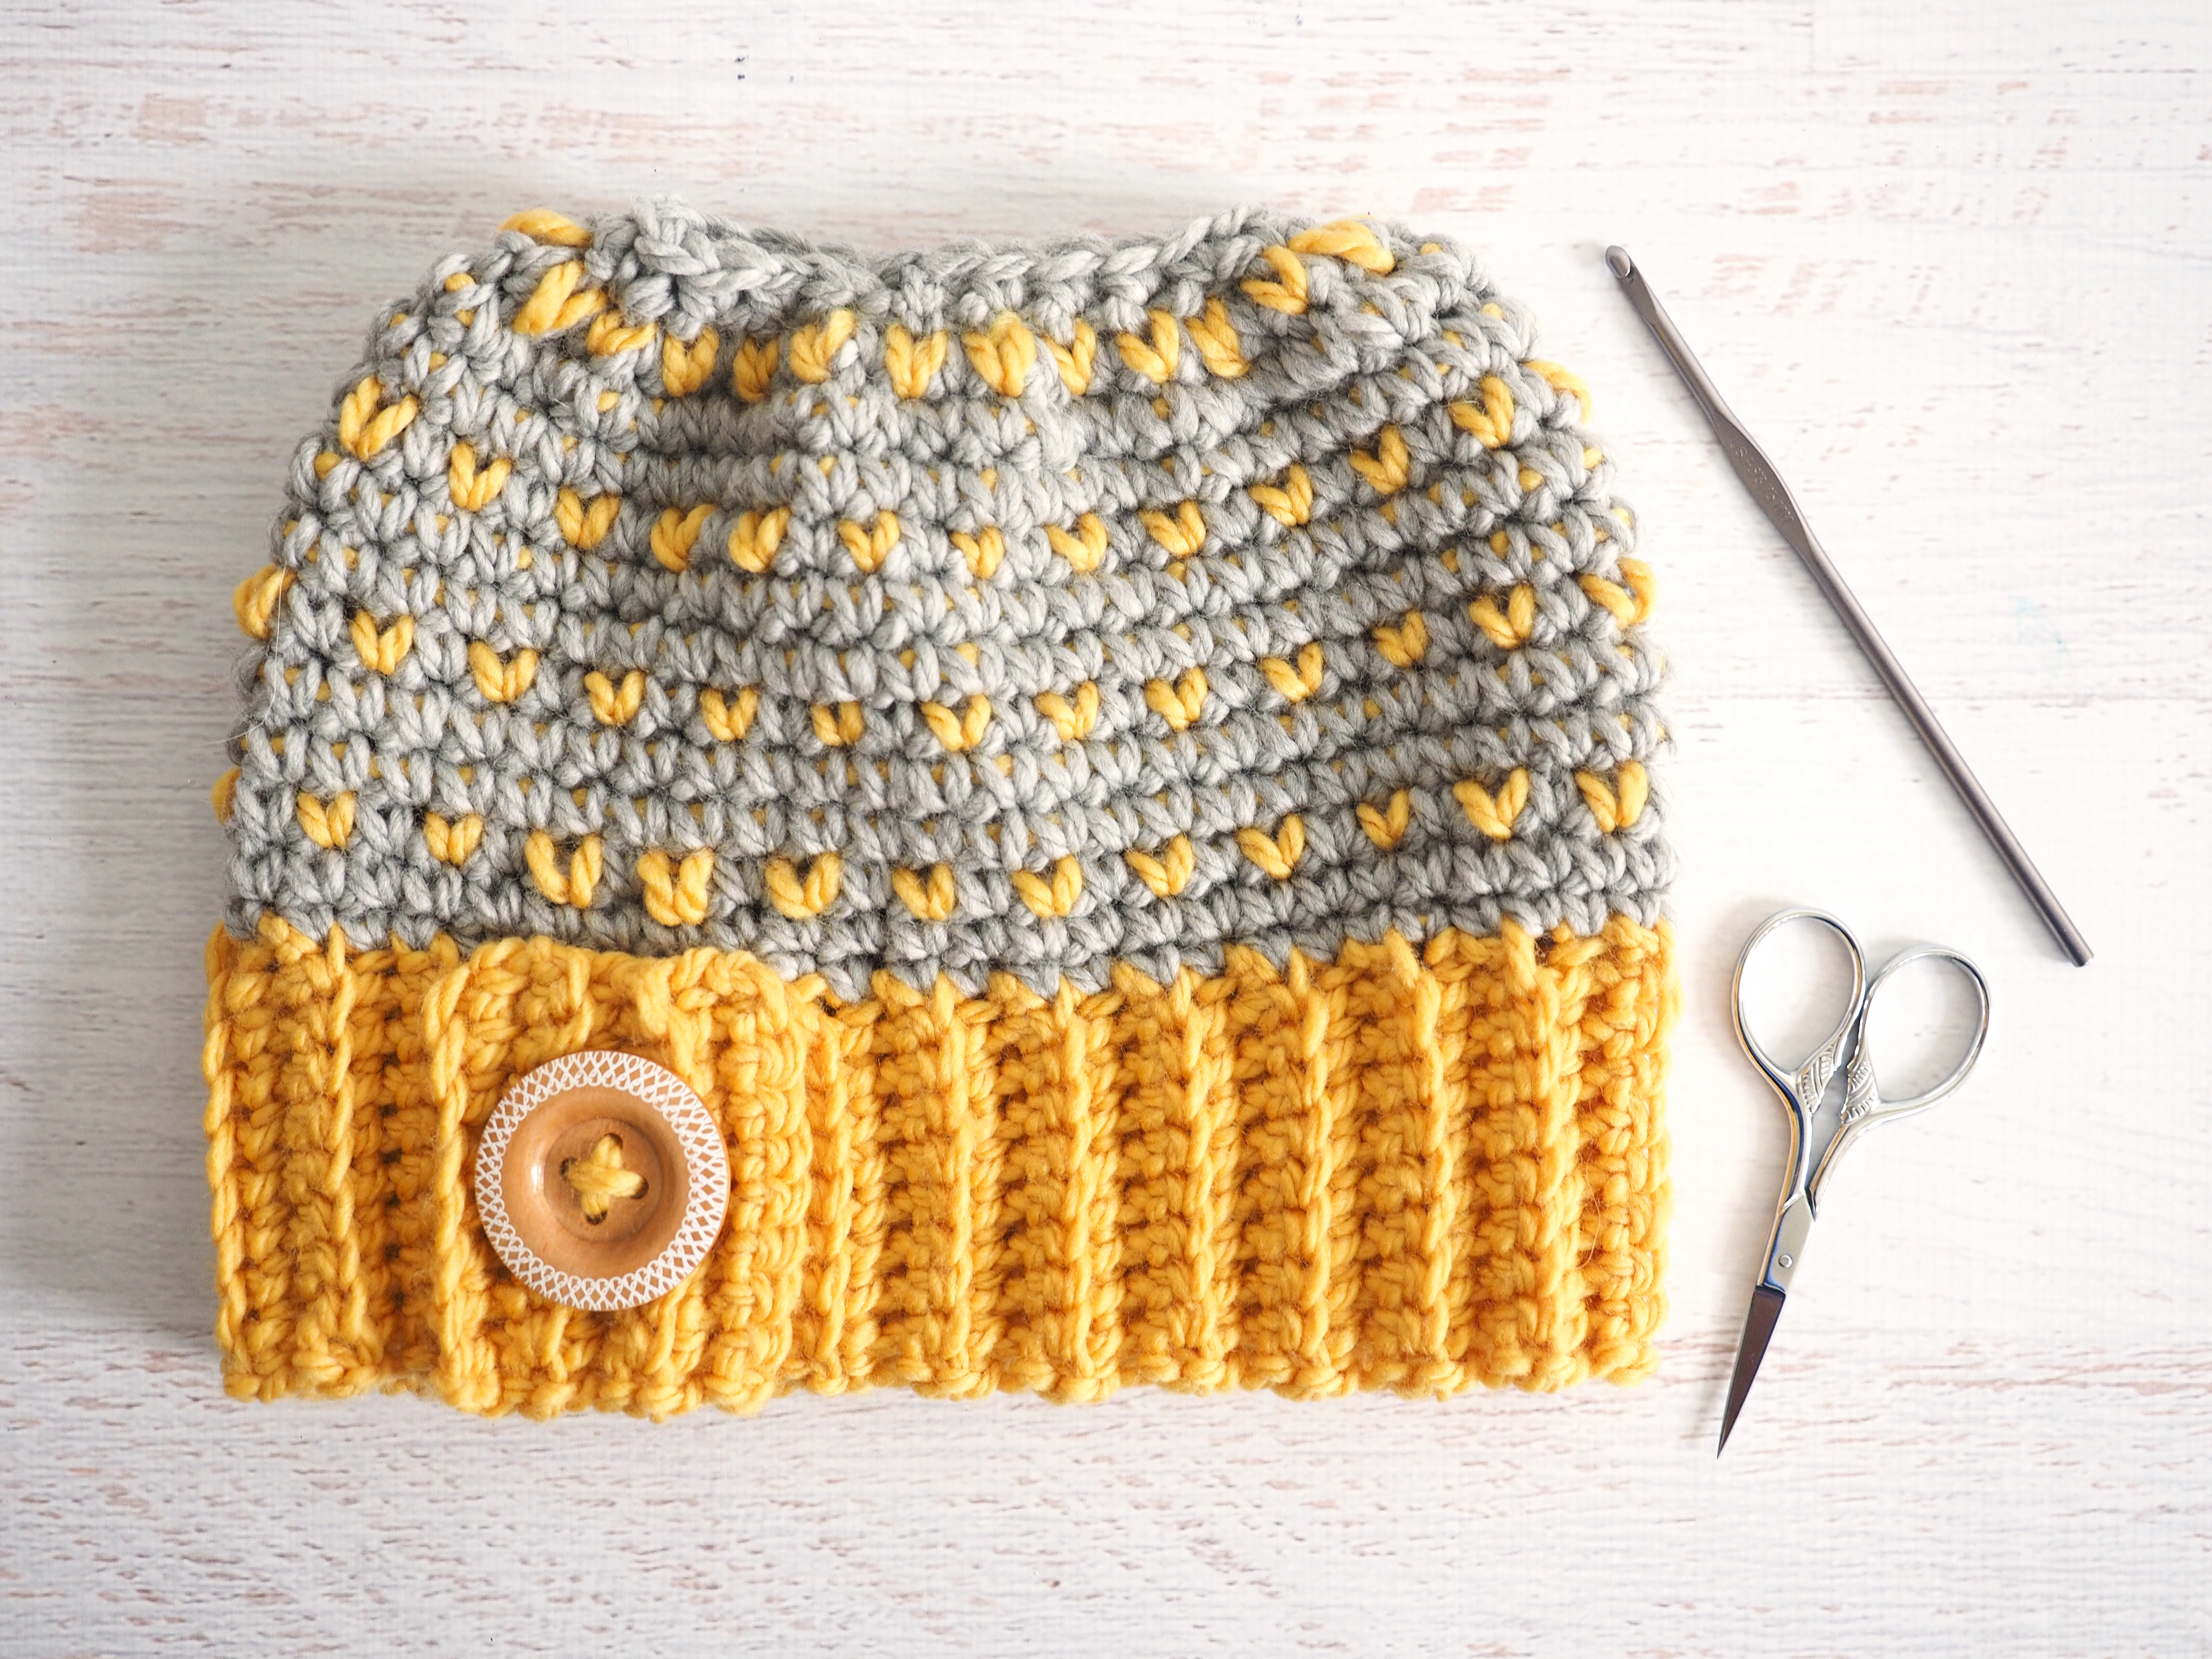
Retro Messy Bun Hat Crochet Pattern

April 17, 2018 By stitch11 7 Comments

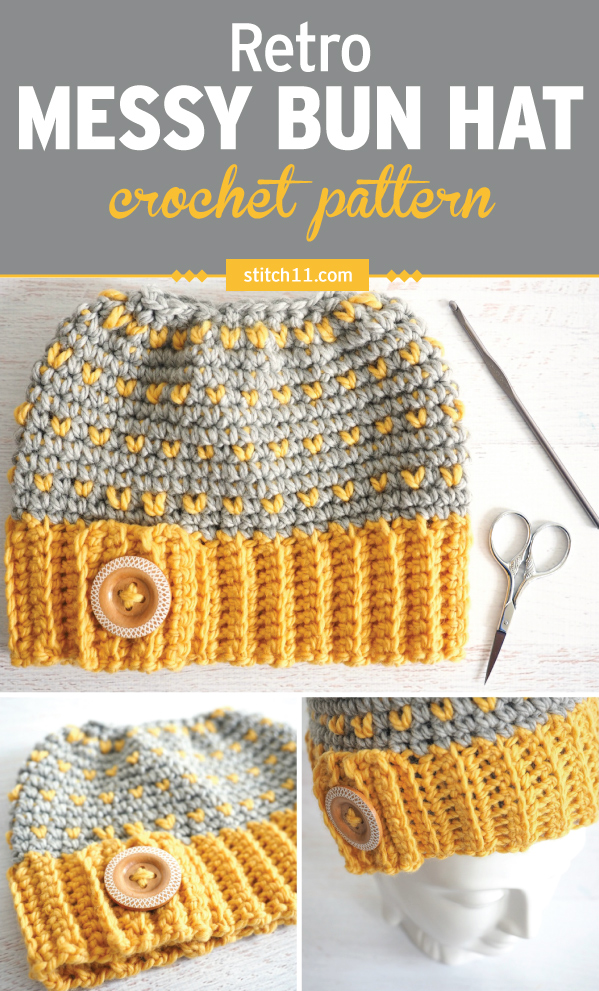
We don't see any reason not to love this bun hat. Aside from being a cute little number that turns heads wherever you go, it's made with the softest and most breathable yarn that'll keep you comfy. You can also pick your favorite colors and work it from the brim up! Get started with the free pattern below or get the ad-free printable PDF here.

Retro Messy Bun Hat - Free Crochet Pattern - Stitch11

Retro Messy Bun Hat Crochet Pattern

This fun yellow hat will be sure to brighten up any gloomy day – even though you can choose whichever color you’d like. People won't be able to help but ask you where you go your cheerful crochet messy bun hat from.

In this easy to intermediate crochet pattern, you'll begin by creating the band. Next, you'll work your way up to making the rest of the hat and finally add whatever button you may choose.

If you feel apprehensive about taking on an intermediate hat pattern I can help you with my step by step crochet fundamentals videos. I teach you exactly how to crochet a hat (and other projects) to help you get started. Just need to brush up on your skills? No problem I have my essential skills course where you can review 72 crochet (& knit skills) that all crocheters need.

For yarn, we chose merino wool yarn because it's warm, soft, and breathable. It doesn't have any of that itchy and scratchy feeling you might associate with wool.

Wear this versatile messy bun hat on a trip to the mountains or outside on a chilly morning walk to keep you cozy. Ok, it's time to grab your yarn and let's get started. Time to add some cheer to the world, one stitch at a time.

Want to customize your hat? Learn 45 new crochet stitches from my Ultimate Crochet Stitch Library and use them to make your very own designed pattern.

Retro Messy Bun Hat - Free Crochet Pattern - Stitch11

Get the ad-free printable PDF here

Pattern Title: Retro Messy Bun Hat

Skill Level: Easy 

Materials: 

• Hook: 

– US Size K/10 1/2 (6.5 mm) crochet hook  or size needed to obtain gauge 

• Yarn: Bulky weight yarn 

– 85 yds yellow (A) 

• – 85 yds grey (B) 

• Notions: 

– Scissors 

– Yarn needle 

– Stitch marker 

– 1.5-inch button 

Size: 

• Top opening diameter: 3 inches

• Hat circumference: 19 inches at band, 20 inches at widest point 

• Hat length: 7.5 inches 

Size/Gauge:  

10 sc x 11 rows = 4 inches

ABBREVIATIONSDESCRIPTION
bloBack loop only
chChain
rndRound
RSRight side(s)
scSingle crochet
sl stSlip stitch
st(s)Stitch(es)
Retro Messy Bun Hat - Free Crochet Pattern - Stitch11

The pattern:

Get the ad-free printable PDF here

Pattern 

BAND:

With A, ch 10

Row 1: Sc in 2nd ch from hook and in each ch across. (9 sc) 

Rows 2-28: Ch 1, turn, sc in blo of each st across.  

Fasten off, leaving a long tail for sewing.  

Fold band in half, overlapping the ends by about 4 rows, so that row 28 lines up with row 4.

Use tail to sew band together where these two rows meet.  

The overlapping flap is now the RS of the band, and is where the button will be placed later. 

HAT: 

Do not join rnds unless indicated. Mark the first st of each rnd. 

With RS facing, join B with sl st in the end of any row on band.  

Rnd 1: Working in sides of rows, 50 sc evenly spaced around side edge of band. (50 sc)

Rnd 2: Sc in each st around.  

Begin carrying A. When working a st with B, work over the color A yarn. When working a  st with A, work over the color B yarn. Change colors as needed by using the new color to  complete the last “pull through” step of the previous st. 

Rnd 3: [Sc with B in next st, sc with A in next st] around. (25 sc with B, 25 sc with A)

Rnds 4-5: Sc with B in each st around. (50 sc with B) 

Rnds 6-11: Repeat rnds 3-5 twice 

Rnd 12: [Sc with B in next st, sc with A in next st] around, join with sl st to first st. (25 sc with B, 25 sc with A) 

Fasten off both colors, leaving a tail of B approximately 45 inches long.  Turn hat inside out.  

Sew long tail of B through each st of rnd 12 and pull tightly until opening measures about 3 inches in diameter.  

Turn hat RS out.  

Sew button to flap on band. 

Get the ad-free printable PDF here

You'll definitely fight against the cold by feeling all warm and fuzzy from the compliments you're bound to receive on this hat. Once you've got your hat finished, you can continue the cozy train by choosing a scarf to make. If you've got a beautiful end result – and of course you do – show it off! We'd love to see it.

Retro Messy Bun Hat #crochethat #crochetpattern #freecrochet #crochetmessybun #crochetlove

Filed Under: Free Patterns, Girls, Hats Tagged With: bun hat crochet, crochet, crochet pattern, hat crochet pattern, messy bun hat pattern, retro messy bun hat crochet pattern

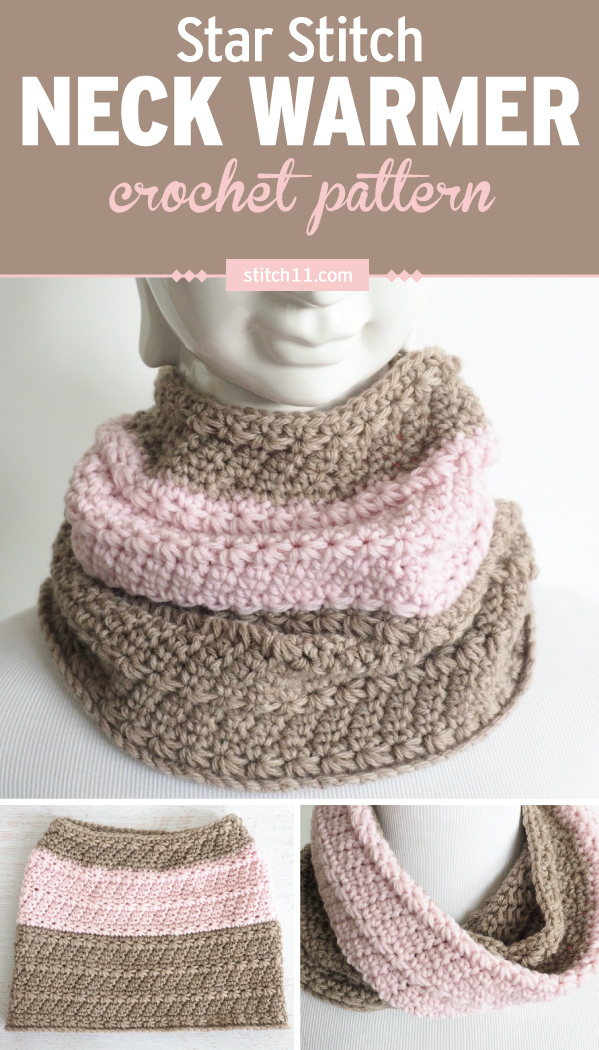
Star Stitch Neck Warmer Crochet Pattern

April 11, 2018 By stitch11 Leave a Comment

Rustic Love Slouch - Free Crochet Pattern - Stitch11

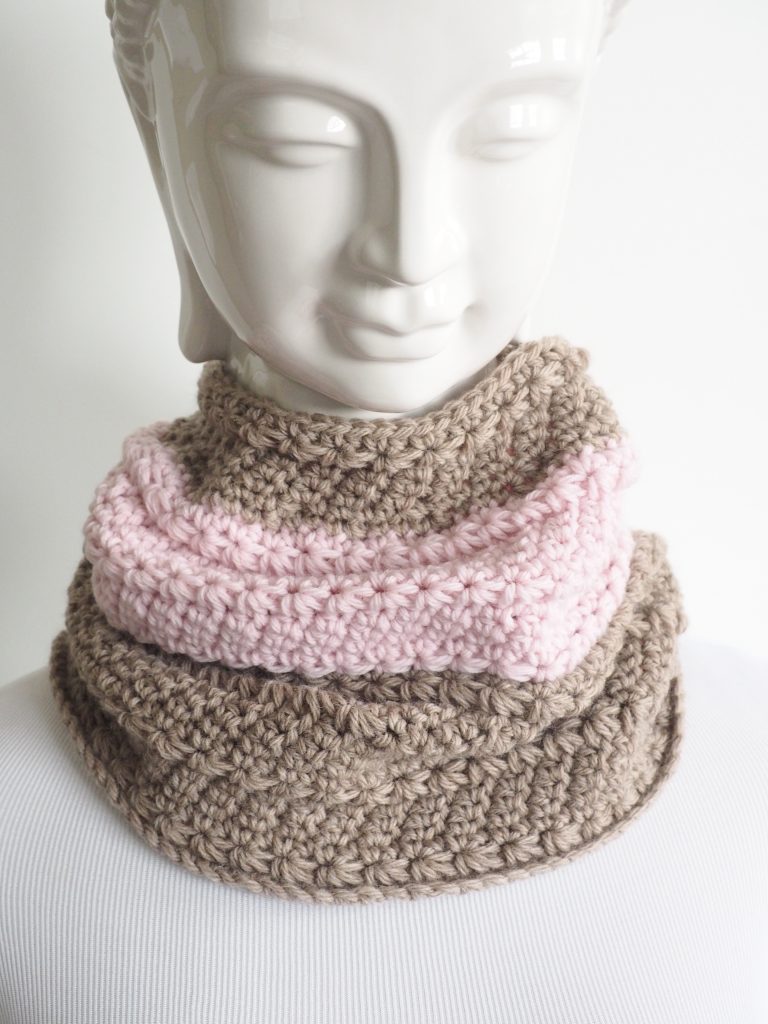
Star Stitch Neck Warmer Crochet Pattern

You know what it’s impossible to do when wearing a cowl? Scowl. You’ll have a smile on your face the whole time you’re wearing your easy to make neck warmer.

Throw this on whenever you need a little extra layer against the elements, and you want to look good doing it. We’re all about easy ways to look great and feel great, and that’s what you’re going to be crocheting when you choose this pattern.

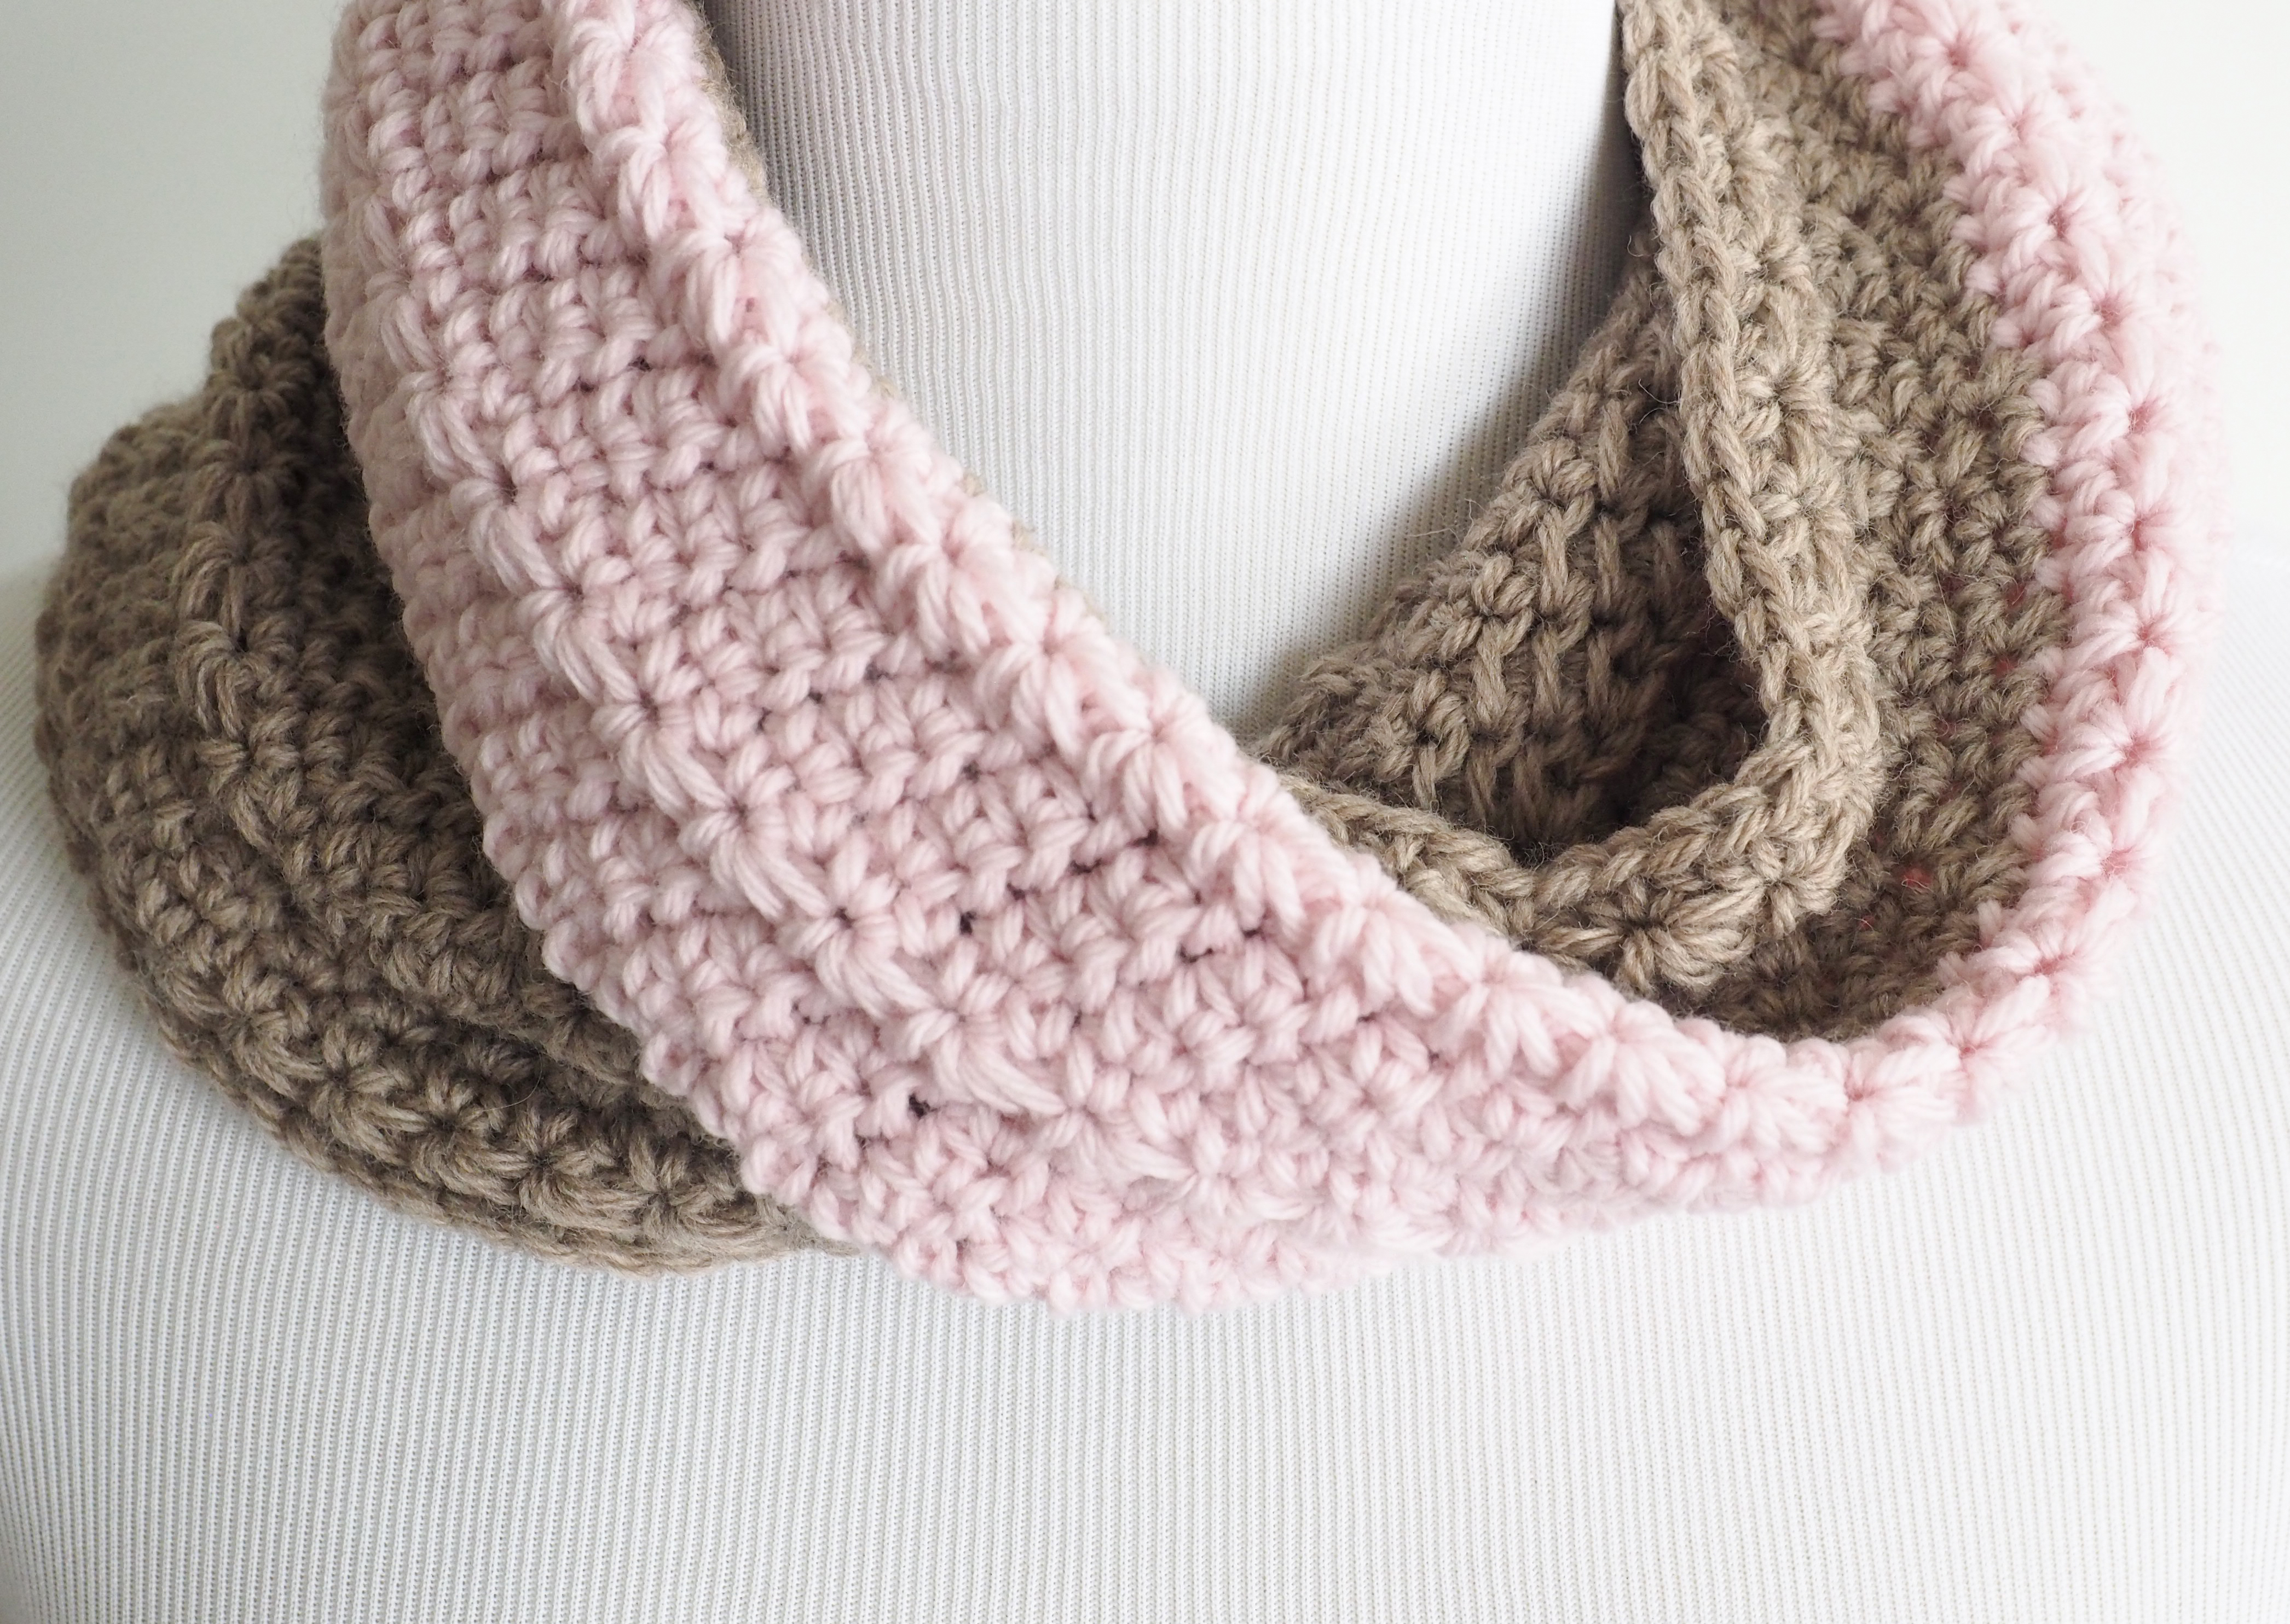
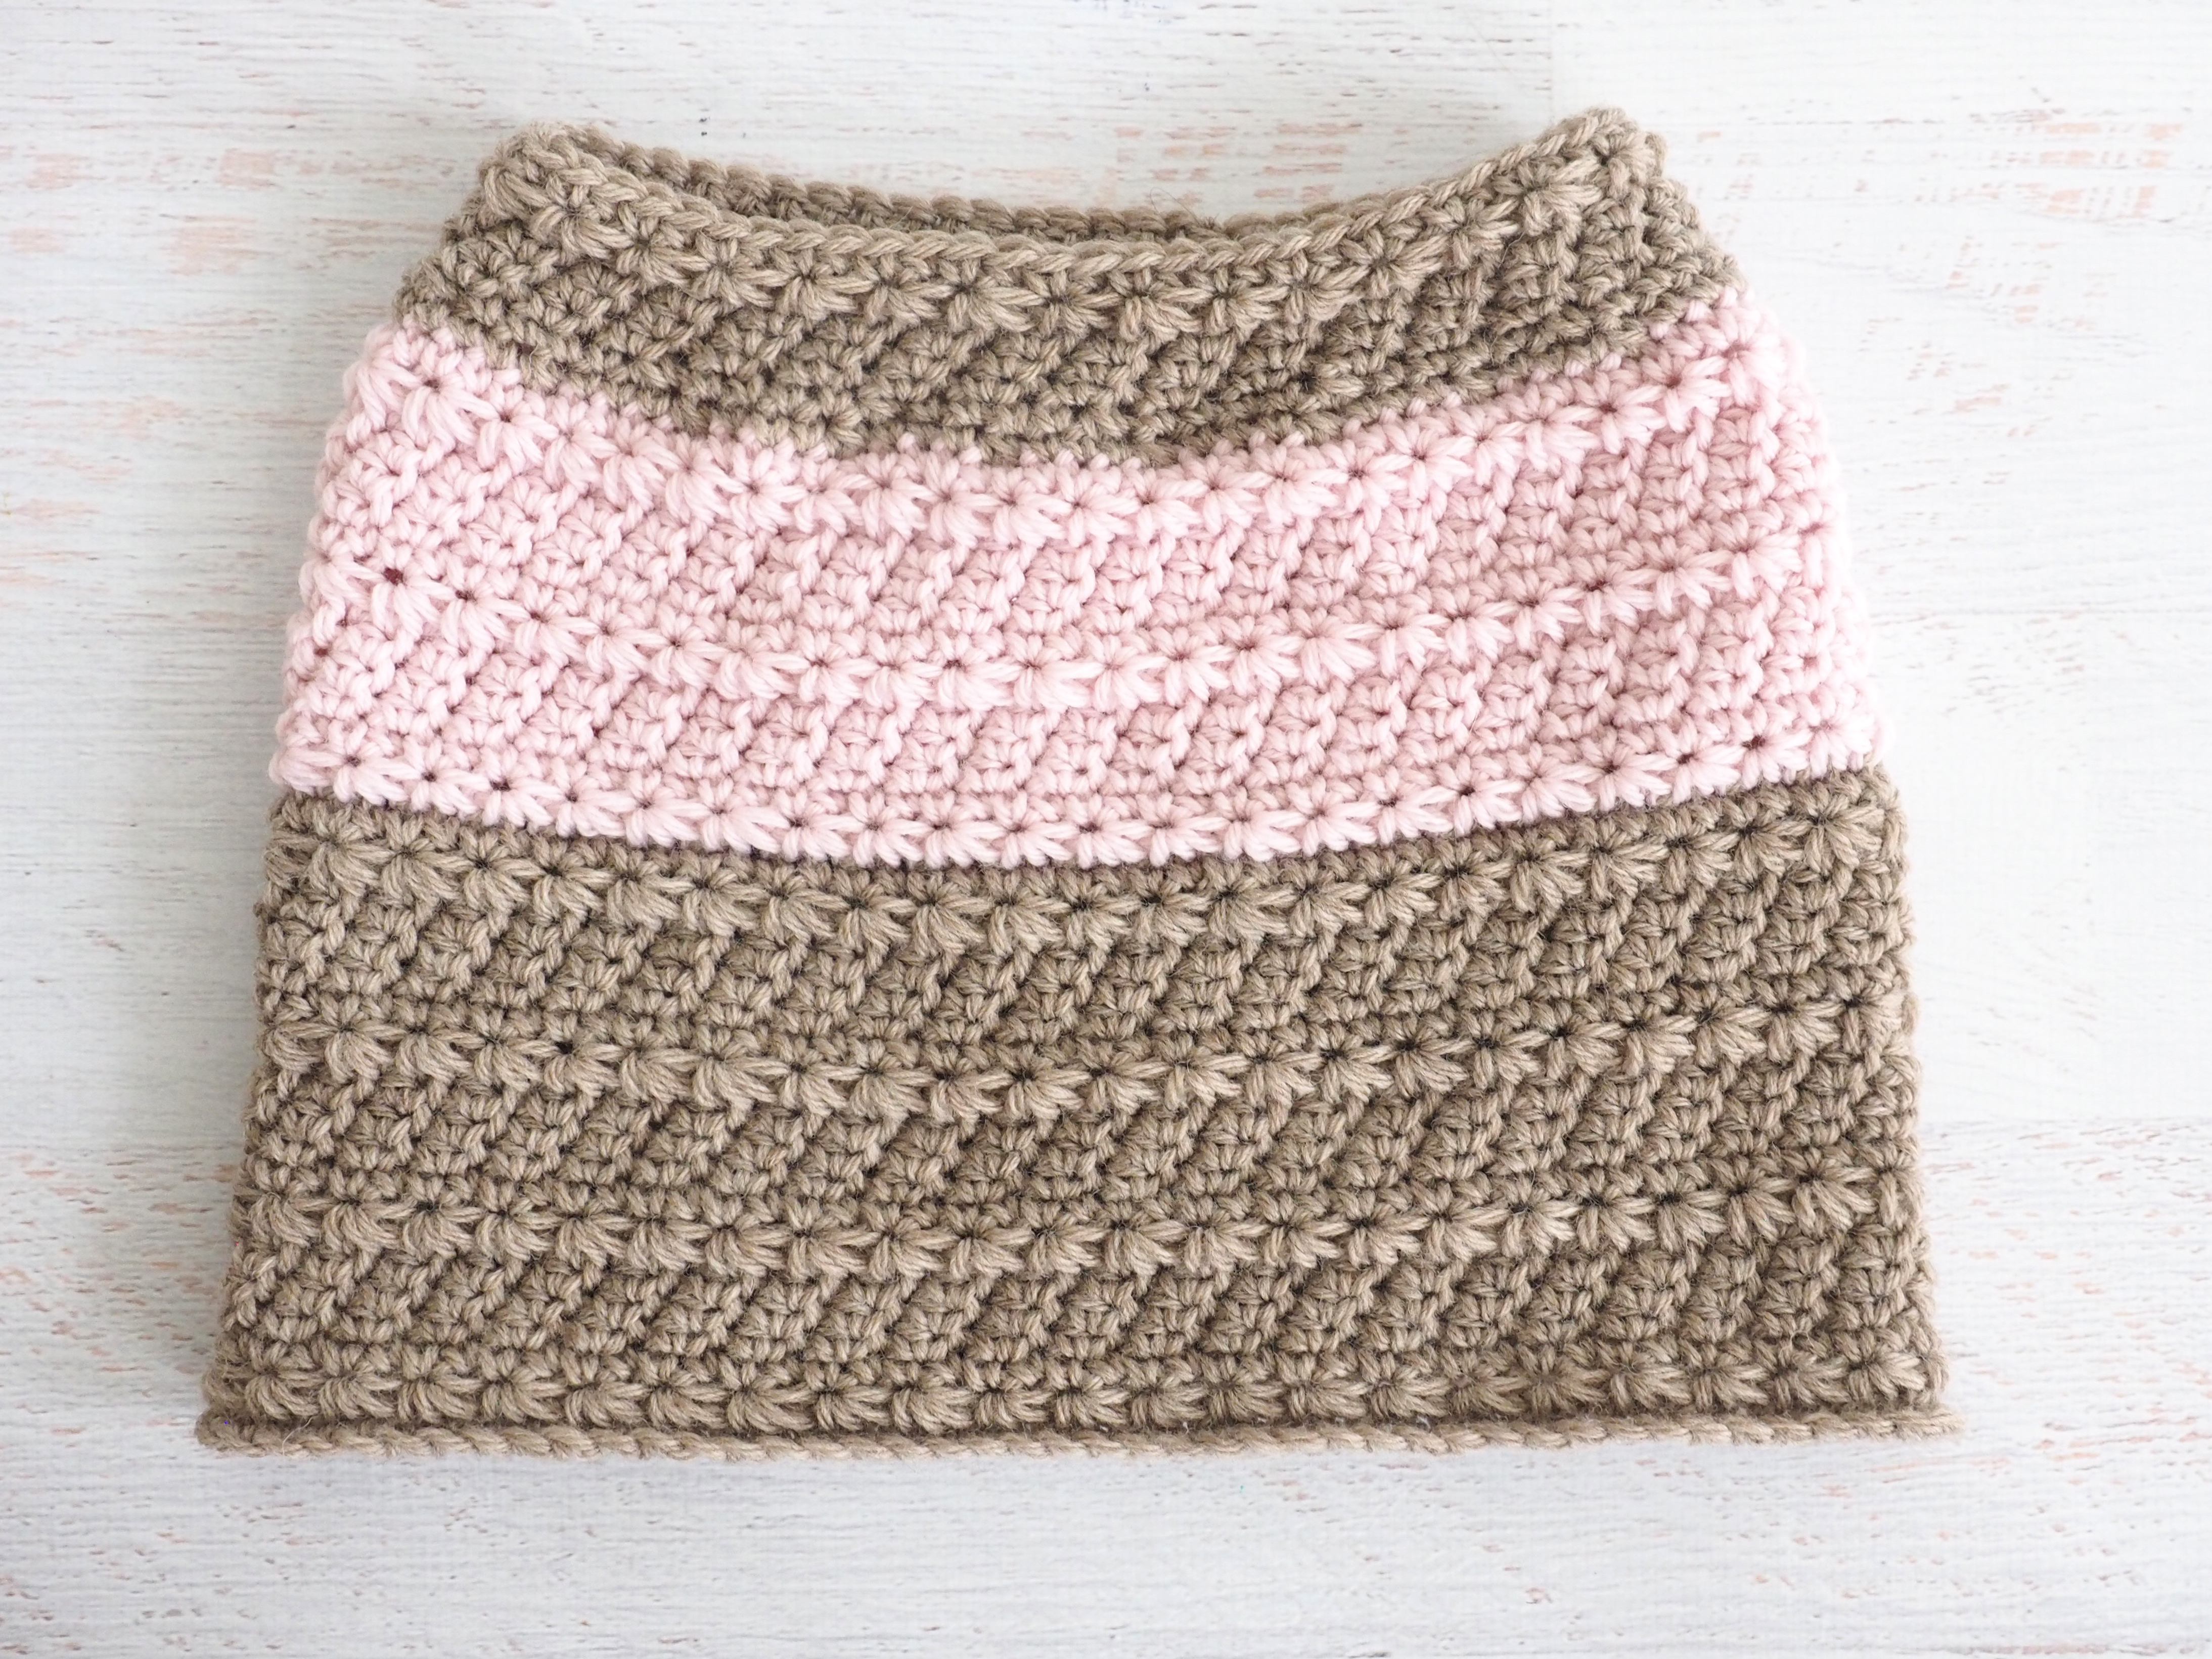
We chose worsted wool in heather and pink to get this muted look. Choose whatever colors tickle your fancy and keep your neck warm.

You get to use your star stitch. You know what that means. The entire time you’re wearing it, you’ll feel like a star. Grab some wool in whichever color you’re feeling, get your crochet needle, and get ready to party like a rockstar.

Star Stitch Neck Warmer - Free Crochet Pattern - Stitch11

Pattern Title: Star Stitch Cowl

Skill Level: Easy / Intermediate

Materials:

Hook(s) size: J/10 6mm

Yarn weight: Worsted

Preferred type of yarn: wool

Suggested yarn: Cascade 220 Heathers

Yarn Yardage: Color A – Cascade 220 doeskin heather (8012) 220 yds (approx), Color B – Cascade 220 soft pink (4192) 140 yds (approx)

Tools – scissors, tapestry needle, stitch marker

Approx. finished dimensions: Height 10.5,” circumference at bottom 26.5,” circumference at neck 20”

Gauge: 4” = 12 sc by 8 rows

Pattern details (ex. How many squares needed to make to complete the blanket):

Special notes

    1. Ch – chain, sl/st – slip stitch, st(s) – stitch(es), sc – single crochet, sp – space, yoh – yarn over hook, hdc – half double crochet,
    1. This pattern is worked in the round from round 2-37
    1. The star stitch consists of two rows and explained in rounds 2 and 3. I would highly recommend watching a video on the star stitch if it is new to you, as it's a bit tricky to explain. The variation I use may differ as it is worked in the round, but watching a tutorial will help with understanding the general way this stitch is worked.
    1. The even moss stitch is used and explained in rounds 4-6
  1. The decrease is worked by crocheting 2 sts together

Star Stitch Neck Warmer - Free Crochet Pattern - Stitch11

The pattern

Color A

Ch 90, sl/st in first ch to create a loop (make sure the ch is not twisted)

Round 1 – Ch 1, sc in each st around, sl/st into ch 1 – 90 sts

Round 2 – ch 2, pull up a loop in second ch from hook, pull up a loop in same sp as ch 2, pull up a loop in each of the next 2 sts (5 loops on hook); yoh and pull through all 5 loops, ch 1 to close star stitch. *Pull up a loop in the eye of the star stitch, pull up a loop in the space between the 2 posts below the eye of the star, pull up a loop in the same ch space, pull up a loop in each of the next 2 sts (6 loops on hook); yoh and pull through all 6 loops, ch 1 to close star stitch; repeat from * to end. The last star stitch is completed by pulling up a loop in the same sp as the ch 2 at the beginning of the round.  – 45 star stitches,

Round 3 – *sc in the next st, sc in the eye of the star stitch; repeat from * to end – 90 sts

Round 4-6 – *sl/st in the next st, hdc in the following st; repeat from * to end – 90 sts

Round 7 – sl/st in the next st; ch 2, pull up a loop in second ch from hook, pull up a loop in same sp as ch 2, pull up a loop in each of the next 2 sts (5 loops on hook); yoh and pull through all 5 loops, ch 1 to close star stitch. *Pull up a loop in the eye of the star stitch, pull up a loop in the space between the 2 posts below the eye of the star, pull up a loop in the same ch space, pull up a loop in each of the next 2 sts (6 loops on hook); yoh and pull through all 6 loops, ch 1 to close star stitch; repeat from * to end. The last star stitch is completed by pulling up a loop in the same space as the ch 2 at the beginning of the round.  – 45 star stitches,

Round 8 – repeat round 3 – 90 sts

Round 9-11 – repeat round 4-6 – 90 sts

Round 12 – repeat round 7 – 45 star stitches

Round 13 – repeat round 3 – 90 sts

Round 14-16 – repeat round 4-6 – 90 sts

Round 17 – repeat round 7 – 45 star stitches

Round 18 – repeat round 3, in the last st, attach color B; tie off and cut color A

Color B

Round 19 – repeat round 7 – 45 star stitches

Round 20 – repeat round 3 – 90 sts

Round 21-23 – repeat round 4-6 – 90 sts

Round 24 – repeat round 7 – 45 star stitches

Round 25 – repeat round 3 – 90 sts

Round 26-28 – repeat round 4-6 – 90 sts

Round 29 – repeat round 7 – 45 star stitches

Round 30 – repeat round 3 , in the last st, attach color A; tie off and cut color B- 90 sts

Color A

Round 31 – ch 1 in the next st, sc in each of the following 2 sts, decrease in the following. Sc in each of the next 3 sts, decrease in the following; repeat from * to end – 72 sts

Round 32 – sc in each of the next 4 sts, decrease in the next st; repeat from * to end – 60 sts

Round 33-35 – repeat round 4-6 – 60 sts

Round 36 – Repeat round 7 – 60 star stitches

Round 37 – repeat round 3, sl/st into the last st, cut yarn and tie off – 60 sts

Sew in all ends with a tapestry needle.

All done? Don’t stop there. Don’t let this go over your head – pun intended. So you’re rocking your cowl? Rock some socks, too. Once you’ve mastered this pattern, these ones should be a walk in the park. Don’t forget to show us what you’ve made – we’d love to see your work.

Star Stitch Neck Warmer Crochet Pattern

Filed Under: Free Patterns, Girls, Scarfs Tagged With: bow crochet pattern, crochet, crochet neck warmer, crochet pattern, neck warmer

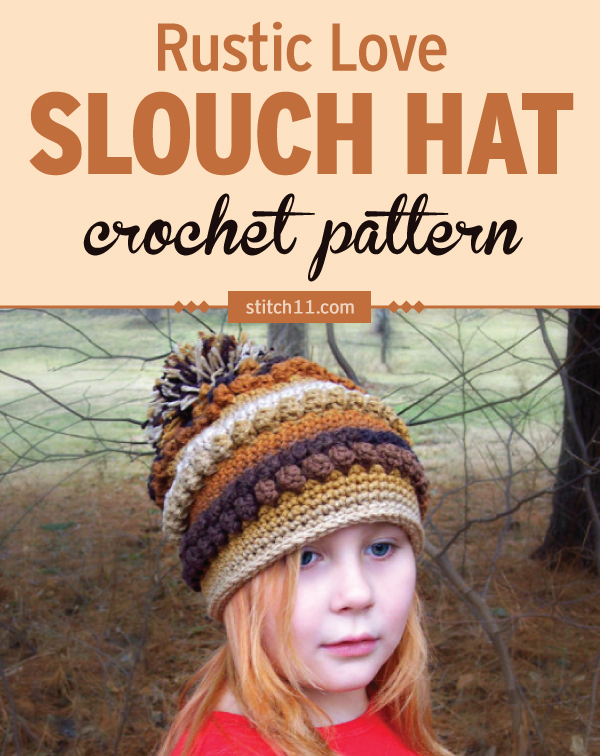
Rustic Love Slouch Crochet Pattern

January 21, 2018 By stitch11 8 Comments

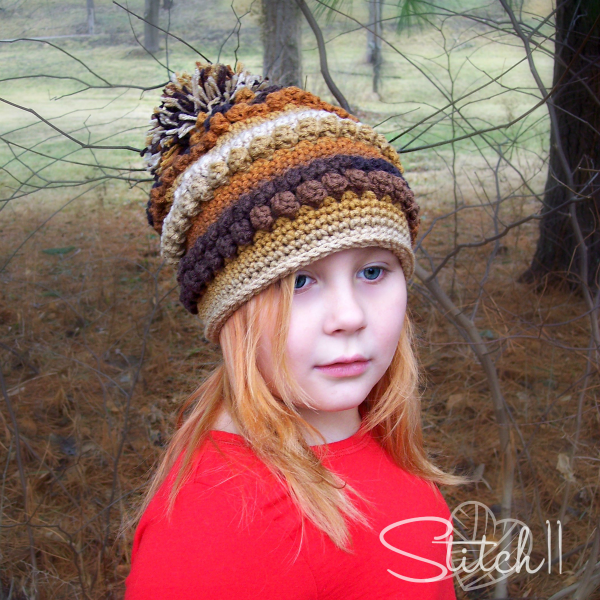
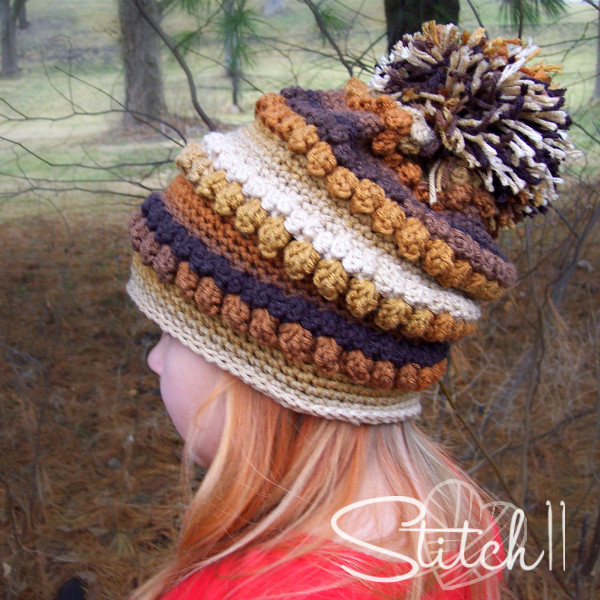
This one is a great stash buster! Maybe you can use your left over self-striping yarns, and make this unique hat with all those textures we love. It's also a great little number for both adults and kids! Make one for yourself, or a couple for your loved ones with the free pattern below or better yet, get the ad-free printable PDF pattern here.

Rustic Love Slouch Crochet Pattern

I had planned to make myself a new hat, but about halfway through, I couldn't decide if this should be MY hat or for my daughter. She is 7 now, and we can share hats! It seems that most children's hat sizes fit me and most small adult hat sizes fit her.  She is growing up so fast, it's not even fair!!! After taking the photo, she told me she wants to keep that hat for wearing to school… maybe next winter I will be able to take over and start wearing it myself. 😉

Need help with any of your crochet skills to make this pattern? Perhaps it’s changing colors, the magic ring, making pom poms or something else? I’ve put together a class designed to help you.  My Crochet & Knit Essential Skills class has 72 videos classes to help with any and every crochet (or knit) technique. What’s even better, I am giving you FREE access to watch these videos for 2 days! Register here now to gain instant access.

My goal was to use only one skein of Super Saver Stripes – Latte Stripes, but to make this hat have the perfect slight slouch to it and a large full pom pom, I had to bust out a second skein. I didn't even use half of the second, leaving you enough yarn to make fingerless gloves or an ear warmer set if you're looking to stay extra cozy!

Rustic Love Slouch - Free Crochet Pattern - Stitch11

Rustic Love Slouch Crochet Pattern

Skill Level: Easy 

Materials: 

• Hook: 

– US Size H/8 (5 mm) crochet hook or size needed to obtain gauge 

• Yarn: 320 yds worsted weight yarn 

• Notions: 

– Scissors 

– Yarn needle 

Size: 

• Hat circumference: 20 inches  

• To fit head circumference: 20-22 inches 

Size/Gauge:  

13 dc x 7 rows = 4 inches

Special Stitches: 

• 3 half double crochet popcorn 

(3-hdc-pc): 3 hdc in indicated st or sp, remove working loop from hook, insert hook into first hdc made and pull working loop through.  

• 5 double crochet popcorn 

(5-dc-pc): 5 dc in indicated st or sp, remove working loop from hook, insert hook into first dc made and pull working loop through. 

Get the ad-free printable PDF pattern here 

ABBREVIATIONSDESCRIPTION
chChain
dcDouble crochet
fpscFront post single crochet
scSingle crochet
skSkip
sl stSlip stitch
spSpace
st(s)Stitch(es)

Pattern

Join rnds where indicated with a sl st in the first st of the rnd. 

Ch 66, being careful not to twist, sl st in first ch to form a circle.  

Rnd 1: Ch 1, sc in each ch around, join. (66 sc) 

Rnds 2-4: Ch 1, sc in each st around, join.  

Rnd 5: Ch 1, (3-hdc-pc, ch 2, 3 hdc-pc) in first st, sk next st, [(3-hdc-pc, ch 2, 3 hdc-pc) in next st, sk  next st] around, join, sl st in first ch-2 sp. (66 3-hdc-pc, 33 ch-2 sps) 

Rnd 6: Ch 2, 5-dc-pc in same sp, ch 1, sk next 2 sts, [5-dc-pc in next st, ch 1, sk next 2 sts] around,  join, sl st in first ch-1 sp. (33 5-dc-pc, 33 ch-1 sps) 

Rnd 7: Ch 1, 2 sc in same ch-1 sp, sk next st, [2 sc in next ch-1 sp, sk next st] around, join. (66 sc)

Rnds 8-25: Repeat rnds 2-7 three more times.  

Rnds 26-29: Ch 1, sc in each st around, join. (66 sc) 

Rnd 30: Ch 1, fpsc around each st around, join. (66 fpsc)

With your starting end, weave back and forth between each stitch from round 1. Close the hole as much as possible. You will still have an opening about the size of a dime.

Make your Secure Pom Pom. Attach it over the opening. Secure it well with your yarn needle and it will cover the hole.

Fasten off.  

Weave in all ends. 

Get the ad-free printable PDF pattern here 

Did you like this pattern? Check out more of my fun patterns below:

  • Sweetheart Boot Cuffs Crochet Pattern
  • Lemon Peel Fingerless Gloves Crochet Pattern
  • Beanie Hat Crochet Pattern
  • Hanging Storage Baskets Crochet Pattern
This Rustic Love Slouch Hat crochet pattern is perfect the cold weather to keep head and ears warm. The popcorn stitches around and in several rows, adds a dimension and interest to an otherwise simple slouchy hat. #crochet #crochetpattern #crochethat #crochetlove #crochetaddict #ilovecrochet

Filed Under: Free Patterns, Girls, Hats Tagged With: crochet, crochet pattern, hat, hat crochet pattern, hat pattern, pattern, slouch, slouch hat, slouchie

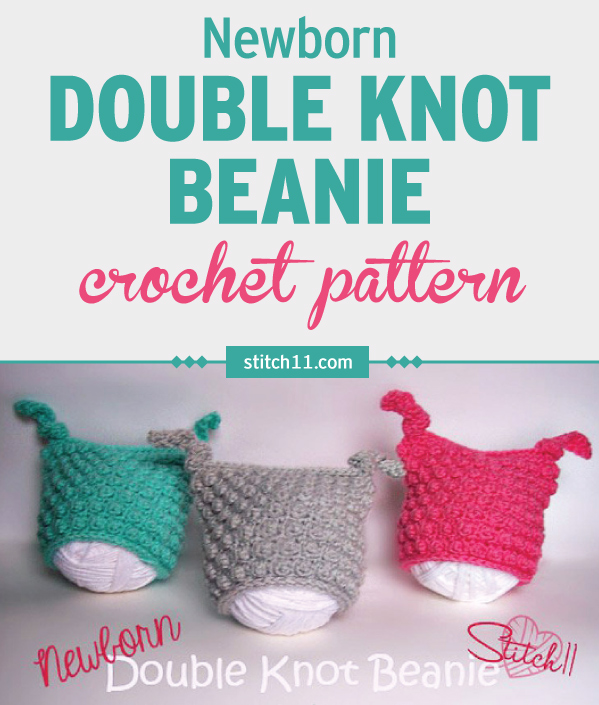
Newborn – Double Knot Beanie Crochet Pattern

December 10, 2017 By stitch11 16 Comments

Awww… we're sure your little one will be the most adorable wherever they are with this hat! This soft and snug head accessory doesn't take that much time to make so you can make multiple colors then mix and match with their onesies! If you'd like to know how it's made, scroll along for the pattern or get the ad-free printable PDF pattern here.

This Newborn Double Knot Beanie crochet pattern is an easy pattern making use of the popcorn stitch to add the bumps. It's a cool looking hat perfect for newborns to keep their heads warm. #crochet #crochethat #crochetbeanie #crochetaddict #crochetlove #crochetpattern #crocheteveryday #crochetinspiration #crochetgoodness #crochettherapy #crochetallthethings

Double Knot Beanie Crochet Pattern

I have exciting news! As many of you know from my very personal post, Gods Timing, my husband and I have struggled with fertility. To my little family's surprise, WE ARE EXPECTING!!! My 6-year-old daughter is beyond thrilled. My 15-year-old stepson is a little… eh, it's another girl… He might be feeling a bit outnumbered 😉 but we could not be happier!!

What does this mean for Stitch11?  Well, when I first taught myself crochet in 2012, my daughter was already a 1 year old. So… I've always kind of struggled with the Newborn/Baby themed patterns. Not anymore! 😉

For my first crochet hat designed with my baby girl in mind, I wanted to make a double knot beanie.  I want a newborn size, but keep in mind the size my older daughter was when she was born. I wanted to make sure this hat will easily stretch to fit a newborn with that not so little head.

If you enjoy crocheting toys for the little people in your life, check out these incredibly cute stuffies in the Crochet Anything with Hexagons class.

Double Knot Beanie Crochet Pattern

Beanie measures 6.5 inches wide – for 13″ circumference while allowing stretching and growing room.
Beanie measures 5.25 inches tall.

Supplies 
Red Heart Super Saver – Medium Weight
H – 5 mm crochet hook
Yarn needle for weaving in ends

Stitches
CH – Chain
SC – Single Crochet
Slip Stitch
DC – Double Crochet
3 HDC Popcorn Stitch
FPSC – Front Post Single Crochet

How to crochet the 3 HDC Popcorn Stitch
-Work 3 half double crochet (hdc) stitches in the same stitch.
-Drop the loop from your hook.
-Insert your hook from front to back under the top 2 loops of the first half double crochet of the group.
-Grab the dropped loop with your hook and pull it through the stitch.

*Looking for more great crochet stitch to try in other projects. Click here to see the Ultimate Crochet Stitch Library.

Get the ad-free printable PDF pattern here.

To start this beanie, we will make the CH for the top of the hat and the knots portion first.

Step 1: CH 46. Join to first CH.


Step 2: CH 14. Turn. Skip 1 CH. SC into next 13 CH.


Step 3: Slip stitch into next CH from starting CH.


Step 4: CH 1. Turn. SC back up, into each of the next 13 SC.


Step 5: CH 1. Turn. SC back down, into each of the next 13 SC.


Step 6: Slip stitch into next CH from starting CH.


Step 7: Folding the starting CH flat, Slip stitch together the two sides, through the top loops of next 20 CH.


Step 8: Repeat steps 2-7.

Working in the bottom loops of starting CH, you will now work in the round. Round 1, in my opinion, maybe the hardest round of the pattern, only because you have to identify the bottom loops of the starting CH. Just remember they are on the opposite side as the slip stitch you joined the CH together with. Trust yourself, you got this!! 

Round 1: Slip stitch into the 1st (nearest) bottom loop of starting CH.  CH 1. SC into same loop and into each of the next 45 loops. Join to first SC. (46 SC)


Round 2: CH 1. SC into each stitch around. Join to first SC. (46 SC)
Round 3: CH 1. HDC into first SC. Popcorn Stitch into next SC. *HDC into next SC. Popcorn Stitch into next SC. Repeat from * around. Join to first HDC. (46 stitches)
Rounds 4-17: Repeat rounds 2 and 3 seven more times.
Round 18: CH 1. SC into each stitch around. Join to first SC. (46 SC)
Round 19: CH 1. FPSC around each SC. Join to first FPSC. (46 FPSC)
Finish off and weave in your ends.
Tie a knot on both sides of the top of the beanie. 

Get the ad-free printable PDF pattern here.

If you love this hat, why not check out more of my patterns for little ones:

  • Child Size Fox Hat
  • Crochet Baby Duck
  • Double The Fun – Double The Flop Hat
  • Huggy Bunny

Filed Under: Free Patterns, Girls, Hats, Newborn Tagged With: baby hat, baby hat pattern, crochet, crochet baby hat, crochet beanie, crochet pattern, hat crochet pattern

Jumping Retro Infinity Scarf

September 4, 2017 By stitch11 8 Comments

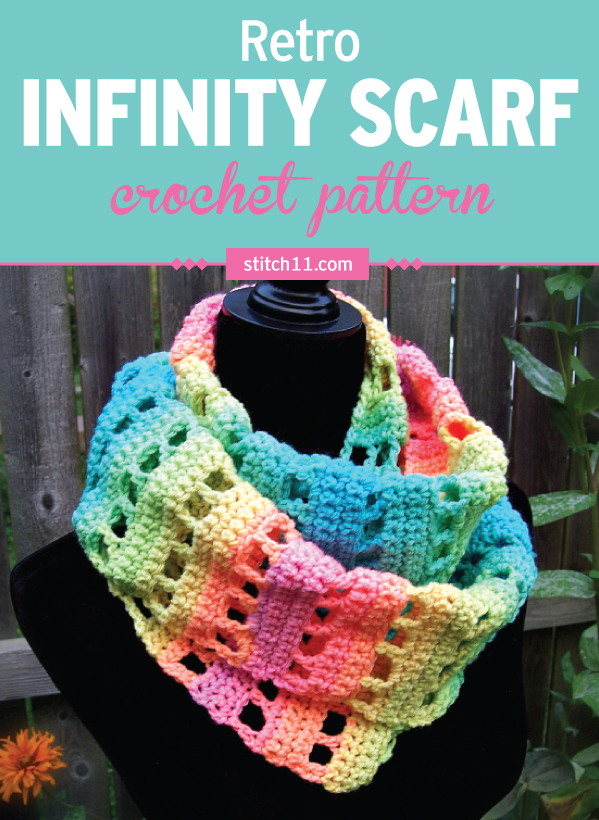
Here's an easy infinity scarf crochet pattern that's super simple to crochet. It’s a cozy, outfit-enhancing accessory that's perfect for stylish fashionistas who hate being cold. You’ll want one in every color for your own wardrobe or for gifts for your friends and family. #crochet #crochetlove #crochetlife #crochetaddict #crochetpattern #crochetscarf #ilovecrochet #crochetgifts #crochet365 #addictedtocrochet #yarnaddict #yarnloveI designed this fun and colorful infinity scarf with the basic crochet stitches: chain, single crochet and double crochet; so even the beginner crocheter can hook this one up! You could easily change this infinity scarf into a cowl, by using only one skein. You could also change this into a normal scarf by using a total of two skeins.  The stitch pattern is so simple that after the first set of repeats, you can get lost on your Netflix binge and mindlessly crochet this entire free pattern!
Jumping Retro Infinity Scarf

Supplies
Red Heart Super Saver – Stripes – “Retro Stripe” – 1.5 skeins
J/10- 6.00 mm crochet hook
Yarn Needle

Stitches
CH – Chain
SC – Single Crochet
DC – Double Crochet

Row 1: CH 36. Turn. Skip 1 CH. SC in each of the next 35 CH.
Row 2-4: CH 1. Turn. SC into each of the 35 stitches.
Row 5: CH 2. Turn. DC into the first stitch *CH 2. Skip 2 stitches. DC into next stitch. Repeat from * across.
Row 6: CH 1. Turn. SC into the first stitch. *2 SC over CH space. SC into next SC. Repeat from * across.
Row 7-9: CH 1.  Turn. SC into each of the 35 stitches.
Repeat rows 5-9 30 times, or until you reach the desired length. 
With yarn needle, attach both ends together. 

Filed Under: Free Patterns, Scarfs Tagged With: crochet, crochet pattern, infinity scarf, infinity scarf pattern, pattern, scarf, scarf pattern

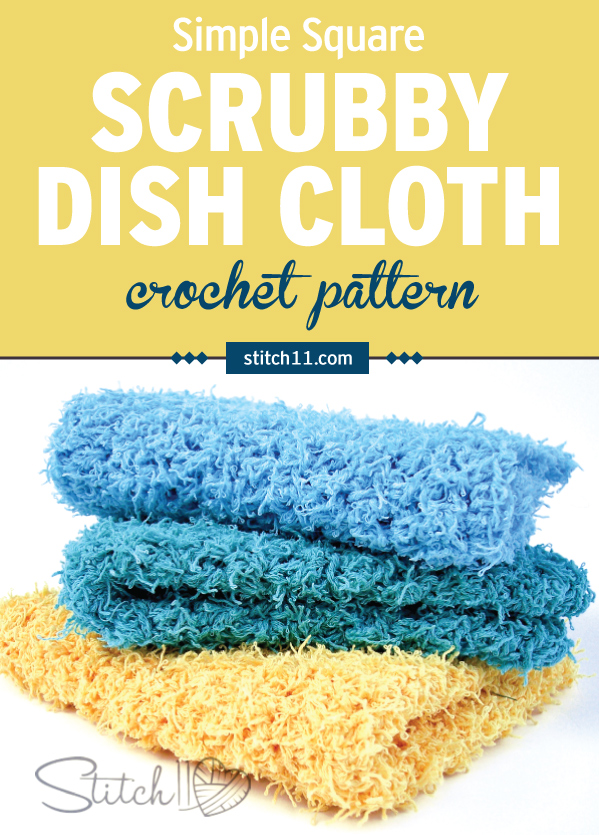
A Simple Square Scrubby Dishcloth

June 14, 2017 By stitch11 8 Comments

Throw away every last kitchen sponge and never waste a single penny on ineffective kitchen cleaning clothes. Learn how to make these easy square scrubby dish cloth. #crochet #crochetlove #crochetlife #crochetaddict #crochetpattern #crochetinspiration #ilovecrochet #crochetgifts #crochet365 #addictedtocrochet #yarnaddict #yarnloveThrow away every last kitchen sponge and never waste a single penny on ineffective kitchen cleaning clothes.
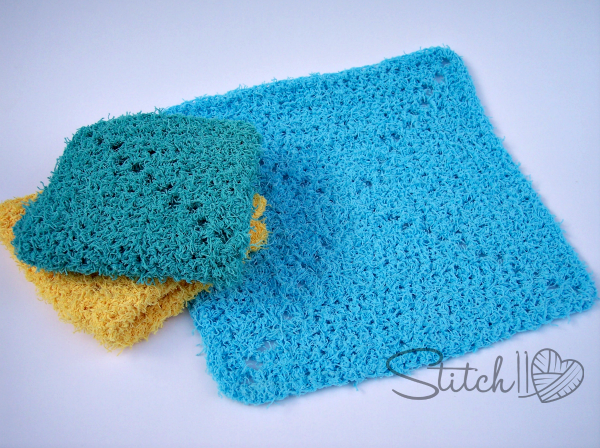
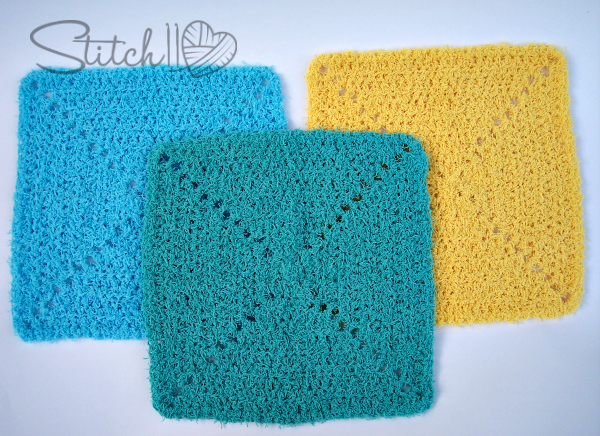
While deciding which way to run with this project, I came up with numerous really fun ideas. But, when it came to actually making them, I knew I wouldn't use them. I like my dishcloths simple. Simple is practical! My daughter, on the other hand, she prefers fun dishcloths! If you have a child in your life, be sure to check out the Dish Scrubby Paw Glove!

Supplies
Red Heart – Scrubby Cotton (Lemony, Fiji, Caribbean)
J/6 mm crochet hook
Yarn needle for weaving in ends.

Stitches
Magic Circle
CH – Chain
SC – Single Crochet
HDC – Half Double Crochet

Simple Scrubby Square Dish Cloth by Stitch11 - Free Crochet Pattern

Round 1: Magic Circle. CH 1. *3 HDC into Magic Circle. CH 2. Repeat from * 3 more times. Join to first HDC.  (12 HDC)
Round 2: CH 1, turn. *{HDC, CH 2, HDC}-all into next CH space. HDC into each of the next 3 HDC. Repeat from * 3 more times. Join to first HDC.  (20 HDC)
Round 3: CH 1, turn. *HDC into each of the next 5 stitches. {HDC, CH 2, HDC}-all into next CH space. Repeat from * 3 more times. Join to first HDC. (28 HDC)
Round 4: CH 1, turn. *{HDC, CH 2, HDC}-all into next CH space. HDC into each of the next 7 HDC. Repeat from * 3 more times. Join to first HDC.  (36 HDC)
Round 5: CH 1, turn. *HDC into each of the next 9 stitches. {HDC, CH 2, HDC}-all into next CH space. Repeat from * 3 more times. Join to first HDC. (44 HDC)
Round 6: CH 1, turn. *{HDC, CH 2, HDC}-all into next CH space. HDC into each of the next 11 HDC. Repeat from * 3 more times. Join to first HDC.  (52 HDC)
Round 7: CH 1, turn. *HDC into each of the next 13 stitches. {HDC, CH 2, HDC}-all into next CH space. Repeat from * 3 more times. Join to first HDC. (60 HDC)
Round 8: CH 1, turn. *{HDC, CH 2, HDC}-all into next CH space. HDC into each of the next 15 HDC. Repeat from * 3 more times. Join to first HDC.  (68 HDC)
Round 9: CH 1, turn. *HDC into each of the next 17 stitches. {HDC, CH 2, HDC}-all into next CH space. Repeat from * 3 more times. Join to first HDC. (76 HDC)
Round 10: CH 1, turn. *{HDC, CH 2, HDC}-all into next CH space. HDC into each of the next 19 HDC. Repeat from * 3 more times. Join to first HDC.  (84 HDC)
Round 11: CH 1, turn. *HDC into each of the next 21 stitches. {HDC, CH 2, HDC}-all into next CH space. Repeat from * 3 more times. Join to first HDC. (92 HDC)
Round 12: CH 1, turn. *{HDC, CH 2, HDC}-all into next CH space. HDC into each of the next 23 HDC. Repeat from * 3 more times. Join to first HDC.  (100 HDC)
Round 13: CH 1, turn. *SC into each of the next 31 HDC.  2 SC into CH space. Repeat from * 3 more times. Join to first SC.  (112 SC)
Finish off and weave in your ends.

Simple Scrubby Square Dish Cloth by Stitch11 - Free Crochet Pattern

Filed Under: Free Patterns, Household Tagged With: cloth, crochet cloth pattern, crochet dish cloth, crochet pattern, dish cloth, dishcloth, free pattern, pattern

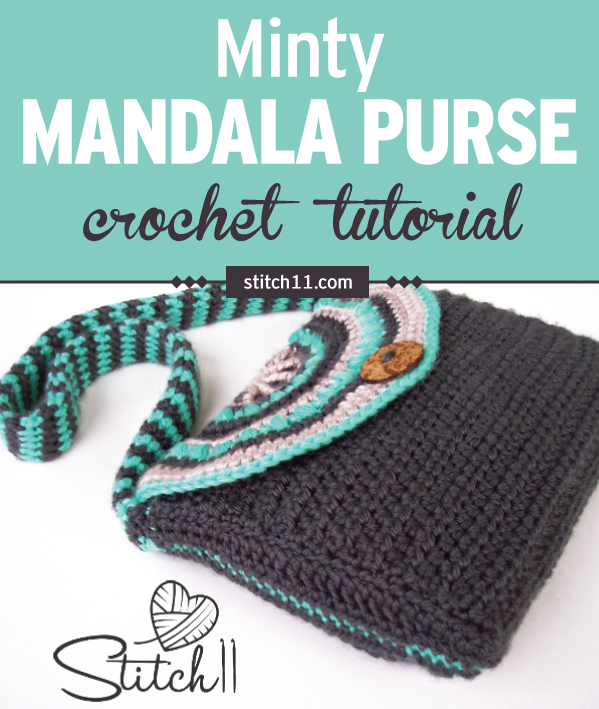
Minty Mandala Purse

January 26, 2017 By stitch11 17 Comments

Minty Mandala Purse doesn't only feature a mesmerizing pattern, the colors are absolutely gorgeous, too! The pattern uses a variety of stitches that can help you polish up on the basics. Try the free pattern below or get the ad-free printable PDF pattern here.

Check out this fun Bohemian style mandala purse crochet pattern. You'll never need to buy a purse or bag ever again. it would be a perfect gift for someone you love because it's beautiful and at the same time pretty easy to make. #crochet #crochetlove #crochetlife #crochetaddict #crochetpattern #crochetbag #ilovecrochet #crochetgifts #crochetpurse #addictedtocrochet #yarnaddict #yarnlove

I designed the Minty Mandala Purse for me! As much as I love to crochet projects and patterns, I rarely make anything for myself.

My Fat Bottom Bag has been through a lot, and needed to be replaced.  I wanted something with a fun Bohemian style. Enjoy your new free crochet pattern!

You know what else I love about this pattern? Most of the pattern is made using just a simple rectangle. There are so many crochet patterns you can make with just rectangles. I show you how in my Crocheting Anything with Rectangles course. Check it out here.

Minty Mandala Purse Crochet Pattern

Skill Level: Intermediate 

Materials: 

• Hook: 

– US Size H/8 (5 mm) crochet hook or  size needed to obtain gauge 

• Yarn: Bulky weight yarn 

– 125 yds beige (A) 

– 250 yds dark grey (B) 

– 125 yds green (C) 

• Notions: 

– Scissors 

– Yarn needle 

– 1-inch – 1.5-inch button 

Size: 

8 x 11 inches 

Gauge:  

16 dc x 7 rnds = 4 inches 

Get the ad-free printable PDF pattern here

ABBREVIATIONSDESCRIPTION
bloBack loop only
chChain
dcDouble crochet
fptrFront post treble crochet
hdcHalf double crochet
rndRound
scSingle crochet
skSkip
sl stSlip stitch
spSpace
st(s)Stitch(es)
yoYarn over

Special Stitch:  

Puff Stitch (puff): [Yo, insert hook in indicated st or sp, pull up a loop] 

3 times, yo and pull through all 7 loops on hook, ch 1 to close.  

Pattern

FLAP: 

With A, make a magic circle. 

Row 1 (RS): Ch 1, 5 hdc in magic circle, close magic circle. (5 dc) 

Row 2: Ch 1, turn, 2 sc in first st, sc in next st, 2 sc in next st, sc in next st, 2 sc in next st. (8 sc) Change to B 

Row 3: Ch 2, turn, dc in first st, 2 dc in next st, [dc in next st, 2 dc in next st] across. (12 sts) Change to A 

Do NOT skip any sts behind the fptrs in row 4. The fptrs are extra sts and you will still work into  every st from row 3.  

Row 4: Ch 1, turn, sc in each of first 2 sts, fptr around 2nd st from row 1, sc in next 2 sts, fptr around  same st as previous fptr, sc in next 2 sts, [fptr around next st from row 1, sc in next 2 sts] twice, fptr  around same st as previous fptr, sc in last 2 sts. (12 sc, 5 fptr) 

Change to B 

Row 5: Ch 1, turn, sc in each st across. (17 sts) 

Change to C 

Row 6: Ch 1, turn, hdc in first st, [puff in next st, hdc in next st] across. (9 hdc, 8 puffs) Change to B 

Row 7: Ch 1, turn, hdc in first st, [2 hdc in next puff, hdc in next st] across. (25 hdc)

Row 8: Ch 1, turn, 2 hdc in first st, hdc in each of next 4 sts, [2 hdc in next st, hdc in each of next 4  sts] across. (30 sts) 

Change to A 

Row 9: Ch 1, turn, 2 hdc in first st, hdc in each of next 5 sts, [2 hdc in next st, hdc in each of next 5  sts] across. (35 sts) 

Change to C 

Get the ad-free printable PDF pattern here

Row 10: Ch 1, turn, hdc in first st, [puff in next st, hdc in next st] across. (18 hdc, 17 puffs) Change to B 

Row 11: Ch 1, turn, hdc in first st, [2 hdc in next puff, hdc in next st] across. (52 hdc) Change to A 

Row 12: Ch 1, turn, hdc in each of first 24 sts, ch 4, sk next 4 sts, hdc in each of last 24 sts. (48 hdc,  1 ch-4 sp) 

Row 13: Ch 1, turn, hdc in each of first 12 sts, 2 hdc in next st, hdc in each of next 5 sts, 2 hdc in  next st, hdc in each of next 5 sts, 5 hdc in ch-4 sp, [hdc in each of next 5 sts, 2 hdc in next st]  twice, hdc in each of last 12 sts. (57 sts) 

Change to C 

Row 14: Ch 1, turn, hdc in each st across.  

Fasten off. Weave in all ends. 

BODY: 

With B, ch 31.  

Row 1 (RS): Hdc in 2nd ch from hook and in each ch across. (30 hdc) 

Rows 2-25: Ch 1, turn, hdc in each st across.  

Row 26: Ch 1, turn, sc in blo of each st across. (30 sc) 

Rows 27-29: Ch 1, turn, sc in each st across.  

Row 30: Ch 1, turn, hdc in blo of each st across. (30 hdc) 

Rows 31-54: Ch 1, turn, hdc in each st across.  

Edging rnd: Ch 1, turn, 2 sc in first st, sc in each st across to last st, 2 sc in last st, working in sides  of rows, sc in each row across, working in bottom of foundation ch, 2 sc in first ch, sc in each ch  across to last ch, 2 sc in last ch, working in sides of rows, sc in each row across, join with sl st in  first st. (172 sc) 

Fasten off, leaving a long tail for sewing. 

SIDES (MAKE 2): 

With B, ch 27.  

Row 1 (RS): Sc in 2nd ch from hook, sc in each of next 6 chs, hdc in each of next 4 chs, dc in each  of next 10 chs, hdc in each of next 2 chs, sc in each of last 3 chs. (10 sc, 6 hdc, 10 dc)

Row 2: Ch 1, turn, sc in each of first 5 sts, hdc in each of next 14 sts, sc in each of last 7 sts. (12 sc,  14 hdc) 

Change to C 

Row 3: Ch 1, turn, sc in each st across. (26 sc). 

Change to B. 

Row 4: Repeat row 2.  

Row 5: Ch 1, turn, sc in each of first 7 sts, hdc in each of next 4 sts, dc in each of next 10 sts, hdc in  each of next 2 sts, sc in each of last 3 sts. (10 sc, 6 hdc, 10 dc) 

Fasten off, leaving a long tail for sewing.  

STRAP: 

With B, ch 10, being careful not to twist the ch, join with a sl st to first ch to make a circle.  Strap is worked in spiral rnds, do not join rnds, do not ch to start rnds.  

Rnd 1: Hdc in each of first 9 chs, remove loop of B from hook and secure with a stitch marker, join  C with sl st in last st, hdc with C in last st.  

Rnd 2: Hdc with C in each st of B until you reach the free loop of B, remove loop of C from hook  and secure with a stitch marker, remove marker from loop of B and place that loop on hook. 

Rnd 3: Hdc with B in each st of C until you reach the free loop of C, remove loop of B from hook  and secure with a stitch marker, remove marker from loop of C and place that loop on hook. Repeat rnds 2-3 until work measures 30 inches or desired length.  

Last rnd: Hdc with C in each of next 6 sts, sl st in next st, fasten off C. Remove marker from loop  of B and place that loop on hook, sl st in next st, fasten off B.  

Fasten off. 

ASSEMBLY: 

The blo stitches on the body create 2 fold lines. The area between these lines is the bottom of the  purse. 

With RS together, place one side piece along one side edge of the purse so that the winder end  aligns with the bottom. Sew together around side and bottom edges, using long tail. Repeat for  the other side piece.  

With RS together, align straight edge of flap with one of the top edges of the purse (this is now the back of the purse). Sew together using long tail.  

Sew one end of handle to top edge of each side piece.  

Weave in all ends.  

Turn bag right side out.  

Sew button to center front of purse. Insert button between dc stitches on flap to close.

Did you enjoy making this sweet purse?

Get the ad-free printable PDF pattern here

If you're looking for more great patterns, check out more of my posts below:

  • Primrose Stitch Cowl Crochet Pattern
  • Lemon Peel Fingerless Gloves Crochet Pattern
  • Pom Pom Cushion Crochet Pattern
  • Cozy Fall Headband Crochet Pattern

Filed Under: Bags, Free Patterns Tagged With: bag, crochet pattern, crochet purse pattern, pattern, purse, purse pattern

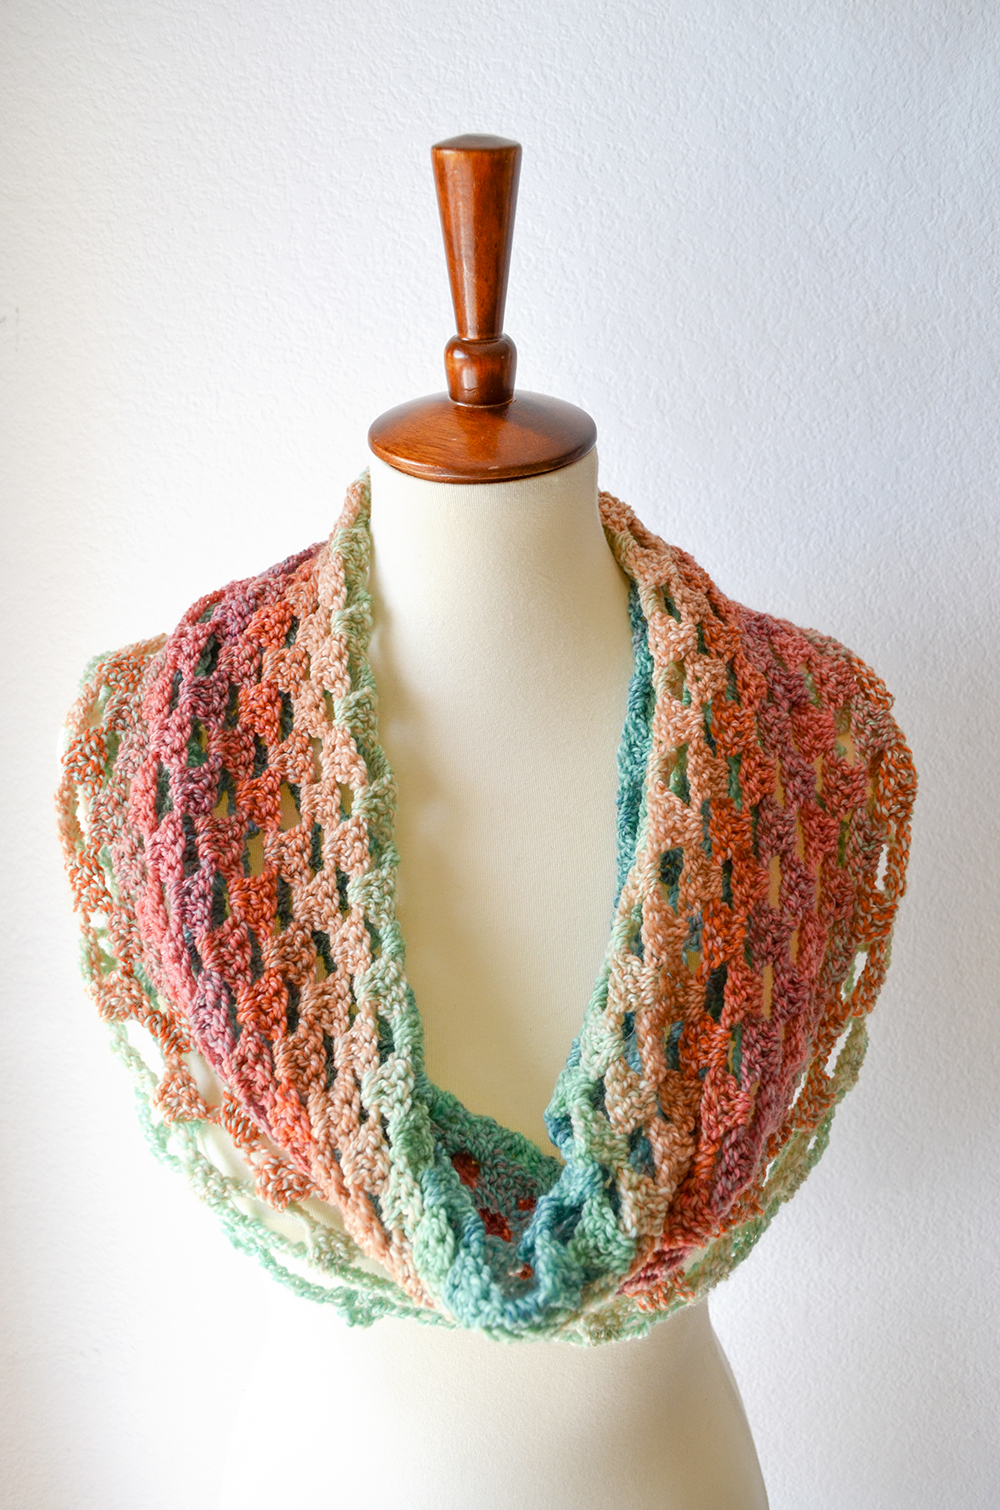
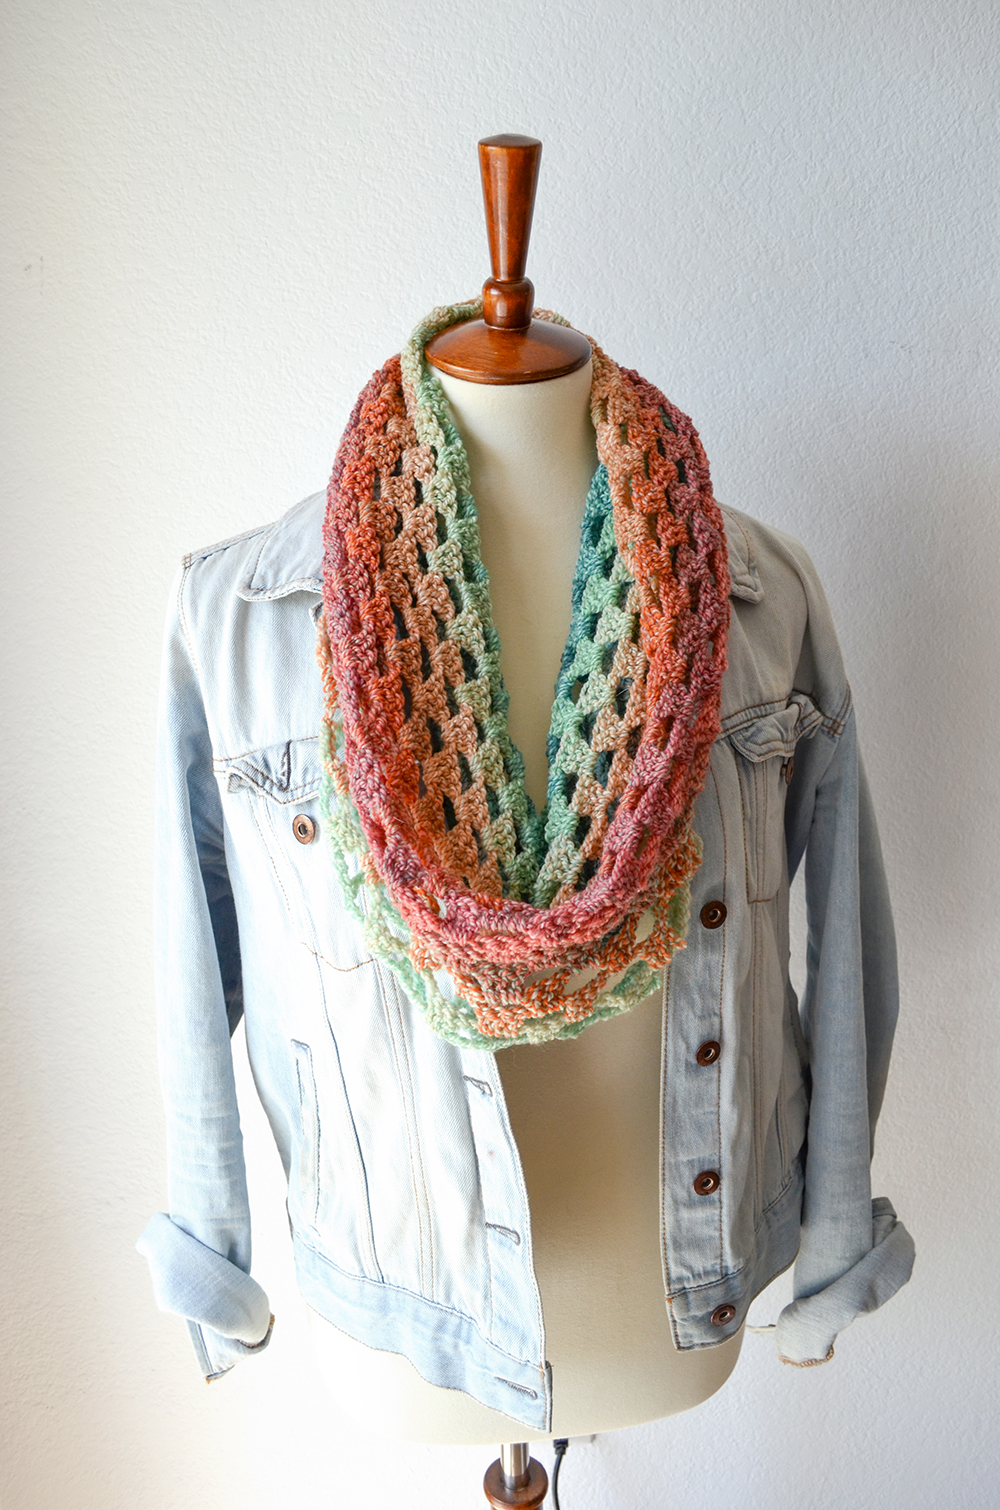
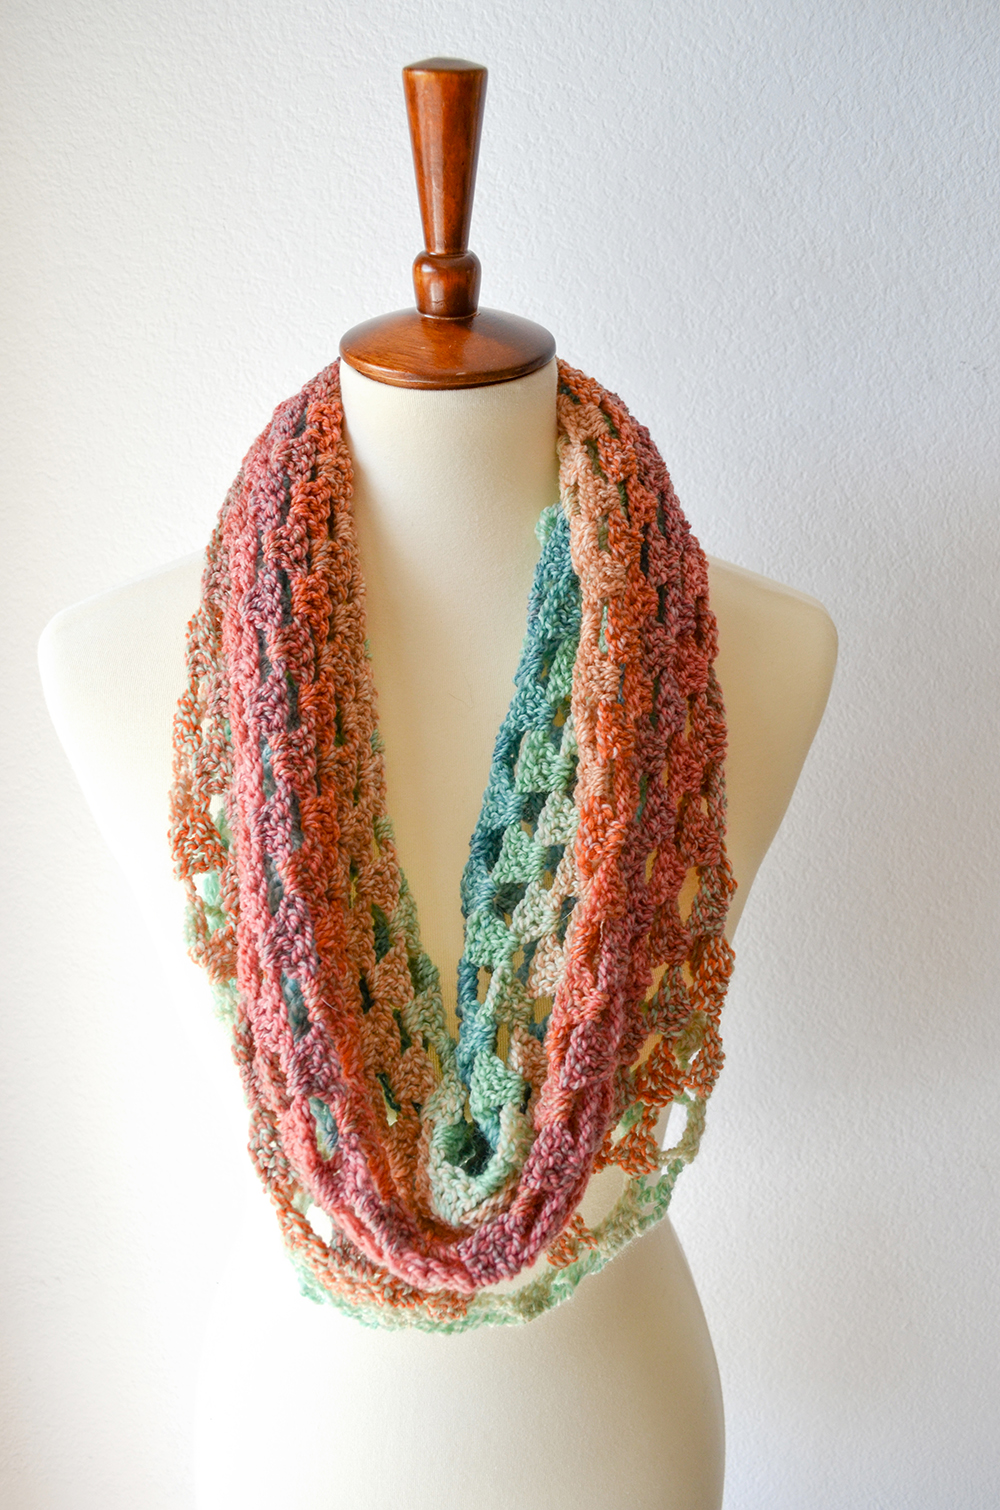
Scarf of Personal Growth – Crochet Scarf Pattern

November 17, 2016 By stitch11 21 Comments

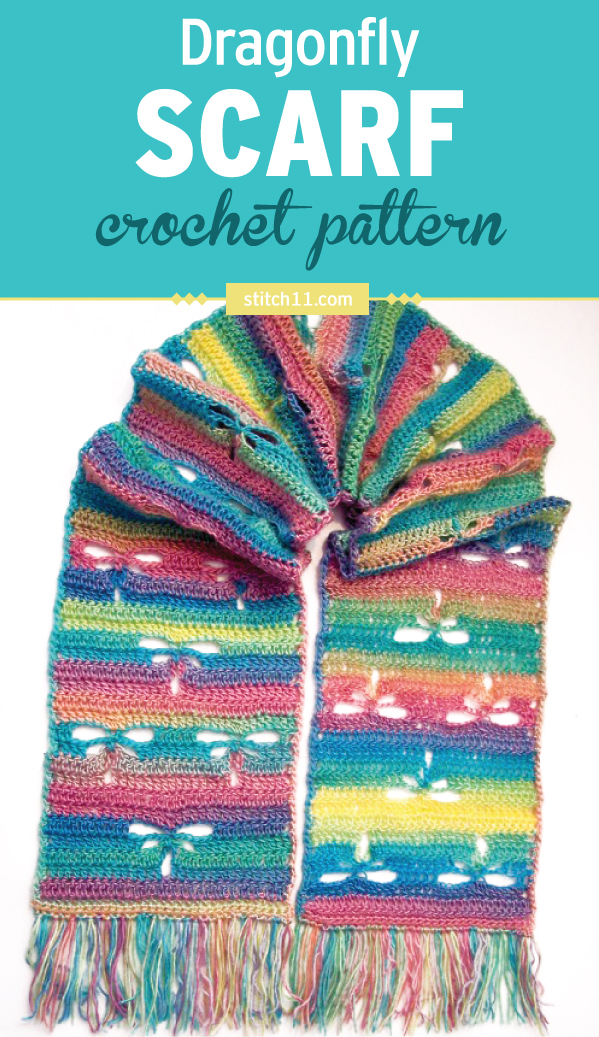
This adorable dragonfly crochet scarf pattern is a fun and easy crochet pattern. This scarf makes a perfect accessory to any outfit. The open spaces in the scarf represent change and reflection. #crochet #crochetlove #crochetlife #crochetaddict #crochetpattern #crochetinspiration #ilovecrochet #crochetgifts #crochet365 #addictedtocrochet #yarnaddict #yarnlove #crochetscarf

The Scarf of Personal Growth reflects exactly what the name suggests. This free crochet pattern is designed for you or for you to gift to someone you know. The open spaces in the scarf represent change and reflection. What are they? They are what your eyes see. Whether it be a dragonfly, fairy, angel…it's all about personal perception.

Supplies 
2 balls of yarn (Red Heart Unforgettable – Candied used in photos)
K – 6.5 mm crochet hook
Yarn needle for weaving in your ends.

Stitches 
CH – Chain
SC – Single Crochet
DC – Double Crochet
3-DC-Cluster – 3 Double Crochet Cluster stitch

[Read more…]

Filed Under: Free Patterns, Scarfs Tagged With: crochet, crochet pattern, crochet scarf, crochet scarf pattern, dragonfly, pattern, scarf, scarf pattern

Free Crochet Cupcake Pattern

April 12, 2016 By stitch11 15 Comments

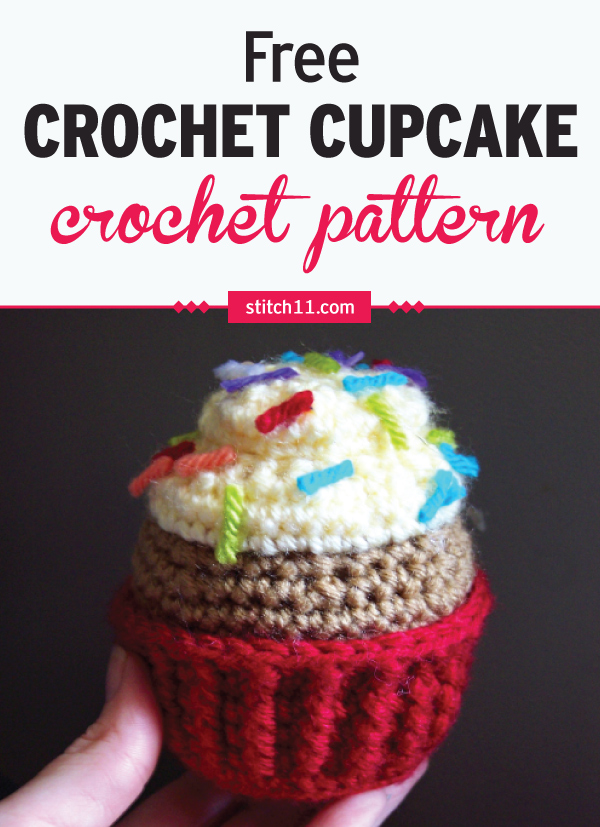
This Crochet Toy Cupcake can be a nice alternative to the usual plastic or rubber toys. It's soft and less of a danger to young kids who like to throw things around. #crochet #crochetlove #crochetlife #crochetaddict #crochetpattern #crochetinspiration #ilovecrochet #crochetgifts #crochet365 #addictedtocrochet #yarnaddict #yarnlove

Get the ad-free, printable PDF here

After hours of searching for the cupcake crochet pattern I had in mind, I decided I would have to design one myself! 

I wanted it to look like it was on the cupcake paper, with a little cake showing, a nice swirl of frosting, and, of course, lots of sprinkles!

This is such a fun project to make for play food for kids or to celebrate a birthday or other special occasion with a treat longer lasting than a real cupcake. 

And this is a perfect stash-busting crochet project because you can use any colors – and probably any weight – of yarn you have on hand to make this sweet surprise.

If you’re a lover of all things crochet toys, take a moment to learn how to make crochet toys from hexagons with the professionally filmed Crochet Anything with Hexagons video classes.

Cupcake Crochet Pattern

Skill Level: Easy 

Materials: 

• Hook: 

– US Size I/9 (5.5 mm) crochet hook or size  needed to obtain gauge 

• Yarn: Worsted weight yarn 

– 40 yds red (A) 

– 20 yds brown (B) 

– 20 yds white (C) 

– Assorted color scraps for sprinkles 

• Notions: 

– Scissors 

– Yarn needle 

– Fiber fill 

– Hot glue or craft glue for sprinkles 

– Marker 

Size: 

• Circumference: 4 inches 

• Height: 5 inches 

Gauge:  

12 sc x 15 rnds = 4 inches

bloBack loop only
chChain
floFront loop only
fpdcFront post double crochet
rndRound
scSingle crochet
sc2togSingle crochet next 2 sts together
sl stSlip stitch
st(s)Stitch(es)

Pattern 

WRAPPER: 

With A, make a magic circle.  

Begin working in continuous rnds – do not join unless indicated. Mark the first st of each rnd.  

Rnd 1: 8 sc in magic circle. (8 sc) 

Rnd 2: 2 sc in each st around. (16 sc) 

Rnd 3: [2 sc in next st, sc in next st] around. (24 sc) 

Rnd 4: [2 sc in next st, sc in each of next 2 sts] around. (32 sc) 

Rnd 5: [2 sc in next st, sc in each of next 3 sts] around. (40 sc) 

Partial rnd: Sc in each of next 4 sts, sl st in next st.  

Begin working in joined rnds. Join rnds where indicated with a sl st in first st of rnd.

Rnd 6: Ch 1, sc in blo of each st around, join.  

Rnds 7-10: Ch 1, fpdc around first st, sc in next st, [fpdc around next st, sc in next st] around, join.  (20 fpdc, 20 sc) 

Rnd 11: Ch 1, fpdc around first st, sc in flo of next st, [fpdc around next st, sc in flo of next st]  around, join. (20 fpdc, 20 sc) 

Fasten off. Remove any markers. Weave in all ends.  

CAKE: 

Join B with sl st in blo of any st on rnd 11.  

Begin working in continuous rnds – do not join unless indicated. Mark the first st of each rnd.  

Rnd 12: Sc in blo of each st around. (40 sc) 

Rnd 13: Sc in each st around. 

Rnd 14: [Sc2tog, sc in each of next 3 sts] around. (32 sts) 

Rnd 15: [Sc2tog, sc in each of next 2 sts] around. (24 sts) 

Partial rnd: Sc in each of next 2 sts, sl st in next st.  

Fasten off. Remove any markers. Weave in all ends.  

ICING: 

Join C with sl st in flo of any st on rnd 15.  

Continue working in continuous rnds – do not join unless indicated. Mark the first st of each rnd.  

Rnd 16: 2 sc in flo of each st around. (48 sc) 

Rnd 17: Sc in each st around. 

Rnd 18: Sc2tog around. (24 sts) 

Rnd 19: Sc2tog around. (12 sts) 

Rnd 20: 3 sc in each st around (36 sc) 

Rnd 21: Sc in each st around. 

Rnd 22: Sc2tog around. (18 sts) 

Rnd 23: Sc2tog around, join with sl st in first st. (9 sts) 

Fasten off leaving a long tail for sewing.  

Sew the tail through each stitch then pull tight to close the top of the icing.  

Weave in all ends.  

SPRINKLES: 

Cut scraps of yarn into 1/2 inch pieces. Glue to top of icing as desired. 

If you like crochet desserts, check out the Ice Cream pattern and Donut pattern too!

Filed Under: Free Patterns, Toys Tagged With: crochet cupcake, crochet pattern, cupcake, cupcake crochet pattern

The Perfect Rainbow Pet Net Hammock

July 30, 2015 By stitch11 24 Comments

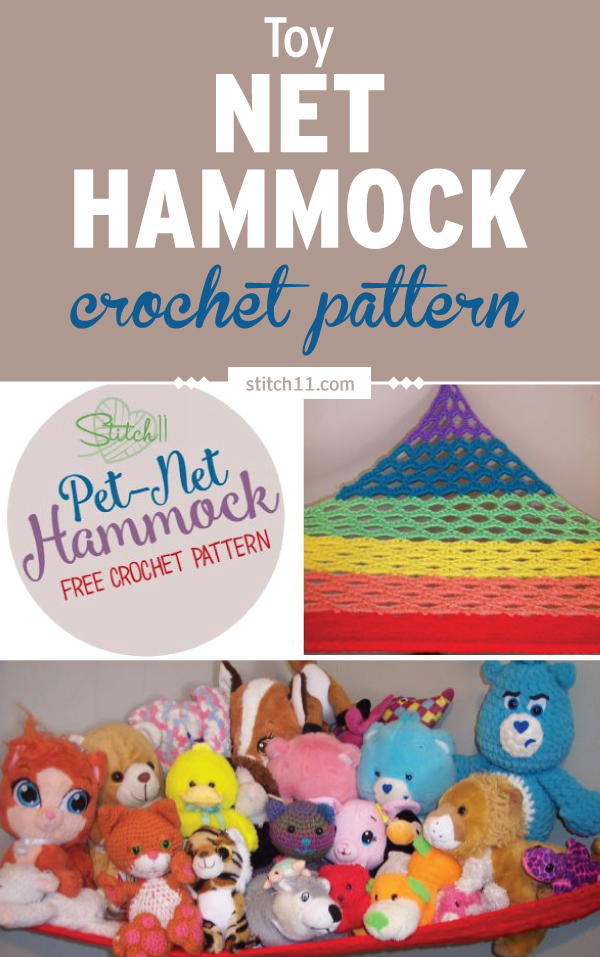
This pretty pattern isn't only lovely to look at. It also has a lot of other purposes, including keeping those messy toys off the floor. It's also one of the best ways to make use of those yarns you want to get rid off! See it come to life with the free pattern below or get the ad-free printable PDF pattern here.

This Toy Net Hammock crochet pattern is a cute hammock where you can place all the sweet stuffies. Instead of the stuffed toys hogging the space on your child's bed, shelves, or floor - you can rest them all on this pretty rainbow hammock! #crochet #crochetlove #crochetlife #crochetaddict #crochetpattern #crochetinspiration #ilovecrochet #crochetgifts #crochet365 #addictedtocrochet #yarnaddict #yarnlove

A few days ago, my daughter came to me and asked me to “please get rid of my creepy dolls.” She was quick to explain that she didn't need creepy dolls because she has so many stuffed animal babies.  Within twenty minutes she comes back to inform me…. she needs *another* crocheted toy net hammock.

I was quick to jump at this request because I desperately needed to update my previous crochet hammock. So really, this is *Take Three* of attempting the perfect hammock. I feel as if I finally did it! One that I am truly proud of designing and sharing with all of you…. for FREE! 🙂

The Perfect Rainbow Pet Net Hammock Crochet Pattern has now arrived.

Before we get to the pattern, if you enjoy crocheting things for the little people in your life, check out these incredibly cute stuffies in the Crochet Anything with Hexagons class.

[Read more…]

Filed Under: Boys, Free Patterns, Girls, Toys Tagged With: crochet pattern, hammock, pattern, toy hammock, toy hammock crochet pattern

Free Steering Wheel Cover Crochet Pattern

July 6, 2014 By stitch11 42 Comments

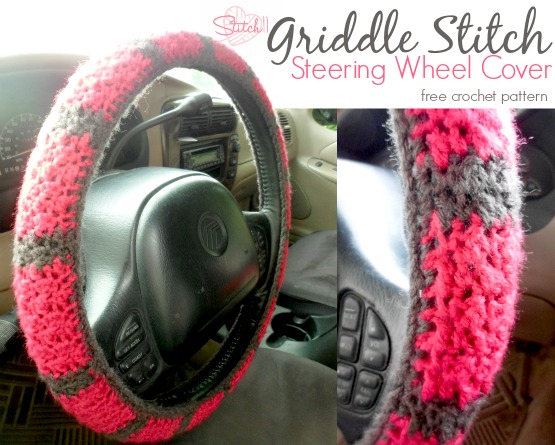
This Steering Wheel Cover crochet pattern will fit a wheel that's 47 inches around the outside with 4 inches in girth. You will need to adjust depending on the size of the steering wheel. #crochet #crochetlove #crochetlife #crochetaddict #crochetpattern #crochetinspiration #ilovecrochet #crochetgifts #crochet365 #addictedtocrochet #yarnaddict #yarnlove

If you follow my blog, you already know that I bought a new/used vehicle. I recently wrote out a free console cover crochet pattern.

Now it is time to cover the cut up steering wheel!
I did a quick search for free patterns but to my surprise, there really are not any to choose from. So here I am, with my yarn, hook, and the Moogly Griddle Stitch Tutorial pulled up. If you are not familiar with this stitch, go ahead and check it out before starting. (Yes, I write the posts as I crochet the item)  🙂

First thing is first, measure your steering wheel. I just took a piece of yarn and wrapped it around the outside of the wheel which measures out to be about 47 inches. Then measure how wide around the wheel is, mine is around 4 inches.

The trick to making your cover, is to make it so it has to stretch as big as you can stretch it to be the length you need. Don't worry, you will be able to get it onto the wheel easier than it seems. Your goal is to make it so it is stretched so tight, that it doesn't want to move once you put it on. I was intimidated by this idea.. but once I made it, I realize it is so much easier and more secure than I imagined beforehand.

So now that I know it is around 4 inches, I will make a band that stretches to be about 4 inches wide. And then I will crochet in length that the steering wheel is round.  I will share my pattern with you, just remember to make your own measurements just in case yours needs to be a few inches different than mine. Mine will fit to stretch into place.

Free Steering Wheel Cover Crochet Pattern

Supplies
Med/WW yarn (I used two colors of I Love This Yarn)
F/5-3.75 mm crochet hook
Yarn needle

Stitches
CH- Chain
SC- Single Crochet
DC- Double Crochet

Row 1: CH 12, skip 3 CH (counts as first DC) SC into next CH. **DC into next CH. SC into next CH. Repeat from ** across. (10)
Row 2-6: CH 3(Counts as first DC) SC into the next stitch. **DC into the next stitch. SC into the next stitch. Repeat from ** across.  (10)
Drop your original color of yarn.Do not finish off. Attach contrasting color.  You will pick up your original yarn after the next two rows.
Row 7-8: CH 3(Counts as first DC) SC into the next stitch. **DC into the next stitch. SC into the next stitch. Repeat from ** across.  (10)
Finish off. Pick up your original color yarn. Slip stitch up the side of the last two rows so that you are starting in the same place you finished off the contrasting yarn. 
Row 9-14: CH 3(Counts as first DC) SC into the next stitch. **DC into the next stitch. SC into the next stitch. Repeat from ** across.  (10)
Drop your original color of yarn.Do not finish off. Attach contrasting color.  You will pick up your original yarn after the next two rows.
Row 15-16: CH 3(Counts as first DC) SC into the next stitch. **DC into the next stitch. SC into the next stitch. Repeat from ** across.  (10) 
Finish off. Pick up your original color yarn. Slip stitch up the side of the last two rows so that you are starting in the same place you finished off the contrasting yarn.
Repeat rows 9-16 twelve more times.

Edging and Joining 
Step 1: CH 1. Turn and work up the side of the steering wheel cover. 1 SC into the side of each SC and 1 SC into the side of each CH 3.
Step 2: CH 1, Turn and work back down this same side. SC into the first stitch. SC DEC. **SC into the next stitch. SC DEC. Repeat from ** across.
Step 3: Repeat steps 1-2 but on the other side of the steering wheel cover.
Step 4. Finish off leaving long tail for joining the ends. Join the ends and stretch around the steering wheel. It will be a good secure and snug fit.

Filed Under: Free Patterns, Household, Inspired Tagged With: crochet pattern, pattern, steering wheel, steering wheel crochet pattern, wheel

Huggy Bunny

March 12, 2014 By stitch11 75 Comments

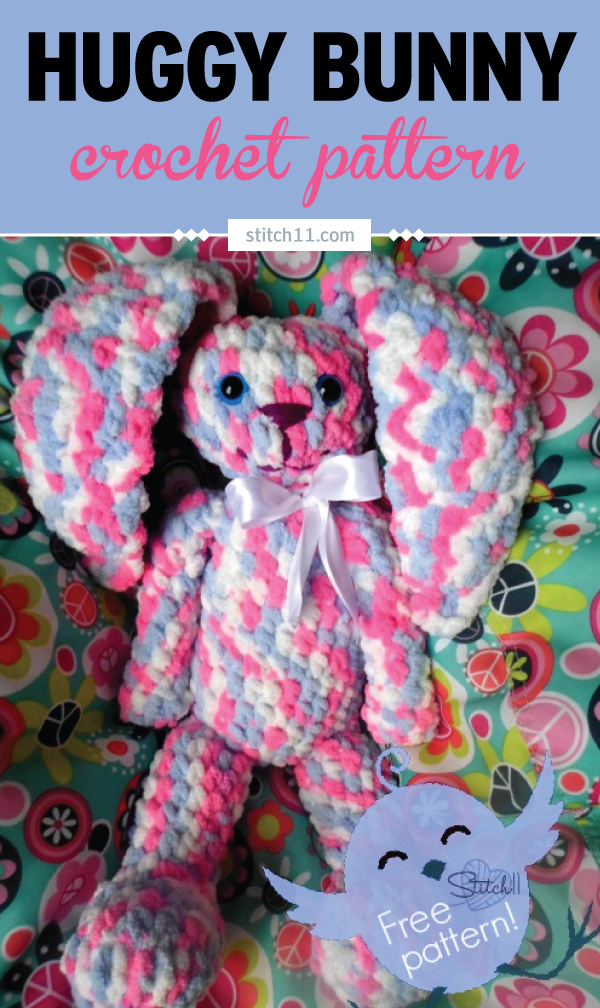
Huggy Bunny Crochet Pattern. She works up quick since she calls for Bernat Baby Blanket yarn. She measures 15 inches from the bottom of her feet to the top of her head. Extremely huggable! #crochet #crochetlove #crochetlife #crochetaddict #crochetpattern #crochetinspiration #crochetgoodness #ilovecrochet #crochetgifts #crochet365 #addictedtocrochet #yarnaddict #yarnlove

Little kids love snuggly stuffed animals, and this huggy bunny crochet pattern is a great option for kids who want something handmade and huggable.

Want an ad-free version of the pattern? You can download it here.

So here she is, Mrs. Huggy Bunny! She works up quickly since she calls for a super bulky yarn. She did use a little more yarn than I had expected or wanted to use, but she was worth it! And that makes for a great stash-busting project, too!

She measures 15 inches from the bottom of her feet to the top of her head. It’s such a cute and easy crochet project and a great gift for a kiddo in your life.

Speaking of the kiddos in your life, if you’re a lover of all things crochet toys, take a moment to learn how to crochet toys from hexagons with the professionally filmed Crochet Anything With Hexagons video classes.

[Read more…]

Filed Under: Free Patterns, Toys Tagged With: bunny, bunny crochet pattern, bunny pattern, crochet pattern, pattern, toy, toy crochet pattern

Extra Small Dog Sweater Crochet Pattern

January 5, 2014 By stitch11 82 Comments

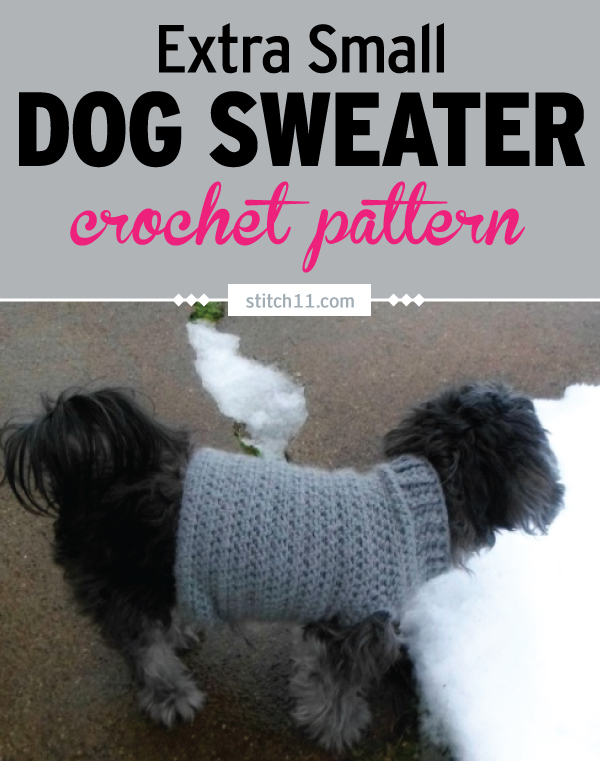
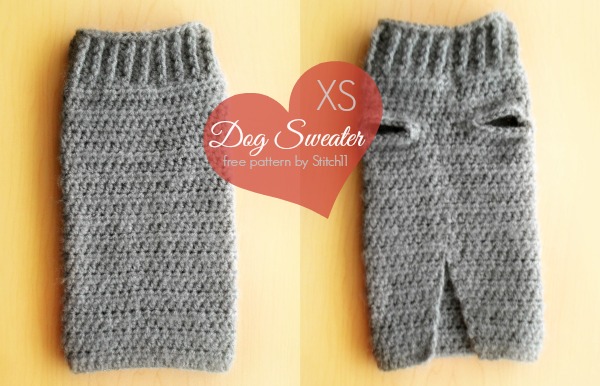
Extra Small Dog Sweater Crochet Pattern

XS Dog Sweater
Since the cold temperatures are on their way to Indiana, I thought it would be best to make my Avis a new sweater. I went to follow my old dog sweater pattern and was horrified from how poorly it was written. So last night I rewrote the pattern 🙂 Hoping this one will be a lot easier for everyone to follow.

Follow this link for the next size up!- Size Small Dog Sweater –

[Read more…]

Filed Under: Free Patterns Tagged With: crochet pattern, dog, dog sweater, dog sweater pattern, pattern for dog

Ella’s Request -Toddler Dress

September 13, 2013 By stitch11 74 Comments

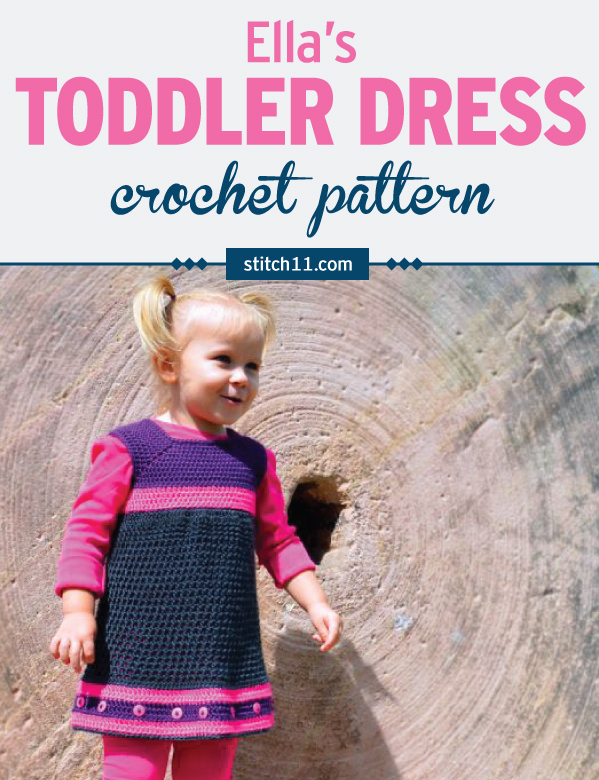
Are you looking for a spring or summer crochet pattern? Then this adorable toddler dress crochet pattern is for you. #crochet #kidscrochet #crochetaddict #crochetpattern #crochetdress #ilovecrochet #crochetgifts #crochet365 #addictedtocrochet #yarnaddict #yarnlove

Are you looking for a spring or summer crochet pattern? Then this adorable toddler dress crochet pattern is for you.

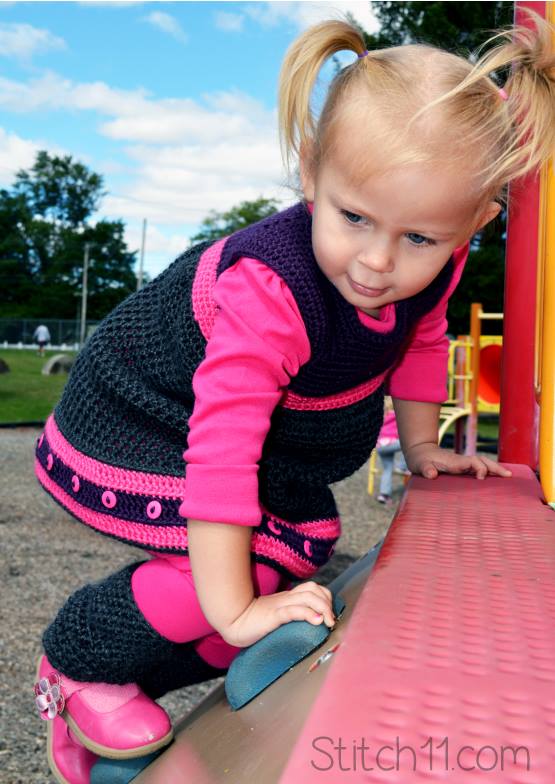
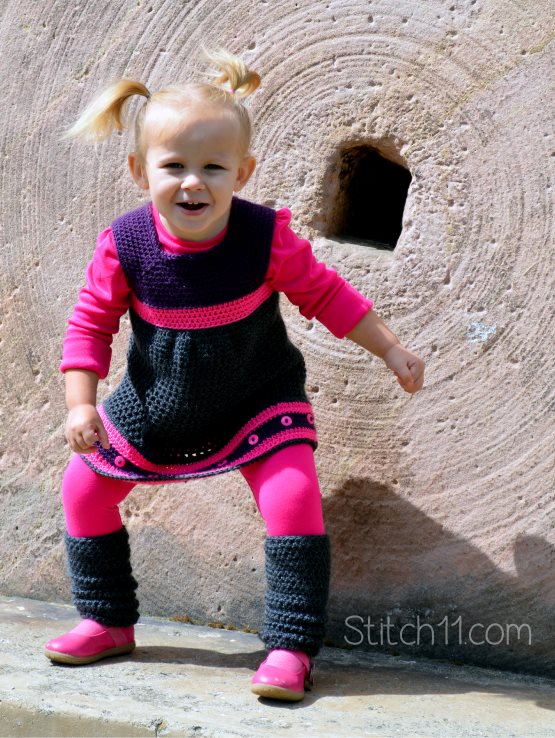
A few weeks ago I decided to venture out into designing a dress. When I told Ella I was going to make her a dress, she didn't waste any time to tell me the details she was expecting. She wanted the dress to have lots of pink buttons. While drawing up the dress ideas I had, she also told me she didn't want a long dress… she wanted it to be small. Which was really a great idea because she could move freely without worrying about the dress getting caught under her knees.

Ella and I are both thrilled with the outcome of this dress and I am very excited to share it with you for free! This dress fits toddler sizes from 2t-4t. To help you get an idea of how it will fit, my daughter is 2 years old and wears 3t and 4t clothes. Also, be sure to check out the free toddler leg warmer pattern!
Ella's Request - Toddler Dress

Ella's Request – Toddler Dress Crochet Pattern

Supplies
Caron Simply Soft Yarn – I used one skein of gray, half skein of pink. and a half skein of purple.
G/6-4.25 mm crochet hook
H/8- 5mm crochet hook
Yarn needle
Pack of 20 buttons (optional) -I bought these at Walmart for 88 cents

Stitches
Slip Stitch

CH – Chain
SC – Single Crochet
HDC – Half Double Crochet
FSC – Foundation Single Crochet

*Tip 1* you will want to take the time to learn the FSC if you do not already know it. Check out this fantastic tutorial by Moogly. Because of using this stitch, the neck of the dress will be able to stretch over all of those big headed toddlers like mine!

*Tip 2* your chains do not count as stitches.

Using G/6-4.25 mm crochet hook. (and I used purple yarn)…
Row 1: 68 Foundation Single Crochet. Join to first FSC. (68)
Row 2: CH 1, SC into the same stitch and each stitch around. Join to first SC. (68)
Row 3: CH 1, HDC in same stitch and next 16 stitches. CH 2, HDC in the same stitch. **HDC in next 17 stitches. CH 2, HDC in the same stitch. Repeat from ** two more times. Join to first HDC. (72)
Row 4: CH 1, HDC into same stitch and next 16 stitches. {HDC, CH 2, HDC} into chain space. **HDC into next 18 stitches, {HDC, CH 2, HDC} into CH space. Repeat from ** two more times. HDC into the last stitch. Join to first HDC. (80)
Row 5: CH 1, HDC into same stitch and next 17 stitches. {HDC, CH 2, HDC} into chain space. **HDC into next 20 stitches, {HDC, CH 2, HDC} into CH space. Repeat from ** two more times. HDC into last 2 stitches. Join to first HDC. (88)
Row 6: CH 1, HDC into same stitch and next 18 stitches. {HDC, CH 2, HDC} into chain space. **HDC into next 22 stitches, {HDC, CH 2, HDC} into CH space. Repeat from ** two more times. HDC into last 3 stitches. Join to first HDC. (96)
Row 7: CH 1, HDC into same stitch and next 19 stitches. {HDC, CH 2, HDC} into chain space. **HDC into next 24 stitches, {HDC, CH 2, HDC} into CH space. Repeat from ** two more times. HDC into last 4 stitches. Join to first HDC. (104)
Row 8: CH 1, HDC into same stitch and next 20 stitches. {HDC, CH 2, HDC} into chain space. **HDC into next 26 stitches, {HDC, CH 2, HDC} into CH space. Repeat from ** two more times. HDC into last 5 stitches. Join to first HDC. (112)
Row 9: CH 1, HDC into same stitch and next 21 stitches. {HDC, CH 2, HDC} into chain space. **HDC into next 28 stitches, {HDC, CH 2, HDC} into CH space. Repeat from ** two more times. HDC into last 6 stitches. Join to first HDC. (120)

Finish off and attach the same color into CH space.

Row 10: CH 1, 2 HDC into CH space. CH 11. 2 HDC into next CH space. HDC into next 30 stitches. 2 HDC into CH space. CH 11. 2 HDC into CH space. HDC into next 30 stitches. Join to first HDC. (68)
Row 11: CH 1, HDC into same stitch. HDC into each stitch and each CH around. Join to first HDC. (90)

Finish off and attach same color yarn into one of the stitches around the armhole.

Row 12: CH 1, SC into the same stitch and each stitch around the armhole (1 SC for each HDC, 2 SC into the side of the HDC and 1 SC for each CH (46)

Repeat Row 12 for another arm whole.

Finish off and weave in your ends.

Attach new color (I used pink) to bottom of the piece. -In the back loop only- Attach to the center under the armpit.

Row 13: In back loops only for this round. CH 1, 2 HDC into the same stitch. HDC in next 44 stitches. 2 HDC into next stitch. HDC in next 44 stitches. Join to first HDC. (92 HDC)
Row 14-16: CH 1, HDC in same stitch and each stitch around. Join to first HDC (92)
Finish off

Change color (I used gray) and attach yarn to the bottom of the stripe of row 16. -Attach into the center stitch under the armpit. IN BACK LOOP ONLY

Now using H/8- 5mm crochet hook

Row 17: Crochet in back loop only for this row. CH 1, SC  into same stitch and each stitch around. Join to top of first SC. (92)
Row 18: CH 1, HDC  in the same stitch and in next 9 stitches. *2 HDC into next stitch HDC into next stitch. repeat from * 12 more times. HDC into next 20 stitches. **2 HDC into next stitch HDC into next stitch. repeat from ** 12 more times. HDC into next 10 stitches. Join to first HDC.   (118)
Row 19: HDC in same stitch and next 9 stitches. *2 HDC into next stitch. HDC into next 2 stitches. Repeat from * 12 more times. HDC into next 20 stitches. **2 HDC into next stitch. HDC into next 2 stitches. Repeat from ** 12 more times.  HDC into next 10 stitches. Join to first HDC. (144)
Row 20: CH 1, SC in the same stitch. CH 1. Skip one stitch. * SC into next stitch. CH 1. Skip one stitch. Repeat from * around. Join to first SC. (72)
Row 21-22: CH 1, SC in same SC. CH 1. Skip CH. * SC in next SC, CH 1. Skip CH. Repeat from * around. Join to first SC. (72)
Row 23-43: CH 1, HDC into same stitch. CH 1. Skip CH. *HDC into next stitch. CH 1. Skip CH. Repeat from * around. Join to first HDC. (72)
Row 44: CH 1, HDC into the same stitch. HDC into each chain and each stitch around. Join to first HDC.  (144)

Finish off. Change colors (I changed mine to pink) Attaching to back loops only

*Tip* I actually counted and attached the yarn 11 stitches left of the seam… to help the seam stay on the side of the dress.

Row 45: Crochet into back loops for this row. CH 1, HDC into same stitch and each stitch around. Join to first HDC. (144)
Row 46: CH 1, HDC into same stitch and each stitch around. Join to first HDC. (144)

Finish off. Change colors (I changed mine to purple) Attaching to back loops only

Row 47: Crochet into back loops for this row. CH 1, HDC into same stitch and each stitch around. Join to first HDC. (144)
Row 48-49: CH 1, HDC into same stitch and each stitch around. Join to first HDC. (144)

Finish off. Change colors (I changed mine to pink) Attaching to back loops only

Row 50: Crochet into back loops for this row. CH 1, HDC into same stitch and each stitch around. Join to first HDC. (144)
Row 51: CH 1, HDC into same stitch and each stitch around. Join to first HDC. (144)

Finish off. Change colors (I changed to gray yarn) Attaching to back loops only.

Row 52: Crochet into back loops for this row. CH 1, SC into same stitch and each stitch around. .Join to first SC. (144)

Finish off and weave in your ends. This is where I attached my buttons. I attached them about 7 stitches apart. Counting 7 HDC between each button. I ended up having one extra button left from the pack of 20.

Crochet Toddler Dress

Filed Under: Free Patterns, Girls Tagged With: crochet, crochet pattern, dress, dress crochet pattern, toddler, toddler dress, tunic

Ninja Turtle Mask

August 22, 2013 By stitch11 67 Comments

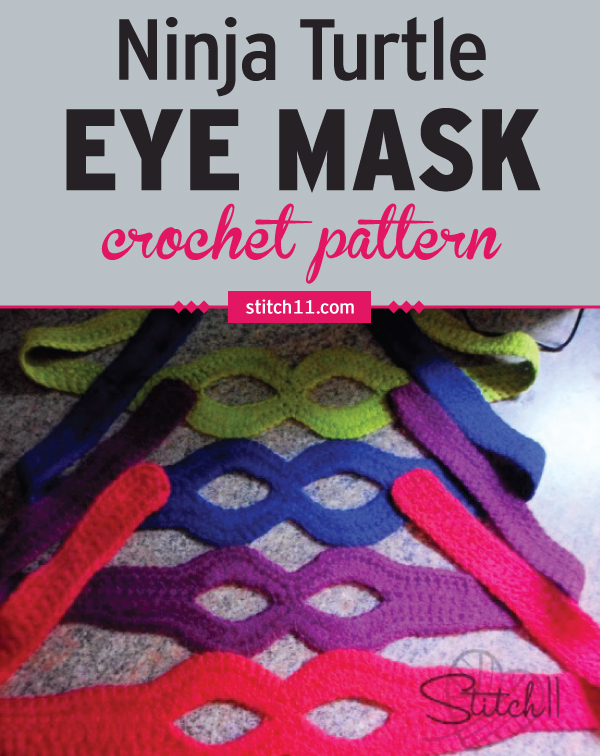
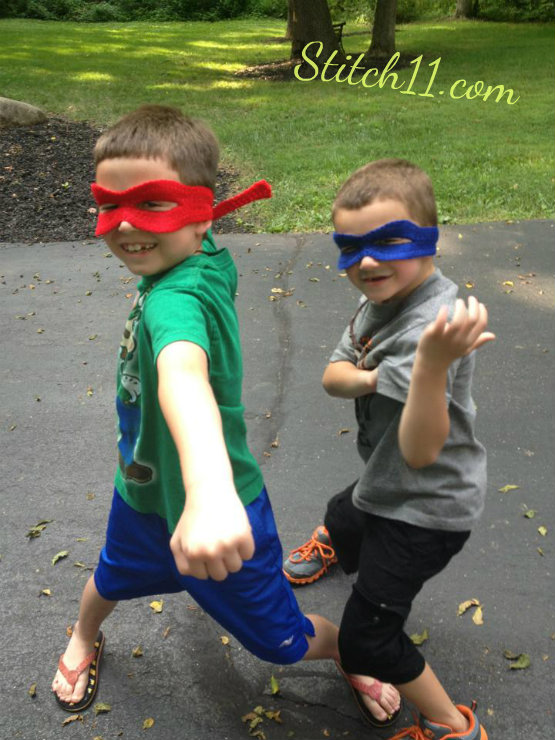
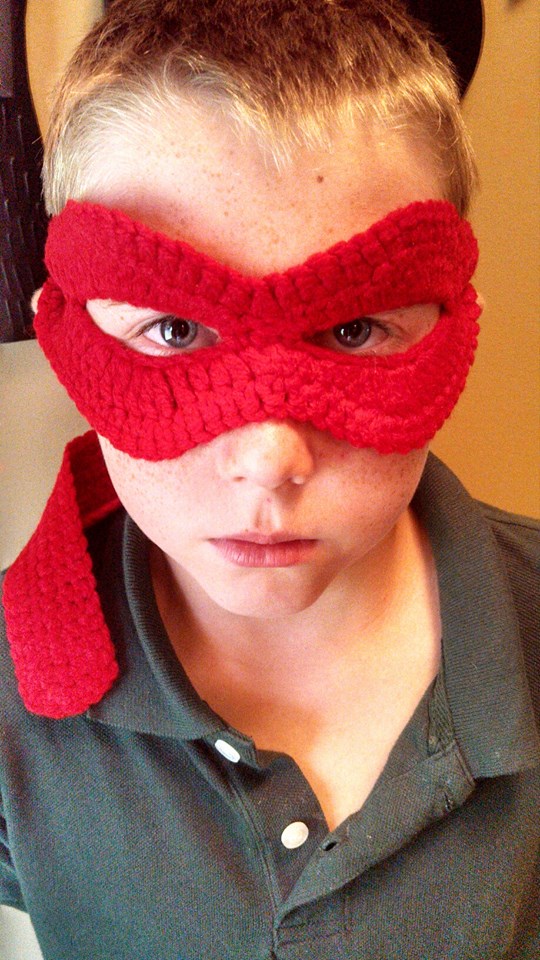
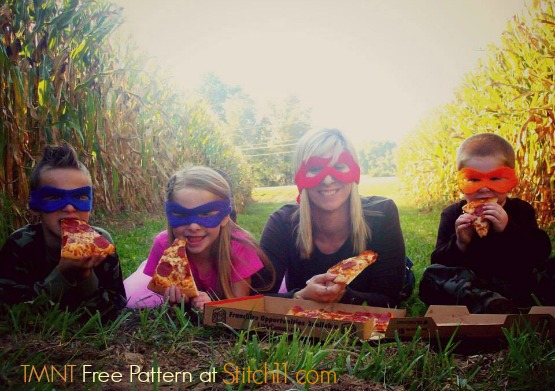
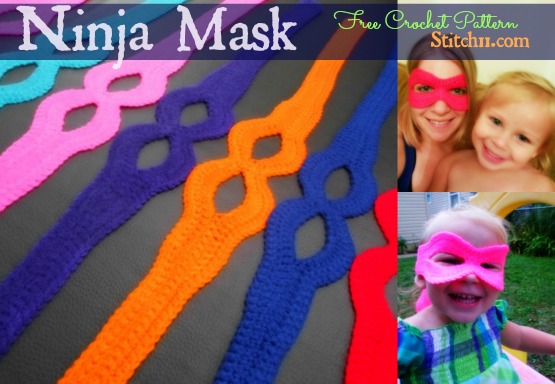
The Ninja Turtle Mask is in the theme of the popular Teenage Mutant Ninja Turtles. Crochet a number of these in every color for each of your ninjas. #crochet #crochetlove #crochetlife #crochetaddict #crochetpattern #crochetinspiration #ilovecrochet #crochetgifts #crochet365 #addictedtocrochet #yarnloveDuring this last week, I have tried and tested countless crochet masks. My goal was to make 4 ninja masks in the theme of the TMNT. 9 masks later I finally got it! I love the technique of making this mask and am very proud to say I came up with it. Now that I have made so many (using this pattern I have written out for you) I already have many more ideas for masks that I plan to test out in the upcoming weeks. So find a ninja or superhero near you and create them a mask of their own!Crochet Ninja Mask
Ninja Turtle Mask

Supplies

Medium weight yarn (Red Heart Super Saver or I Love This Yarn)
Using H hook
Yarn Needle (for weaving in your ends)
Iron and wet cloth (for killing yarn)
A Super Hero 😉

Stitches
CH- Chain
HDC- Half Double Crochet
DC- Double Crochet
HDC 3 Together
Slip Stitch

Get Started!

Row 1: CH 116, turn, skip 1 CH. SC in next 40 CH, HDC in next CH, DC in next 9 CH, 2 DC in next 2 CH. 3 DC in next CH. 2 DC in next CH. HDC in next CH. 2 HDC in next CH. HDC 3 together. 2 HDC in next CH. HDC in next CH. 2 DC in next CH. 3 DC in next CH. 2 DC in next 2 CH. DC in next 9 CH. HDC in next CH. SC in next 40 CH. slip stitch into the same chain. CH 1, turn.

Row 2: (working on the other side of the CH)  SC in same CH and next 47 CH. CH 8. Skip 8 stitches. SC in next 3 CH. CH 8, skip 8 stitches. SC in next 48 CH. CH 1, turn.

Row 3: SC in the same stitch and next 37, HDC in next stitch, DC in next 9 stitches, DC into next CH. 2 DC in next 2 CH. 3 DC in next CH. 2 DC in next CH. HDC in next CH. 2 HDC in next CH. HDC in next CH. HDC 3 together. HDC in next CH. 2 HDC in next CH. HDC in next CH. 2 DC in next CH. 3 DC in next CH. 2 DC in next 2 CH. DC in last CH. DC in next 9 stitches. HDC in next stitch. SC in next 38 stitches.

Row 4: CH 1, SC around the entire piece. Join to first SC.

Now you need to weave in your ends. Lay the piece on a flat surface and kill the acrylic yarn! To do this you will need to lay a wet washcloth or towel over the piece and iron it. For a “How to kill acrylic yarn”check out Moogly's tutorial! *tip* killing and letting it air dry will help the fit

.
Free Ninja Mask Crochet Pattern

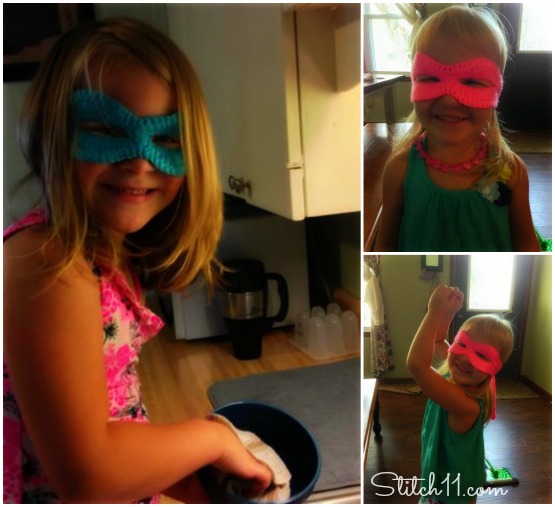
Girl Ninja Masks

TMNT crochet mask

TMNT - Free Crochet Pattern

Filed Under: Boys, Costumes, Free Patterns, Toys Tagged With: crochet, crochet pattern, mask, mask crochet tutorial, ninja mask

Lalaloopsy Inspired Doll

July 10, 2013 By stitch11 49 Comments

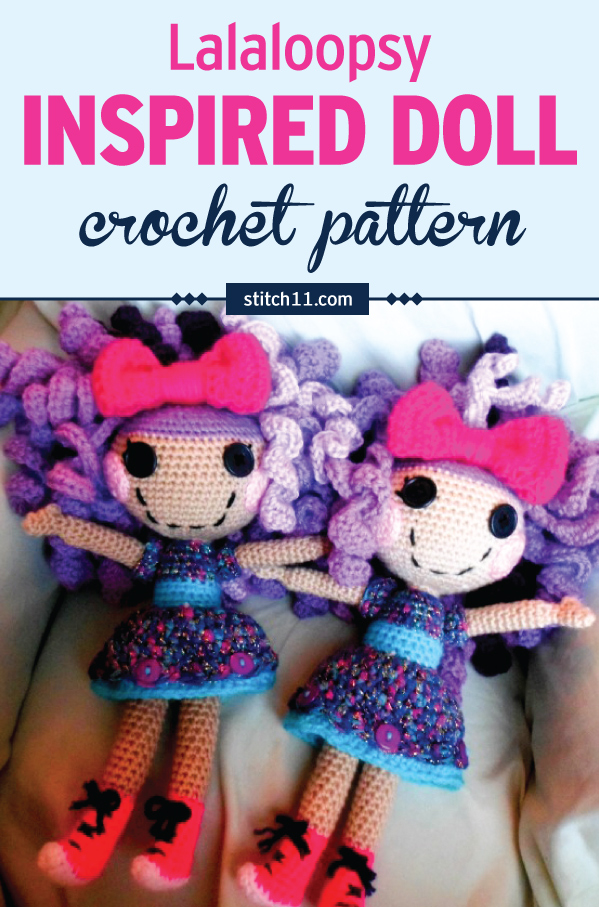
Lalaloopsy inspired doll crochet pattern. Easy to love and adorably cute! Make a very special doll for your child or as a gift that is sure to be cherished. #crochet #crochetlove #crochetlife #crochetaddict #crochetpattern #crochetdoll #ilovecrochet #crochetgifts #crochet365 #addictedtocrochet #yarnaddict #yarnloveHere she is! For the last few months, I have had so many requests for me to write this free Lalaloopsy crochet pattern.  I tried to keep her simple and I did my best at explaining everything as well as I know how. This is not an “Easy” pattern…. mostly because it takes a little extra patience. This crochet pattern is loads of fun! I encourage you to be creative with your yarns. I used all medium weight yarns but mixed up the textures and brands of yarns and I LOVE it!!!  Now go look through your scraps and find all those small amounts of beautiful yarn that you have been waiting to use! And I will warn you, the hair takes twice as much yarn and twice as much time as it appears.
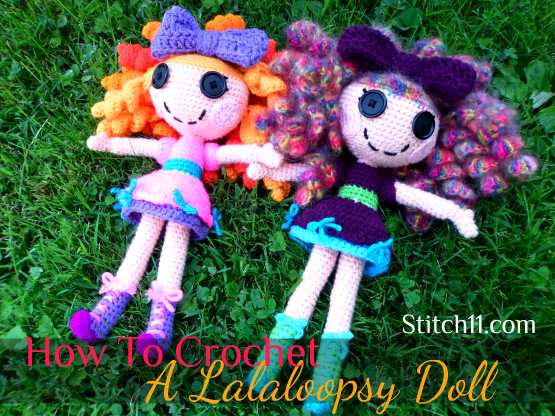
This Doll measures 12 inches in length.

Lalaloopsy Crochet Supplies

Medium Weight Yarn. Lots of colors! You can custom choose your color for what lalaloopsy you are going for.
2 one inch buttons
3.5 mm crochet hook for entire lalaloopsy doll. 5 mm hook for lalaloopsy hair and bow
Yarn needle
Scissors
Stuffing

Crochet Stitches used

SC – Single Crochet
HDC – Half Double Crochet
DC – Double Crochet
SC DEC – Single Crochet Decrease
Slip Stitch
CH- Chain
SC into front (or) back loop only

Note – When “joining” to your first stitch, you will use the slip stitch. On the next round it will say to crochet into the same stitch, you will be crocheting into the SC you joined to (not the slip stitch).

Free Crochet Lalaloopsy Crochet Pattern

Using 3.5 mm crochet hook

Crochet Lala Legs and Shoes (make two)

With your color choice for the sole of the shoes. (I used I Love This Yarn – Neon Purple)

Round 1: CH 8. SC in 2nd CH from hook. SC in next 2 CH. HDC in next 4 CH. HDC in same CH 3 more times. Turn and work into other side of CH. HDC into next 3 CH. SC into next 2 CH. SC 3 times into starting CH. Join to first SC (18 stitches)
I went ahead and wove my ends in now. 

Change to your choice of color for the shoes (I used Red Heart with Love – Lilac) *Joining to back loop only*

Round 2: In back loops only. CH 1, SC into same stitch and into next 4 stitches. 4 SC DEC.  SC into next 5 stitches.  Join to first SC. (14 SC)
Round 3: CH 1, SC into same stitch and next 2 stitches. 4 SC DEC. SC into next 3 stitches.  Join to first SC. (10 stitches)
Round 4-10:  CH 1, SC into same stitch and each stitch around. Join to first SC. (10 SC)
Finish off.. I went ahead and wove my end in and stuffed the boots with scrap yarns.

Change to skin color yarn (I used I Love This Yarn – Light Peach) *Joining to back loop only and into the starting stitch of round 10 *

Round 11: In back loops only. CH 1, SC into same stitch and each stitch around. Do not join (10 SC)
Work in continuous rounds now.
Round 12-28:  SC into same stitch and each stitch around. (10 SC)
Slip stitch into next stitch. Finish off.

Change to color of the undies/panties
Round 29-30: CH 1. SC into same stitch and each stitch around. Join to first SC. (10 SC)
Finish off the first leg but do not finish off the yarn with the second leg. Set the legs together and slip stitch into the stitch that lines up from the top of the other leg.
Round 31: CH 1, SC into same stitch. SC around the legs in one large circle. (20 SC)
Round 32-35: CH 1, SC into same stitch and each stitch around. Join to first SC. (20 SC)

Crochet Lalaloopsy Belt and Skirt

With color of your choice for the belt band. Join yarn to the back of the doll.. in the back loop only.

Round 36: In back loops only. CH 1, SC into same loops and around. Join to first SC. (20 SC)
Round 37-38: CH 1, SC into same stitch and each stitch around. Join to first SC. (20 SC)
Finish off (I wove in my ends)

Using color of your choice for the top layer of skirt. Attach to the back of the doll into the front loop from round 35.

Round 39: In front loops. Crocheting from the top of the loops so the pretty side of the stitches will lay down as the outside of the skirt. CH 1, HDC into same stitch and each stitch around. Join to first HDC. (20 HDC)
Round 40: CH 1, HDC into same stitch. 2 HDC into next stitch. **HDC into next stitch. 2 HDC into next stitch. Repeat from ** around. Join to first HDC. (30 HDC)
Round 41:CH 1, HDC into same stitch and into the next stitch. 2 HDC into next stitch. **HDC into next 2 stitches. 2 HDC into next stitch. Repeat from ** around. Join to first HDC. (40 HDC)
Round 42-43: CH 1, HDC into same stitch and each stitch around. Join to first HDC. (40 HDC)
Round 44: In front loop only. CH 1, SC in same stitch. Skip one stitch. 3 DC into next stitch.  Skip one stitch. **SC into next stitch. Skip one stitch. 3 DC into next stitch. Skip one stich** repeat from ** around. Join to first SC.

Change colors to your choice for the bottom layer of the dress. Attach to the back of the doll and  into the back loops from round 43. 

Round 45:  In the back loops only. CH 3, DC into each stitch around. Join to top of CH 3. (40 DC)
Round 46: CH 1, HDC into same stitch and each stitch around. Join to first HDC. (40 HDC)
Finish off and weave in your ends.

Add some bows and shoe strings!

I added bows to every other shell at the bottom of  the dress. When tying them on, I tied them through the center DC of the shell and I tied them through both the top and bottom layer of the skirt. (this helps the top layer from flipping up. The way I made my bows was very simple. I cut a piece of yarn and pulled in through from the top to the inside.. and then back out… and then tied it into a nice bow. If you are worried about your bows not wanting to stay tied, you can add a very small amount of hot glue under the knot and it will hold like a champ!
Now for the laces I used a yarn needle. I started at the bottom and pulled a piece of yarn half way through.. zig zagged both ends up the shoe and then tied them. Again, you can use a small amount of hot glue if you do not feel it it secure enough.

Lala Body

With color of your choice (I used the same color as the top layer of the skirt) Attach yarn to the back side of the doll. Into the back loop of the top of the belt. 

Round 47: In back loops only-  CH 1, SC into same stitch and each stitch around. Join to first SC. (20 SC)
Round 48-50:  CH 1, SC into same stitch and each stitch around. Join to first SC. (20 SC)
Round 51: CH 1, SC DEC around. Join to first SC DEC. (10 stitches)
Finish off and weave in your end. Go ahead and stuff the body of the doll.

Crochet Lalaloopsy Neck and Head (part 1)

Attach skin color yarn into the back loop.

Round 52: In back loops only. CH 1, SC into same stitch and each stitch around. Join to first SC. (10 SC)
Round 53: CH 1, SC into same stitch and each stitch around. Join to first SC. (10 SC)
Round 54: In front loops only- CH 1, 2 SC into same stitch and each stitch around. Do NOT join. (20 SC)
Start working in continuous rounds.
Round 55: 2 SC into same stitch. SC into next stitch ** 2 SC into next stitch. SC into next stitch. Repeat from ** around.  (30 SC)
Round 56: SC into each stitch around. (30 SC)
Round 57: 2 SC into same stitch. SC into next 2 stitches ** 2 SC into next stitch. SC into next 2 stitches. Repeat from ** around.  (40 SC)
Round 58: SC into each stitch around. (40 SC)
Round 59: 2 SC into same stitch. SC into next 3 stitches ** 2 SC into next stitch. SC into next 3 stitches. Repeat from ** around.  (50 SC)
Round 60: 2 SC into same stitch. SC into next 4 stitches ** 2 SC into next stitch. SC into next 4 stitches. Repeat from ** around.  (60 SC)
Round 61-70: SC into each stitch around. (60 SC)

Slip stitch into next stitch and finish off. Attach color of yarn you will be using for the hair. (I used Caron Simply Soft

Round 71: SC into each stitch around (60 SC) DO NOT FINISH OFF

This is where I put the crochet at a pause and made her face.

Lalaloopsy face

The first step to making the face is to add the eyes. But before you can sew the 1 inch buttons on, you will need to use some black yarn and your yarn needle to make the lashes. I cannot tell you exactly how to do this other than to make two lashes. I start the lashes where the button will cover and then work out at an upper angle.
-Sew on your buttons.
-With yarn needle stitch a smile. You can use my doll as a guide or you can google images a picture of a lalaloopsy doll.

Now for the cheeks. 
With light pink yarn. (make two)

Magic circle, CH 1, 9 HDC inside ring. pull ring tight and join to first HDC. CH 1, 2 SC into each HDC. Leave a long tale and use that tail to attach them to the face,

Crochet Lalaloopsy Head (part 2)

Pick the yarn pack up where you left off on the hair.

Round 72: SC into each stitch around (60 SC)
Round 73: **SC into next 2 stitches. SC DEC. Repeat from ** around. (45 stitches)
Round 74: **SC into next stitch. SC DEC . Repeat from ** around. (30 stitches)
Round 75: SC into each stitch around. (30 stitches)
Round 76: SC DEC around. (15 stitches)
Stuff the head now while you still have a small hole.
Round 77: SC DEC 7 times. SC into last stitch. ( 8 stitches)
Round 78: SC DEC around. (4 stitches)
Finish off leaving long tail to close hole.

Lalaloopsy Arms and Sleeves

Starting with skin color yarn.

Round 1: Magic circle, CH 1, SC 5 into magic ring, pull ring tight. Join to first SC. (5 SC)
Round 2-3: CH 1, SC into same stitch and each stitch around. Join to first SC. (5 SC)
Round 4: CH 1, HDC into same stitch. CH 1, Slip stitch into same stitch, SC into next 4 stitches. Join to first SC (skipping over the HDC thumb)
Round 5: CH 1, SC into each stitch around. (4 SC)
Round 6:  CH 1, 2 SC into each stitch around. Join to first SC (8 SC)
Working in continuous rounds now.
Round 7-19: SC into each stitch around. (8 SC)

Change colors to your choice for the sleeves. Attach the yarn in the front loop. You with be crocheting into the loops upside down so that the pretty side of the stitches will be on the outside of the sleeves.

Round 20: In front loops only.  CH 3, DC into same stitch and  DC into the next stitch. **2 DC into next stitch. DC into next stitch. Repeat from ** around.  Join to top of CH 3. (12 DC)
Round 21: CH 1, SC into same stitch and each stitch around, (12 SC)
Finish off. Weave in ends and attach the arms with a yarn needle. (I lightly stuffed the arms with yarn ends) This may be a little tight… be patient and it will all come together. I pinched the arm flat and sewed it on my the back loops that were left.

 Lalaloopsy Curls

Using 5 MM crochet hook

Leaving tail, CH 15, 3 DC into second CH from hook and down the rest of the chains.  *For a double curl do not finish off — CH 15, 3 DC into second CH from hook and in remaining chains. Cut yarn leaving tail – Make as many as it takes to get the fullness of hair you are going for.
To attach the hair. Inset hook around SC stitch of the scalp, pull one yarn tail through, tie both tails into a knot, the using yarn needle, weave in ends into the hair curl.
**When making my lalaloopsy with rainbow mohair I had to put 4 DC into each CH to get a good curl)

Crochet Hair Bow

With your choice of yarn color.

Step 1:  CH 33, DC into 4th CH from hook and each CH across. (31 DC)
Step 2-4: CH 3, Turn, DC into each stitch across. (31 DC)
Join both ends with a slip stitch. Fold the bow so that the seam is in in the middle. CH 60. Finish off leaving long end.. Wrap your chain around the center of the bow. Weave your ends in to secure the CH. And then using the same end, attach it to the top of the lalaloopsy head.

Lala Collection using Stitch11 crochet pattern

Filed Under: Free Patterns, Girls, Inspired, Toys Tagged With: crochet pattern, doll, doll crochat pattern, lalaloopsy, lalaloopsy crochet doll, lalaloopsy doll

  • « Previous Page
  • 1
  • 2
  • 3
  • Next Page »
  • Email
  • Facebook
  • Pinterest
  • RSS

Stitch11 is a Red Heart Blogger!

unnamed

.

Grab My Button

Archives

Privacy Policy

Copyright © 2026 Stitch11.com · All Rights Reserved · Log in