• Home
  • Free Patterns
    • Toys
    • Costumes
    • Bags
    • Flowers
    • Hats
    • Pattern Reviews
    • Household
    • Newborn
    • Scarves
    • Sports
  • Disclosure
  • Contact
  • Yummy Food
  • Round Ups

Stitch11

A Yarntastic Life!

  • Girls
  • Boys
  • Hats
  • Newborn
  • Flowers
  • Household
  • Costumes
  • Toys
  • Pattern Reviews
  • Grannys
You are here: Home / Archives for stitch11

Gone Green

April 20, 2016 By stitch11 Leave a Comment

I never realized how little I use green yarn until trying to round up all my green projects! If you love green, you will love these 11 crochet patterns either written or reviewed by me!
Also check out Crochet Your BLUES Away ,  11 Free PINK Crochet Patterns and Rainbows For Love! 
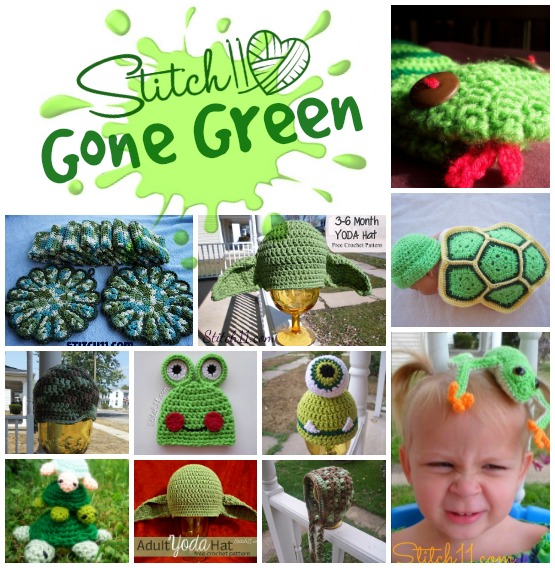
Green Crochet Patterns review or written by Stitch11

Click the name of the project to view the pattern or Stitch11 review. 

Snake Puppet 
Kitchen Set 
3-6 Month Yoda Hat 
Newborn Turtle Photo Prop
Army Newsboy Hat
0-3 Month Frog Hat
Newborn Cyclops Hat 
Turtles! 
Adult Yoda Hat 
Army Bonnet 
Tree Frog
 

Filed Under: Round Ups

Sweet and Free Crochet Patterns

April 18, 2016 By stitch11 Leave a Comment

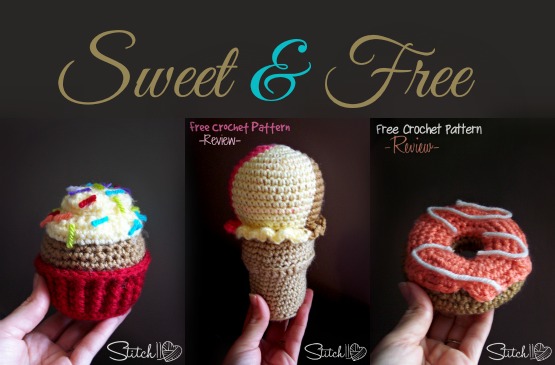
Sweet and Free crochet patterns. Cupcake, ice cream, and donut.

I'll be honest.. during the 4 years I have been crocheting, I have wondered why people get stuck in food related crochet. I just didn't understand the appeal to that extent, until I made the Ice Cream.
So far I have reviewed or written just the three sweet patterns but I can already envision all the foods I MUST make!

For your copies of these patterns, read my reviews of the Ice Cream Cone and Donut. Also check out my Cupcake Pattern!

What foods have you made? What do you want to make?

Filed Under: Free Patterns, Round Ups, Toys, Yummy Food

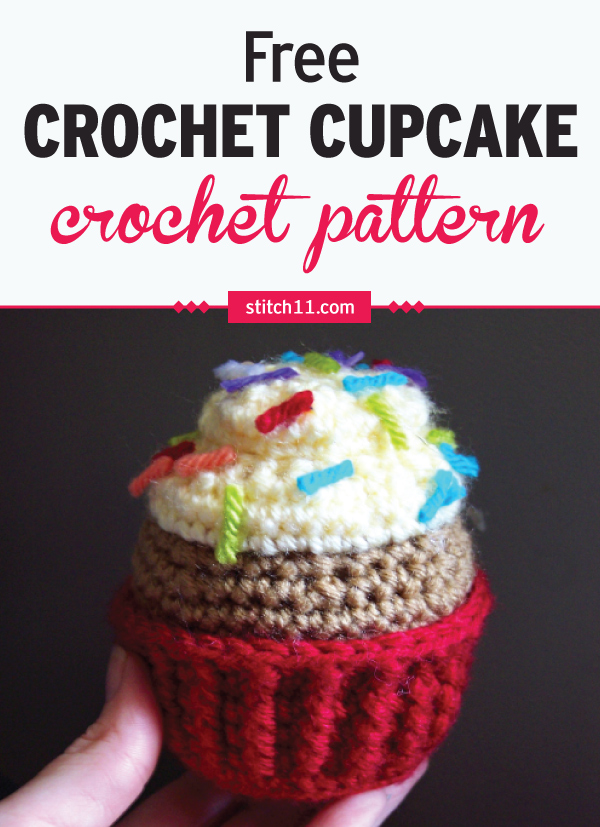
Free Crochet Cupcake Pattern

April 12, 2016 By stitch11 15 Comments

This Crochet Toy Cupcake can be a nice alternative to the usual plastic or rubber toys. It's soft and less of a danger to young kids who like to throw things around. #crochet #crochetlove #crochetlife #crochetaddict #crochetpattern #crochetinspiration #ilovecrochet #crochetgifts #crochet365 #addictedtocrochet #yarnaddict #yarnlove

Get the ad-free, printable PDF here

After hours of searching for the cupcake crochet pattern I had in mind, I decided I would have to design one myself! 

I wanted it to look like it was on the cupcake paper, with a little cake showing, a nice swirl of frosting, and, of course, lots of sprinkles!

This is such a fun project to make for play food for kids or to celebrate a birthday or other special occasion with a treat longer lasting than a real cupcake. 

And this is a perfect stash-busting crochet project because you can use any colors – and probably any weight – of yarn you have on hand to make this sweet surprise.

If you’re a lover of all things crochet toys, take a moment to learn how to make crochet toys from hexagons with the professionally filmed Crochet Anything with Hexagons video classes.

Cupcake Crochet Pattern

Skill Level: Easy 

Materials: 

• Hook: 

– US Size I/9 (5.5 mm) crochet hook or size  needed to obtain gauge 

• Yarn: Worsted weight yarn 

– 40 yds red (A) 

– 20 yds brown (B) 

– 20 yds white (C) 

– Assorted color scraps for sprinkles 

• Notions: 

– Scissors 

– Yarn needle 

– Fiber fill 

– Hot glue or craft glue for sprinkles 

– Marker 

Size: 

• Circumference: 4 inches 

• Height: 5 inches 

Gauge:  

12 sc x 15 rnds = 4 inches

bloBack loop only
chChain
floFront loop only
fpdcFront post double crochet
rndRound
scSingle crochet
sc2togSingle crochet next 2 sts together
sl stSlip stitch
st(s)Stitch(es)

Pattern 

WRAPPER: 

With A, make a magic circle.  

Begin working in continuous rnds – do not join unless indicated. Mark the first st of each rnd.  

Rnd 1: 8 sc in magic circle. (8 sc) 

Rnd 2: 2 sc in each st around. (16 sc) 

Rnd 3: [2 sc in next st, sc in next st] around. (24 sc) 

Rnd 4: [2 sc in next st, sc in each of next 2 sts] around. (32 sc) 

Rnd 5: [2 sc in next st, sc in each of next 3 sts] around. (40 sc) 

Partial rnd: Sc in each of next 4 sts, sl st in next st.  

Begin working in joined rnds. Join rnds where indicated with a sl st in first st of rnd.

Rnd 6: Ch 1, sc in blo of each st around, join.  

Rnds 7-10: Ch 1, fpdc around first st, sc in next st, [fpdc around next st, sc in next st] around, join.  (20 fpdc, 20 sc) 

Rnd 11: Ch 1, fpdc around first st, sc in flo of next st, [fpdc around next st, sc in flo of next st]  around, join. (20 fpdc, 20 sc) 

Fasten off. Remove any markers. Weave in all ends.  

CAKE: 

Join B with sl st in blo of any st on rnd 11.  

Begin working in continuous rnds – do not join unless indicated. Mark the first st of each rnd.  

Rnd 12: Sc in blo of each st around. (40 sc) 

Rnd 13: Sc in each st around. 

Rnd 14: [Sc2tog, sc in each of next 3 sts] around. (32 sts) 

Rnd 15: [Sc2tog, sc in each of next 2 sts] around. (24 sts) 

Partial rnd: Sc in each of next 2 sts, sl st in next st.  

Fasten off. Remove any markers. Weave in all ends.  

ICING: 

Join C with sl st in flo of any st on rnd 15.  

Continue working in continuous rnds – do not join unless indicated. Mark the first st of each rnd.  

Rnd 16: 2 sc in flo of each st around. (48 sc) 

Rnd 17: Sc in each st around. 

Rnd 18: Sc2tog around. (24 sts) 

Rnd 19: Sc2tog around. (12 sts) 

Rnd 20: 3 sc in each st around (36 sc) 

Rnd 21: Sc in each st around. 

Rnd 22: Sc2tog around. (18 sts) 

Rnd 23: Sc2tog around, join with sl st in first st. (9 sts) 

Fasten off leaving a long tail for sewing.  

Sew the tail through each stitch then pull tight to close the top of the icing.  

Weave in all ends.  

SPRINKLES: 

Cut scraps of yarn into 1/2 inch pieces. Glue to top of icing as desired. 

If you like crochet desserts, check out the Ice Cream pattern and Donut pattern too!

Filed Under: Free Patterns, Toys Tagged With: crochet cupcake, crochet pattern, cupcake, cupcake crochet pattern

Free Donut Crochet Pattern – Stitch11 Review

April 11, 2016 By stitch11 1 Comment

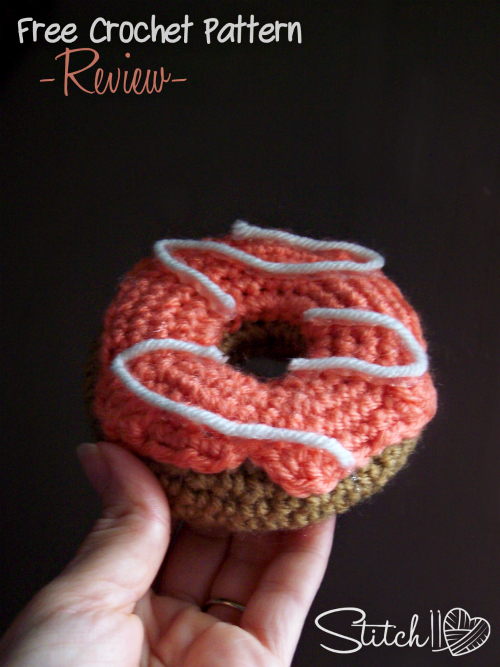
Free Donut Crochet Pattern -Stitch11 Review

The fun experience of crocheting the Ice Cream Cone, made me excited and anxious to make more desserts! I'm not sure if I can stop with just the donut and ice cream either.
What should I make next?

This FREE DONUT CROCHET PATTERN by Little Things Blogged is perfect! While working it up, I was sure it was going to end up tiny. To my surprise, it is the actual size of a donut!
Before starting the project, I was trying to picture in my mind how the donut designers actually put stitches together to make the shape. I was very happy when following Little Things Blogged's crochet pattern because it's put together so simply!
Crocheting the icing and attaching it was a lot of fun! I love how she left that little ending for us to get creative with the icing drops.

Thank you Little Things Blogged for such an adorable and fun free crochet pattern! I am really excited to make more, and attempt to make my stringed icing as pretty as yours!


Filed Under: Free Patterns, Pattern Reviews, Toys

Free Ice Cream Crochet Pattern – Stitch11 Review

April 9, 2016 By stitch11 1 Comment

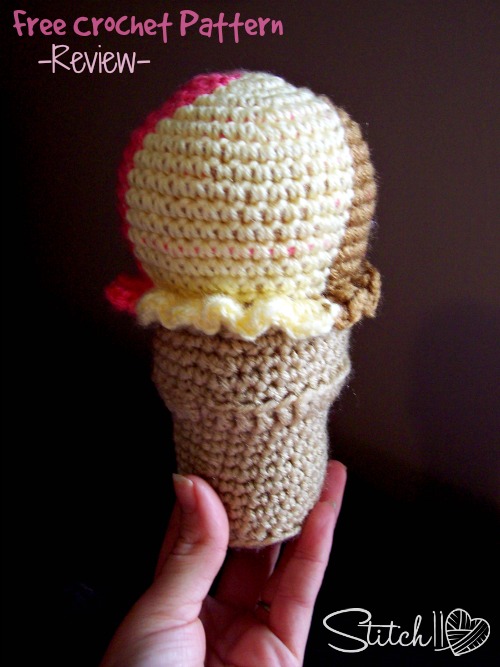
Free Crochet Ice Cream Pattern - Stitch11 Review

Originally, I was planning to crochet a cupcake for my daughter. When I shared my next project idea, she insisted I make her an ice cream instead. As most of you know, I have to listen to the boss. 😉

Before I start any project, I always search the web for an ideal pattern. If I don't find the perfect pattern for what I need, I will design one.
Lucky for me, Crochet Cake Sachet's designed the perfect scoop of ice cream on a cone. Fetch your copy of the free crochet pattern HERE.

The pattern was flawless. It was very easy to follow the 3 color option too! The ice cream and cone turned out slightly larger  than I expected… but not much. If I would have used Caron Simply Soft instead of Red Heart Super Saver, and a smaller hook, I am betting it would have turned out more like the designer's photo. I am very happy with the size and outcome though!

Thank you Crochet Cake Sachet's for designing the perfect ice cream crochet pattern!

Filed Under: Free Patterns, Pattern Reviews, Toys

Free Magical Crochet Patterns

March 30, 2016 By stitch11 Leave a Comment

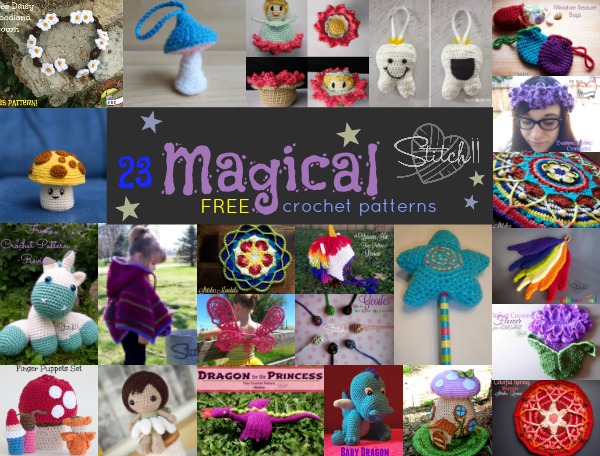
23-Free-Magical-Crochet-Patterns

I am between crochet projects. Although I have a really long *to do* list (like most of us) I couldn't help but to be swept away with checking out all the free crochet patterns online.  Although I know what I should crochet next, I am tempted to go other directions. Those fairy wings are calling my name!

Check out all 23 of these amazingly magical and free crochet patterns!

Enchanted Ivy Wings – by  Lisa Jelle

Unicorn Hat – Review by Stitch11

Baby Unicorn – Review by Stitch11

Margarita (Fairy) – by Mia Zamora-Johnson

Crochet Tooth Fairy Pillow – by Repeat Crafter Me

Mini Treasure Bag – by Stitch11 

Spring Fairy House – by Crafty is Cool

Grandma Perkins Magical Flower Child – by Look at What I Made 

Colorful Spring Mandala – Review by Stitch11 

Sophie's Mandala – Review by Stitch11 

Stitch11 Mandala – by Stitch11 

Magical Toadstool Finger Puppet Set – by Moogly 

Amigurumi Mushroom – by Little Things Blogged

Sun-Shroom – by Olka Novitskava

Baby Dragon – Review by Stitch11 

Dragon for the Princess – Review by Stitch11

Summertime Concert Crown – by Raising Robertsons Farts

Deer Daisy Woodland Crown – by Raising Robertsons Farts

Geodes – How to turn a rock into a necklace – by Stitch11

Hooded Poncho for Toddlers – by Stitch11 

Tangled Happy Wand – by Tangled Happy

Rainbow Tail – by Stitch11 

Infant Flower Cocoon – by Stitch11

Filed Under: Costumes, Free Patterns, Round Ups, Uncategorized

Pikachu – Free Crochet Pattern – Stitch11 Review

March 23, 2016 By stitch11 1 Comment

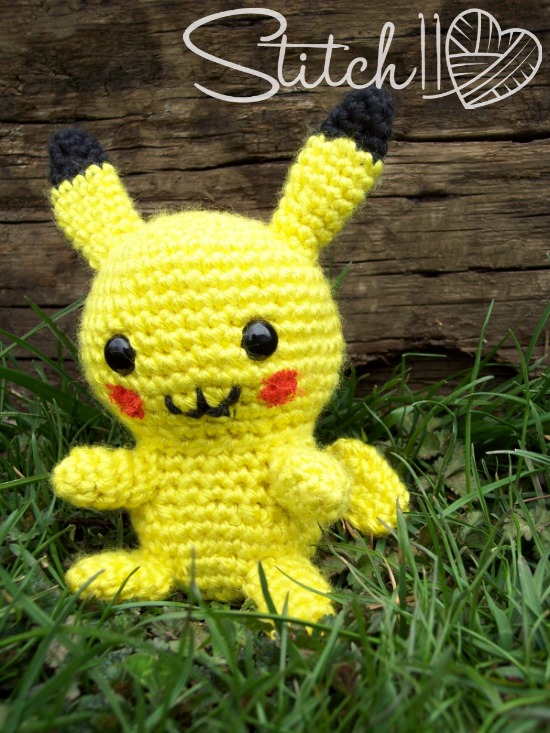
I'm not sure how many of you remember the Pokemon Balls I made a year ago, but ever since, my daughter has been begging me to make her a Pikachu.
I finally agreed to make this little monster. He is small, adorable, and very lovable. The pattern is very easy to follow and well written.
I did have confusion with the tail. I don't know what I did wrong, but whatever it was, it still worked out just fine.
Instead of felt cheeks, I just used some acrylic paint.
You can find your copy of this free Pikachu crochet pattern here.

Pikachu - Free Crochet Pattern - Stitch11 Review

Filed Under: Boys, Free Patterns, Inspired, Pattern Reviews, Toys, Uncategorized

Free Stitch11 Toddler Crochet Patterns

March 17, 2016 By stitch11 Leave a Comment

Free Stitch11 Crochet Patterns for Toddlers

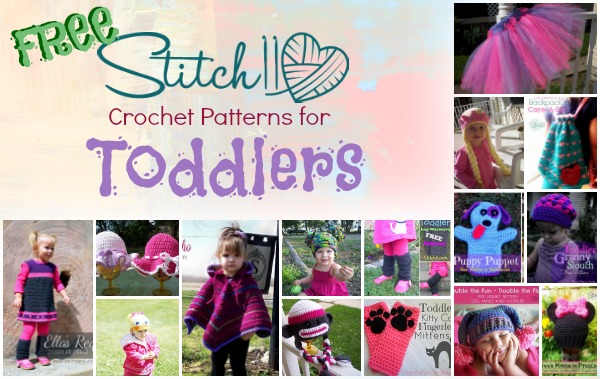
Over the last few years, I have created many things for toddlers. I decided to put together a list of my favorite free Stitch11 toddler crochet patterns.

How To Make a Tutu
Princess Crown and Braids
Backpack to Care-A-Lot
Puppy Puppet 
Granny Stitch Slouch
Double The Fun – Double The Flop Hat
Minnie Mouse in Preschool 
Ella's Request Toddler Dress 
Sun Hat 
Duck Hat 
Hooded Poncho 
Sock Monkey Hat 
Paw Print Fingerless Gloves
Leg Warmers 
Thick and Thin Pompom Beanie

For more leg warmers Click Here!

Filed Under: Free Patterns, Round Ups

Toddler Hooded Poncho

March 15, 2016 By stitch11 109 Comments

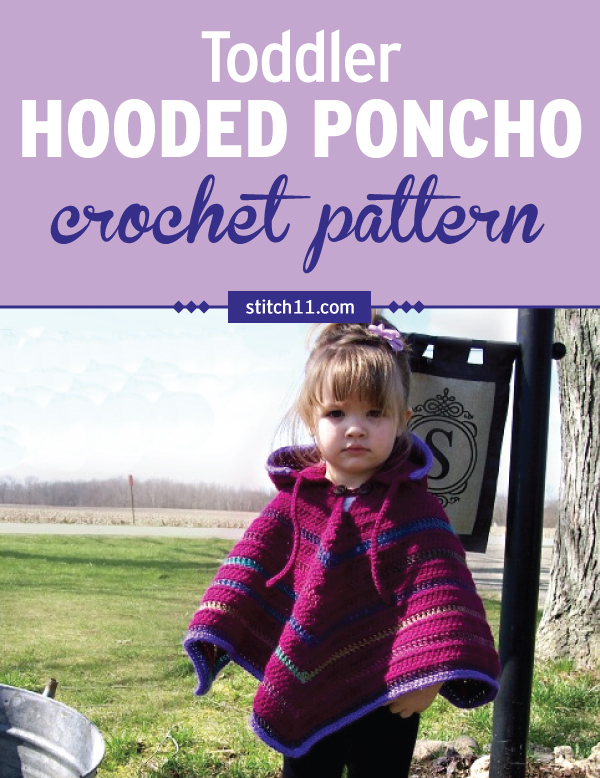
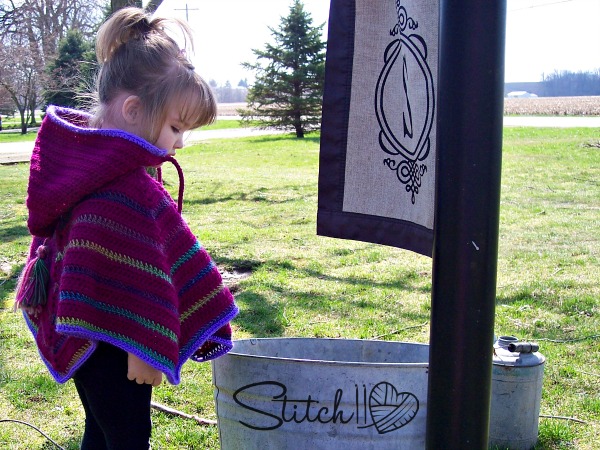
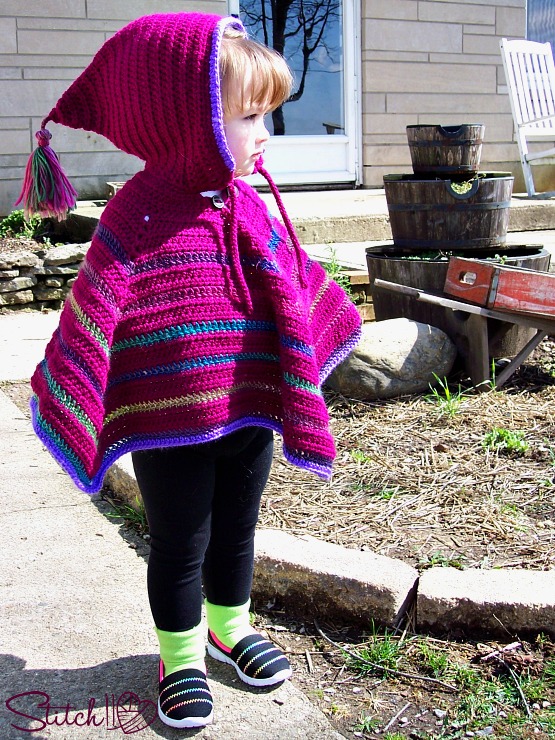
This Toddler Hooded Poncho crochet pattern is worked in 3 pieces - hood, neck, and poncho. It is crocheted both in the round and by rows. You can choose whatever color, with or without the highlights. Perfect for any toddler, to keep them warm in cold months as they walk around outside. #crochet #crochetlove #crochetlife #crochetaddict #crochetpattern #crochetinspiration #crochetgoodness #ilovecrochet #crochetgifts #crochet365 #addictedtocrochet #yarnaddict #yarnlove

I was given the challenge to create the perfect hooded toddler poncho. After searching online for WEEKS and not having much luck finding a hooded crochet poncho.. I knew I was left with no choice but to write one out.
Luckily, the person who wanted the poncho guided me with the wonderul directions of this poncho while still giving me creative freedom.
I am beyond pleased with the outcome! I am  also so very happy to share the pattern with you, for free!

Toddler Hooded Poncho Crochet Pattern

Supplies
For the most of the pattern you will be using Red Heart With Love. I used “Boysenberry” aka Maroon. (about 1.5 skeins)
For the highlight in front of the hood and the trim of the poncho,  I used purple Caron Simply Soft . (1/4 skein)
For the contrast stripes I used Red Heart Boutique “Unforgettable”. (1 skein)
You will need a 5 mm crochet hook.
You will need a yarn needle
*Optional* – 2 buttons

Stitches
Magic Circle
CH – Chain
SC – Single Crochet
HDC – Half Double Crochet
DC – Double Crochet

Stitch11 Crochet Poncho

Hood

Round 1: Magic Circle. CH 1. 5 HDC. Join to first HDC. Pull magic circle tight. Turn. (5 HDC)
Round 2: CH 1. 1 HDC into each HDC. Join to first HDC. Turn. (5 HDC)
Round 3: CH 1. 2 HDC into each HDC. Join to first HDC. Turn. (10 HDC)
Round 4: CH 1. 1 HDC into each HDC. Join to first HDC. Turn. (10 HDC)
Round 5: CH 1. 2 HDC into first HDC. 1 HDC into next HDC. *2 HDC into next HDC. 1 HDC into next HDC. Repeat from * around. Join to first HDC. Turn. (15 HDC)
Round 6: CH 1. 1 HDC into each HDC around. Join to first HDC. Turn (15 HDC)
Round 7: CH 1. 2 HDC into first HDC. 1 HDC into each of the next 2 HDC. * 2 HDC into next HDC. 1 HDC into each of the next 2 HDC. Repeat from * around. Join to first HDC. Turn. (20 HDC)
Round 8: CH 1. 1 HDC into each HDC around. Join to first HDC. Turn.20 HDC)
Round 9: CH 1. 2 HDC into first HDC. 1 HDC into each of the next 3 HDC. * 2 HDC into next HDC. 1 HDC into each of the next 3 HDC. Repeat from * around. Join to first HDC. Turn. (25 HDC)
Round 10: CH 1. 1 HDC into each HDC around. Join to first HDC. Turn. (25 HDC)
Round 11: CH 1. 2 HDC into first HDC. 1 HDC into each of the next 4 HDC. * 2 HDC into next HDC. 1 HDC into each of the next 4 HDC. Repeat from * around. Join to first HDC. Turn. (30 HDC)
Round 12: CH 1. 2 HDC into first HDC. 1 HDC into each of the next 5 HDC. * 2 HDC into next HDC. 1 HDC into each of the next 5 HDC. Repeat from * around. Join to first HDC. Turn. (35 HDC)
Round 13: CH 1. 1 HDC into each HDC around. Join to first HDC. Turn. (35 HDC)

Round 14: CH 1. 2 HDC into first HDC. 1 HDC into each of the next 6 HDC. * 2 HDC into next HDC. 1 HDC into each of the next 6 HDC. Repeat from * around. Join to first HDC. Turn. (40 HDC)
Round 15: CH 1. 2 HDC into first HDC. 1 HDC into each of the next 7 HDC. * 2 HDC into next HDC. 1 HDC into each of the next 7 HDC. Repeat from * around. Join to first HDC. Turn. (45 HDC)
Round 16: CH 1. 1 HDC into each HDC around. Join to first HDC. Turn. (45 HDC)

Round 17: CH 1. 2 HDC into first HDC. 1 HDC into each of the next 8 HDC. * 2 HDC into next HDC. 1 HDC into each of the next 8 HDC. Repeat from * around. Join to first HDC. Turn. (50 HDC)
Round 18: CH 1. 2 HDC into first HDC. 1 HDC into each of the next 9 HDC. * 2 HDC into next HDC. 1 HDC into each of the next 9 HDC. Repeat from * around. Join to first HDC. Turn. (55 HDC)
Round 19: CH 1. 1 HDC into each HDC around. DO NOT JOIN. Turn. (55 HDC)

Round 20: CH 1. 2 HDC into the first stitch. 1 HDC into the next 10 HDC. *2 HDC into next stitch. 1 HDC into next 10 HDC. Repeat from * around. Turn. (60 HDC)
Round 21: CH 1. 2 HDC into the first stitch. 1 HDC into the next 11 HDC. *2 HDC into next stitch. 1 HDC into next 11 HDC. Repeat from * around. Turn. (65 HDC)

Round 22-28: CH 1. 1 HDC into each HDC around. Turn. (65 HDC)
Round 29-30: CH 2. 1 DC into each of the first 5 stitches. HDC into next 55 stitches. DC into last 5 stitches. Turn. (65 stitches)
Round 31: CH 2. 1 DC into first 10 stitches. HDC into next 45 stitches. DC in last 10 stitches. Turn. (65 stitches)

Round 32: CH 1. 1 SC into the next 64 stitches. 2 SC into the next stitch.
Turn (rotate your piece), working up the side of the stitches of the neck of the hood.
You will put 3 SC over each side of the next 3 DC. 2 SC over each side of the next 22 HDC. Put 3 SC over each side of the next 3 DC. 1 SC into the starting stitch. Join to first SC. (129 stitches)

Round 33: CH 1. SC into next 64 stitches. 2 SC into each of the next 3 stitches. 1 SC into next 13 stitches. 1 HDC into each of the next 34 stitches. 1 SC into each of the next 13 stitches. 2 SC into each of the next 2 stitches. 1 SC into starting stitch.  (135 stitches)

Finish off and attach highlighting color.

Hood Edge and Highlight

Row 1: CH 1, SC into same stitch and next 64 stitches. Turn. (65 SC)
Row 2: Skip first stitch. SC into next 63 stitches. Turn. (63 SC)
Row 3: Crocheting over the last 2 rows, this row will be worked into stitches from round 33, bunching the last 2 rows inside the stitches. (63 SC)

Finish off. Count 12 stitches to the left. Attach your main color.

Neck of Poncho

Row 1: CH 1. 2 HDC into first stitch. 1 HDC into next 46 stitches. 2 HDC into next stitch. Turn. (50 HDC)
Row 2: CH 2. *2 DC into first stitch. DC into next stitch. 2 HDC into next stitch.  HDC into each of the next 44 stitches. 2 HDC into next stitch. DC into next stitch. 2 DC into last stitch. Turn (54)
Row 3: CH 2.  *3 HDC into first stitch. HDC into next 52 stitches. 3 HDC into last stitch. Turn (58)
Row 4: CH 2. * 2 DC into first stitch. DC in next stitch. 2 HDC into next stitch. HDC into each of the next 4 stitches. 2 HDC into the next stitch. HDC into each of the next 42 stitches. 2 HDC into next stitch. HDC into each of the next 4 stitches. 2 HDC into next stitch DC into next stitch. 2 DC into last stitch.CH 4 join to the top of the first DC from row 4.  Turn. (68 stitches including the chains.)

Poncho
Round 1: CH 1, 1 HDC into the first CH. 2 HDC into the next chain. CH 2. 2 HDC into the next CH. 1 HDC into next CH. 1 HDC into next 14 stitches. *2 HDC into next stitch. CH 2. 2 HDC into next stitch. 1 HDC into next 15 stitches.  Repeat from * one more time.  2 HDC into next stitch. CH 2. 2 HDC into next stitch. 1 HDC into next 14 stitches. Join to first HDC. Turn. (72 stitches not including chains.)
Round 2-5: CH 1. 1 HDC into each HDC. { HDC, CH 2, HDC} into each CH space. Join to the first stitch. Turn at the end of each row.  *note* make sure you do not miss the hdc before the chain spaces.

Finish off and attach your contrasting stripes colored yarn to a CH 2 space.
Round  6: Make sure your are crocheting with the nice side of the stitches facing the outside of the poncho.
CH 2. *{DC, CH 2, DC} into CH space. 1 DC into each HDC. Repeat from * around. Join to the top of first DC. Turn.
Change back to main color. Attaching into CH space.
Round 7: CH 1. *{HDC, CH 2, HDC} into CH space. 1 HDC into each stitch. Repeat from * around. Join to the top of first HDC. Turn.
Round 8-9: CH 1. 1 HDC into each HDC. { HDC, CH 2, HDC} into each CH space. Join to the first stitch. Turn at the end of each row.

Repeat rows 6-9 four more times.

Edging

Using your contrasting stripes colored yarn, attach into CH 2 space.
Make sure your are crocheting with the nice side of the stitches facing the outside of the poncho.
CH 2. *{DC, CH 2, DC} into CH space. 1 DC into each HDC. Repeat from * around. Join to the top of first DC.

Using your Highlight color, attach into CH 2 space.
CH 1, 4 HDC into each CH 2 space. 1 HDC into each DC. Join to first HDC.

Weave in all of your ends.

Add a tassel to the tip of your hood. I used THIS tutorial.

Attach yarn to the corner of your hood. CH 30. Slip stitch back up your chain. Finish off, weave in your end, and repeat on other side.

*Optional buttons and loop* Attach yarn to one side of the chest opening. We had to have this to be sure the head could fit through easily… but that doesn't mean we always want it wide open.
Ch  8. Slip stitch back to starting spot to create a button loop. Add a button to both sides- one is for appearance.

Check out this free Boot crochet pattern review to match!

Stitch11 free crochet poncho pattern

Filed Under: Boys, Free Patterns, Girls Tagged With: crochet poncho, hooded crochet pattern, hooded poncho, pattern, poncho, poncho pattern

Crochet Bubble Booties – Review – Free Crochet Pattern

March 1, 2016 By stitch11 3 Comments

Bubble Boots - Free Crochet Pattern - Review - Stitch11

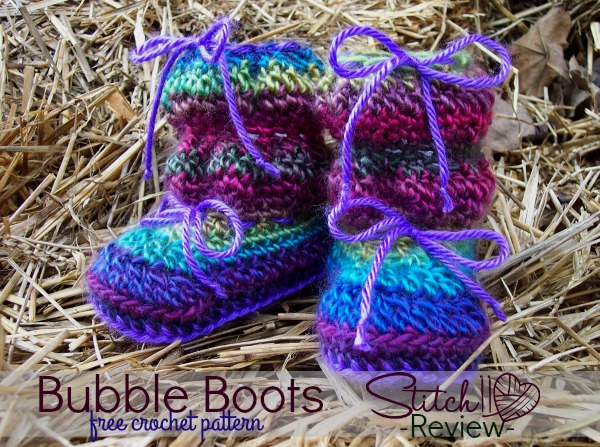
I found this *free* adorable crochet boots pattern HERE at Whistle and Ivy!

This pattern is available in sizes 0-3, 3-6, 6-9, and 9-12. I needed 12-18 month size, and as you can see in my notes, it was a simple change of hook size to get the perfect measurements for the larger size.
Notes
-I added an extra row of HDC between rounds 12 and 13.
– I used a 5 mm crochet hook to make mine a size larger. I needed them to be 5 inches in length (12-18 month size)
-I used Red Heart Boutique, Unforgettable yarn.
I can see where they get the name “Unforgettable”. Although the pattern alone is supper cute, I honestly don't think you can go wrong with this yarn choice!

The pattern is very easy to follow, simple to adjust, and perfect for babies that love to kick their feet! Because it has two ties, and the bubble shape, these booties will not only be comfortable but will hold onto those little ninja feet!

I will definitely be using THIS free pattern again!!

If you'd like some more inspiration for baby patterns, take a peek at some of my other blog pages here: 25 Easy Crochet Baby Booties for Beginners

Filed Under: Boys, Free Patterns, Girls, Pattern Reviews

Veggie Stir Fry – Guest Post by Andrea Aizlewood

February 25, 2016 By stitch11 1 Comment

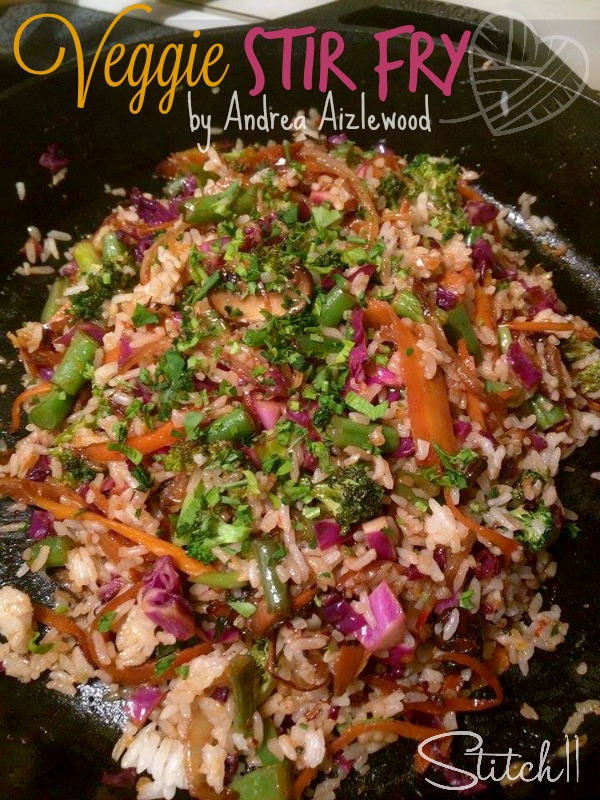
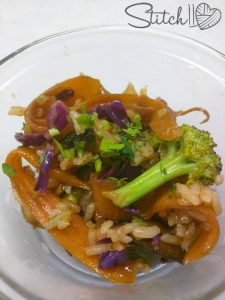
Veggie Stir Fry

Meet Andrea Aizlewood! Andrea is a stay at home mom with her toddler. She enjoys living a natural and healthy lifestyle and strives to help others to do the same.

Andrea AizlewoodAndrea is wanting to get started with sharing her love for healthy and delicious foods with the world! What better way to jump into the blogging world than to guest blog for me!? 😉
Once she get's her business going, I will be sure to update this post with all of her information.

How to Make Stir Fry

Veggie Stir Fry
by Andrea Aizlewood

The main inspiration for this recipe comes from receiving all that extra rice when getting Chinese take out. So much work goes into harvesting every grain of rice. It is so crushing to throw any food away, especially rice. This is a quick and easy way to use up random veggies and leftover rice to make a healthy and filling meal for the family. It is also great to eat as a late night snack straight from the fridge or for a cold lunch the next day when you're on the go.

Tip: There is a term the French use, “mis en place” which means “putting in place”. It means to have all of the ingredients for the recipe and having them prepped and ready for cooking. Practicing mis en place ensures that you won't be half way through making your dish and realizing you are out of a key ingredient. It also ensures that you can execute without worrying about cutting or chopping while something is sitting and burning in the pan. Making this stir fry is a great way to practice prepping everything or mis en place.


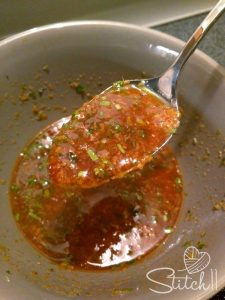
Orange Sauce


Orange Sauce

¼ cup of sweet chili sauce
1 orange zested and juiced
2TBL Soy sauce or Tamari
1 tsp grated ginger
2 grated garlic cloves
1 tsp vinegar


Chopping up veggies for stir fry

Veggies

1 whole onion
1/3 cp mushrooms (I used baby portabella because it was the organic choice on sale)
1 cp shredded carrot
1 cp green beans, diced (You can use snow pea or sugar snap peas)
1 cp broccoli
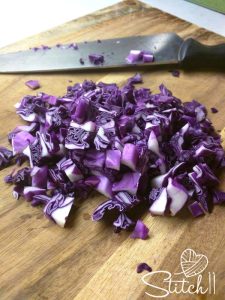
½ cp purple cabbage
1 ½ – 2 cp of rice, already cooked (I used leftover rice from take out)
1 TBL cilantro


Methodsaute mushrooms and onions

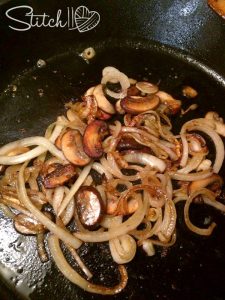
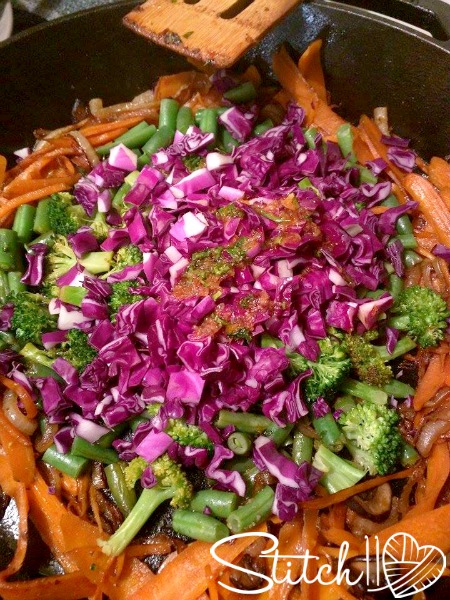
Saute the onion and mushroom in coconut oil on medium low heat till caramelized.
Push to outer edges of pan.

Add carrots to middle of pan. Sautee till slightly tender. Mix with onions and mushrooms.
Push to outer edges of pan.

Add in green beans and broccoli. Sautee till tender. Mix with rest of veggies.

Add the cabbage, Rice, cilantro, and orange sauce and mix. Now eat!


Yum! Stir Fry!


Filed Under: Uncategorized, Yummy Food

Geodes – How to Turn a Rock Into a Necklace

February 24, 2016 By stitch11 2 Comments

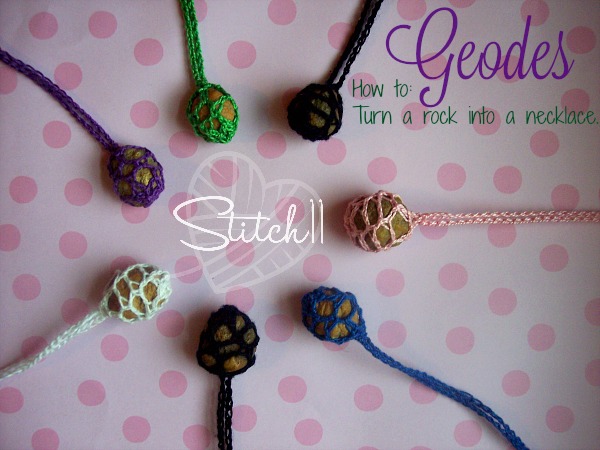
How To Turn a Rock Into a Necklace. - Stitch11

My family recently went on an adventure to look for geodes. We found so many of all shapes and sizes! My cousin was collecting “baby geodes” and I had an exciting idea!

NECKLACES!

Lately Iv'e been crocheting around semiprecious stones and crystals to turn them into necklaces. I've been collecting little pebbles of quartz from the river for a future masterpiece to hang on my living room wall.  My family has joined me in my rock loving adventures and enjoy the excitement of finding something beautiful.

Back to my baby geodes necklaces!

Each of these geodes are around 1 inch wide.
You will need a small crochet hook. I used a 2.1 mm crochet hook.
You will need crochet/yarn thread.

Step 1: Magic circle. *SC into magic circle. CH 3. Repeat from * 4 more times. Join to first SC and pull your magic circle tight.
Step 2: *SC into next CH space. CH 3.  Repeat from * until you read the top of the rock.  Make sure you have your rock inside the piece before continuing to the next step.
Step 3: SC into next 5 CH spaces. Slip stitch to first SC of this step. Now you will CH until your CH is long enough to fit around your head. You can add a little extra length depending on how low you want your necklace to hang. Slip stitch back to the top of the rock. Finish off and weave in your ends. That simple!

What is a geode and why are they special?
Each Geode is completely unique. If you were to break one open, you would be mesmerized with the beauty. Geodes can be completely solid or hallow in the center with nicely formed crystals. They can contain calcite crystal or quartz. When they had been heated in the earth, or when they mix with other minerals they can change colors. This is how you get Amethyst, Citrine, Smokey Quartz, or many other variations quartz.

Some say you can put intentions or other energies into your geode. Some say that you lose its properties if you bust it open. But, I personally find it nearly impossible to contain myself. I want to see the pretties inside!!! Luckily, a couple of the necklaces are for me, and I will do my best to keep them intact.

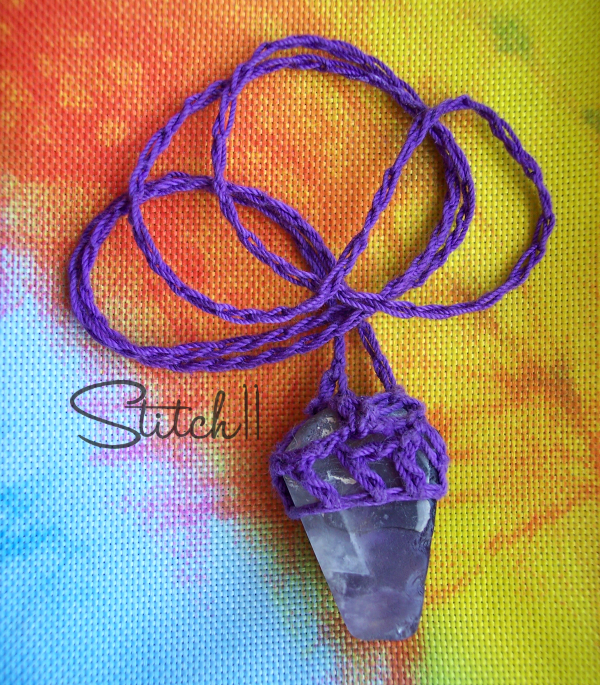
Here is my daughters Chevron Amethyst I crocheted into a necklace. It's the same idea as a geode necklace, but this time I started with a chain that fit around the center of the stone. This only works if the stone is angled, so it cannot fall out the bottom.

Stitch11-Chevron-amethyst - Crochet Necklace

Filed Under: Free Patterns, Girls

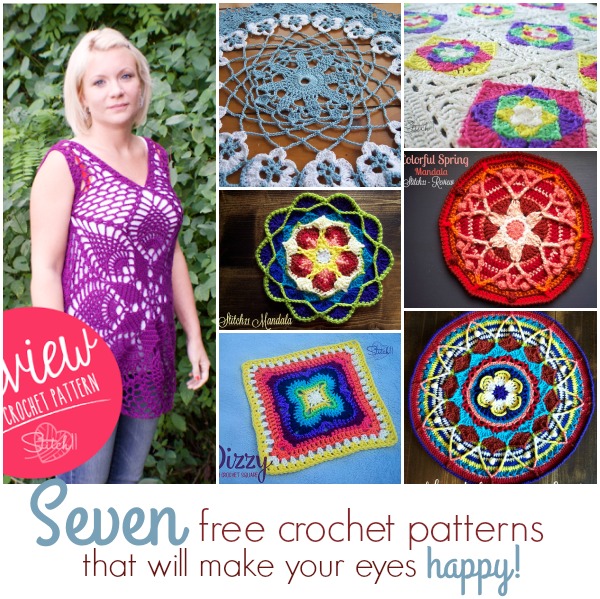
Seven Free Crochet Patterns to Make Your Eyes Happy

February 18, 2016 By stitch11 Leave a Comment

Seven Free Crochet Patterns That Will Make Your Eyes Happy - Stitch11

There are some types of patterns that are just so visually appealing or hypnotizing that they make not only your eyes happy, but your soul too!

Here are 7 free crochet patterns that I have either written/designed or reviewed!

Summer Tank  *update* – I just noticed the pattern is no longer free. It's still a wonderful pattern and well worth the money.

Pansy Doily 

Optical Illusion Baby Blanket 

Stitch11 Mandala 

Colorful Spring Mandala 

Dizzy Square

Sophies Mandala

Please see our other fantastic designs here if you're looking for more amazing crochet projects: 35 Stylish Crochet Bralette Patterns for Every Body Type

Filed Under: Free Patterns, Round Ups

Colorful Spring Mandala – Review –

February 15, 2016 By stitch11 Leave a Comment

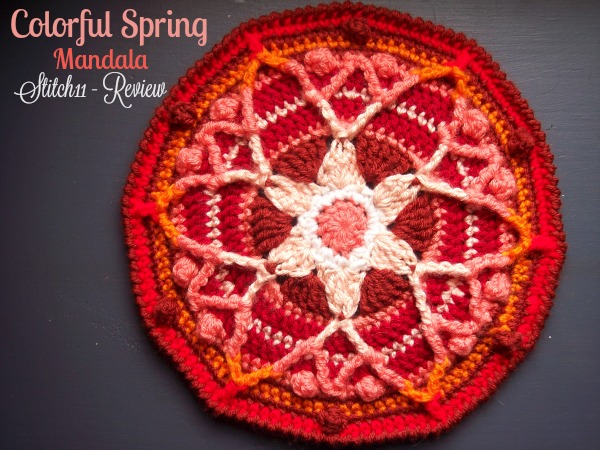
Colorful Spring Mandala - Free Crochet Pattern Review - Stitch11

I've been searching through all the mandala crochet patterns available online. While aiming to get a free pattern, I found the Colorful Spring Mandala at Drops Design!
It's designed to be a pot holder.. but since I'm on a mandala craze, I only made the one side.

I did choose to make a couple changes for my own liking.
– I started with a magic circle instead of a CH.
– I changed the bobble into a 3 DC bobble I am used to.
– On round 13, I just crocheted a TR into the two DTR's at once. I also had to crochet a few more stitches before each repeat to make it look even and straight.
– added a crab stitch finishing round.

Although I found this pattern a little difficult to follow, with patience, it all made more sense for me.
I absolutely LOVE the outcome. It's so beautiful!


Filed Under: Free Patterns, Household, Pattern Reviews

Stitch11 Mandala

February 9, 2016 By stitch11 7 Comments

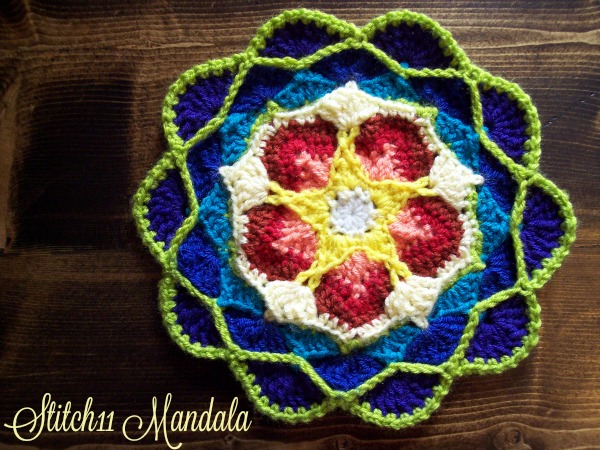
Stitch11 Mandala - Free Crochet Pattern

While crocheting the Sophia's Mandala, I knew I wanted to create more mandalas. Just looking at one is an inspiration for crochet.
Although this pattern does not have step by step photos for directions, I tried to explain it as well as I could with my words. Happy Hookin'!

Stitch11 Mandala Crochet Pattern

Supplies
G – 4.25 mm crochet hook
Medium/Worsted weight yarn
Yarn Needle for weaving in your ends.

Stitches Used 
Magic Circle
Slip Stitch
CH – Chain
SC – Single Crochet
HDC – Half Double Crochet
DC – Double Crochet
TRE – Treble Crochet

The Stitch11 Mandala measures to be 10 inches.
I changed colors after every round.

Round 1: (white) Magic Circle. CH 1, 10 HDC into magic circle. Join to first HDC.  (10 HDC)

Round 2: (light yellow) Starting in any SC.
CH 1, SC into same stitch. * CH 1. SC into next SC. Repeat from * 9 more times. Join to your first SC. (10 SC + 10 CH 1 spaces)

Round 3: (yellow) Starting in CH 1 space.
CH 1. SC into same CH space. {SC, DC, TRE, CH 6, Join to first CH , TRE, DC, SC}- all  into next CH space.  *SC into next CH space. {SC, DC, TRE, CH 6, Join to first CH , TRE, DC, SC}- all  into next CH space. Repeat from * 3 more times. Join to your first SC. You will have 5 points.

Round 4: (peach) Starting in TRE that's on the left side of the CH 6 space.
For this round you will be working in back loops only.
You will be pushing the points from round 3 towards the front. You will NOT be crocheting into them yet.
CH 1. *SC into 1st stitch. HDC into next stitch. DC into next stitch. TRE into next stitch. CH 4, slip stitch into first CH. TRE into same stitch. DC into next stitch. HDC into next stitch. SC into next stitch.
Repeat from * 4 more times.  Join to your first SC.

Round 5: (Red) Starting in CH 4 space from round 4.
Still leaving CH 6 spaces unworked and pushed towards the front of your piece.
CH 1. *5 HDC into CH 4 space. HDC into each of the next 8 stitches. Repeat from * 4 more times. Join to your first HDC.

Round 6: (Rusty Orange) Starting in 3rd HDC/ the center HDC of the 5 HDC that are worked into the CH 4 space.
CH 1. {SC, CH 2, SC} into same stitch. HDC into next 3 stitches. DC into next 6 stitches. HDC into next 3 stitches. *{SC, CH 2, SC} into next stitch. HDC into next 3 stitches. DC into next 6 stitches. HDC into next 3 stitches.

Round 7: (Light Yellow) Starting in CH 2 space.
CH 1. * SC into CH 2 space. CH 2. SC into same CH 2 space. HDC into next 3 stitches. Skip 3 stitches.
Crocheting through the point of the star from round 3 (the CH 6 space) and through the next stitch at once- crochet 3 TRE, CH 4, slip stitch into first CH, 3 TRE into same stitch.
Skip 4 stitches. HDC into next 3 stitches. Repeat from * 4 more times.

Round 8: (Green) Starting in TRE next to and to the left of a CH 4 space.
For this round you will be working in back loops only.
Ch 1. *SC into next 7 stitches. {SC, CH 2, SC} into CH 2 space.  SC into next 7 stitches. Skip CH 4 loop and push it towards the front of the piece. Repeat from * around and join into your first SC.  (80 SC)

Round 9: (Teal) Starting in Ch 2 Space from round 8.
Ch 1. * SC into CH 2 space. Skip 3 stitches. 3 DC into next stitch. CH 4. Slip stitch into first CH. 3 DC into next stitch. SC into CH 4 space from round 7. Skip 6 stitches. 3 DC into next stitch. CH 4. Slip Stitch into first CH.3 DC into next stitch. Skip 3 stitches. Repeat from * around. Join to first SC.

Round 10: (Blue) Starting in a CH 4 space from round  9.
Ch 1. *SC into CH 4 space. Skip 3 stitches. 4 TRE into next stitch. CH 4, slip stitch to first CH. 4 TRE into same stitch. Repeat from * around. Join to first SC.

Round 11: (Purple) Starting in CH 4 space from round 10.
Ch 1, *SC into CH 4 space. 9 TRE into next SC. Repeat from * around. Join to first SC.

Round 12: (Green) Starting in any stitch.
Ch 1. SC into first stitch. CH 1. *SC into next stitch. CH 1. Repeat from * around. Join to first SC.

Round 13:(Green) Starting in a SC that is above a CH 4 space from round 10.
You will be making a CH zig zag from CH 4 spaces between rounds  10 and 11.
CH 1. SC into the SC that is worked above the CH 4 space from round 10. CH 5. Slip stitch over next CH 4 space from round 9. CH 5. * SC into next SC that is worked above the CH 4 space from round 10. CH 5. Slip stitch over next CH 4 space from round 9. Ch 5. Repeat from * around. Join to first SC.

Weave in all your ends.
Mine finishes a little wavy but lays flat easily. If yours doesn't lay flat, blocking your mandala will do the trick.

Stitch11 - free mandala crochet pattern

Filed Under: Flowers, Free Patterns, Household

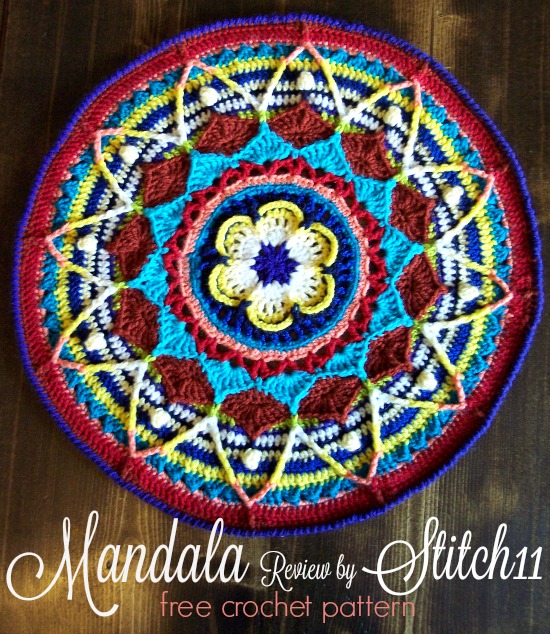
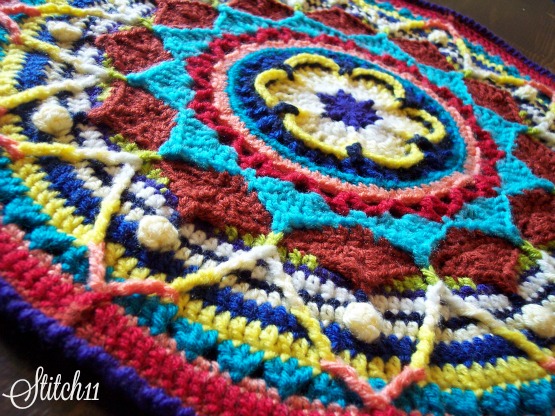
Mandala – Free Crochet Pattern – Review by Stitch11

February 5, 2016 By stitch11 3 Comments

Mandala - Free Crochet Pattern - Review by Stitch11

I've noticed many people are crocheting mandala's. They are so beautiful and each one is so unique…. I LOVE IT!
I spent a few days looking through mandala crochet patterns. After deciding to go with a free crochet pattern for my first mandala experience, I chose this stunning design by Look At What I Made called “Sophie's Mandala“.

Free Mandala Crochet Pattern - Stitch11 Review

I am VERY impressed with the pattern instructions. The designer did an amazing job with writing each step clear and even included step by step photos for each round! As a designer, I know how much time that can take… and she definitely put her heart into this design.
I did not have any issues or confusion while following the pattern. None!! 😀

When choosing my colors, I wanted to mix up warm and cool colors. I knew when I got to the front post stitches, that I wanted to keep them with either warm or cool colors… I decided on warm. I didn't want to mix it up too much on those rounds because I wanted to front post stitches to have an extra pop.

I used medium/worsted weight yarns and a 4.25 mm crochet hook. My finished piece measures around 22 inches long.
It took me 3 days to complete my mandala. I probably could have finished it in one day of constant crochet, but decided to go hikes, clean, cook, and be a mom. 😉

I highly recommend The Sophie's Mandala to any beginner or experienced hooker who wants to make a beautiful and stunning crochet piece.

I plan to put this on some nice wood and hang it on the wall. I will treasure my first mandala for the rest of my life.  Not only am I pleased with the outcome, but I am inspired to attempt designing my own. Thank you so much, Look What At What I Made, for sharing your creative mind with us all!

Filed Under: Free Patterns, Pattern Reviews

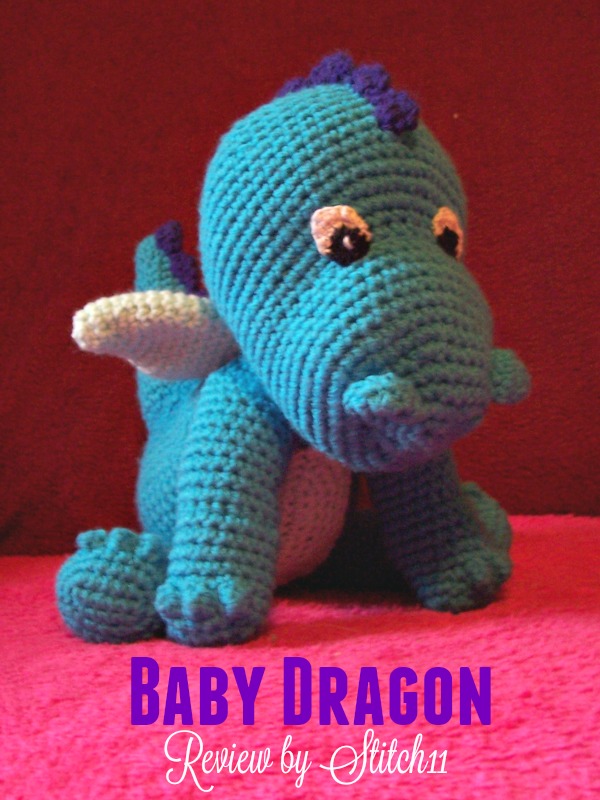
Baby Dragon – Free Crochet Pattern Review

January 27, 2016 By stitch11 1 Comment

Baby Dragon - Review by Stitch11 - Free Crochet Pattern
My 5 year old boss wanted me to make her a baby dragon. She stood over my shoulder as I skimmed through the patterns available online. When we came across the Baby Dragon pattern by Amigurumi BB… she insisted I started on him right away!
Get your copy of the FREE baby dragon pattern here!
My daughter *cough* I mean, my boss, went through my yarn to show me what colors she wanted. She was very specific!
If you look at the pattern, you will notice I am missing a few parts on my dragon. My boss refused to allow me to crochet ears or horns for this magical baby dragon. After begging her to tell me why… she finally admitted her sneaky plan. She wanted me to crochet a baby version of “Ord” from Dragon tales.

The pattern is fairly easy. There were a couple times when I had to add a few extra stitches to get it to line up correctly. I'm not positive if it was a pattern flaw, or my own. But even with the little errors, it was really easy to correct.
Just as the designer tells us on the pattern, the spikes down the spine are “no piece of cake”. It's not the actual stitches that make it tough.. it's just working the stitches into the slip stitches down the spine that were not too easy on the hands. Mostly because of the angle.
We LOVE our new baby dragon. As I type.. he is flying up and down the stairs, scaring our cats into hiding. 🙂
Check out more patterns by Amigurumi BB here!
Check out more of the stuffed items I have made too!

Filed Under: Free Patterns, Pattern Reviews, Toys

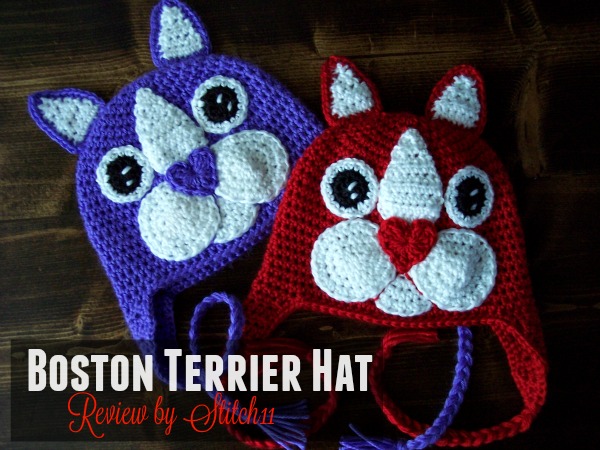
Boston Terrier Hat – Review by Stitch11

January 21, 2016 By stitch11 Leave a Comment

Boston Terrier Hat - Review by Stitch11

A couple months ago, I reviewed the Boston Terrier Scarf designed by Crochetions. {View the scarf review here}

The scarf was so adored by my Boston loving freak of a sister 😉 that I knew I was going to be making my nieces each a Boston Terrier hat.
Luckily, Crochetions has designed the perfect pattern! {Fetch your copy of the Boston Terrier Hat here}

The hat calls for Medium Worsted, and comes in sizes that range from baby – adult!

Crochetions patterns are well written and very easy to follow.  She has a large variety of designs that will melt the hearts of all your animal loving friends and customers.

Thank you Crochetions for another fabulous design!

Filed Under: Pattern Reviews

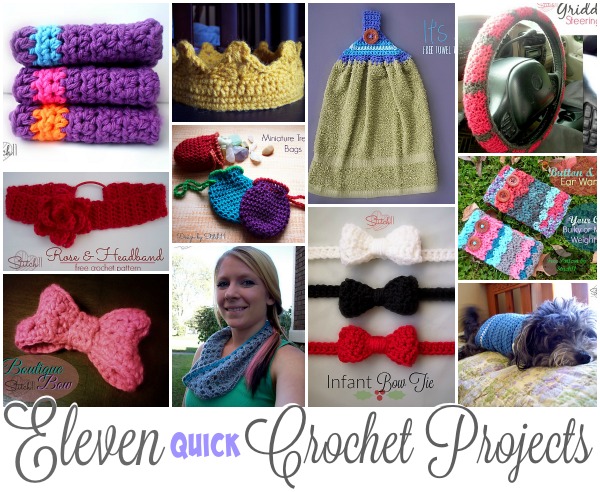
Eleven Quick Crochet Patterns

January 16, 2016 By stitch11 Leave a Comment

11 Quick Crochet Projects

Now that the holidays are finally over 😉 We can work on keeping our Crojo!

There is something about Christmas that makes me lose my crochet mojo. Every year it happens again and again. It's horrible!!! One way I have found to help me keep interest in working up projects is to take a break from the big things and work on small, quick, and simple things.

Here is a list of 11 (free) Stitch11 crochet patterns that are not only small, but QUICK!

Perfectly Square Washcloths 
Crown
Simple (easy) Towel Topper 
Steering Wheel Cover 
Rose Headband 
Miniature Treasure Bags 
Button & Shell Ear Warmers 
Boutique Bow
Good Morning Cowl 
Bow Ties 
Dog Sweater

Filed Under: Free Patterns, Round Ups

Miniature Treasure Bags

January 14, 2016 By stitch11 5 Comments

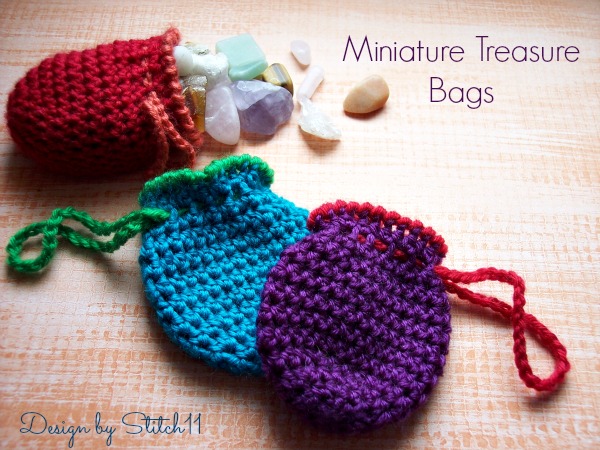
These have to be the easiest stash buster projects you will make and you can use them for so many things you will want to make one for everyone you know! Scroll down for the complete free pattern or get the ad-free, printable PDF here.

Miniature Treasure Bags

Get the ad-free, printable PDF pattern here.

These tiny crochet treasure bags are perfect for using little bits of yarn left over from other projects. You can also change up the size by using a different weight of yarn or making the base or the sides of the bag bigger. 

The samples use a single color for the body with the contrasting yarn used at the top of the bag and for the drawstring, but you can make it even scrappier by changing colors every couple of rounds. 

These cute crochet bags are perfect for holding little rocks or shells from a nature walk, tiny gifts, and other special treasures.

One great thing about this crochet project is that it's super quick to work up. If you enjoy crocheting projects that are quick and easy, check out 90 amazing “Done in a Day” crochet patterns here.

Skill Level: Easy 

Materials: 

• Hook: 

– US Size E/4 (3.5 mm) crochet hook or size  

needed to obtain gauge 

• Yarn: DK / light worsted weight yarn 

– 60 yds main color (A) 

– 15 yds contrasting color (B) 

• Notions: 

– Scissors 

– Yarn needle 

Size: 

• Width: 3.5 inches at widest point 

• Height: 3 inches 

Gauge:  

17 sc x 17 rnds = 4 inches

ABBREVIATIONSDESCRIPTION
chChain
rndRound
scSingle crochet
sl stSlip stitch
st(s)Stitch(es)

*Looking for more great crochet stitches to try in other projects. Click here to see the Ultimate Crochet Stitch Library.

Pattern

Get the ad-free, printable PDF pattern here.

Join rounds where indicated with a sl st in the first st of the rnd.  

BAG: 

Make a magic circle. 

Rnd 1: Ch 1, 10 hdc in magic circle, close magic circle, join. (10 hdc) 

Rnd 2: Ch 1, 2 hdc in first st, hdc in next st, [2 hdc in next st, hdc in next st] around, join. (15 hdc)

Rnd 3: Ch 1, 2 hdc in first st, hdc in each of next 2 sts, [2 hdc in next st, hdc in each of next 2 sts]  around, join. (20 hdc) 

Rnd 4: Ch 1, 2 hdc in first st, hdc in each of next 3 sts, [2 hdc in next st, hdc in each of next 3 sts]  around, join. (25 hdc) 

Rnd 5: Ch 1, 2 hdc in first st, hdc in each of next 4 sts, [2 hdc in next st, hdc in each of next 4 sts]  around, join. (30 hdc) 

Rnds 6-12: Ch 1, hdc in each st around, join.  

Fasten off. 

Crab Stitch Edging: 

This rnd is worked in the opposite direction from normal, to make the working yarn twist around  the sts. So if you are right-handed, you will be working from left to right. If you are left-handed,  you will be working from right to left. Do not turn your work, simply work each single crochet in  the previous st instead of the next one.  

Join B with sl st in any st.  

Rnd 13: Ch 1, [sc in previous st] around. Fasten off, sew tail to first st to join rnd.  Weave in all ends.  

Drawstring: 

Ch 50. Fasten off.  

Weave drawstring through the stitches of rnd 11 on bag.  

Using one of the tails, sew the ends of the drawstring together. 

Weave in all ends. 

If you enjoyed this crochet bag pattern, you may also like some of my other patterns below.

Lemon Peel Fingerless Gloves Crochet Pattern

Pom Pom Cushion Crochet Pattern

Fringe Shopping Bag Crochet Pattern

Filed Under: Bags, Free Patterns

  • « Previous Page
  • 1
  • …
  • 4
  • 5
  • 6
  • 7
  • 8
  • …
  • 25
  • Next Page »
  • Email
  • Facebook
  • Pinterest
  • RSS

Stitch11 is a Red Heart Blogger!

unnamed

.

Grab My Button

Archives

Privacy Policy

Copyright © 2026 Stitch11.com · All Rights Reserved · Log in